Teleport your device anywhere instantly with one click.


 100% Security Verified | No Subscription Required | No Malware

 :

 ChatGPT
 Perplexity
 Gemini
 Claude
 Grok
To change the location Skout receives, you first need to distinguish a phone's GPS position from a dating app's discovery settings. A device-level simulator may supply different coordinates on a supported phone, but Skout can still apply its own permissions, cached data, and account rules. No method below guarantees that a new city will appear immediately.
Skout is a long-running location-based social discovery service with iOS and Android apps. This 2026 guide retains four approaches from the original: an iPhone desktop simulator, a legacy Cydia workflow, an Android mock-location app, and Tinder's own location feature as an alternative service. The last option changes Tinder discovery, not Skout.
In this article
Part 1: Two iPhone Approaches to Changing Reported Location
1.1 Use a Computer-Based GPS Simulator for iPhone
 Set your map route to simulate GPS movement.
- Set your wanted movement speed.
- HD and large map view to check location.
- Fake GPS location to anywhere.
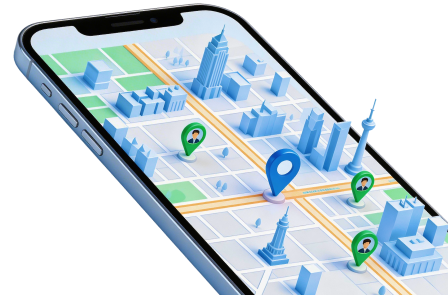
Dr.Fone - Virtual Location provides a desktop map for choosing a supported iPhone's virtual GPS position without jailbreaking in the illustrated workflow. You can search a destination or define a simulated route, with movement controls available in the relevant modes. This is a phone-location tool, not a way to rewrite Skout account information.
Check device and operating-system support before starting. The source's claims of complete safety and superiority over every competitor are not established facts. Even when a map confirms changed coordinates, a third-party service may reject simulated location or continue displaying older information. Use your own device, review the app's rules, and be transparent with other people about where you actually are.
Step 1 Install and open the desktop tool
Obtain the software from the product's official download path and complete the installer on a compatible computer. Open the toolkit and select Virtual Location. The home-screen layout may differ in your installed version; choose the named feature rather than relying on a particular icon position.
Original demonstration of the desktop location workflow. Step 2 Connect the iPhone to the computer
Use a suitable data cable for your iPhone, such as Lightning on the older models illustrated in the source or the appropriate connector on your own model. Complete any device trust or selection prompts. After the software recognizes the phone, continue with Get Started where shown.
Step 3 Inspect the map and select Teleport Mode
Check the position displayed in the map window. If necessary, use its centering or current-location control to return the view to the detected point. That control centers the map; it is not evidence that an inaccurate GPS reading has been repaired.
Choose Teleport Mode by its label or tooltip. The old article's instruction to select the third icon is not universal; current official documentation identifies the teleport control separately from route modes. Type the destination name, address, or coordinates, then submit the search using the action shown in your version.
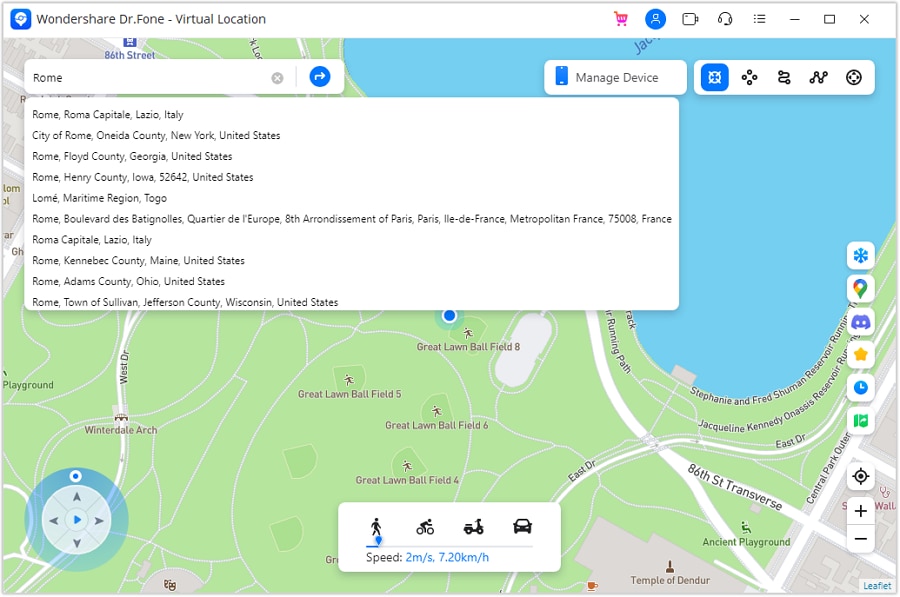
Step 4 Confirm the destination and check the phone
Review the marker and destination details before pressing Move Here. Once the tool applies the virtual position, inspect a map on the iPhone, then reopen Skout with the necessary location permission. If Skout does not reflect the change, do not interpret a successful desktop action as guaranteed app support.
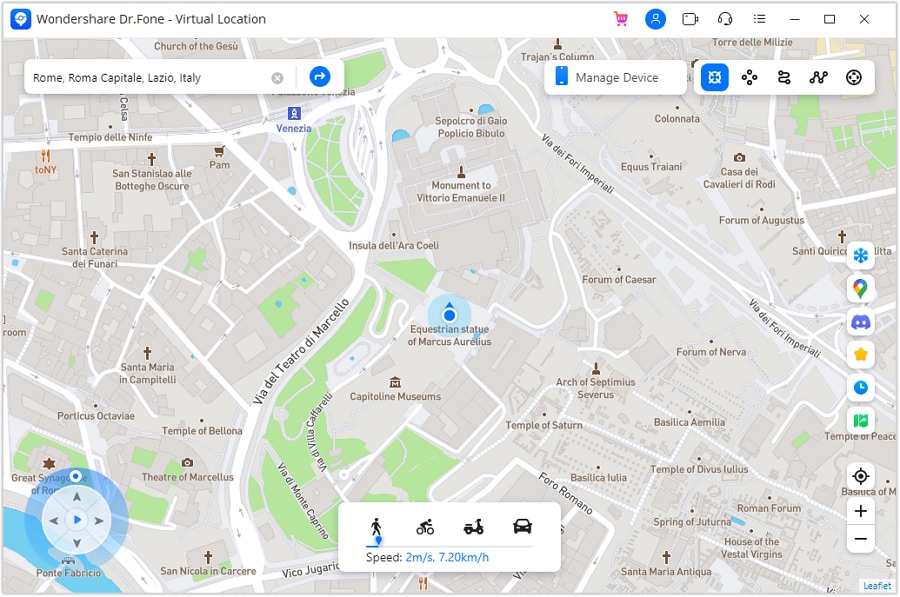
Dr.Fone - Virtual Location: Route Controls and Limits
The original product section also describes one-point teleporting and movement along a chosen route with configurable stops and speed. Supported iOS and Android setups depend on the release you install. These controls describe simulated device coordinates, not proof of travel, anonymous browsing, or permission to misrepresent location on a social service.
Related source guides cover Pokemon Go, Snapchat, Instagram, and Facebook. Their presence is not a compatibility guarantee or an exemption from each service's rules.
When the location test is complete, stop any route simulation and follow the restore prompt. The official teleport guide describes restarting the device to recover its actual location. Check a normal map again before using navigation or another service that depends on genuine position.




1.2 Understand the Legacy Cydia and FakeLocation Method
Cydia is associated with software distribution on jailbroken iOS devices. It is not Apple's App Store, and the historical FakeLocation example assumes a compatible jailbreak and tweak. This is not a recommendation to jailbreak a current iPhone or evidence that the pictured utility still supports your OS.
- Modified-system prerequisite: The method assumes jailbreak access rather than a standard iOS installation.
- Stability concerns: An incompatible tweak can cause failures and may require recovery or restoration.
- Security exposure: Untrusted repositories and packages can introduce malicious code or weaken the device's protections.
Check those limitations before interpreting the following historical sequence. If you cannot verify the repository, package, and OS compatibility, do not proceed merely to reproduce an old screenshot.
Legacy Cydia Setup Sequence for the Skout App
Step 1 Locate the historical package
On an already compatible jailbroken test device, the source opens Cydia and searches for FakeLocation. A matching name alone does not establish that a package is genuine or suitable.
Step 2 Review the package action
The illustrated version uses Modify before returning to the Home Screen. The available action depends on package state; do not assume tapping Modify by itself performs a complete installation.

Step 3 Open FakeLocation
Find the installed utility on the Home Screen and open its Choose my fake location control, if that version supplies it.

Step 4 Set the map position
Move the map or marker to the intended test location and inspect the selection. This selects a simulated point in the utility rather than a confirmed location inside Skout.
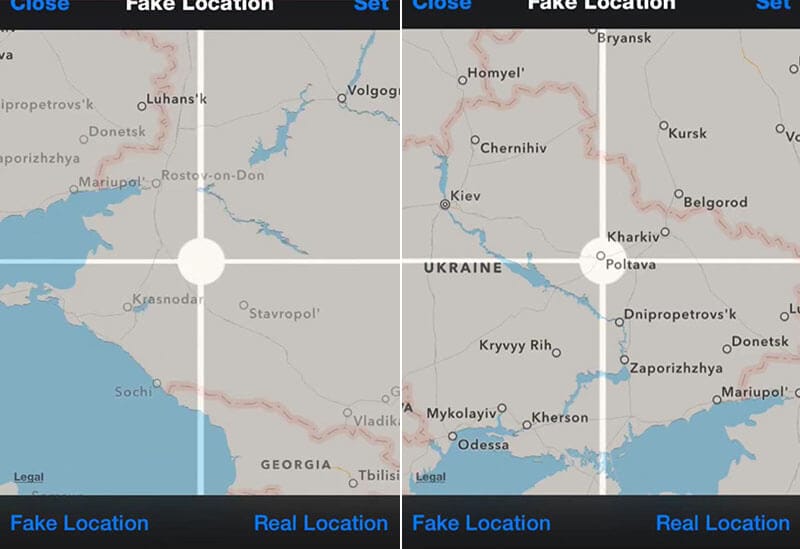
Step 5 Check what Skout displays
Open Skout and inspect the displayed area. Permissions, app updates, and cached information may prevent the historical behavior from reproducing. Disable the test setting afterward rather than leaving other apps with an unintended position.

Part 2: Android Location Testing with a Mock GPS App
The Android example uses Fake GPS GO Location Spoofer Free and the system's mock-location provider setting. The source identifies a non-root approach for Android 6 and later, but that historical minimum is not proof of support on every newer phone. Confirm the current listing, publisher, OS requirements, and permissions before installation.
Six Steps for the Source's FakeGPS Go Workflow
Step 1 Open device information
In Android Settings, open About Phone. Manufacturer interfaces vary, so use Settings search if the category has a different name.
Step 2 Enable Developer Options
Open Software Info where applicable, locate Build Number, and tap it seven times. Complete any authentication prompt required by the device.
Step 3 Install the verified GPS utility
Find the intended app in Google Play, check its publisher, and install it only if the listing supports your device. Launch the utility after installation.
Step 4 Follow its mock-location setup prompt
The source interface shows an Enable button near the bottom. Use the equivalent setup control if available; a changed interface may not match the old illustration.

Step 5 Choose the mock provider
In Developer Options, select Select mock location app, then choose the installed utility. The pictured build labels it FakeGPS Free. Selecting the provider permits Android test data; it does not force Skout to accept it.

Step 6 Apply a point or route and verify
Return to the utility, choose the intended location or supported route, and use its Play control. Inspect the result in a map before checking Skout. Stop the service and clear the mock provider after testing.
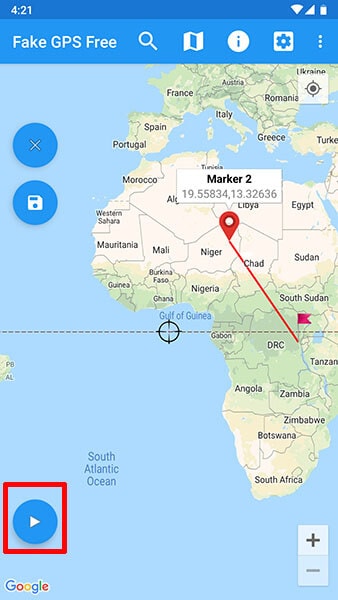
Limitations: Selecting a mock provider can be confusing on customized Android interfaces, and some other utilities require root access. Skout may reject simulated coordinates or apply account restrictions under its rules. Neither occasional use nor a familiar app name guarantees protection, and this guide does not claim that frequent use is the only circumstance in which a service can detect manipulation.
Part 3: Use Tinder Passport as a Different-Service Alternative
If the real aim is discovering people in another city rather than changing Skout itself, Tinder offers Passport Mode. Unlike a device GPS simulator, this is Tinder's own discovery-location feature. It changes where you browse within Tinder and does not change the phone's GPS coordinates or a Skout profile.
Current Tinder help lists Passport as a standalone purchase and within Tinder Plus, Gold, and Platinum subscriptions. Review the price and availability in your account instead of assuming Plus is the only option. The source's Facebook-account requirement is also outdated: current account instructions include phone verification and supported Apple or Google connections. Skout's discovery interface, including its source-described Meet tab with profile photos and ages, is a different experience rather than a like-for-like replacement.
Step 1 Open your Tinder profile
Launch Tinder on Android or your supported device, sign in, and select the profile icon.
Step 2 Check Passport access
Open Settings and inspect the available Passport purchase or subscription options. If choosing a subscription, read its terms and price before confirming payment.
Step 3 Return to profile settings
After access is active, reopen the profile and Settings. There is no need to change Android's mock-location provider for Tinder's own feature.
Step 4 Add the discovery location
Open Location and choose Add a new location, then select the intended city or map point. The older screenshot calls this area Swiping in; follow the current label in your app.

Tinder documents one active Passport city at a time, and people you liked may still see your profile for up to 24 hours after you leave that location. This is not an anonymous browsing feature. Check any regional verification requirement shown before using it.
Conclusion
Choose the method according to the actual task: a supported iPhone GPS test, an Android mock-location test, or a built-in discovery feature in a different dating service. The Cydia sequence is a legacy example with significant compatibility and security caveats, not a standard modern iPhone setup.
Check service rules and actual app behavior before relying on any changed position. Preserve honest expectations with other users, stop location simulation when finished, and restore the phone's genuine coordinates. A successful map change is never a guarantee of how Skout will display your profile.
FAQ
1. Will a changed phone GPS always update Skout?
No. Skout may depend on permissions, stored data, and its own service behavior. Check the phone's map first and then the app without assuming immediate or universal support.2. Does the desktop iPhone method require jailbreaking?
The illustrated desktop simulator workflow does not require a jailbreak on a supported setup. The separate historical Cydia method does assume a compatible jailbroken device.3. Does Android 6 support mean every newer Android phone will work?
No. The original minimum-version statement is historical. Check the current utility's requirements and remember that a social app can reject mock coordinates even when Android permits them.4. Does Tinder Passport change a Skout location?
No. Passport changes Tinder's discovery city within Tinder. It is an alternative for meeting people elsewhere, not a setting that updates Skout or device GPS.
 Add Wondershare Dr.Fone as a preferred source on Google