Teleport your device anywhere instantly with one click.


 100% Security Verified | No Subscription Required | No Malware

 :

 ChatGPT
 Perplexity
 Gemini
 Claude
 Grok
Trying to enable a fake GPS app on a Samsung S24, but unable to find the old Allow Mock Locations switch? On many current Android phones, the relevant setting is called Select mock location app. You enable Developer options, install a suitable test app, and select that app as the location provider. The setting alone does not move your position.
This distinction explains much of the confusion around allow mock locations on Samsung, Xiaomi, Huawei, and other Android devices. The general workflow is similar, but menu names vary by manufacturer and Android version. The walkthrough below covers the developer setting, the app that supplies test coordinates, a desktop alternative, and the brand-specific differences you should check.

In this article
- Part 1: What does it mean to allow Mock Locations on Android?
- Part 2: What is the Mock Location Feature used for?
- Part 3: How to Allow Mock Locations and Change your Phone’s Location?
- Part 4: How to Fake GPS on Android without Mock Location/Root
- Part 5: Mock Location Features on Different Android Models
Part 1: What Android mock locations actually allow
A mock location is test position data supplied to Android instead of an ordinary location estimate. Developers use it to check how an app responds to a chosen latitude and longitude without traveling to that place. A compatible application can generate those positions after you authorize it through Developer options.
Older versions may show an Allow Mock Locations checkbox. Many modern releases instead let you select one mock location app. These are not two unrelated tricks: they reflect different versions of the same developer-oriented workflow. There is no matching Android Developer options menu on an iPhone, although other platforms have their own testing mechanisms.
Crucially, a mock coordinate is not necessarily invisible to the receiving app. Android exposes a way to identify mock locations, and apps can decide whether to accept them. Enabling the option therefore does not guarantee that a game, dating service, or other location-dependent application will behave as though you physically traveled.
Part 2: Useful testing scenarios and common misconceptions
The intended use is testing location-dependent behavior in a controlled environment. It can help you compare responses to different cities, check a map screen, or reproduce a location-related problem. The original guide also discussed entertainment and regional content; those examples need important qualifications.
- App development: Supply a known test point and check the response of an app you own or are authorized to test.
- Regional app availability: A GPS point does not automatically change your store country, account region, payment information, or eligibility to download an app.
- Local information: Weather or nearby-result testing may use the simulated point if the app accepts it. Some apps also let you search for a city without altering device location.
- Location-based games: Pokémon GO and similar services may reject mock data or penalize location falsification. A working map pin is not evidence that a game permits it.
- Dating services: Apps such as Tinder can use additional account rules and location checks. A mock setting does not promise new profiles or paid location features.
- Streaming: Spotify, Netflix, and Prime Video can use IP address, account region, licensing, or other signals. GPS simulation is not a VPN and does not guarantee access to another catalog.

Use your own device, review the target service's rules, and avoid using test coordinates for real-world safety decisions. An inaccurate location can affect navigation and other useful services even when the original purpose was only a short experiment.
Part 3: Enable the setting, then start a mock GPS provider
There are two separate tasks: expose Android's developer controls and authorize an installed application to supply coordinates. If you have enabled Developer options but have not selected or started a provider, your phone may continue reporting its ordinary position. Work through both stages before diagnosing a failure.
3.1 Enable Developer options and locate the mock-app setting
Step 1 Find the Build number
Open Settings and inspect About phone or About device. Depending on the manufacturer, Build number may be inside Software information or a similar submenu. Search Settings if the illustrated route is not present.

Step 2 Unlock the developer menu
Tap Build number seven times and enter the device credential if requested. Follow the confirmation message. This does not require an uninterrupted speed-tapping trick; the important result is that Android enables the developer menu.

Step 3 Open Developer options
Return to Settings and locate Developer options, sometimes under System or Additional settings. Keep its master switch enabled while carrying out the test. Avoid changing unrelated debugging controls.
Step 4 Locate the mock-location control
Find Select mock location app, Mock location app, or the older Allow Mock Locations option. Enable the old checkbox if that is what your version uses. On current versions, you will select an installed provider in the next stage.

Managed devices or restricted profiles can prevent access to developer settings. If the option is disabled by an administrator, obtain authorization rather than trying to bypass the restriction. Menu differences are normal, but a blocked policy is a different issue from a renamed setting.
3.2 Install, select, and run a GPS testing app
Choose an application by its current developer identity, permissions, and compatibility, not just by a similar name. The original guide used Fake GPS by Lexa as its example. It also named Fake GPS by Hola, Fake GPS Free, GPS Emulator, and Location Changer; those historical mentions are not proof that every current listing is safe, available, or suitable.
Step 1 Search the official app store
Open Google Play and search for a GPS testing or mock-location application. Terms such as fake GPS, location changer, or GPS emulator can surface candidates, but verify the developer before choosing one.

Step 2 Compare the requirements
Review the app's supported Android versions, recent changes, required permissions, and any paid features. Do not assume that a free listing works on every phone or that it can override a target service's policies.
Step 3 Install the intended provider
If you choose the Lexa example, confirm its listing identity and install it. The screenshot records the example used in the original article; prices and interface details can change.

Step 4 Reopen Developer options
Return to the developer menu and confirm that it remains enabled. Installing a provider does not necessarily authorize it automatically.
Step 5 Select the installed app
Tap Select mock location app and choose the provider you installed. Android generally authorizes one selected mock provider through this setting, so make sure an older unused app is not still selected.

Step 6 Choose a test point and start
Launch the provider, search for a destination or drop a map pin, and use its Start or Play control. Inspect the result in a map or an app you are authorized to test. Do not assume that a service accepting one point will accept every subsequent update.

The provider may need to continue running while your test app requests updates. To finish, open the provider and press Stop or Pause, then set the mock location app to None where offered. Recheck the real location in a map; if a stale position remains, stop the test application and follow the device or provider's restoration guidance.
Part 4: Desktop GPS simulation and the limits of 'without mock location'
 Set your map route to simulate GPS movement.
- Set your wanted movement speed.
- HD and large map view to check location.
- Fake GPS location to anywhere.
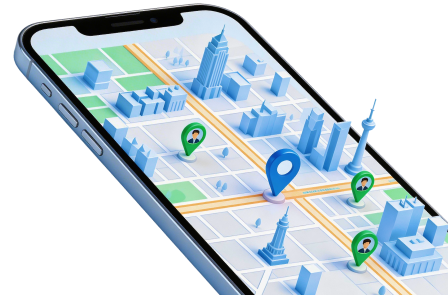
Dr.Fone - Virtual Location provides a desktop map for choosing positions and simulating movement on supported connected devices. This can be easier to review on a large display than entering coordinates on the phone itself, particularly when comparing a route or several test points.
The phrase 'without mock location/root' should not be read as a universal compatibility guarantee. Root access and Android's mock-location authorization are different requirements. Follow the setup shown for your exact device and software release; if the Android connection workflow requests Developer options, debugging, a helper, or mock-app selection, complete those authorized steps rather than assuming they are unnecessary.
Key features of Dr.Fone - Virtual Location
- Device support: Check the current compatibility information for your exact model and OS. The source's Android 14 and iOS 17 references are version examples, not evidence that they are the latest releases in 2026 or that every combination works.
- Location-dependent testing: Teleport mode can set a test position, but compatibility with Snapchat, Pokémon GO, Tinder, Bumble, or Instagram must not be generalized into support for every function. Wizards Unite is a historical example, not a current playable service.
- Movement controls: Joystick, jump-teleport, route, and speed options can simulate movement where supported. They do not conceal account information, encrypt traffic, or guarantee that mock data goes undetected.
Step-by-step: select and confirm a desktop test position
Before starting, install the appropriate desktop edition and connect your own supported Android phone using a USB data cable. Complete the phone-side permissions and setup prompts. The following two steps retain the original teleport workflow; they are not a claim that setup is identical on every Android release.
Step 1 Select Teleport Mode and search
Open the connected device in the location module. Choose Teleport Mode, enter the intended address or coordinates in the search bar, and submit with Enter or the displayed search control. Review the destination on the map rather than relying solely on the search text.
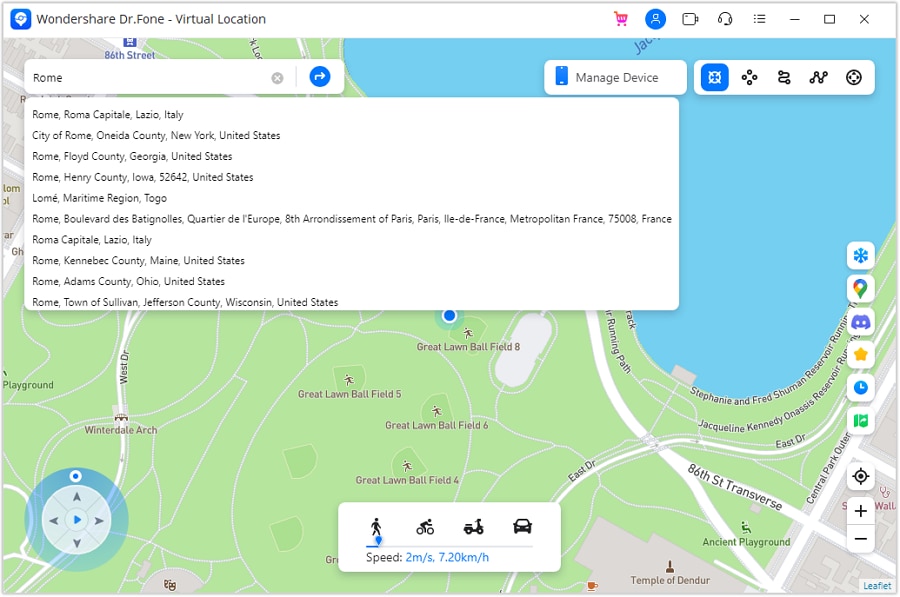
Step 2 Confirm the point and verify on the phone
If the selected point is correct, choose Move Here. Compare the desktop result with Google Maps or another suitable map on the connected phone. If the position does not change, check compatibility and the connection workflow; do not assume an app that rejects simulated data can be forced to accept it.
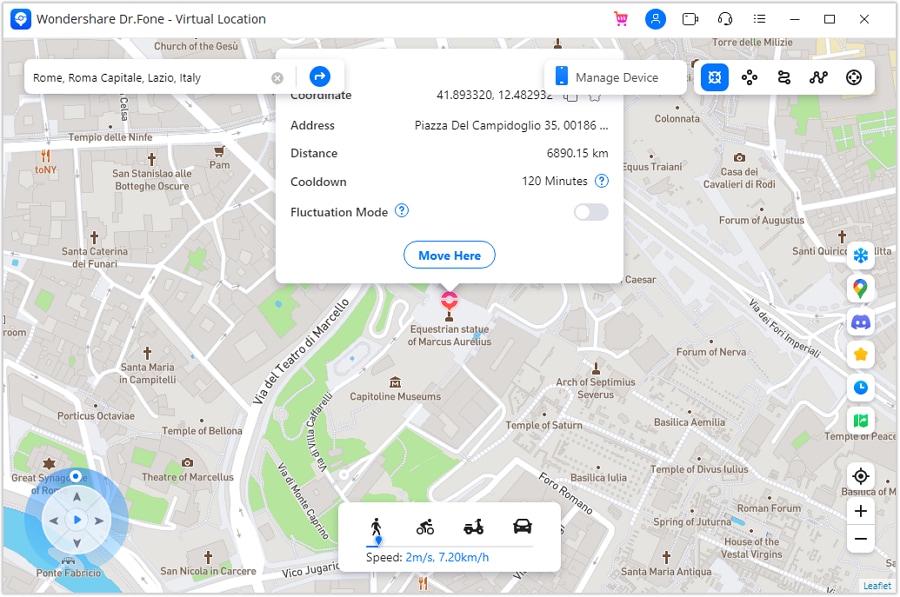
When the test is complete, stop simulation and follow the application's restoration prompt. The official teleport guide describes restarting the device to restore the actual location. Verify the result before using navigation or another service that depends on a real position.




Part 5: Samsung, LG, Xiaomi, and Huawei menu differences
The concept remains the same across these Android families, but interface layers change both the developer-menu entry point and the mock-app label. The supplied pictures show older interfaces, so use them as orientation rather than proof of a current menu's exact appearance.
Samsung: On Galaxy S8 and later models, Android's documentation lists Settings > About phone > Software information > Build number as the developer-menu activation route. After enabling it, open Developer options and look under Debugging for Select mock location app. This is the setting to look for on a Galaxy S24 rather than expecting the old checkbox.

LG: Android's documentation places the LG G6 and later Build number under About phone > Software info. Once Developer options is available, look for the applicable mock-location control. Some older releases show Allow Mock Locations; others require selecting an app. Match the instruction to the software actually installed.

Xiaomi: On MIUI devices, the original workflow activates Developer options by repeatedly tapping the MIUI version under About phone. Developer options is commonly under Additional settings. Newer Xiaomi interfaces can use a different OS-version label, so inspect the current About phone screen and search Settings if the MIUI entry is absent. Select the installed mock provider rather than assuming every version has a toggle.

Huawei: On Android-based EMUI devices, locate Build number in About phone or software information and tap it seven times, then open the available Developer options menu and select your mock app. Menus differ across releases, and this Android procedure should not be assumed to apply to every Huawei operating system.

If the setting is missing, verify that Developer options is enabled, that the provider is installed in the active profile, and that no device policy restricts testing. Do not solve an ordinary menu mismatch by rooting the phone or installing an unknown modified application.
Conclusion
To allow mock locations on Android, enable Developer options, install an appropriate GPS test provider, select it, and start its test position. Manufacturer menus differ, but authorizing an app and choosing a coordinate remain separate tasks. Stop the provider and verify your real position when finished.
Dr.Fone - Virtual Location offers a desktop alternative for supported devices. Check the actual setup requirements and the target app's rules; neither a mock provider nor a desktop tool guarantees regional-content access, privacy, or acceptance by every location-based service.
FAQ
1. Why is there no Allow Mock Locations switch on my phone?
Many current Android versions use Select mock location app instead. Enable Developer options first, then choose an installed provider.2. Does enabling Developer options change my position?
No. You must authorize a mock-location provider and start a test position in that app. Merely opening the developer menu supplies no new coordinates.3. Can mock GPS unlock every streaming or dating feature?
No. Services may use account region, IP address, subscriptions, or mock-location detection. A GPS coordinate does not override those conditions.4. How do I return to my real location?
Stop the provider, remove its mock-app selection where available, and recheck a map. For a desktop workflow, follow its restoration instructions and verify the phone's position afterward.
 Add Wondershare Dr.Fone as a preferred source on Google