A Comprehensive Guide on How To Back Up iPhone to Google Drive
iPhone Backup
- iPhone Data Backup
- 1. Back up iPhone in Recovery Mode
- 2. Back Up iPhone With/Without iTunes
- 3. Back up iPhone to Mac
- 4. Back up iPhone/iPad to Computer
- 5. Back up iPhone to Mac Catalina
- 6. Back up Jailbreak Apps And Restore
- 7. iPhone Backup Software
- 8. Back up iPhone/iPad Easily
- 9. Back up iPhone/iPad in DFU Mode
- 10. Back up iPhone Apps and App Data
- 11. Back up Notes on iPhone and iPad
- 12. Back up iOS to External Hard Drive
- 13. Export Notes from iPhone to PC/Mac
- 14.Back up iPhone Photos to Google Photos
- 15. Back Up Your iPhone Voicemails
- 16. Back Up to External Drive
- 17.How to Back Up to NAS
- 18.Back Up iPhone With Broken Screen
- 19.Back Up iPhone to Google Drive
- 20.Buy Used iPhones
- 21.Sell Used Phone for Cash
- 22.Sell Used iPhone for Dollar
- 23.How Much is My iPhone Worth
- iPhone Data Recovery
- 1. Recover iPhone Data Without Backup
- 2. Restore Calendar on iPhone
- 3. Recover Call History on iPhone
- 4. Recover iPhone Lost Data
- 5. Restore iPhone in Recovery Mode
- 6. Undelete iPhone Backup Files
- 7. Recover Deleted iPhone Messages
- iPhone Data Restore
- 1. Restore iPhone from iTunes Backup
- 2. Restore iPhone after Downgrade
- 3. Restore iPhone from Backup
- 4. Restore iPhone from iPad Backup
- 5. Restore iPhone from DFU Mode
- 6. Restore iPhone Deleted Text Message
- iPhone Backup Problems
- 1. Find iPhone Backup Location on Mac
- 2. iPhone Backup Password Never Set
- 3. iPhone Backup Password Forget
- 4. iCloud Backup Taking Forever
- 5. iPhone Won't Backup to iCloud
- 6. iTunes Won't Backup iPhone
- iPhone Restore Problems
- 1. iTunes Stuck on Verifying iPhone
- 2. Not Space to Restore iPhone Backup
- 3. iTunes Backup Not Restoring
- 4. iPhone Won't Restore
- WhatsApp Backup & Restore
- 1. WhatsApp from Google Drive to iOS
- 2. Restore Old WhatsApp Backup
- 3. Restore WhatsApp Chat on iPhone
- 4. Retrieve WhatsApp Chat History
- 5. See Deleted Messages on WhatsApp
- 6. Restore WhatsApp Stuck on iPhone
- 7. iPhone WhatsApp to Google Drive
- 8. Back Up WhatsApp on iPhone
- 9. Backup WhatsApp Data before Changing Number
- iPhone Backup Tips
- 1. Extract Data From iPhone
- 2. Encrypt iPhone Backup
- 3. Reset iPhone Backup Password
- 4. Extract iPhone Backup in Win 10
- 5. How Long take iPhone to Backup
- 6. Find iPhone Backup Location
- 7. iPhone Backup Password
- 8. View iPhone Backup on Computer
- 9. iPhone Backup with iTunes/iCloud
- 10. iPhone Backup Unlockers
- 11.How To Encrypt iPhone Backup
- 12. Best Backup Chargers for iPhone
- 13. Speed Up Your iPhone Backups
- 14. Save Data When iPhone Disabled
- 15.Check Last Backup on iPhone
- ● Manage/transfer/recover data
- ● Unlock screen/activate/FRP lock
- ● Fix most iOS and Android issues
- Back up Now Back up Now Back up Now

Jul 12, 2024 • Filed to: Backup & Restore Data • Proven solutions
Accidents happen, like damaging your phone, losing it, or deleting files causing you to lose important photos, messages, and more. That's why backing up your data is crucial. One popular backup solution is Google Drive.
It is a digital storage space where you can keep a copy of your iPhone data. Google Drive gives enough storage, security, and accessibility. In this article, you'll learn all about backup iPhone to Google Drive and how you can do it. In the end, you'll discover an alternative tool for backing up more files on your computer.
Part 1: What Are the Reasons To Backup iPhone to Google Drive?
Have you ever wondered why it's crucial to back up your iPhone to Google Drive? In this section, you'll explore why it is a good choice.
Enhanced Data Security
Google Drive is known for keeping your data safe. When you back up your iPhone to Google Drive, only you can access it unless you want to share the file with private links. Google Drive also has security features that protect against spam, phishing, and malware.
Additional Storage Space
Do you take lots of photos and videos on your iPhone? For starters, if you prefer a more generous free storage option, Google Drive is the way to go. When you sign up for iCloud, you get 5GB of free storage, but with a Google Account, you get 15 GB. You can use this cloud storage across Google Drive, Google Photos, and Gmail.
Platform Independence
Imagine being able to access your iPhone backup from different devices and platforms. Well, that's what you can do when you plan to back up your iPhone to Google Drive. Whether you're using a computer, an Android device, or even another iOS device, you can access your backup anytime, anywhere. It's convenient and lets you switch between devices without worrying about losing important data.
Alternative to iCloud
When you use Google Drive, you can choose how good you want your photos and videos to look when uploaded. Plus, with Google Drive, you can share files with your friends and family, even if they don't have an iPhone. You can also work together on projects and keep your important files organized.
Part 2: How To Backup iPhone to Google Drive Instead of iCloud?
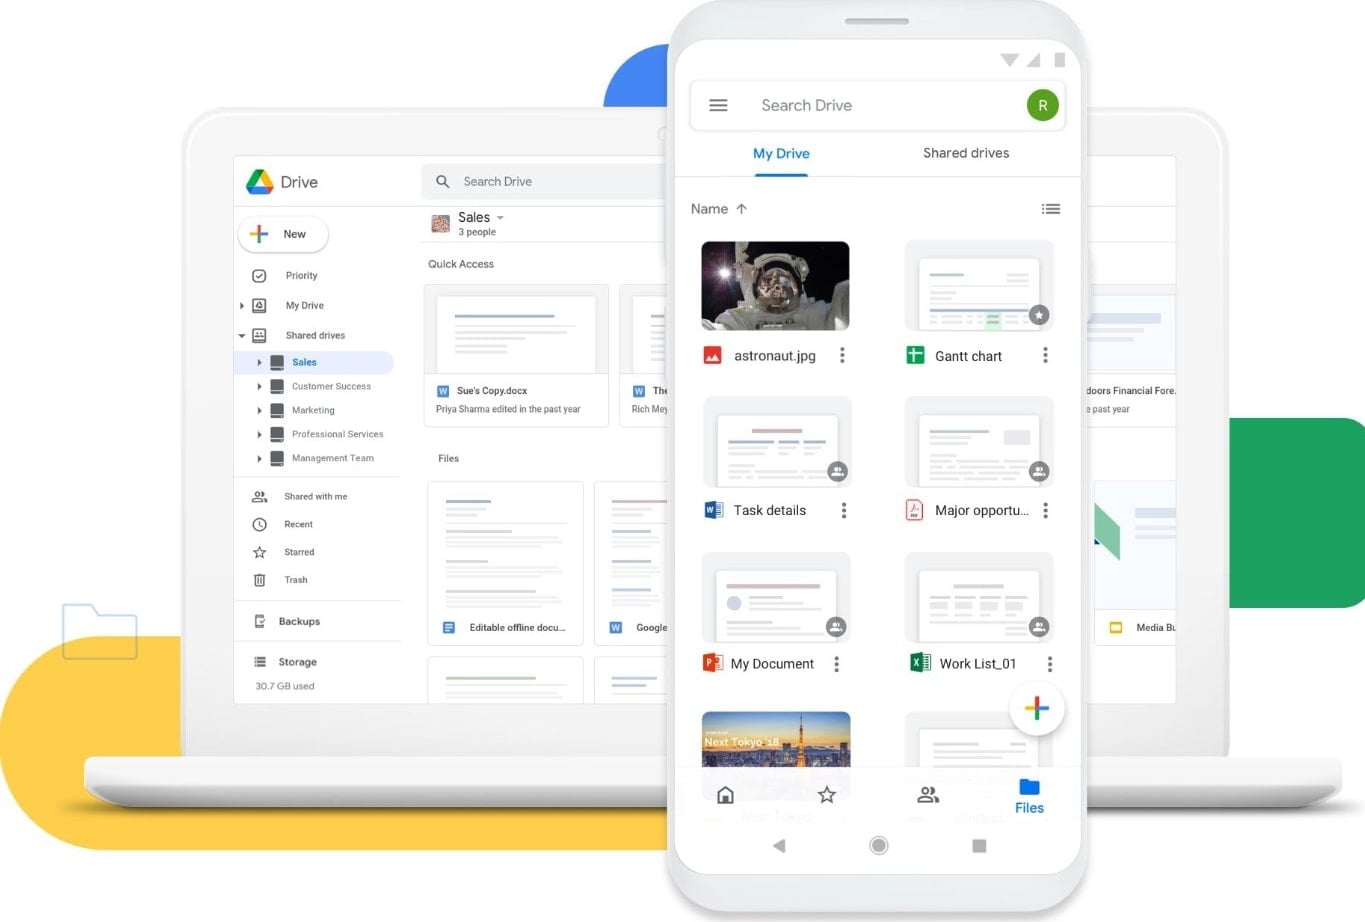
Google Drive is a cloud storage where you can easily upload, open, share, and collaborate on files. Did you know you can also use it to back up your iPhone? There are two ways to back up your iPhone to Google Drive.
Option 1: Backup iPhone to Google Drive Directly
Learn how to back up your iPhone to Google Drive directly with the steps below.
- Step 1: Install the Google Drive app from the App Store on your iPhone. Once it's ready, launch the app and look for the Menu icon in the upper left corner.
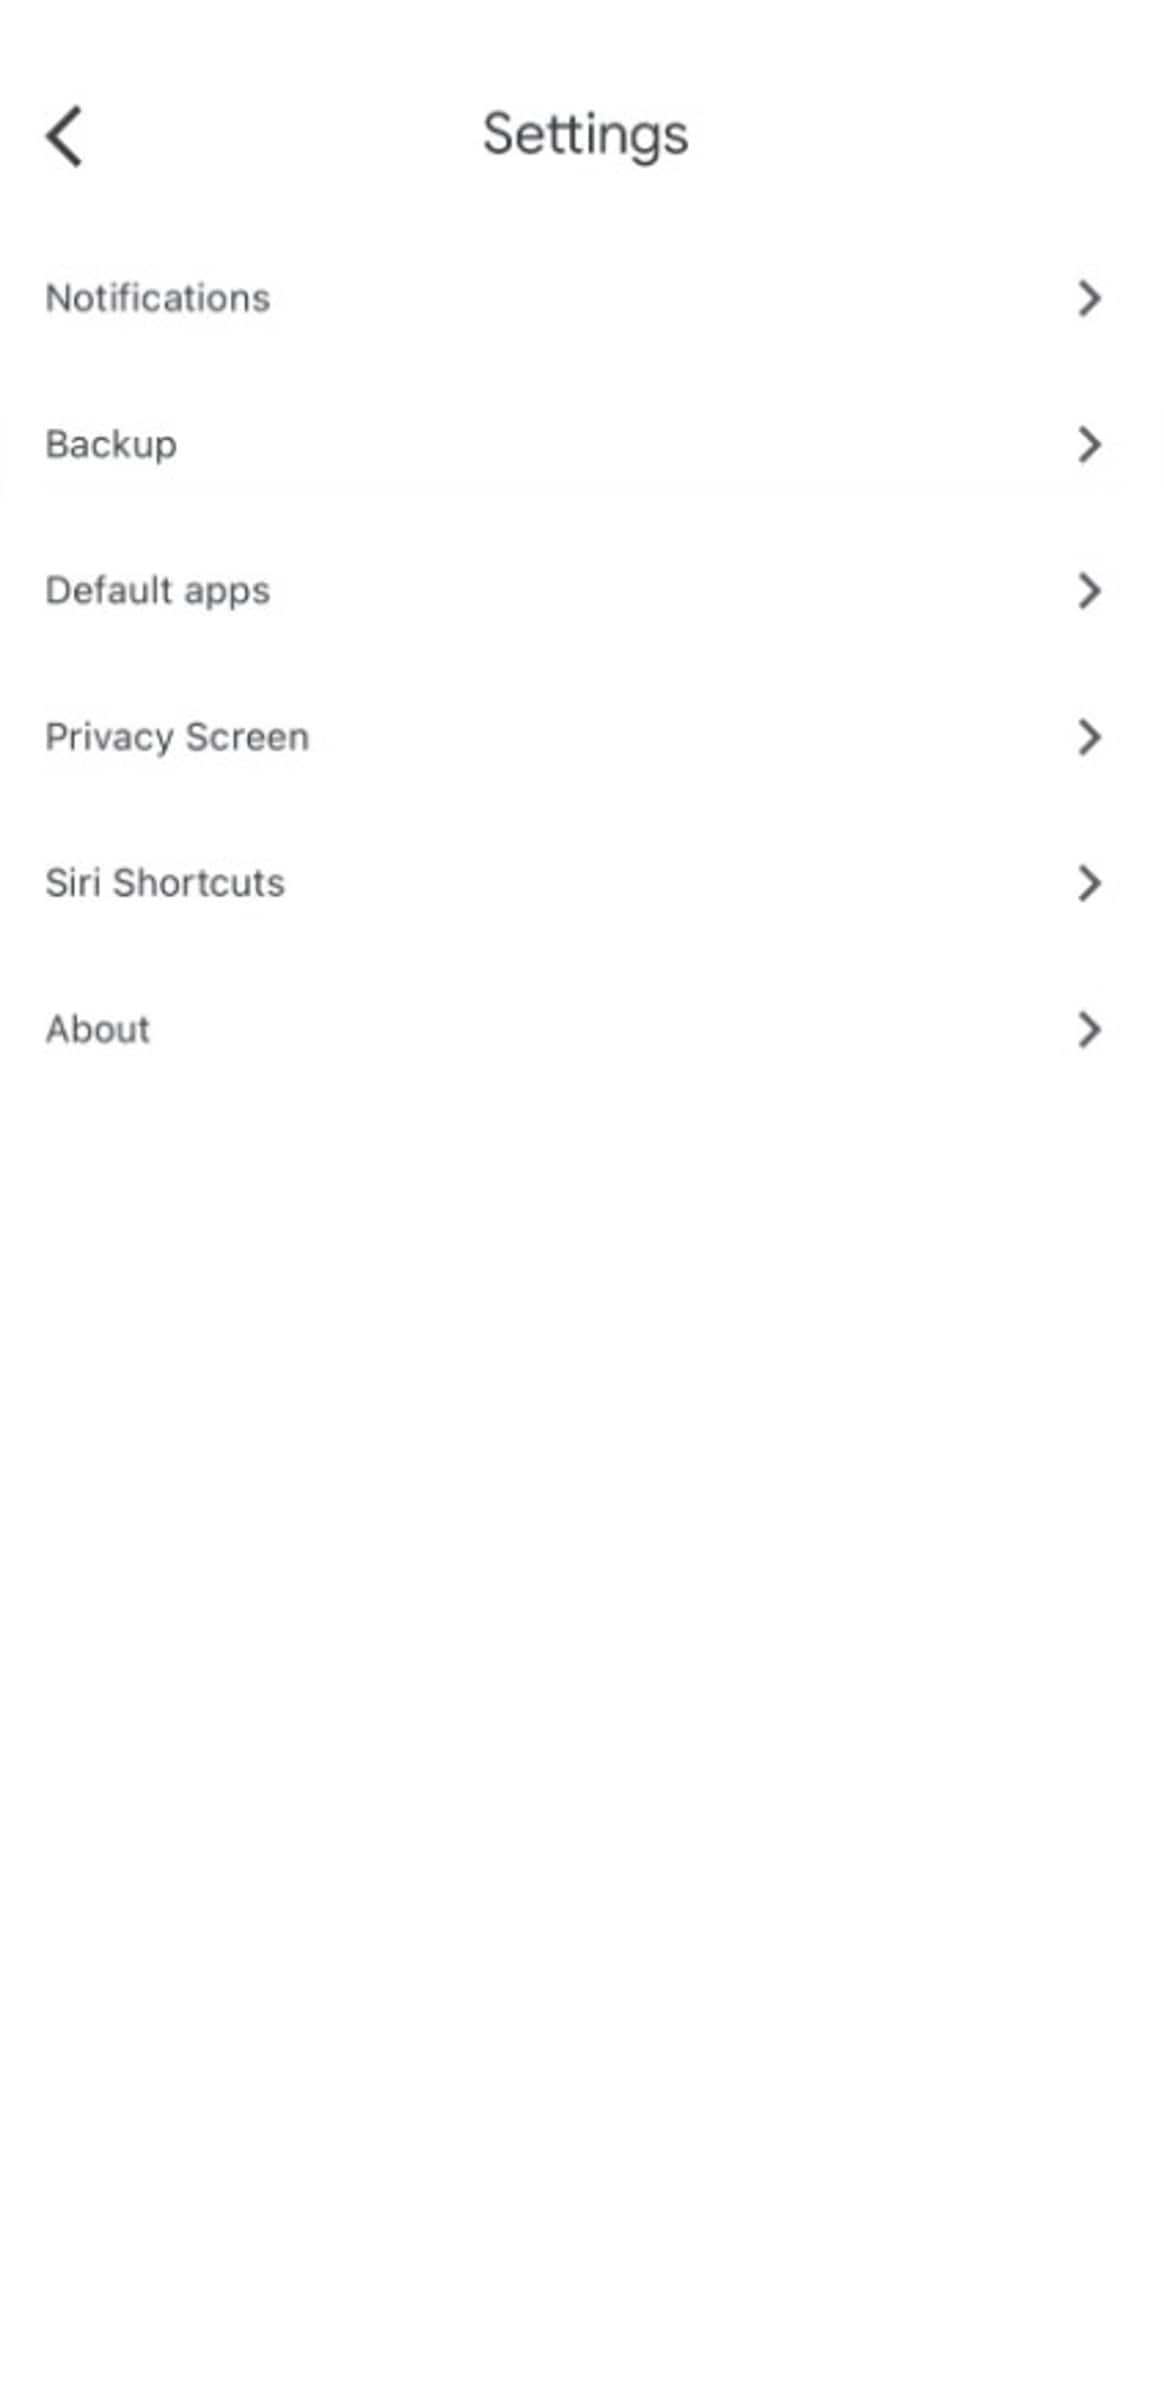
- Step 2: Tap on Settings and then Backup. Choose which files you want Google Drive to back up from your iPhone:
- Select Contacts and turn on the Back up to Google Contacts toggle switch.
- Calendar events.Select the Calendar event and turn on the Backup to the Calendar toggle button.
- Photos & videos.Select Photos & Videos, turn on Backup to Google Photos, then choose the quality you want.
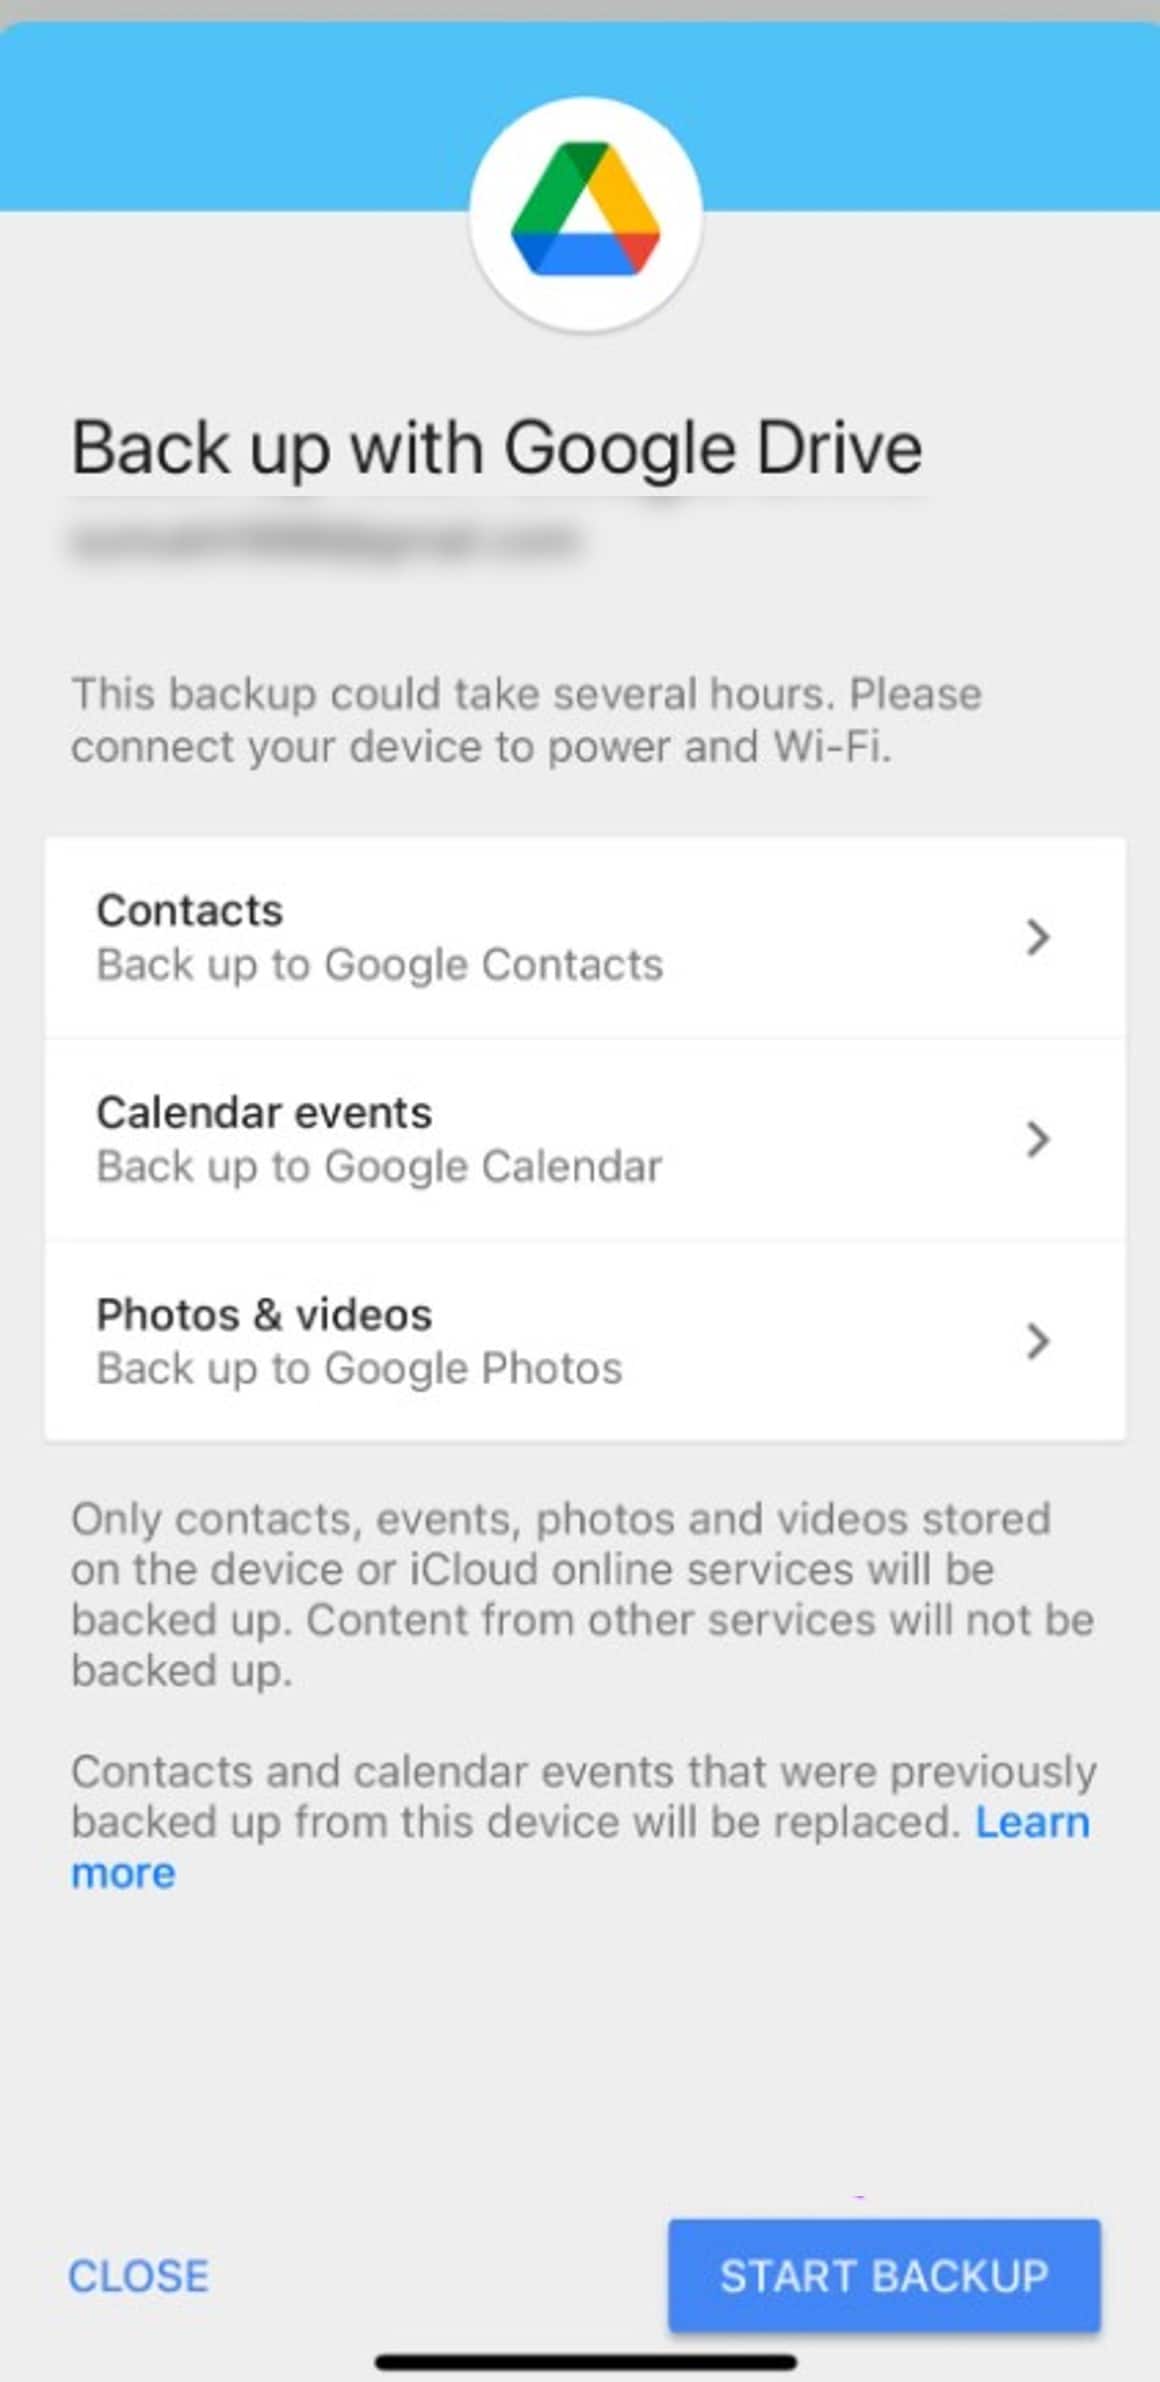
- Step 3: Tap on Start Backup and wait for it to finish.
Option 2: Upload and Backup iPhone To Google Drive Selectively
Follow these steps to back up specific files from your iPhone manually.
- Step 1: Open the Google Drive app on your iPhone or iPad and tap the + icon.
- Step 2: Choose Upload and find the files you want to upload from your iPhone.
Part 3: How To Transfer Files Backup From iPhone to Google One?
Google Drive is a storage service that keeps your files safe. If you want more storage and extra benefits, you can get Google One. You can still use Google One to create a backup even if you're not a member. Note that Google One can't entirely back up your iPhone, but you can use it on some of your files, including photos and videos.

Follow these steps to back up your iPhone to Google One instead.
- Step 1: Download the Google One app on your iPhone or iPad.
- Step 2: In the Google One app, tap the Menu button on the left. Then, go to Settings and click Sync Settings.
- Step 3: Good if you already have Google Photos installed on your device. Tap Photos & Videos, then select Go to Google Photos. Otherwise, tap the Get Google Photos app and follow the instructions to install it.
- Step 4: Once in Google Photos, scroll to Backup Settings, then turn on Back up & Sync. This way, photos and videos will automatically back up iPhone to Google Drive.
Part 4: Bonus Tip: Create Local iPhone Backups With Wondershare Dr.Fone
If you find that the backup iPhone to Google Drive method is limiting, there's another solution. Wondershare Dr.Fone is a helpful tool that offers an alternative way to back up iPhone data on your desktop.

It can help you back up 24 types of iOS data like photos, call history, messages, app data, WhatsApp, and more. Plus, the new backup won't overwrite the old one, so you can have multiple backups. You can even preview the contents of a backup whenever you want.
Features
Let's explore how Dr.Fone can help users who prefer local backups.
- Export and Preview Backups
Dr.Fone also helps transfer data between your iOS device and computer without relying on iTunes or iCloud. You can selectively export files from your iPhone to your computer. For example, you can make a separate backup of your Safari history, messages, and more.

- Selective Restore of Backups
Unlike iTunes and iCloud, which only allow you to restore the entire backup, Dr.Fone lets you restore your backups selectively. So, if you only need to retrieve specific files, you can easily do that with Dr.Fone.
Compatibility
Dr.Fone is compatible with different platforms. It requires iOS 9.0 or later for your iPhone, iPad, or iPod touch. For your computer, it works with Windows 7 or newer and macOS X 10.8 & higher.
Pricing Plans
You can access some features of Dr.Fone for free. If you want to enjoy more features for backing up your iOS device, you can consider purchasing the Dr.Fone Basic plan, which starts at $39.95 annually. There are also perpetual and business plans available at different prices.
How To Back Up Several Types of iPhone Files in a Computer
Here's how to use Dr.Fone to back up your iPhone to your computer.
- Step 1: Visit the official website of Wondershare Dr.Fone and download the app on your computer.
- Step 2: Launch Dr.Fone on your computer and connect your iPhone. Follow the in-app instructions to establish a connection between your iPhone and computer.
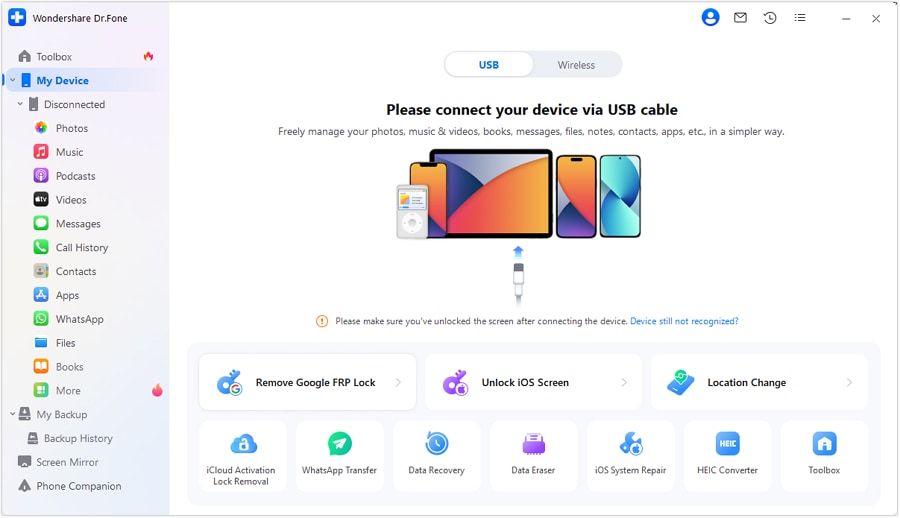
- Step 3: Click My Device in the lower left navigation pane. Next, there are two ways to back up iPhone to a computer using Dr.Fone.
- Click Back Up Now and wait as the backup process takes place.
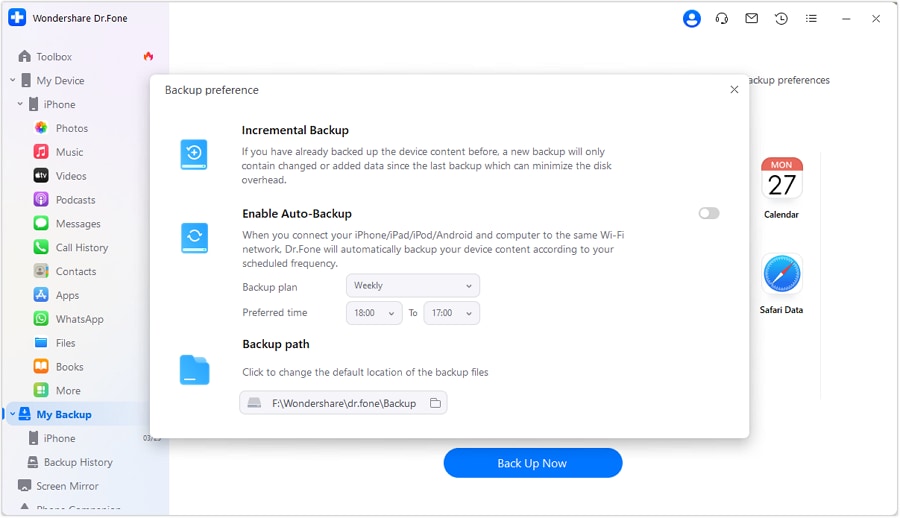
- Click Backup Preferences and set the Backup plan and Preferred time below the Enable Auto-Backup in the Backup preference dialogue box.
- Step 4: Once complete, your iPhone data is available in the Backup History.

Conclusion
Now you have an idea for your question, "How to backup iPhone to Google Drive?" Google Drive provides a safe cloud-based backup option to back up iPhone data. It offers benefits like ample storage space and platform independence.
But, if you prefer local backups or want more control over your backup files, Wondershare Dr.Fone is a good alternative. With its user-friendly interface, you can save more types of files, preview them, and selectively restore them to your computer. So, whether to back up your iPhone to Google Drive instead of iCloud or use Dr.Fone for local backups, files are ready.


James Davis
staff Editor