Ultimate Guide: Back Up Notes or Recover Deleted Notes on iPhone without Backup
iPhone Backup
- iPhone Data Backup
- 1. Back up iPhone in Recovery Mode
- 2. Back Up iPhone With/Without iTunes
- 3. Back up iPhone to Mac
- 4. Back up iPhone/iPad to Computer
- 5. Back up iPhone to Mac Catalina
- 6. Back up Jailbreak Apps And Restore
- 7. iPhone Backup Software
- 8. Back up iPhone/iPad Easily
- 9. Back up iPhone/iPad in DFU Mode
- 10. Back up iPhone Apps and App Data
- 11. Back up Notes on iPhone and iPad
- 12. Back up iOS to External Hard Drive
- 13. Export Notes from iPhone to PC/Mac
- 14.Back up iPhone Photos to Google Photos
- 15. Back Up Your iPhone Voicemails
- 16. Back Up to External Drive
- 17.How to Back Up to NAS
- 18.Back Up iPhone With Broken Screen
- 19.Back Up iPhone to Google Drive
- 20.Buy Used iPhones
- 21.Sell Used Phone for Cash
- 22.Sell Used iPhone for Dollar
- 23.How Much is My iPhone Worth
- iPhone Data Recovery
- 1. Recover iPhone Data Without Backup
- 2. Restore Calendar on iPhone
- 3. Recover Call History on iPhone
- 4. Recover iPhone Lost Data
- 5. Restore iPhone in Recovery Mode
- 6. Undelete iPhone Backup Files
- 7. Recover Deleted iPhone Messages
- iPhone Data Restore
- 1. Restore iPhone from iTunes Backup
- 2. Restore iPhone after Downgrade
- 3. Restore iPhone from Backup
- 4. Restore iPhone from iPad Backup
- 5. Restore iPhone from DFU Mode
- 6. Restore iPhone Deleted Text Message
- iPhone Backup Problems
- 1. Find iPhone Backup Location on Mac
- 2. iPhone Backup Password Never Set
- 3. iPhone Backup Password Forget
- 4. iCloud Backup Taking Forever
- 5. iPhone Won't Backup to iCloud
- 6. iTunes Won't Backup iPhone
- iPhone Restore Problems
- 1. iTunes Stuck on Verifying iPhone
- 2. Not Space to Restore iPhone Backup
- 3. iTunes Backup Not Restoring
- 4. iPhone Won't Restore
- WhatsApp Backup & Restore
- 1. WhatsApp from Google Drive to iOS
- 2. Restore Old WhatsApp Backup
- 3. Restore WhatsApp Chat on iPhone
- 4. Retrieve WhatsApp Chat History
- 5. See Deleted Messages on WhatsApp
- 6. Restore WhatsApp Stuck on iPhone
- 7. iPhone WhatsApp to Google Drive
- 8. Back Up WhatsApp on iPhone
- 9. Backup WhatsApp Data before Changing Number
- iPhone Backup Tips
- 1. Extract Data From iPhone
- 2. Encrypt iPhone Backup
- 3. Reset iPhone Backup Password
- 4. Extract iPhone Backup in Win 10
- 5. How Long take iPhone to Backup
- 6. Find iPhone Backup Location
- 7. iPhone Backup Password
- 8. View iPhone Backup on Computer
- 9. iPhone Backup with iTunes/iCloud
- 10. iPhone Backup Unlockers
- 11.How To Encrypt iPhone Backup
- 12. Best Backup Chargers for iPhone
- 13. Speed Up Your iPhone Backups
- 14. Save Data When iPhone Disabled
- 15.Check Last Backup on iPhone
- ● Manage/transfer/recover data
- ● Unlock screen/activate/FRP lock
- ● Fix most iOS and Android issues
- Back up Now Back up Now Back up Now

Jul 12, 2024 • Filed to: Backup & Restore Data • Proven solutions
The thing about iPhone notes is that they're pretty important, especially if you're one of those folks who rely on them all the time, like students or busy workers.
People usually use iPhone notes to put brilliant ideas, make to-do lists, and even save important info. It's like having your own little digital notebook right in your pocket.
However, notes often go unnoticed and underappreciated, leaving them vulnerable to unexpected data loss. Whether it's an unforeseen mishap or software glitches, the risk looms over anyone and strikes at any moment.
If you're wondering how to back up notes on iPhone, this guide is a must-read. Keep reading, and we have the answer for you!
- Part 1: How to Use iCloud for Automatic Backups
- Part 2: Using Google Drive to Backup iPhone Notes
- Part 3: Sync iTunes for Local Backups
- Part 4: Backup Notes on iPhone with Wondershare Dr.Fone

- Part 5: Tips to Prevent Data Loss in iPhone Notes
- Bonus Part: How to Recover Deleted Notes on iPhone without Backup
Part 1: How to Use iCloud for Automatic Backups
First method: using iCloud to back up iPhone notes. iCloud serves as Apple's default cloud storage and synchronization service. One of its most valuable features is the ability to automatically back up your iOS devices, ensuring that your important data is securely stored and restorable.
iCloud features:
- Easy access from any device that is signed in to your iCloud account.
- Wide range of supported data.
- Easy restoration in case of a device failure, loss, or upgrade
- Secure storage with encrypted backups
Pros of using iCloud for backup:
- With automatic backups, you don't have to remember to back up your device manually. iCloud handles the process in the background, making it a hassle-free solution.
- iCloud offers various storage plans to fit your needs.
Cons of using iCloud for backup:
- iCloud users only get 5 GB of free storage. It might not be sufficientfor users with large amounts of data.
- Your device needs a good and stable internet connection.
How to set up automated backups on iCloud:
- Step 1: Open your iCloud settings on your iPhone.
- Step 2: Navigate and select "Backup" from the list of options.
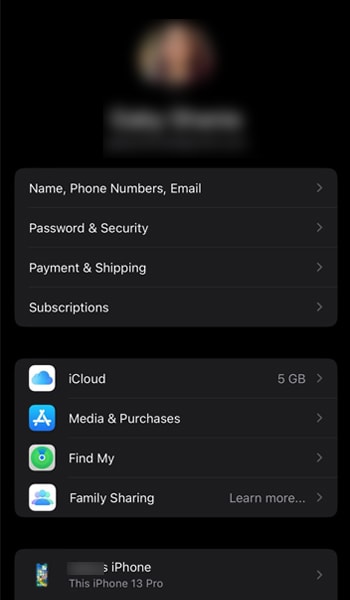
- Step 3: Switch on the "iCloud Backup" toggle to enable backup.
A prompt will appear, saying that your device will be backed up when connected to Wi-Fi, locked, and charging.
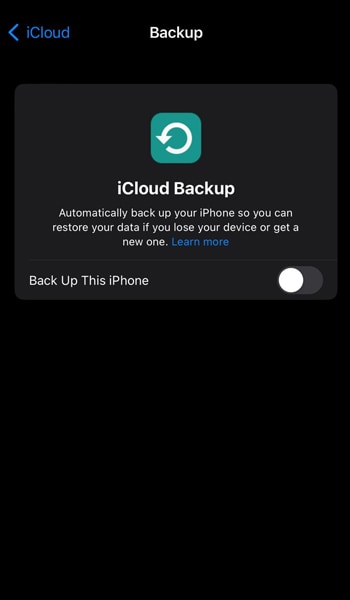
To initiate an immediate backup, tap on "Back Up Now." Otherwise, your device will automatically back up according to the schedule mentioned earlier.
Part 2: Using Google Drive to Backup iPhone Notes
Google Drive can be a good alternative to iCloud, especially for cross-device platforms. Google Drive is a cloud-based storage developed and provided by Google. While primarily associated with Android devices, Google Drive can also be used to back up and sync iPhone, including notes.
Google Drive features:
- Cross-platform compatibility, including iOS, Android, and web browsers.
- Access your notes from any device by signing in to your Google account.
- Collaboration and sharing to collaborate in real-time and make edits together
Pros of using Google Drive for backup:
- Google Drive provides 15GB of free storage space, which can accommodate a significant amount of note data.
Cons of using Google Drive for backup:
- Unlike iCloud, which is seamlessly integrated into the iOS ecosystem, using Google Drive as a backup solution for iPhone notes requires installing the Google Drive app and manually managing the backup process.
How to use Google Drive to backup iPhone notes:
- Step 1: Open your iPhone Settings.
- Step 2: Tap "Notes" > "Accounts."
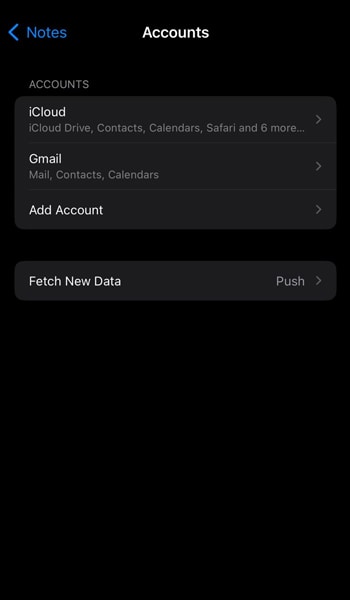
- Step 3: Select "Add Account" and choose "Google" from the list of services. Sign in with your Google account.
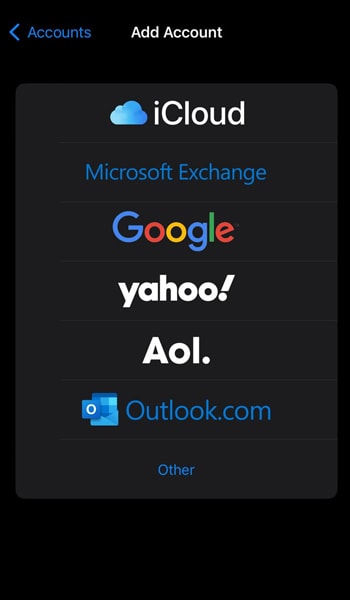
- Step 4: Open your Notes folders, then tap "Notes" under the "Gmail" section. Create a new note, and it will be automatically saved to your Google account.
Part 3: Sync iTunes for Local Backups
iTunes, another Apple product, is a powerful tool that can do more than just play music and videos. You can also use it to back up your iPhone data. In fact, iTunes is one of the most popular backup solutions for Apple devices.
iTunes features:
- Full device backup
- Backups are stored locally on your computer
Pros of using iTunes for backup:
- Your data is encrypted, so it is protected from unauthorized access
- Back up your iPhone data to your local computer
Cons of using iTunes for backup:
- If you have a lot of data, backing up your device with iTunes can be slow.
How to sync iTunes for backup iPhone notes:
- Step 1: Start by connecting your devices. Then, launch iTunes on your computer to initiate the backup procedure.
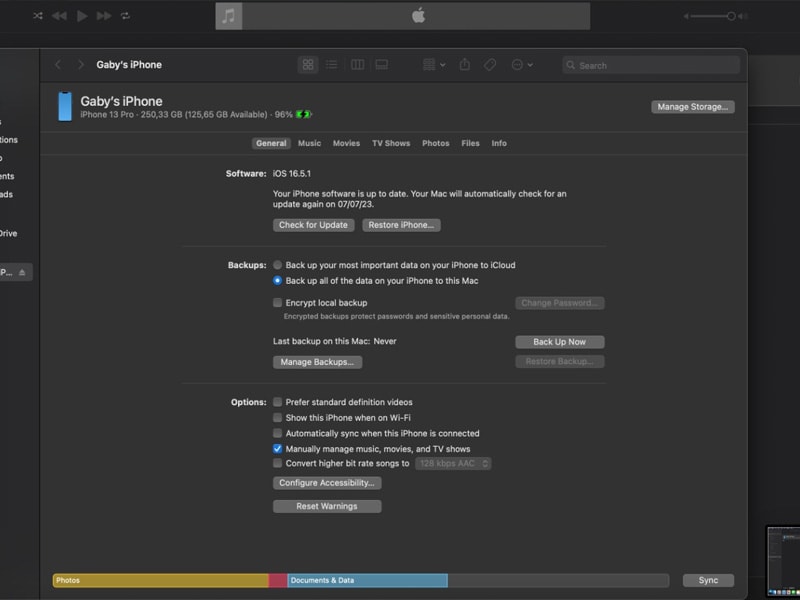
- Step 2: In iTunes, click on the device icon in the iTunes window's upper-left corner. It will open your iPhone's summary page.
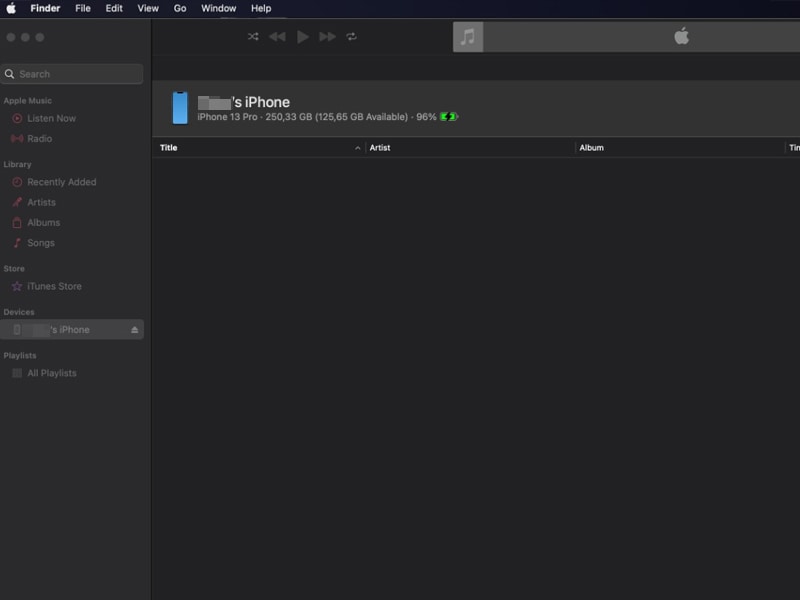
- Step 3: In your iPhone’s summary settings, select "Back up all of the data on your iPhone to this Mac." Then, click “Backup Now” or “Sync.” This way, your iTunes will back up your iPhone’s data, including your notes.
Part 4: Backup Notes on iPhone with Wondershare Dr.Fone
For a more convenient and effortless approach to backing up your iPhone notes, using a third-party app like Wondershare Dr.Fone can be a practical solution. Wondershare Dr.Fone offers Dr.Fone Back Up feature that can simplify the process of securing and preserving your notes.
Wondershare Dr.Fone Back Up features:
- Selective backup. You have the flexibility to choose specific categories to back up, giving you control over what data gets stored.
- Backup preview. Before initiating the backup process, Dr.Fone allows you to preview the backup, ensuring that you have selected the correct data.
- Ability to recover lost or deleted data from your iPhone.
Pros of using Dr.Fone:
- Fone provides a simple and intuitive interface, making it easy for even non-technical users to navigate and perform backups.
- The encrypted backups ensure the confidentiality and privacy of your notes, protecting them from unauthorized access.
Cons of using Dr.Fone:
- Fone requires software installment. Your devices need to have enough storage to download and install it.
How to use Wondershare Dr.Fone for backup iPhone notes:
- Step 1: Begin the iPhone backup
Firstly, launch the Dr.Fone application on your computer after connecting it to your iPhone. Select "My Backup" in the left panel and click "Back Up Now."

- Step 2: Wait until the backup is complete.
Dr.Fone's system will automatically detect and back up various types of files from your iPhone, including your iPhone notes. Allow the software to complete the backup process. It will ensure that all your data is safely stored within the platform.

Once the backup is complete, there will be a prompt window displaying comprehensive backup details. You can access the backups by clicking "View Backups" or locate the backup folder directly by selecting "Open in Folder."
Part 5: Tips to Prevent Data Loss in iPhone Notes
Now, you must’ve understood why losing important information stored in your iPhone notes can be a real headache. You already learn several methods to back up your notes.
To avoid the distress of data loss, here are some simple yet effective tips to keep your iPhone notes safe and secure:
- Back up your notes regularly.
After learning how to back up your iPhone notes, don’t forget to do it regularly! One of the most crucial steps in preventing data loss is to create regular backups.
- Encrypt your backups.
When backing up your iPhone notes, it's important to prioritize security. Encrypted backups can add an extra layer of protection by securing it with a password. This way, even if someone gains unauthorized access to your backup files, they won't be able to view your sensitive information.
- Be careful about what apps you give access to your notes.
Before allowing any app to access your notes, carefully review its privacy policy and consider whether it's necessary. Stick to reputable apps from trusted sources to reduce the chance of data breaches or unauthorized access.
- Keep your iPhone software up to date.
Apple frequently releases updates that patch any identified loopholes, making it harder for malicious actors to exploit them. If you keep your software up to date, you decrease the chances of data loss due to security breaches.
Bonus Part: How to Recover Deleted Notes on iPhone without Backup
Some people may want to know if it is possible to recover deleted notes without backup. Now, let's address the question: how to recover deleted notes on iPhone without backup? The lack of iPhone backups has raised concerns among many users.
Unfortunately, if you have not backed up your iPhone notes, recovering them can be challenging. Regarding how to recover deleted iPhone notes without backup, you can try checking the "Recently Deleted" folder.
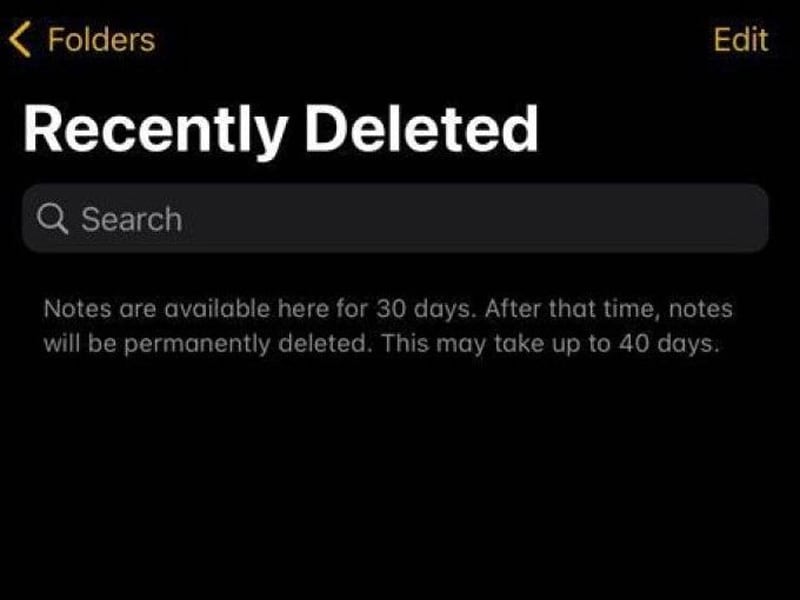
iPhone devices have a "Recently Deleted" folder in the Notes app. Deleted notes are stored there for a limited period, usually around 30 days, before they are permanently removed.
How to see if you can recover deleted notes:
- Step 1: Go to your iPhone Notes app
- Step 2: Tap back to “Folders” and open the “Recently Deleted” folder.
- Step 3: Check if there is your iPhone notes you want to recover. If yes, you can hold and select the notes, then tap Move > Notes.
However, if you can’t see the deleted notes, you can also try this method using iCloud:
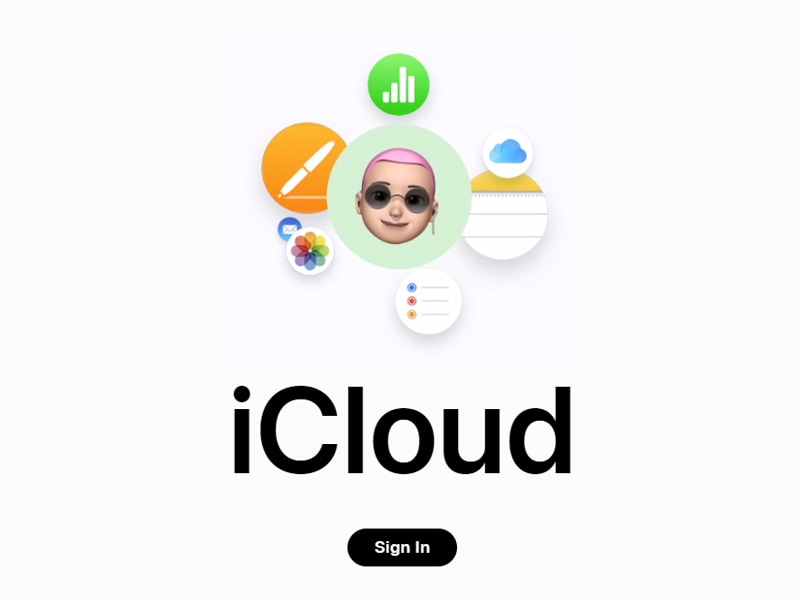
- Step 1: Go to the iCloud website at icloud.com and sign in with your account.
- Step 2: Tap on the Notes and tap the “<” button.
- Step 3: See if there are notes you are looking for on all iCloud data. If not, you can tap back “<” again and open the “Recently Deleted” folder. If your notes haven’t been permanently deleted, it should be there.
There, you can recover your iPhone notes without any problem.
Conclusion
Backing up your iPhone notes is an essential practice that ensures the safety and preservation of your valuable information. With the risk of unexpected data loss always present, taking proactive measures to create backups is a wise decision.
Whether you choose to use iCloud, Google Drive, iTunes, or third-party apps like Dr.Fone, each method offers its advantages and features to suit your preferences. Most importantly, don't underestimate the importance of backing up your iPhone notes. Take action today to safeguard your valuable digital content!


James Davis
staff Editor