
 TL;DR:
You can check spelling and grammar in Microsoft Word by pressing the F7 shortcut key or using the Review tab, provided the document is fully editable and unlocked.
● To enable automatic red and blue error underlining if it is missing, navigate to File > Options > Proofing and check "Check spelling as you type" along with "Mark grammar errors as you type."
● Manual scanning allows you to process one mistake at a time with options to change, ignore, or add specific words to your custom dictionary using the Editor panel or the status bar book icon.
● Word completely disables all proofing tools and shortcuts if the file is restricted or password-protected, requiring decryption via software like Dr.Fone - DocPassRemover to restore text editing capabilities before running a check.
Ask AI for a summary
 ChatGPT
 Perplexity
 Gemini
 Claude
 Grok
Grok
We have all been there. You send an email or submit a report, and seconds later, you see a big spelling mistake. It feels bad and can look unprofessional. That is why accuracy matters so much in writing. Clear and clean text helps your message sound smart and easy to read. How do you check spelling in Word? Microsoft Word helps with this using its built-in spell check tool. It finds spelling and grammar mistakes while you type and helps fix them fast. This tool is simple but very powerful for daily work, school tasks, and office files.
But what if you cannot even open or edit the document to run spell check because it is locked with a password you forgot? In that case, Dr.Fone - DocPassRemover can help you unlock files and continue your work.
In this article
Part 1. How to Check Spelling and Grammar in MS Word
Wondering how to get spell check on Word? Spell check in Word is normally enabled by default. At times when it helps you, it lets you correct errors as you type.
Automatic Spell & Grammar Check
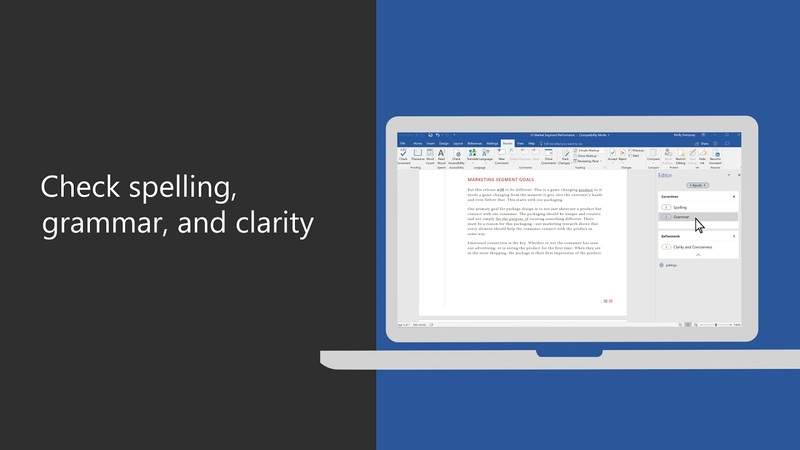
When you type in Word, you may see red wavy lines under words. These are spelling errors. You may also see blue lines which point out grammar or sentence issues. You can right-click on the underlined Word to see correct suggestions. Click one to fix it.
How to Verify or Enable Spell Check
If you do not see these lines, spell check may be turned off. Follow these steps:
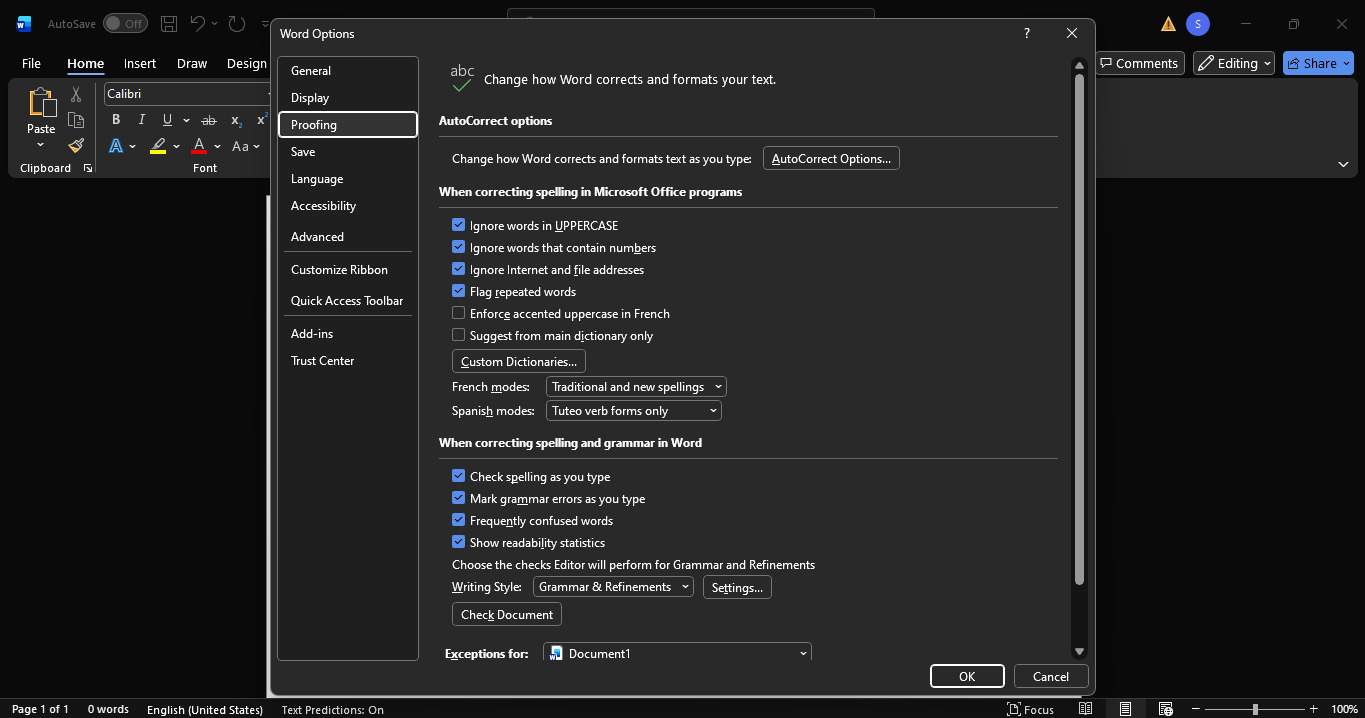
- Step 1. Click "File" in the top menu.
- Step 2. Select "Options."
- Step 3. Go to "Proofing."
- Step 4. Make sure these boxes are checked:
- Check spelling as you type
- Mark grammar errors as you type
- Step 5. Click "OK."
Turn On Spell Check If It's Not Working
If spell check still does not work, try these quick fixes:
- SCheck the language (Review → Language → Set Proofing Language).
- SMake sure "Do not check spelling or grammar" is unchecked.
- STry restarting Word.

Once fixed, Word will again check spelling and grammar as you type.
Part 2. How to Perform a Manual Spell Check in MS Word
Since you already have an idea of how a spell check function generally works behind the scenes, it is time for us to talk about manual spell checking.
Method 1: The Ribbon Command (Step-by-Step)
This is the most common and easiest way to check spelling in Word.
Steps to follow:
- Step 1. Open your Word document.
- Step 2. Click the "Review" tab at the top.
- Step 3. Click "Spelling & Grammar."
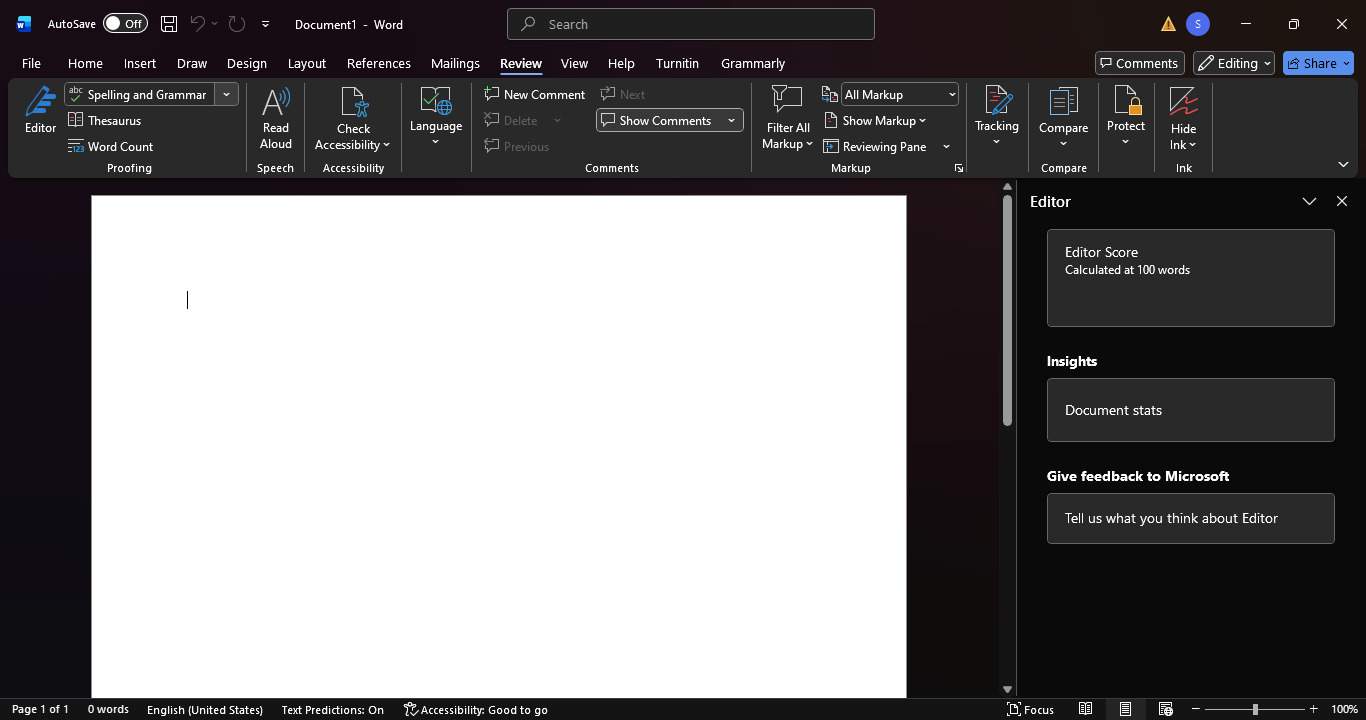
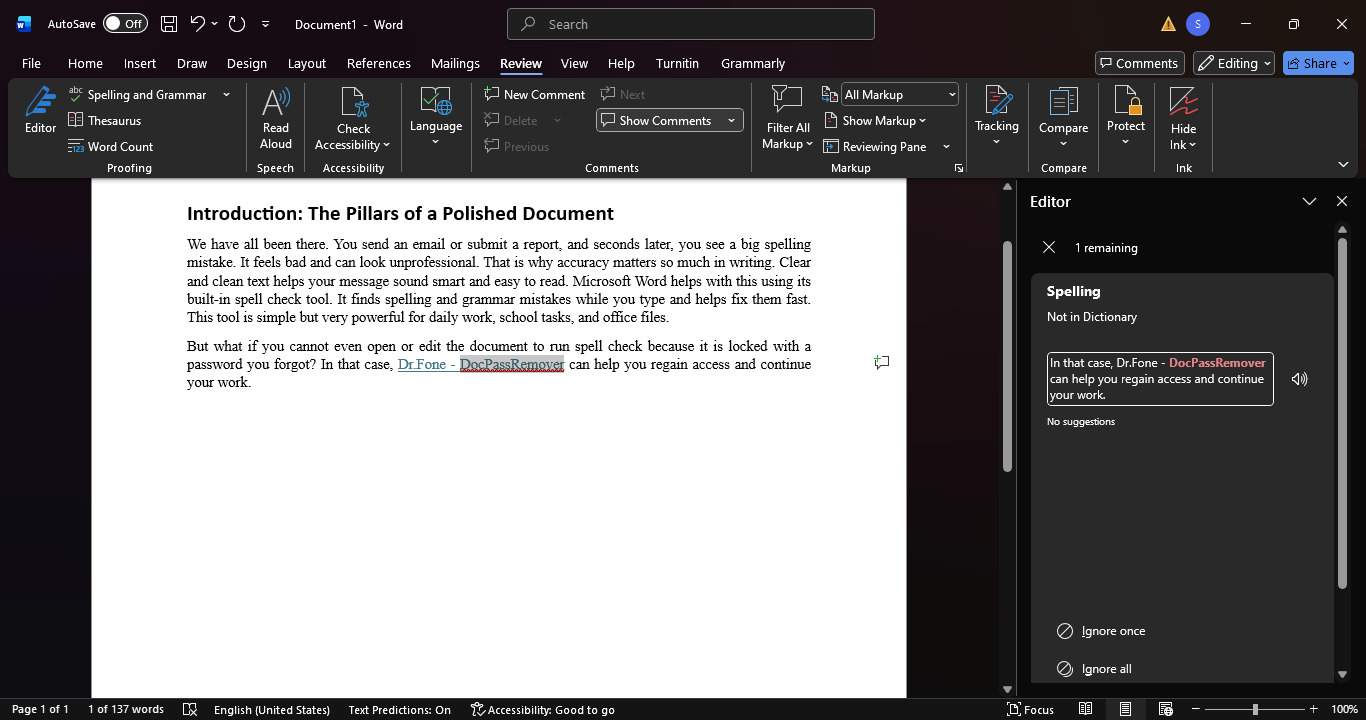
Word will now scan your document from top to bottom. A box will appear on the screen. Word shows one mistake at a time and gives suggestions.
You can choose to:
- Change – Fix the Word using a suggestion
- Ignore – Skip this mistake once
- Ignore All – Skip this Word everywhere
- Add to Dictionary – Use this for names or special words
This method is perfect if you want full control. It helps you carefully check spelling and grammar in Microsoft Word before sharing your file.
Method 2: The Status Bar Shortcut
This method is faster and works with one click. Look at the bottom bar of your Word window. You will see a small book icon:
- A check mark means no errors
- An X implies spelling or grammar issues exist
Steps:
- Step 1. Click the book icon.
- Step 2. Word opens the spell check window.
- Step 3. Review and fix errors one by one.
This is a quick way to find spell check in Word without opening menus.
Part 3. Shortcut Key to Check Spelling and Grammar in MS Word (F7)
How do you check spelling in Word? If you like speed, keyboard shortcuts are your best friend. Instead of clicking around, you can spell check in seconds using one key.
The Ultimate Shortcut: F7
The main shortcut key to check spelling and grammar in MS Word is F7.
Steps:
- Step 1. Open your document.
- Step 2. Press Function key + F7 on your keyboard.
- Step 3. Word starts checking spelling and grammar.
Alternative Shortcut
You can also use this keyboard path: Press Alt + R, then S.
This opens the Review tab and starts spelling check.
Beyond Spelling: Grammar Check
Spell check tools also check grammar. They point out:
- Long or unclear sentences
- Punctuation mistakes
- Passive voice
- Word repetition
In newer Word versions, the Editor panel shows a simple score and writing tips.
Bonus Tip. Before Running Spell Check: Make Sure the Word File Is Fully Editable
Spell check is a really handy tool, but it only works if your Word file is open and editable. So many people just forget the simple step. You may be familiar with checking spelling in Word, however, what if Word doesn't allow you to type or click anything at all? That's typically where the trouble starts.
When Spell Check Can't Work
Imagine opening an important Word file and seeing a message asking for a password. You try to remember it, but nothing works. Now you can't edit the text. You can't press F7. You can't turn spell check on in Word. The document feels locked like a safe.
This usually happens when:
- The file is protected with an open password
- Editing is restricted
- The password was set long ago and forgotten
In this case, Word's built-in tools stop working. Spell check, grammar check, and shortcuts all fail. This is where many users get stuck.
Dr.Fone – DocPassRemover (Tool Overview)
Dr.Fone - DocPassRemover is a professional desktop tool
made to unlock protected
documents. It works like a master key for locked Office and PDF files. The tool is simple, safe, and
works fully offline.
It supports many file types, including Word (doc/docx), Excel, PowerPoint, and PDF files. Dr.Fone
uses smart recovery methods to handle both simple and strong passwords. The process is easy. You
import the file, choose a recovery method, and start unlocking. Once unlocked, your document stays
the same. Text, layout, and formatting are not damaged.
This makes it perfect when spell check in Word cannot be used due to a locked file.
Step-by-Step Guide to Unlock Word File Before Spell Check
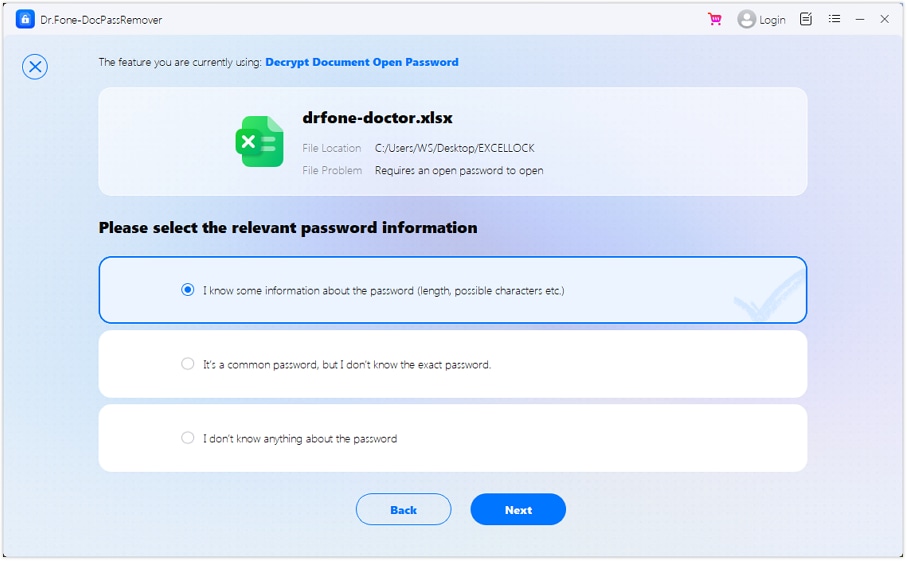
- Step 1. Install and open Dr.Fone – DocPassRemover, then click "Add File", select your locked Word document (.doc/.docx).
- Step 2. Choose how much you remember. Click "I know some information", "It's a common password", or "I don't know anything".
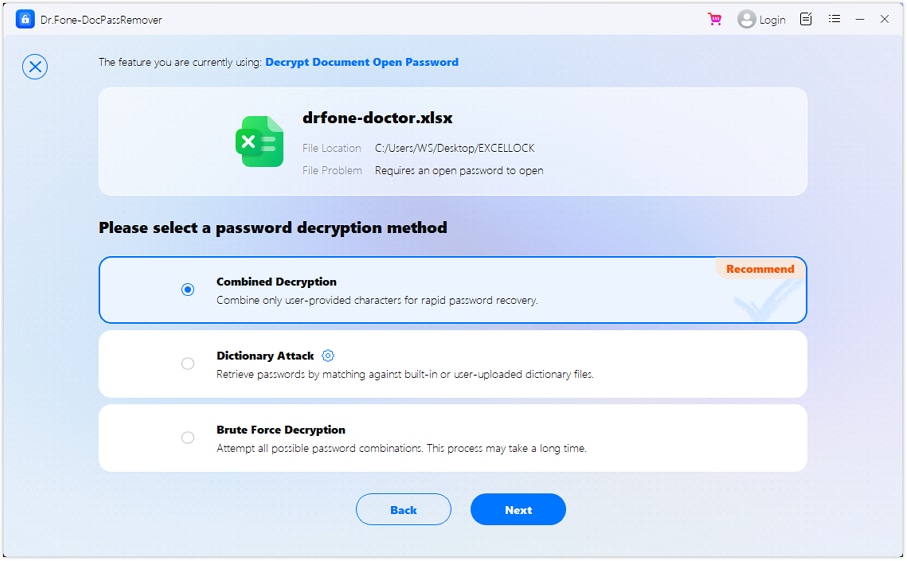
- Step 3. Select the matching mode—"Combined Decryption", "Dictionary Attack", or "Brute Force Decryption", then click "Next".
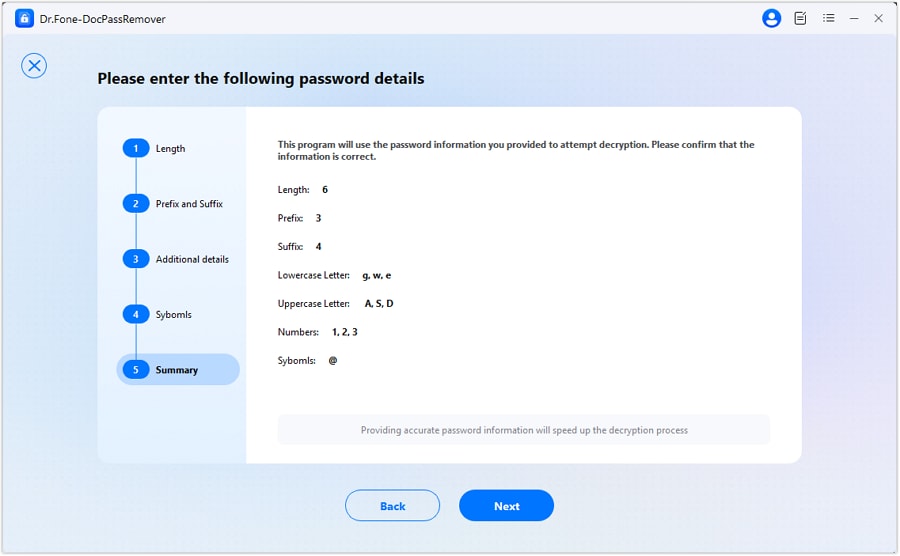
- Step 4. Click "Next", wait for recovery, note the revealed password, and open your Word file safely.
Conclusion
Spell check in Microsoft Word helps keep your writing clear and professional. From red lines to keyboard shortcuts, Word gives many easy ways to fix spelling and grammar. But none of these tool's work if the file is locked. That is why access matters first. When a document is protected, and the password is forgotten, Dr.Fone - DocPassRemover offers a simple and safe solution. Once your file is unlocked, you can turn spell check on in Word and polish your writing with ease.
FAQs
-
Q: How do I turn spell check on in Word if it is missing?
A: Go to File > Options > Proofing and enable "Check spelling as you type" and "Mark grammar errors as you type." Restart Word to apply the changes properly.
-
Q: What should I do if Spell Check or Grammar Check is not working in Word?
A: First, make sure spell check is turned on in File > Options > Proofing. Also, check the document language. If the file is read-only or locked, spell check will not work.
-
Q: What is the shortcut key to check spelling and grammar in Microsoft Word?
A: Press F7 on your keyboard. This shortcut opens the spelling and grammar checker and helps you quickly review errors.


Selena Lee
staff Editor
Generally rated4.5(105participated)