How to Download and Install iOS 16: The Complete Guide
Feb 11, 2026 • Filed to: Phone Repair Solutions • Proven solutions
With the incredible advancements in iOS technology, keeping your device updated is more important than ever. iOS 16 brings a host of exciting features that can give your device a fresh and enhanced experience, ensuring it runs smoothly and efficiently. Hence, you must know how to install iOS 16.
While we’ll explore those features in detail soon, it’s worth noting that for users eager to stay ahead, upgrading to iOS 16 brings a fresh set of improvements and innovations. Staying up to date with the latest iOS version ensures you’re making the most of your device’s performance, security, and overall user experience.
iOS 16 new functions:
- Mail app: Apple improves the mail app; it provides suggestions before you start typing, and allows you to search for your needs more concisely.
- Lock Screen: You can personalize the iPhone lock screen as per your requirements.
- Focus: Allows you to select the apps and people you want to receive notifications.
- iCloud Shared Photo Library: Allows you to share photos in the iCloud-shared library.
Now that we know what new features you get by downloading iOS 16. Let us understand how to download iOS 16 to stay up to date with the latest technology in the market.
Part 1: Make Sure Your Devices Support iOS 16
Apple limits each iOS release to devices with hardware capable of running its new features. Before upgrading, you should check compatibility. The good news is that iOS 16 supports all devices that ran iOS 15 or iOS 14, including older models like the iPhone SE and iPhone 8. Given below is the list of devices iOS 16 is compatible with:
- iPhone 13
- iPhone 13 mini
- iPhone 13 Pro
- iPhone 13 Pro Max
- iPhone 12
- iPhone 12 mini
- iPhone 12 Pro
- iPhone 12 Pro Max
- iPhone 11
- iPhone 11 Pro
- iPhone 11 Pro Max
- iPhone XS
- iPhone XS Max
- iPhone XR
- iPhone X
- iPhone 8
- iPhone 8 Plus
- iPhone SE (2nd generation or later)
If you possess any of the services mentioned above, you needn't worry about upgrading to iOS 16. You can do it within a few minutes!
Part 2: Preparations for Upgrading to iOS 16
Before upgrading your old iOS version to the iOS 16 version, you need to prepare your iPhone. This is how you can do it!
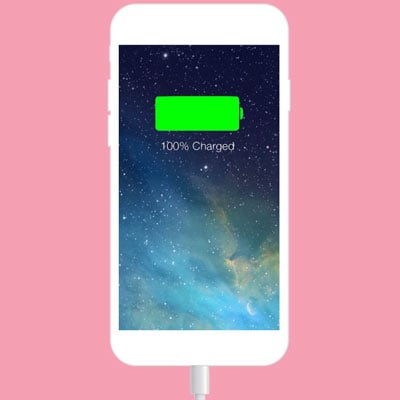
1. Make sure your iPhone is fully charged
iPhone version upgrades often take a while to upgrade. This is because, when the iPhone upgrades, several new software needs to be downloaded. This is a battery-intensive process and consumes a lot of power. In fact, even before installing a new update, the iPhone needs to have at least 30 percent of battery. However, it is recommended to ensure that your iPhone has at least 50 percent of battery.
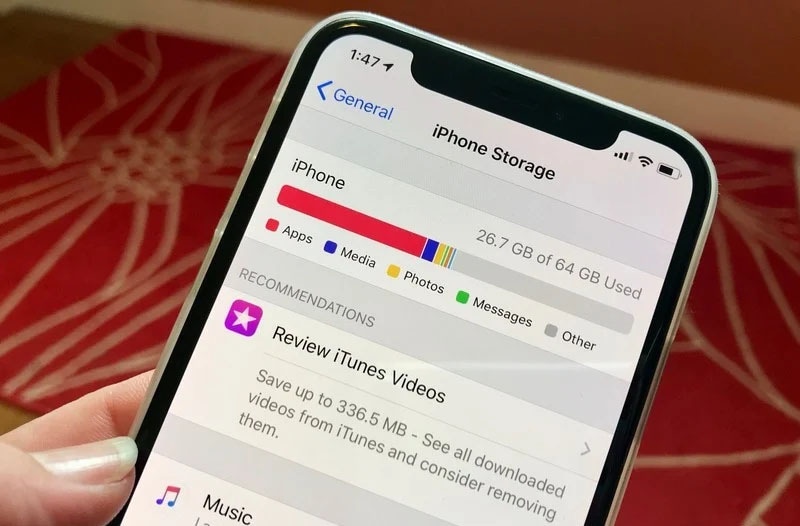
2. Keep enough free space
iPhone users often face storage issues, especially during updates. Since new features require additional space, ensure you have enough storage before starting the iOS 16 download and install process.
3. Back up your data
iOS updates don’t always go smoothly—unexpected errors can cause data loss. To stay safe before the iOS 16 download and install, back up your iPhone. This ensures your important files, photos, and apps remain secure during the update process!

Method 1: Use iCloud to back up your data
iCloud is Apple’s built-in cloud service and a reliable way to back up iPhone data before the iOS 16 download and install. It’s easy to use, secure, and lets you restore files anytime. The only drawback is its limited free storage—once full, you’ll need to purchase extra space.

Method 2: Use computers to back up your data
Backing up your iPhone to a computer is another reliable option before the iOS 16 download and install. Unlike iCloud, it’s completely free, though slightly more complex. Simply connect your device via USB, choose the backup option, and save your data to the computer. To restore, reconnect your iPhone and transfer the files back in minutes.
Method 3: Use Dr.Fone - Phone Backup to back up your data
Dr.Fone - Phone backup is another excellent option to back up your device data. It is not highly sophisticated, and even a neophyte can easily use the software to back up data from their iPhone. Using Dr. Fone to back up and restore data can be done in no time and without spending a penny! The exporting of data from your phone to a computer device becomes very straightforward by using Dr.Fone.

Part 3: How to Download iOS 16?
Before downloading iOS 16, make sure your iPhone is connected to stable Wi-Fi, and then check the following steps:
Step 1. Open Settings, find General, then tap Software Update.
Step 2. When you see the iOS 16 update option available, tap it and then you should see Download and Install, click it.
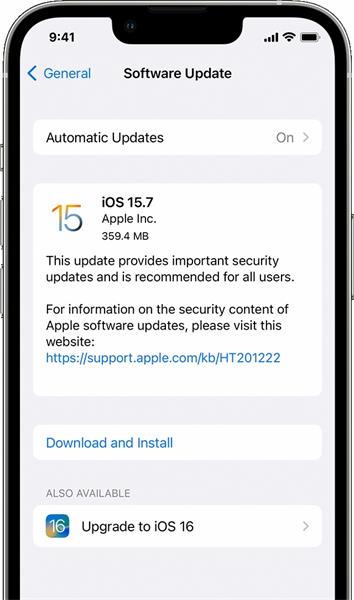
3. Now, it should ask you to enter your passcode, enter your correct password, and tap Install Now.
Part 4: Regret Upgrading to iOS 16/26 Beta? Here is the Fix!
Sometimes users don’t enjoy the new interface after an upgrade and want to revert to the older version. Downgrading iOS manually can be difficult, but Dr.Fone - System Repair (iOS) makes it simple. If you regret the iOS 16 download and install, this tool helps you repair your system and safely downgrade to a previous iOS version in just a few steps.
Note: Please check on https://ipsw.me/product/iPhone to make sure the compatible firmware is available before downgrading.
Dr.Fone - System Repair (iOS)
Dedicated Tool to Upgrade/Downgrade iOS 16!
- Fix iOS issues in a few clicks without any data loss
- Troubleshoot and repair a variety of iPhone errors
- Enjoy a safe, reliable, and seamless experience
- Work for all models of iPhone, iPad, and iPod touch
Step 1: Launch the Dr.Fone software on your PC. Now, when you enter the first screen, simply click the “System Repair” module and then click "iOS Upgrade/Downgrade".

Step 2: It will give you a choice to either use the "Upgrade iOS" or the "Downgrade iOS". Select "Downgrade iOS". Then, connect your iOS device to the PC. The software then detects your device.

Step 3: By now, you will see a list of iOS firmware versions you can downgrade to. Click on the firmware you want to "Download".
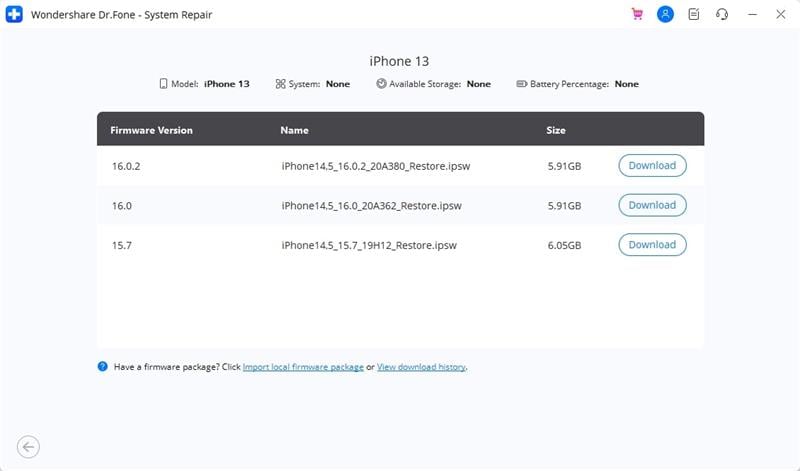
Step 4: After you can select the firmware package you wish to downgrade your device to. Make sure the internet is working properly during the process. The firmware will begin to download.
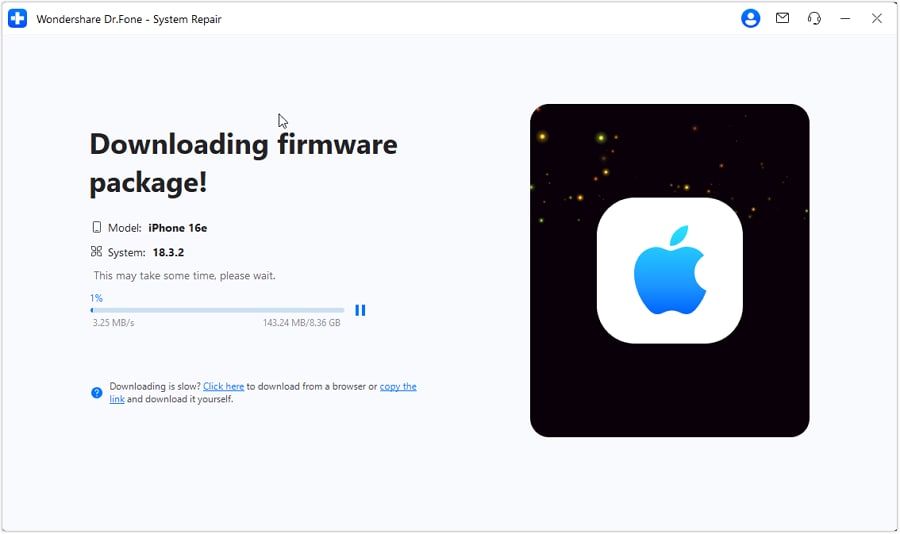
Step 5: Once the iOS firmware is installed and verified, the following screen will appear. Click on "Repair Now" and the software will now start fixing the problem in your iOS device if there is any. Once this process is done, your iPhone will be repaired.

The Bottom Line
iOS 16 is an excellent choice for users who value stability, performance, and upgraded features for daily use. Before the iOS 16 download and install, make sure your device is compatible and backed up. With Wondershare Dr.Fone - System Repair (iOS), you can manage updates, back up data securely, and fix any iOS issues—making it the perfect companion for a smooth upgrade.
Upgrade & Downgrade
- iOS Beta Install
- 1. Download iOS Beta Profile
- 2. Download the iOS 13 Beta
- 3. iOS 16 Beta Download
- 4. Uninstall iOS Beta
- 5. Install iPhone Beta Profile
- 6. Install Mac Beta Profile
- 7. Install iOS 15 Beta Profile
- 8. Upgrade iPad to iOS 14
- iOS News
- 1. Update iPhone 4s to iOS 9
- 2. Cheaper iPhone
- 3. Customize iPhone Home Screen
- 4. Know About iOS 15 Lock Screen
- 5. Add Lyrics to Song on Apple Music
- 6. Current iOS Version
- 7. Current iOS for iPad
- 8. iOS 19 and the iOS 26 Rumor
- iPhone Downgrade Tips
- 1. Downgrade iOS Like a Pro
- 2. Roll Back to an Older iOS Version
- 3. Downgrade to iOS 15
- 4. Install Developer Profile
- 5. Downgrade iOS without iTunes
- 6. Downgrade to iOS 14
- 7. Download and Install the iOS 16
- iPhone Update Tips
- 1. iPhone & iPad Security Updates
- 2. Undo an Update on iPhone
- 3. Update iPhone with/without iTunes
- 4. Fix iPhone Checking for Update Stuck
- 5. Fix iPad Software Update Failed
- 6. Fix iPhone Stuck On Update
- 7. Fix iPhone Won't Update
- 8. Fix Update Server Not Be Contacted
- 9. Fix iPhone Stuck on Update Requested
- 10. Resolve iPhone Cellular
- 11. Resolve iPhone Error 1110
- 12. Fix iPhone Frozen
- iOS 11/12 Problems
- 1. Fix iPhone Stuck on Waiting
- 2. Fix iPhone Can't Make Calls
- 3. Fix iPhone Stuck on Logo
- 4. Fix Photos Disappeared from iPhone
- 5. Fix iPhone Keeps Freezing
- iOS 13/14 Problems
- 1. Fix CarPlay Not Connecting
- 2. Fix Resolve Apps Won't Open
- 3. Fix Song/Playlist Missing
- 4. Fix iPhone Asking for Passcode
- 5. Fix Map Voice Navigation Won't Work
- 6. Fix iMessage Not Working
- 7. Recover Deleted Data on iOS 14
- 8. Recover Disappeared Notes on iOS 14
- iOS 15 Problems
- iOS 16 Problems
- 1. Fix iPhone Wi-Fi Not Working
- 2. Fix iOS 16 Battery Drain Issues
- 3. Fix Screen Mirroring Not Working
- 4. Fix Apple CarPlay is Not Supported
- 5. Fix iPhone Screen Not Responding
- 6. Fix iPhone Apps Keep Crashing
- 7. Fix Call Failed iPhone Issue
- 8. Fix iPhone Stuck On Apple Logo
- 9. Counter iPhone Heating Problems
- 10. Fix iPhone Stuck in Boot Loop
- 11. Fix iPhone Bluetooth Not Working
- iOS 17 Problems
- 1. iPhone Freezing After Update
- 2. iOS 17 Wallpapers Blurry at Top
- 3. Fix iPhone Charging Slow
- 4. Enable Live Activities iOS 17
- 5. Fix iOS 17 Apps Crashing
- 6. Fix iPhone Stuck on Verifying Update
- 7. Overheating after 17 Update
- 8. Fix iOS 17 Keyboard Bug
- 9. Fix iOS 17 Green Screen Issue
- 10. iOS 17 Bugs & Fixes
- 11. No iOS 17 Update on Your iPhone
- 12. iOS 17 Unable to Download
- 13. Missing contacts with iOS 17 update
- iOS 18 Problems
- 1. iOS 18 Black Screen
- 2. iPadOS 18 Math Notes Issues
- 3. iPhone Email Not Working
- 4. iPhone Contacts Disappeared
- 5. iPhone Stuck in Restore Mode
- 6. iPhone Stuck on Preparing Update
- 7. iPhone Flashlight Not Working
- 8. iPhone Bluetooth Issues
- 9. Stuck on Terms and Conditions
- 10. Frozen iPhone iOS 18
- 11. iOS 18 Beta Boot Loop Issue
- 12. iOS 18 Beta Overheating
- 13. iOS 18 Beta Volume Bug
- iOS 26 Topics


Selena Lee
chief Editor
Generally rated4.5(105participated)