
How to Fix an iPhone Stuck on Preparing iOS 18/26 Update

Feb 11, 2026 • Filed to: Phone Repair Solutions • Proven solutions
Trying to install iOS 18 or iOS 26, but your iPhone is stuck on the preparing update screen? You’re not alone—and yes, it’s frustrating. While the update process is usually smooth, occasional glitches can stall it.
To ensure you don’t miss out on the latest features, it's essential to fix this issue quickly. Follow these simple steps to resolve the Stuck on Preparing iOS 18/26 Update error and get your iPhone back on track.
Part 1: Why is my iPhone Stuck on Preparing iOS 18/26 Update?

If your iPhone is stuck on the “Preparing Update” screen while installing iOS 18 or iOS 26, don’t panic—this is a common issue faced by many users during major iOS rollouts. Whether it’s due to network instability, software glitches, or storage limitations, these delays can disrupt the update process and prevent you from accessing the latest iOS features.
There may be various reasons causing your iPhone to get stuck on preparing the iOS 18/26 update. Let's see what some common causes are:
- Slow or unstable internet connection: A poor internet connection may lead to slow speeds or interruptions during downloading and preparing the iOS update file.
- Insufficient storage space: During an update, your iPhone may get stuck or malfunction if it has low storage space.
- Low battery: Issues with the updating procedure may arise from a low battery level. It is advised by Apple that you update your iPhone when fully charged.
- Corrupted update file: The preparing update screen may become stuck if the iOS 18/26 update file you downloaded is faulty or incomplete.
- Background processes: The preparation process for updates may be affected by background programs and services that require system resources.
- Performance of the device: Compared to newer models, older iPhone models with less RAM and a slower processor may take longer to install updates.
Part 2: Step-by-Step Guide on How to Fix an iPhone Stuck During Update

If you are installing the latest iOS update and find that your iPhone is getting stuck on the Preparing Update screen, worry not. To unstuck and update, there are several methods you can use for fixing. Here's a step-by-step guide on what to do:
Step 1: Make Sure You Have a Stable Internet Connection

When updating iOS, an unstable or poor internet connection could cause the problem. Ensure you have a stable cellular data connection or a strong Wi-Fi network. Switch to a different network or stand close to your wireless router if needed.
Step 2: Check Your Storage Space on iPhone

To update your iOS, ensure your device has enough storage space. Go to Settings > General > iPhone Storage and check the available space. If running low, delete unused apps, photos, or files to free up space. Aim to have at least 5GB of free storage before attempting the update again.
Step 3: Fully Charge Your iPhone

Apple recommends updating whenever your iPhone has 50% battery life. Charge your device by plugging it into power before performing the iOS 18/26 update.
Step 3: Force Restart Your iPhone

A hard reboot helps resolve temporary bugs or issues that may cause your iPhone to freeze during the update process.
- For iPhone 8 or later: Press and release the volume up button, click and release the volume down button, then press the side button and hold until the Apple logo appears.
- For iPhone 7/7 Plus: Press and hold the volume down and the side button simultaneously until the Apple logo appears.
- For iPhone 6s and below: Press and hold the home button. You may press the side or top button until the Apple logo appears.
Step 4: Delete the Existing iOS 18/26 Update File

Sometimes, this issue of an iPhone can be caused by a downloaded file that is corrupted. Delete the existing download file and redownload a fresh copy as follows:
- Click on Settings, then click General. Now click on iPhone Storage and navigate to the iOS 18/26 update file.
- Tap on the update file and then click on the Delete Update option.
- Go to Settings > General > Software Update. Tap Download and Install to get the fresh iOS 18/26.
- Using iTunes or Finder to Update
If you have tried everything and all else fails, you may update your iPhone to iOS 18/26 using a computer. Connect your device using a Lightning cable to your computer, open iTunes (on Windows or older macOS), or use Finder (on macOS Catalina or later). Select your iPhone from the left pane and click Check for Update. Follow the instructions to download and upgrade to iOS 18/26.
Part 3: Bonus Tips - Fix an iOS Stuck on Preparing Update with Powerful Tool: Dr.Fone
Sometimes, updating your iPhone can lead to it getting stuck on preparing iOS 18/26 update, making it difficult to access key features. Fortunately, you can resolve this issue by using a computer to perform basic update repairs. If standard methods don’t work, a more effective solution is Wondershare Dr.Fone - System Repair (iOS).
Key Features of Dr.Fone - System Repair
- No Data Loss: Dr.Fone - System Repair will not delete your iPhone’s data.
- Works with All iPhones: It supports all iPhone models, including the newest iPhone 15 Pro, and all iOS versions.
- Fixes Many Problems: Dr.Fone - System Repair can solve iPhone issues like screen freezes, boot loops, and system crashes.
- Easy to Use: The tool has simple steps that anyone can follow, even if they are not good with technology.
Dr.Fone - System Repair (iOS)
Repair iOS System Errors Without data loss.
- Only fix your iOS to normal, no data loss at all.
- Fix various iOS system issues stuck in recovery mode, white Apple logo, black screen, looping on start, etc.
- Downgrade iOS without iTunes at all.
- Work for all iPhone/iPad/iPod Touch, running on all iOS versions


Step-by-Step Guide
Step 1: Download and Install Dr.Fone
First, download the software Dr.Fone and install it on your computer.
Step 2: Launch Dr.Fone and Select System Repair
Launch the program Dr. Fone after successful installation. On the top left area from the display window of Toolbox, click on the item labeled “System Repair.”

Step 3: Choose an iOS Device
It will open another window. Then select the option for your iOS device since you intend to fix an iPhone system-related issue.

Step 4: Enter iOS Repair Mode
Now, you will be presented with multiple repair options in the next window. Select "iOS Repair" to repair your iPhone's system further.

Step 5: Select Standard Mode of Repair
When prompted to select a repair mode, choose ""Standard Repair."" This option will ensure that all data on your device is safely retained.

Step 6: Put iPhone into Recovery Mode
Follow the onscreen instructions to put your iPhone into Recovery Mode. Once done, tap Enter Recovery Mode to lead next. If some steps do not work, click the " "Guide"" button to view step-by-step instructions.

Step 7: Download Firmware
Using Dr.Fone, when your iPhone is in recovery mode, it will detect the proper iOS firmware for it. Then select the firmware to be installed and click “Download.”

Step 8: Start Repair Process
Click on ""Repair Now"" after downloading the firmware to start the repair process for your iPhone.

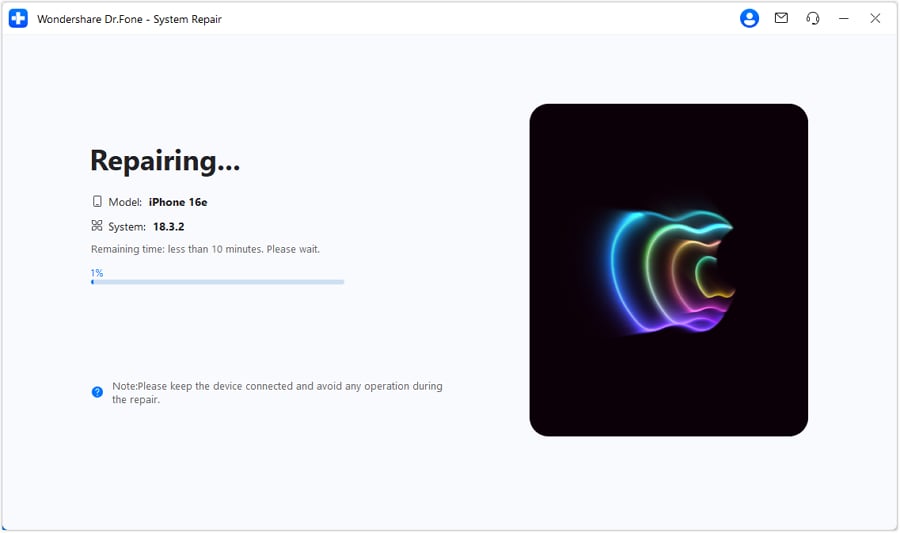
Step 9: Wait for Completion
In this step, you need to wait while the progress bar is shown as Dr.Fone repairs your system of the iPhone. Do not forget to keep the device connected to your computer.
Step 10: Finish Repair
Once done, the successful message will be displayed; click"Done" to finish repairing your iPhone for flawlessly smooth usage.

The Best Solution for iOS 26 Issues
Tips: Dr.Fone - System Repair now enables zero-data-loss solutions for iOS 26 crashes (boot loops/black screen/failed updates) and one-click downgrades to signed versions (e.g. iOS 18.5), completing in 10 minutes. Supports all iPhone models, bypassing iTunes factory reset risks. Downgrades require open Apple signing windows (real-time tool verification). Pre-export critical data when reverting from iOS 26.
Conclusion
iOS update may cause your iPhone to become stuck on the preparing update screen. Fortunately, Wondershare Dr.Fone - System Repair is a simple and effective fix. It keeps your data safe, works with all iPhone models, and is easy to use. For a fast and efficient solution, we highly recommend trying Dr.Fone - System Repair.


Upgrade & Downgrade
- iOS Beta Install
- 1. Download iOS Beta Profile
- 2. Download the iOS 13 Beta
- 3. iOS 16 Beta Download
- 4. Uninstall iOS Beta
- 5. Install iPhone Beta Profile
- 6. Install Mac Beta Profile
- 7. Install iOS 15 Beta Profile
- 8. Upgrade iPad to iOS 14
- iOS News
- 1. Update iPhone 4s to iOS 9
- 2. Cheaper iPhone
- 3. Customize iPhone Home Screen
- 4. Know About iOS 15 Lock Screen
- 5. Add Lyrics to Song on Apple Music
- 6. Current iOS Version
- 7. Current iOS for iPad
- 8. iOS 19 and the iOS 26 Rumor
- iPhone Downgrade Tips
- 1. Downgrade iOS Like a Pro
- 2. Roll Back to an Older iOS Version
- 3. Downgrade to iOS 15
- 4. Install Developer Profile
- 5. Downgrade iOS without iTunes
- 6. Downgrade to iOS 14
- 7. Download and Install the iOS 16
- iPhone Update Tips
- 1. iPhone & iPad Security Updates
- 2. Undo an Update on iPhone
- 3. Update iPhone with/without iTunes
- 4. Fix iPhone Checking for Update Stuck
- 5. Fix iPad Software Update Failed
- 6. Fix iPhone Stuck On Update
- 7. Fix iPhone Won't Update
- 8. Fix Update Server Not Be Contacted
- 9. Fix iPhone Stuck on Update Requested
- 10. Resolve iPhone Cellular
- 11. Resolve iPhone Error 1110
- 12. Fix iPhone Frozen
- iOS 11/12 Problems
- 1. Fix iPhone Stuck on Waiting
- 2. Fix iPhone Can't Make Calls
- 3. Fix iPhone Stuck on Logo
- 4. Fix Photos Disappeared from iPhone
- 5. Fix iPhone Keeps Freezing
- iOS 13/14 Problems
- 1. Fix CarPlay Not Connecting
- 2. Fix Resolve Apps Won't Open
- 3. Fix Song/Playlist Missing
- 4. Fix iPhone Asking for Passcode
- 5. Fix Map Voice Navigation Won't Work
- 6. Fix iMessage Not Working
- 7. Recover Deleted Data on iOS 14
- 8. Recover Disappeared Notes on iOS 14
- iOS 15 Problems
- iOS 16 Problems
- 1. Fix iPhone Wi-Fi Not Working
- 2. Fix iOS 16 Battery Drain Issues
- 3. Fix Screen Mirroring Not Working
- 4. Fix Apple CarPlay is Not Supported
- 5. Fix iPhone Screen Not Responding
- 6. Fix iPhone Apps Keep Crashing
- 7. Fix Call Failed iPhone Issue
- 8. Fix iPhone Stuck On Apple Logo
- 9. Counter iPhone Heating Problems
- 10. Fix iPhone Stuck in Boot Loop
- 11. Fix iPhone Bluetooth Not Working
- iOS 17 Problems
- 1. iPhone Freezing After Update
- 2. iOS 17 Wallpapers Blurry at Top
- 3. Fix iPhone Charging Slow
- 4. Enable Live Activities iOS 17
- 5. Fix iOS 17 Apps Crashing
- 6. Fix iPhone Stuck on Verifying Update
- 7. Overheating after 17 Update
- 8. Fix iOS 17 Keyboard Bug
- 9. Fix iOS 17 Green Screen Issue
- 10. iOS 17 Bugs & Fixes
- 11. No iOS 17 Update on Your iPhone
- 12. iOS 17 Unable to Download
- 13. Missing contacts with iOS 17 update
- iOS 18 Problems
- 1. iOS 18 Black Screen
- 2. iPadOS 18 Math Notes Issues
- 3. iPhone Email Not Working
- 4. iPhone Contacts Disappeared
- 5. iPhone Stuck in Restore Mode
- 6. iPhone Stuck on Preparing Update
- 7. iPhone Flashlight Not Working
- 8. iPhone Bluetooth Issues
- 9. Stuck on Terms and Conditions
- 10. Frozen iPhone iOS 18
- 11. iOS 18 Beta Boot Loop Issue
- 12. iOS 18 Beta Overheating
- 13. iOS 18 Beta Volume Bug
- iOS 26 Topics


James Davis
staff Editor
Generally rated4.5(105participated)