100% Security Verified | No Subscription Required | No Malware

 :
: 
 ChatGPT
 Perplexity
 Gemini
 Claude
 Grok
Grok
Losing important files, whether they're cherished family photos or critical work documents, can be a highly stressful experience. In these moments, the immediate goal is to find a reliable solution to recover your data quickly and safely. This is where file recovery software becomes indispensable, offering a way to restore lost files without needing deep technical expertise.
Among the many options available, PhotoRec is a well-known name, often recommended for its powerful file recovery capabilities across various storage devices. But how does it hold up in 2026? In this detailed review, we will explore every aspect of the PhotoRec software, from its core features to its real-world usability. We'll also introduce a more user-friendly alternative to help you make the best choice for your data recovery needs.
In this article
Part 1. What Are the Core Features of PhotoRec Software?
The PhotoRec software is designed to recover a wide range of deleted files, from photos and videos to documents and archives, across numerous storage devices. Its main strength lies in its ability to ignore the file system and go directly for the underlying data. This means it can recover files even if the media has been reformatted or severely damaged. With support for over 480 file extensions, PhotoRec is a versatile and powerful recovery utility.
It is compatible with traditional hard drives, SSDs, memory cards, USB flash drives, and even optical media like CDs and DVDs. As open-source software distributed under the GNU General Public License, PhotoRec is completely free for unlimited use. It is typically bundled with TestDisk, a companion tool for recovering lost partitions and fixing non-booting disks.
Key Features Explained
- Extensive File Signature Recognition: Instead of relying on a file system's directory, PhotoRec identifies files based on their unique data signatures, allowing it to recover data from corrupted or formatted drives effectively.
- Broad Device Compatibility: It can recover data from almost any storage device your computer can read, including cameras, smartphones (via their storage cards), and more.
- RAW Photo Recovery: A crucial feature for photographers, it can retrieve RAW image files from major camera brands like Canon, Nikon, Sony, and others, preserving the original image quality.
- Bundled with TestDisk: This provides a comprehensive data recovery suite. While PhotoRec handles files, TestDisk can recover entire lost partitions and repair boot sectors.
- Cross-Platform Support: Whether you need a PhotoRec download for Windows, macOS, or Linux, the tool is available, offering flexibility for users on any major operating system.
Part 2. Is PhotoRec Worth Using? A 5-Factor Analysis
Before you proceed with a PhotoRec software download, it's crucial to determine if it aligns with your technical skills and recovery needs. Let's break down five key factors to help you decide if PhotoRec is the right tool for you.
1. Strengths & Weaknesses
Understanding the pros and cons of PhotoRec is the first step in making an informed decision. Here’s a clear breakdown of what it does well and where it falls short.

- Completely Free: No costs, subscriptions, or hidden fees, making it ideal for users on a budget.
- Safe Operation: Uses read-only access to scan the drive, preventing any further data loss or overwriting.
- Highly Versatile: Recovers a vast number of file types from nearly any storage device.
- Powerful Recovery Engine: Effective even on corrupted or formatted partitions due to its file signature scanning method.
- Challenging Interface: Its command-line interface is intimidating for beginners.
- No File Preview: You cannot see a preview of files before recovery, so you recover everything and sort it later.
- Disorganized Results: Recovered files lose their original names and folder structure, creating a lot of manual sorting work.
- Lacks Advanced Features: No RAID recovery, disk imaging, or other advanced functions found in paid software.
2. Ease of Use
The usability of PhotoRec data recovery heavily depends on your comfort with a text-based interface. For those accustomed to graphical user interfaces (GUIs), PhotoRec's command-line approach can be a significant hurdle. However, the process is guided by on-screen prompts. For Windows users, a version called QPhotoRec offers a basic GUI, but for PhotoRec Mac and Linux users, the terminal is the primary method of interaction.

3. File Format Support
The PhotoRec recovery software is impressive in its scope, supporting over 480 file extensions. This covers almost any common file type you might need to recover. Here is a selection of supported formats:
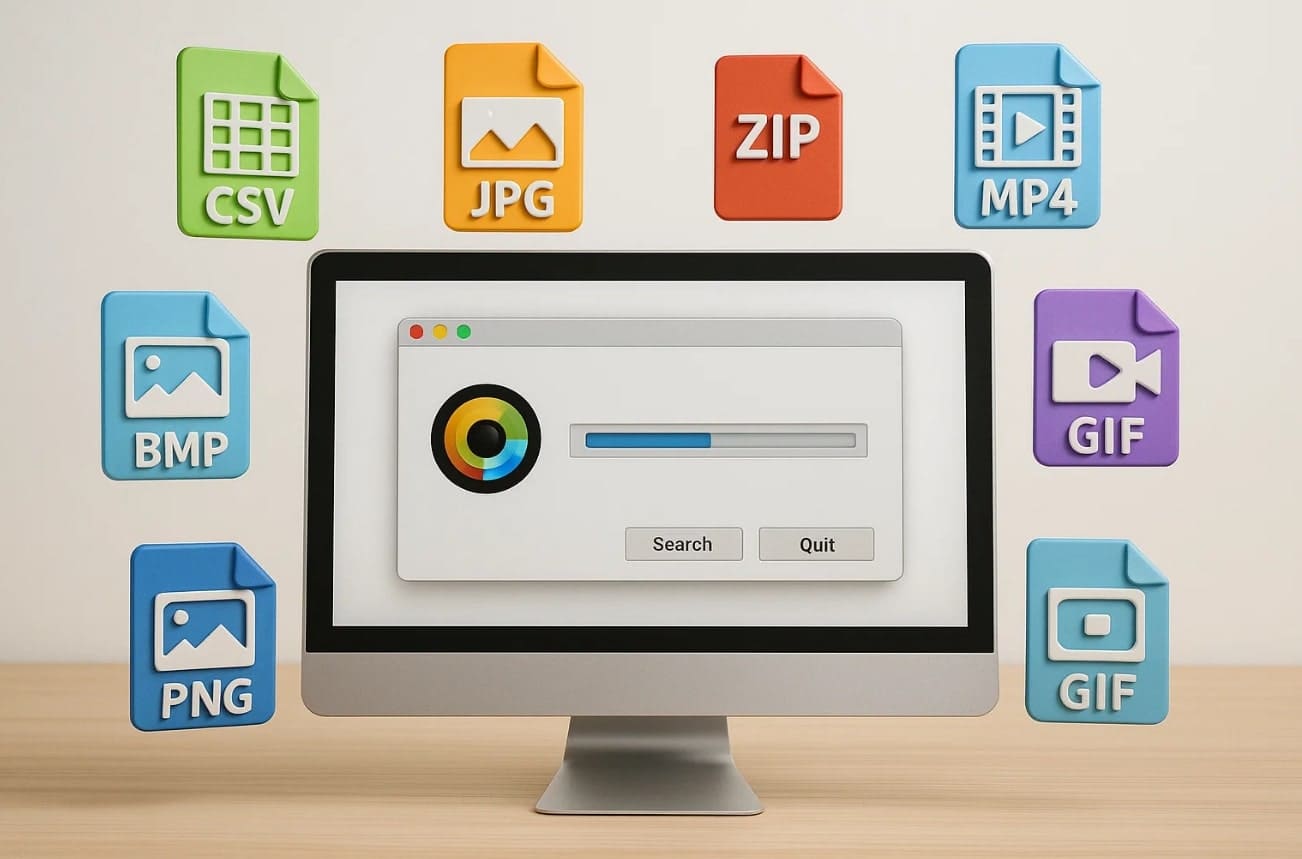
- Archives: ZIP, RAR, 7Z, TAR, GZ, BZ2, ISO, CAB.
- Audio & Video: MP3, MP4, MOV, AVI, WMV, MKV, FLV, M4A, WAV.
- Documents: PDF, DOC/DOCX, XLS/XLSX, PPT/PPTX, ODT, TXT, HTML.
- Images: JPEG, PNG, GIF, BMP, TIFF, WebP, HEIC, PSD, AI, SVG.
- RAW Images: CR2 (Canon), NEF (Nikon), ARW (Sony), ORF (Olympus), and more.
4. Operating System Compatibility
One of PhotoRec’s major advantages is its wide-ranging OS support, ensuring it's accessible to nearly everyone. Whether you're on a modern or legacy system, there's likely a version of PhotoRec for you.
- Windows: Compatible with Windows 11, 10, 8.1, 8, 7, and even older versions like Vista and XP. Also supports Windows Server editions.
- macOS: PhotoRec for Mac is available for macOS X 10.6 and newer, including versions compatible with Apple Silicon (M1/M2) via Rosetta.
- Linux: Works on virtually all major Linux distributions (Ubuntu, Fedora, Debian, etc.).
- Other Systems: Also supports DOS, FreeBSD, NetBSD, OpenBSD, and Sun Solaris.
5. Pricing and Availability
When it comes to cost, PhotoRec stands out because it is 100% free. There are no hidden charges, premium versions, or recovery limits. It is open-source software, meaning you can download, use, and even redistribute it without any financial obligation. This makes it an extremely attractive option for anyone needing powerful file recovery without a budget for paid software.

Part 3. How to Use PhotoRec for File Recovery: A Step-by-Step Guide
Despite its command-line interface, using PhotoRec is a straightforward process guided by prompts. Its ability to recover hundreds of file types makes it a reliable choice for diverse recovery needs. Follow the steps below to download and use PhotoRec on your computer.
-
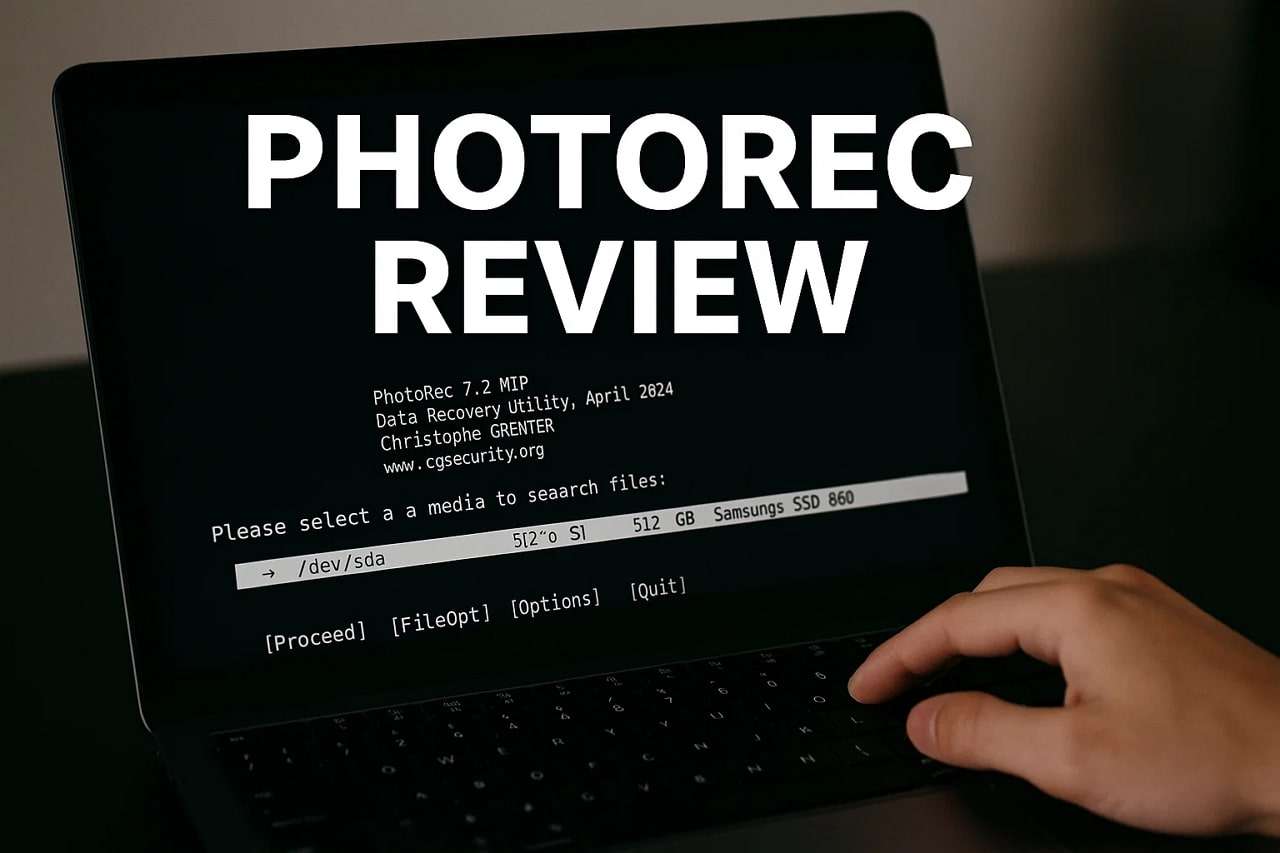
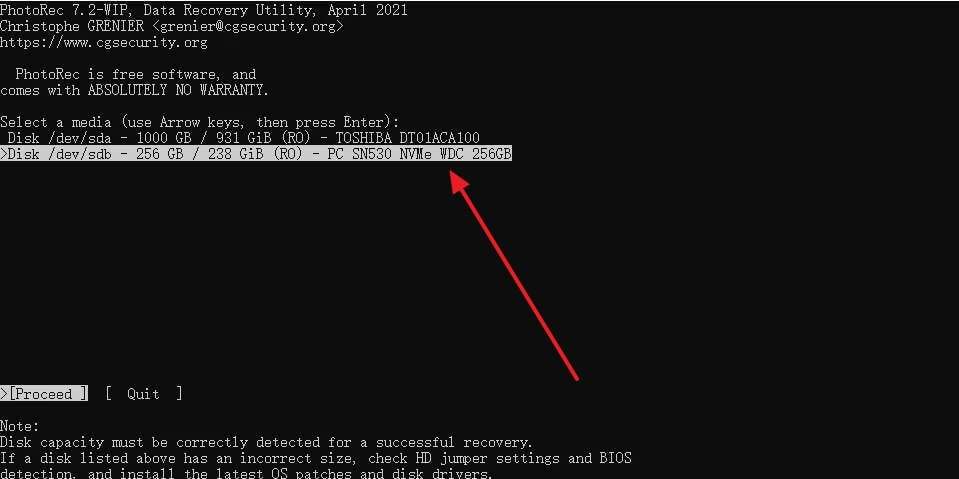
Step 1 Launch PhotoRec and Select the Drive
After launching the PhotoRec application, you will see a list of available storage devices. Use the Up/Down arrow keys to highlight the disk containing your lost files and press "Enter" to proceed.
-
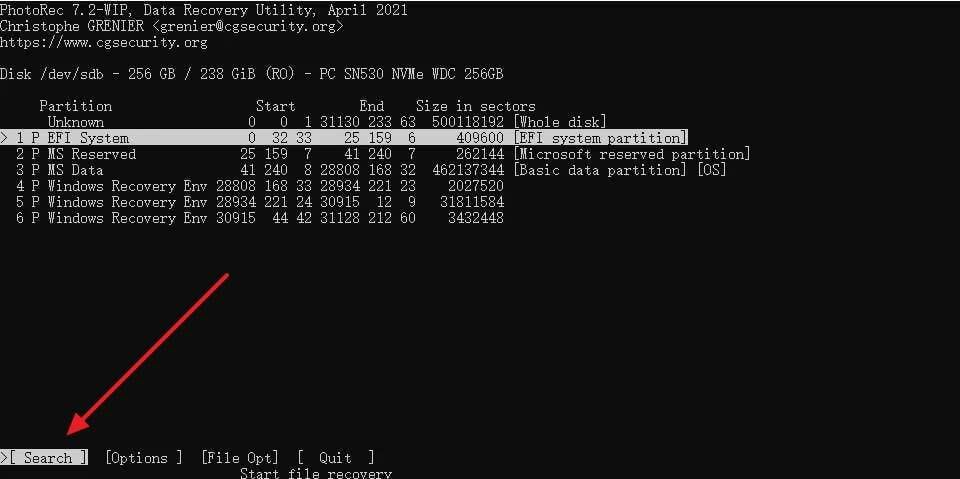
Step 2 Choose the Partition and Start the Search
Next, select the specific partition from which you want to recover data. Navigate to the "[ Search ]" option using the arrow keys and press "Enter" to begin the recovery scan.
-
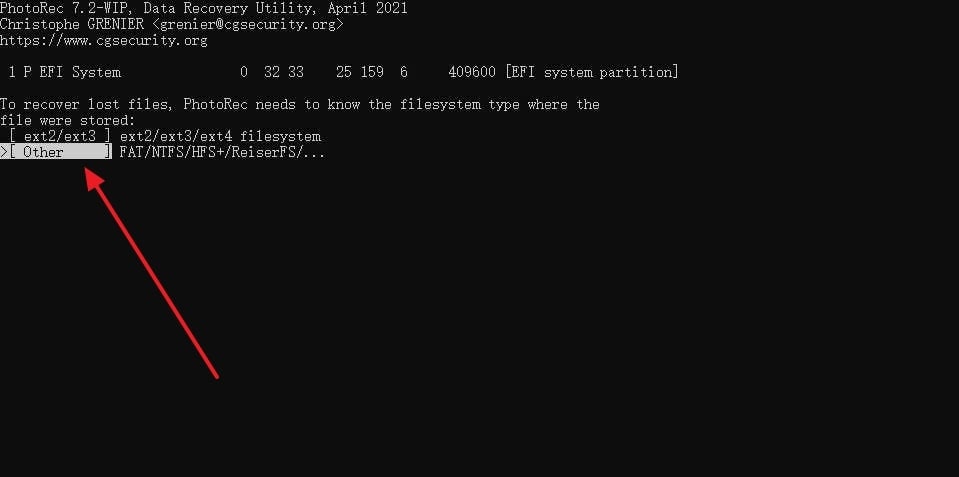
Step 3 Specify the File System Type
PhotoRec will ask you to specify the file system type. If you are scanning a Linux drive, choose "ext2/ext3/ext4." For most other drives, including Windows (NTFS, FAT) and macOS (HFS+), select the "[ Other ]" option.
-
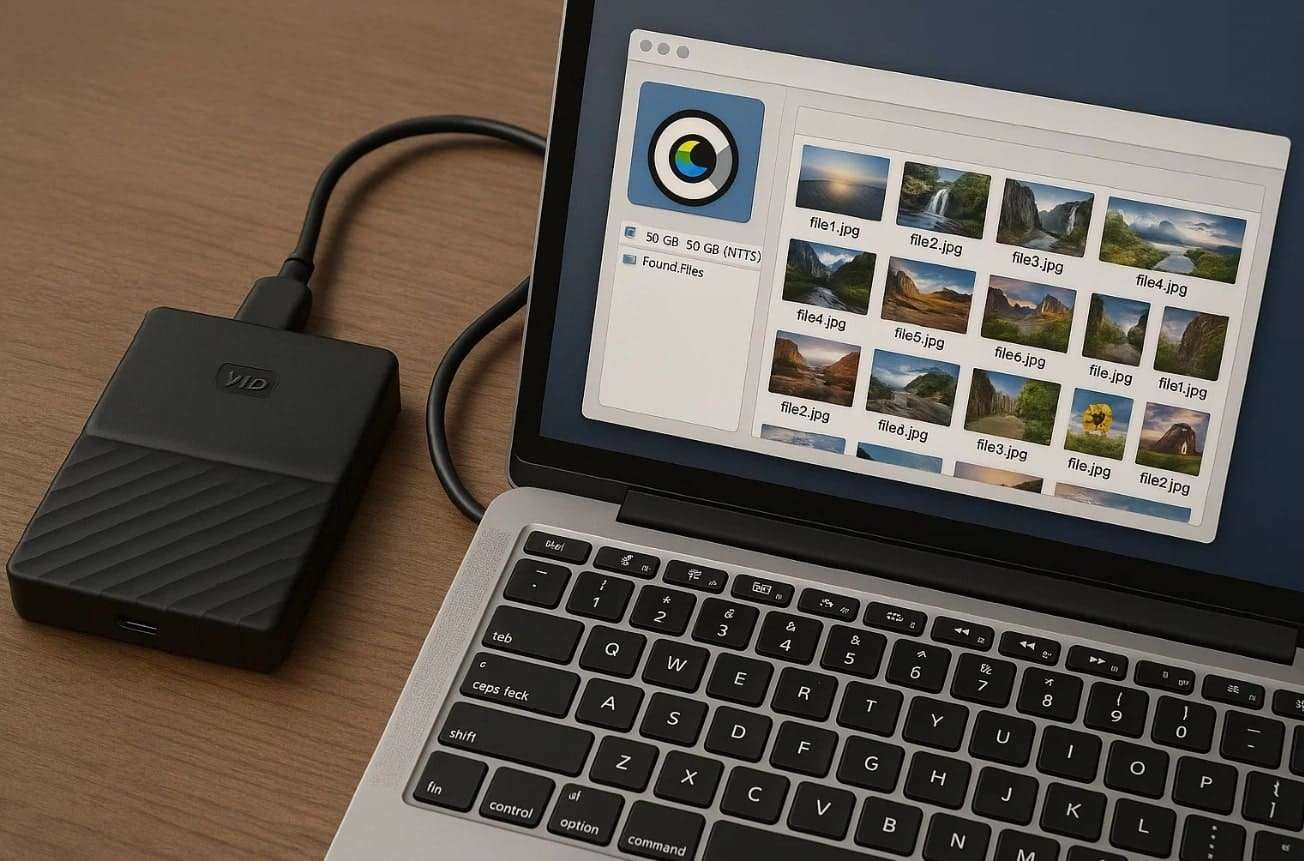
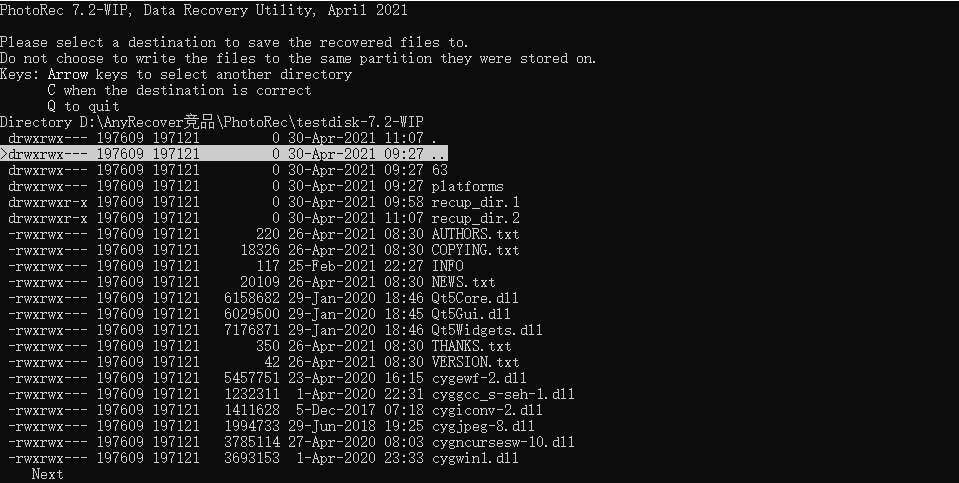
Step 4 Select a Destination and Begin Recovery
Now, you must choose a location to save the recovered files. It is critical to select a different drive than the one you are recovering from to avoid overwriting data. Navigate to your desired folder and press the 'C' key to confirm and start the recovery process.
Part 4. A More User-Friendly Alternative to PhotoRec: Dr.Fone - Data Recovery
While PhotoRec recovery is powerful, its command-line interface and lack of a preview function can be frustrating for many users. If you're looking for a simpler, more intuitive solution with advanced features, especially for mobile devices, we recommend Dr.Fone - Data Recovery (Android). This software provides a graphical interface, selective recovery, and specialized support for Android devices.
Dr.Fone allows you to recover a wide range of data types, including contacts, messages, photos, videos, and even WhatsApp chats, often without needing to root your device. It supports over 6,000 Android models and can recover data from various scenarios like accidental deletion, system crashes, or even from broken Samsung devices. Its high success rate and ability to preview files before recovery make it a superior choice for a hassle-free experience.
 Scan Android phones and tablets directly.
- Preview and recover only what you want.
- Supports WhatsApp, photos, videos, contacts, and more.
- Works with 6000+ Android devices.
Guide to Recover Deleted Data on Android Using Dr.Fone
If you've found the PhotoRec file recovery process too complex, Dr.Fone offers a much simpler alternative. Here's how you can use it to recover your deleted Android data:
-
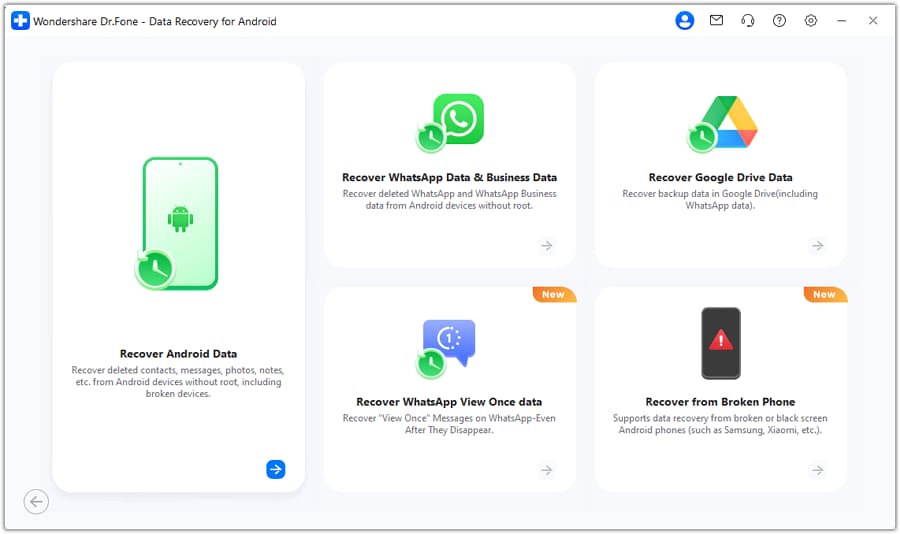
Step 1 Launch Dr.Fone and Select Data Recovery
Open Dr.Fone on your computer and navigate to the "Toolbox" tab. From there, select the "Data Recovery" feature. On the next screen, choose "Android" as your device type and then click "Recover Android Data."
-
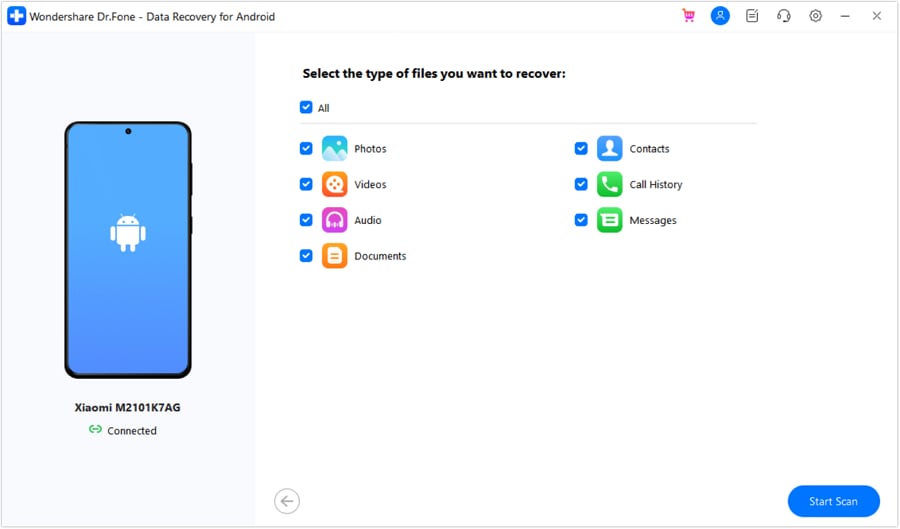
Step 2 Connect Your Device and Choose File Types
Connect your Android phone to your computer using a USB cable. Once Dr.Fone detects the device, you will be prompted to select the types of data you want to recover (e.g., Contacts, Photos, Videos). Check the boxes for the desired file types and click "Start Scan."
-
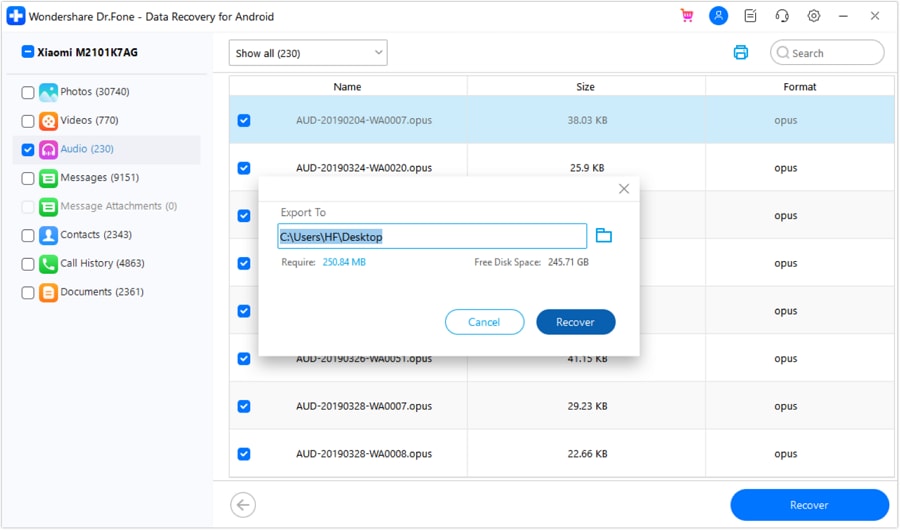
Step 3 Preview and Recover Your Data
After the scan is complete, Dr.Fone will display all the recoverable files, neatly organized by category. You can preview the files to verify their contents. Select the items you wish to restore and click the "Recover" button. Choose whether to save the files to your computer or directly back to your device, and click "Recover" again to complete the process.
Conclusion
In summary, PhotoRec remains a powerful and effective tool for file recovery, especially considering it is completely free. Its strengths lie in its comprehensive file format support and its ability to recover data from severely damaged drives. However, its command-line interface makes it best suited for technically proficient users. For those who prioritize ease of use, a clear interface, and features like file previews, PhotoRec can feel outdated and cumbersome.
For a more modern and user-friendly experience, especially for Android data recovery, Dr.Fone - Data Recovery (Android) stands out as an excellent alternative. It streamlines the entire process, provides better organization of recovered files, and ensures a higher success rate with less effort.
FAQ
-
1. Can PhotoRec recover files from a physically damaged drive?
PhotoRec can only recover data if your computer's operating system can still detect the storage device. If the drive is physically damaged (e.g., making clicking noises, not spinning, or not being recognized at all), PhotoRec will not be able to access it. In such cases, professional hardware-based recovery services are necessary. -
2. Will PhotoRec recover the original file names and folder structure?
No, this is one of PhotoRec's main drawbacks. Because it scans for file signatures directly on the drive, it cannot retrieve the original file names, timestamps, or folder hierarchy. All recovered files are given generic names (like f12345.jpg) and saved into a single directory, requiring you to sort through them manually after recovery. -
3. What is the difference between PhotoRec and TestDisk?
PhotoRec and TestDisk are companion programs created by the same developer. PhotoRec is specifically designed to recover individual files (photos, documents, etc.) by ignoring the file system. TestDisk, on the other hand, is designed to recover lost partitions, repair partition tables, and make non-booting disks bootable again. Essentially, TestDisk fixes the drive's structure, while PhotoRec recovers the files within it. -
4. Are there any risks when using PhotoRec?
PhotoRec itself is very safe as it operates in a read-only mode, meaning it won't write to or alter the source drive you are recovering from. The biggest risk comes from user error, specifically saving the recovered files back to the same drive. Doing so can overwrite the very data you are trying to recover, making it permanently irretrievable. Always save recovered files to a separate physical drive.
 Add Wondershare Dr.Fone as a preferred source on Google