
Troubleshooting the No Command Error on Android Devices
Oct 13, 2025 • Filed to: Screen Lock Removal • Proven solutions
Android’s recovery partition is a crucial tool that can reset your device, wipe the cache, and install updates. While the system usually handles these tasks for you, sometimes you need to manually access the recovery partition.
That's when you might face the dreaded “Android No Command” error on your device. This error typically appears when users attempt to access recovery mode, often to perform a factory reset or troubleshoot other issues, and are greeted with a "No Command" message on the Android screen. If you’re trying to factory reset your phone from the recovery mode and see the No Command message, don't worry. We’ll guide you through a few detailed steps to fix the issue in no time, ensuring you can get your device back to optimal performance quickly.
- Part 1: What Is No Command Error On Android
- Part 2: How To Fix No Command Error On Any Android Device
- Method 1. Reboot to Recovery Mode With the Correct Key Combination
- Method 2. Use Power + Volume Key Combination
- Method 3. Factory Reset Your Android Device
- Method 4. Re-install the Custom Recovery
- Method 5. Reboot to System Using Recovery Mode
- Method 6. Wipe Cache Using Recovery Mode
- Method 7. Most Effective Method to Recovery No Command on Android

- Part 3: Bonus: How To Get Into Samsung Recovery Menu Without No Command Screen
Part 1: What Is No Command Error On Android
If you boot your phone into recovery mode using a key combination, you might see the "No Command" error first. Don’t worry! This is a common issue that can often be resolved easily. On some phones, pressing another set of keys, such as the volume up button along with the power button, will take you to the Recovery screen.
However, make sure to research the correct key combination for your specific phone model, as pressing the wrong keys might have caused that error message in the first place. Additionally, if you continually face issues, consulting your phone’s manual or seeking help from a professional might be beneficial.
The No Command error on your Android device can pop up for a few reasons. It might be some bugs in the operating system that disrupt normal functionality. Alternatively, a corrupted recovery image could be the culprit, preventing the device from accessing necessary files.
Another common cause is a faulty installation of an update file, which can lead to inconsistencies and errors during the boot process. Sometimes, this error could even be due to hardware issues, such as malfunctioning buttons or other internal components that interfere with your device's ability to reboot properly.
Additionally, issues like insufficient storage space or a failing battery can also contribute to this frustrating error. Troubleshooting each of these potential causes can help you identify and resolve the problem effectively.
Part 2: How To Fix No Command Error On Any Android Device
Here are ten methods that you can try to resolve the No Command error on your Android device. Let’s begin.
Method 1. Reboot to Recovery Mode With the Correct Key Combination
If you are unable to boot into the recovery mode on your Android device, make sure you are using the right key combination. Different devices have different key combinations – so refer to the device manual or the community/forum that is dedicated to your device to find the correct combination.
Additionally, ensure your device is fully powered off before attempting to boot into recovery mode. If you're still having trouble, consider connecting your device to a computer and using specialized software or tools that can assist with accessing recovery mode. Sometimes, a firmware update or custom recovery installation might also be required.
Once you are using the right key combination, you will be able to boot into the recovery mode. This process may take a few moments, so be patient. However, if you still see the No Command error, don’t worry. It’s a common issue that can be resolved with a few additional steps.
Move on to the next set of methods to help you fix the issue, such as checking the physical buttons for any faults or trying an alternative key combination. If the problem persists, you might need to consider a software update or consult a professional for further assistance.
Method 2. Use Power + Volume Key Combination
Several users across various forums have suggested this method that can potentially fix the issue. When you see the No Command error while trying to access the recovery mode, try holding the power button for a few seconds, and then tap on the volume-up key. After performing this action, your Android device should now boot into the recovery mode, allowing you to troubleshoot and resolve various issues. This method has been particularly helpful for those experiencing trouble with their device’s normal boot process. It's always a good idea to follow these steps carefully to avoid any unintended consequences.
However, make sure not to hold the power button for an extended period as it could cause the device to reset or malfunction. Additionally, do not press the volume up and the power button at the same time, as this combination may trigger an unwanted command or disrupt the device’s functionality. Press the volume up key only when you’ve held the power button pressed for a few seconds to ensure the correct sequence of actions is followed. This will help maintain the device's operational integrity and prevent any unexpected behavior.
Method 3. Factory Reset Your Android Device
If your Android device cannot boot to the recovery mode, you can reset your device to factory settings. This may help by re-installing the recovery image while getting rid of the corrupted one, allowing your device to function properly again. Here’s how you can factory reset your Android device:
Step 1: Open the Settings app and go to additional settings.
Following the reset, your device will restart and initiate the setup process.

Step 2: Tap on ‘Back up and Reset’.

Step 3: Tap on Reset Phone.

Step 4: Select Erase Data and follow the onscreen prompts to finish the process.

Method 4. Re-install the Custom Recovery
You can flash a custom recovery. A custom recovery overwrites your existing recovery partition and provides you with additional functionalities. These include the ability to take a complete backup of your entire Android system, install a new ROM, or wipe certain partitions. Unlike the stock recovery, custom recoveries such as TWRP or ClockworkMod offer a more user-friendly interface and powerful options, making it easier to manage your device's software and troubleshoot issues. This can be particularly useful for enthusiasts who like to experiment with different ROMs or need to recover from system malfunctions.
Even if you don’t wish to use those features, a custom recovery like TWRP can help you eliminate the No Command Error while still performing the same duties as the stock recovery. This can be particularly useful for troubleshooting and maintaining your device's smooth operation.
To get started, head over to the TWRP website and check if there’s a custom recovery available for your specific device model. The site provides detailed instructions and downloads to guide you through the process. If you find a compatible recovery, it’s time to unlock the bootloader. Be sure to back up your data before proceeding, as unlocking the bootloader can erase all your information. Once backed up, follow the steps to unlock your bootloader and install TWRP. With TWRP installed, you’ll have a powerful tool at your disposal for managing and customizing your device's software.
Method 5. Reboot to System Using Recovery Mode
If your Android device isn’t recognizing the long press of the power button as a command to boot into the operating system, you may encounter the No Command error. This error often appears when the device is unable to complete the boot process due to various issues, such as corrupted system files or software glitches. To resolve this, you can try rebooting to the recovery mode instead. Once in recovery mode, navigate through the options using the volume buttons and select the option to reboot the system using the power button. This method can help bypass the boot issue and restore normal functionality to your device.
Step 1: Enter the recovery mode on your Android device.
Step 2: Select Reboot > Reboot to System. If the recovery mode does not support touch controls, use the volume buttons to navigate up and down, and press the power button to select the option.

Method 6. Wipe Cache Using Recovery Mode
The residual and junk system files on your Android device may execute a few bugs that lead to the No Command error message. These residual files accumulate over time from app installations, updates, and general use of the device. If you are unable to boot into the system, you can wipe the cache partition using the recovery mode on your Android device. This process helps clear out these unnecessary files and can often solve various issues, including the No Command error.
However, it's important to note that this option may not be present on all recovery images. Stock recovery images provided by the device manufacturer might lack this feature. You may only find the option to wipe the cache if you use a custom recovery image, such as TWRP (Team Win Recovery Project). Custom recoveries offer more advanced features and options, making them a valuable tool for troubleshooting and maintaining your device.
Step 1: Enter the recovery mode on your Android device.
Step 2: Select the ‘Wipe Cache Partition’. If the recovery mode does not support touch controls, use the volume buttons to navigate up and down and press the power button to select the option.

Method 7. Most Effective Method to Recovery No Command on Android Using Dr.Fone
For the best method to resolve system issues, try Dr.Fone-System Repair (Android). This powerful tool offers a comprehensive solution for fixing various Android problems, ranging from boot issues to software glitches. It provides an easy-to-use interface, making it accessible to users of all technical levels.
By utilizing Dr.Fone, you can ensure your device runs smoothly and efficiently, minimizing downtime and enhancing overall performance. Whether you're dealing with a frozen screen, unresponsive apps, or other software-related problems, Dr.Fone-System Repair (Android) has got you covered.
Part 3: Bonus: How To Get Into Samsung Recovery Menu Without No Command Screen
Removing a Google account from a device might sound straightforward to you. But sometimes, it's crucial to consider a few details about the smartphone. What if you bought a used Samsung device and need to remove its FRP lock? If you're unsure about its OS version or just want the simplest Samsung FRP bypass method, there's a solution for all Android versions. Let's explore how you can easily handle this process:

Dr.Fone - Screen Unlock (Android)
Get Into Samsung Recovery Menu Without No Command Screen
- Completely unlinked from the previous Google account, it won’t be traced or blocked by it anymore.
- Remove all Android screen locks (PIN/pattern/fingerprints/face ID) in minutes.
- Compatible with various Android models.
- Provide specific removal solutions to promise good success rate.
Step 1: Open the Screen Unlock Tool
Begin by launching Wondershare Dr.Fone on your computer and connecting your Samsung phone or tablet. Next, navigate to Toolbox > Screen Unlock to open the specific toolkit in a new window.

Step 2: Access the FRP Lock Function
From the options on the next screen, choose Android to proceed.
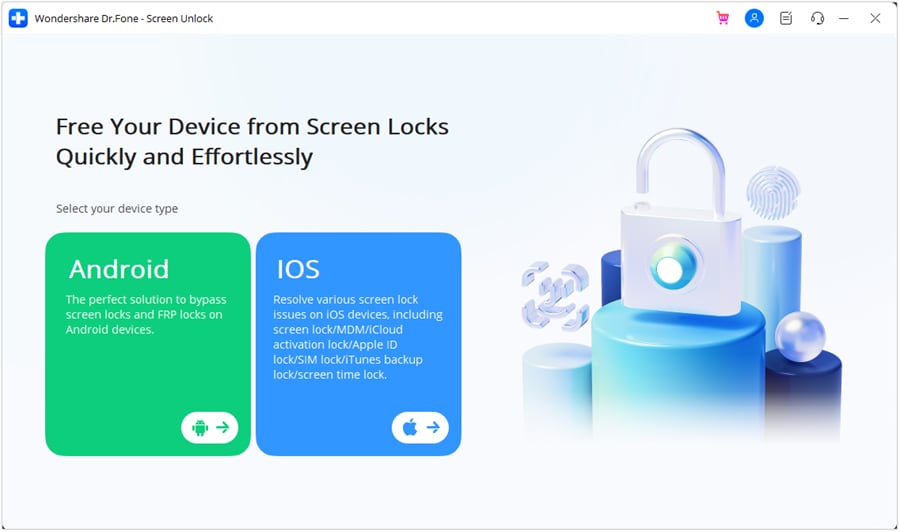
Next, select Remove Google FRP Lock on the screen to proceed with the operation.

Next, choose Samsung and press the Start button to proceed.
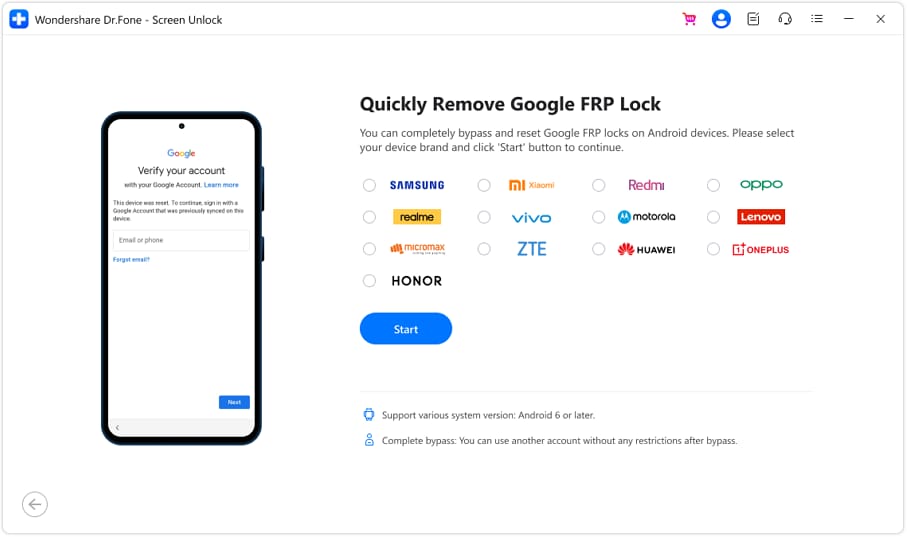
Note: Unlocking the FRP (Factory Reset Protection) on a Samsung device requires a factory reset, which will result in data loss. To prevent permanent data erasure, make sure to back up your data before proceeding.
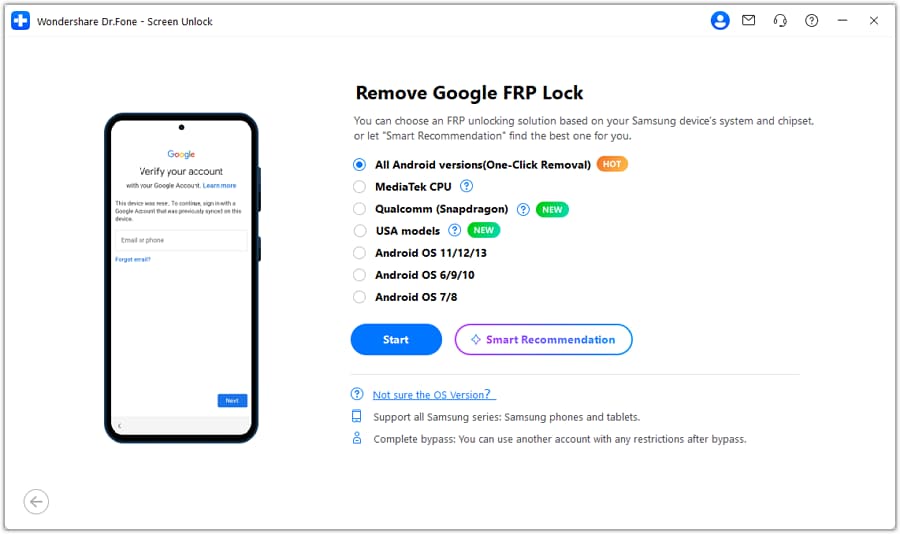
Step 3: Select All Android versions (One-Click Removal)
If you're unsure about the Android OS version of your Samsung device or want the fastest way to remove Google Lock, choose All Android versions (One-Click Removal) and click Start to proceed.
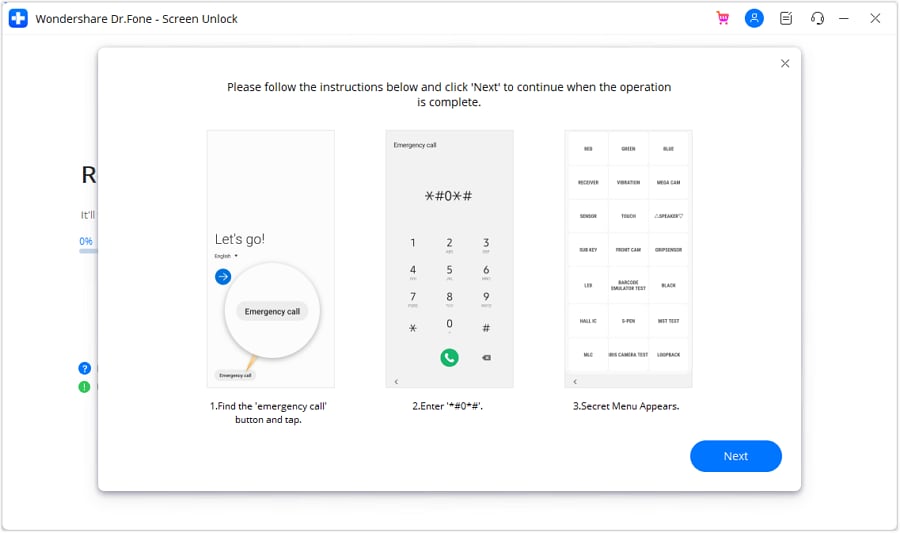
Step 4: Follow On-Screen Instructions to Open Emergency Call
You will be directed to a screen with on-screen instructions. Find the Emergency Call button on your Android device and tap it. Enter #0# to access a secret menu. After that, click Next on your computer screen.
Step 5: Allow USB Debugging
Your Android screen will display a prompt to enable USB debugging. Once you approve it on your Samsung device, click Authorize on your computer screen.

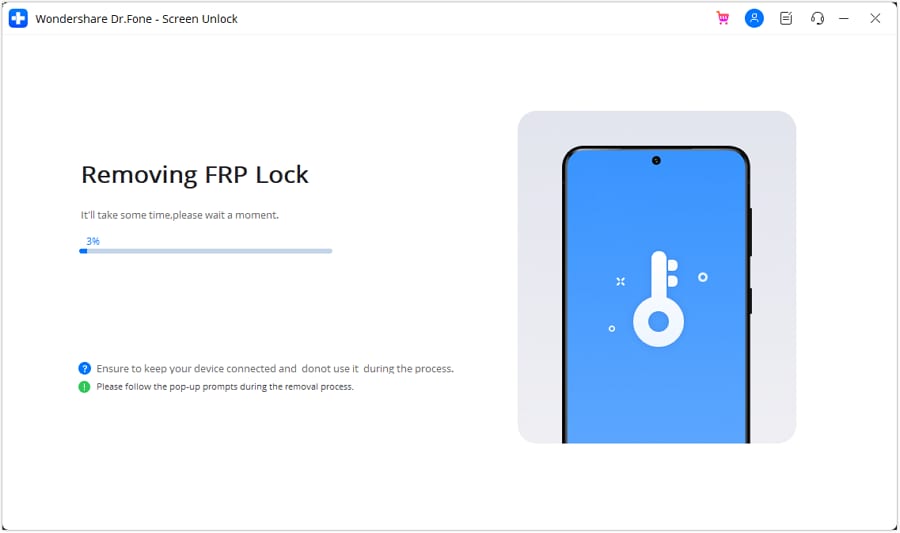
Step 6: Successfully Remove FRP Lock
Your computer screen will now show the FRP lock being removed from your Samsung device. frp lock removing android
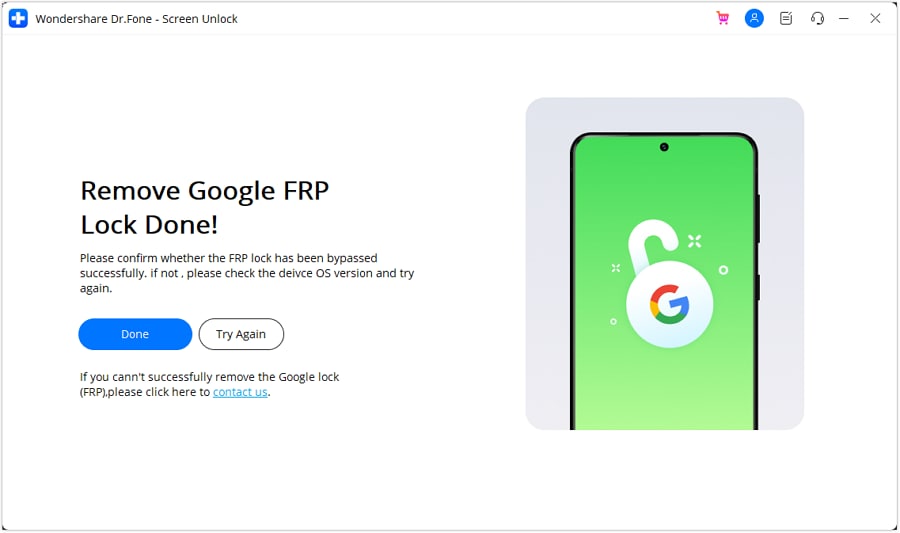
frp lock removed successfully
Conclusion
While various methods can help resolve the No Command error and other Android issues, Dr.Fone-System Repair (Android) stands out as a comprehensive and user-friendly solution. Its powerful features and intuitive interface make it an ideal choice for users of all technical levels.
Besides, we also showed you how To Get Into the Samsung Recovery Menu Without a No Command Screen opting for Dr.Fone-Screen Unlock (Android), you can efficiently tackle software glitches, boot issues, and other system problems, ensuring your device operates smoothly. We highly recommend giving Dr.Fone-System Repair a try to swiftly and effectively overcome any Android difficulties you encounter. For more information and a step-by-step guide, visit their official website and experience the ease of resolving Android issues with Dr.Fone.
Samsung Unlock
- Samsung Code
- 1. Samsung Unlock Code List
- 2. Samsung Reset Code List
- 3. Samsung Secret Code List
- 4. Check Screen Using Secret Codes
- 5. Samsung Unlock Code Generators
- 6. Free Samsung Unlock Code
- 7. Free Samsung Unlock Code Generators
- 8. Samsung Galaxy S2 Unlock Code
- Samsung A Series FRP Bypass
- 1. Samsung A01 FRP Bypass
- 2. Samsung A01 Core FRP Bypass
- 3. Samsung A02/A02s FRP Bypass
- 4. Samsung A2 Core FRP Bypass
- 5. Samsung A10/A10s FRP Bypass
- 6. Samsung A11 FRP Bypass
- 7. Samsung A12 FRP Bypass
- 8. Samsung A20/A20S FRP Bypass
- 9. Samsung A14 FRP Bypass
- 10. Samsung A30/30s FRP Bypass
- 11. Samsung A50 FRP Bypass
- 12. Samsung A51 FRP Bypass
- Samsung J Series FRP Bypass
- 1. Samsung J2 FRP Bypass
- 2. Samsung J4 FRP Bypass
- 3. Samsung J5 Prime FRP Bypass
- 4. Samsung J6 FRP Bypass
- 5. Samsung J7 FRP Bypass
- 6. Samsung J7 Prime FRP Bypass
- 7. Samsung J250 FRP Bypass
- Samsung S Series FRP Bypass
- 1. Samsung S7 FRP Bypass
- 2. Samsung S22 FRP Bypass
- 3. Bypass Samsung S24 FRP Lock
- 4. Samsung S25 FRP Bypass
- Samsung FRP Bypass for Others
- 1. Samsung M01 FRP Bypass
- 2. Samsung M11 FRP Bypass
- 3. Samsung G532F FRP Bypass
- 4. Samsung G531F/G531H FRP Bypass
- 5. Samsung Google Verification Bypass
- 6. HushSMS APK FRP Unlock
- 7. Samsung Android 11 FRP Bypass
- 8. Samsung FRP Bypass Without PC
- Samsung Factory/Hard Reset
- 1. Reboot Samsung
- 2. Hard Reset Samsung
- 3. Reset Locked Samsung Phone
- 4. Reset Samsung Tablet
- 5. Reset Samsung Without Password
- 6. Reset Samsung Account Password
- 7. Reset Samsung Galaxy S3
- 8. Reset Samsung Galaxy S4
- 9. Reset Samsung Galaxy S5
- 10. Reset Samsung Galaxy S9/S10
- 11. Reset Samsung Galaxy J5/J7
- 12. Reset Samsung A12
- 13. Factory Reset Samsung Tablet
- Samsung S Series Screen Unlock
- 1. Samsung S2 Screen Unlock
- 2. Samsung S3 Screen Unlock
- 3. Samsung S4 Screen Unlock
- 4. Samsung S5 Screen Unlock
- 5. Samsung S6 Screen Unlock
- 6. Samsung S7/S8 Screen Unlock
- 7. Samsung S20 Screen Unlock
- 8. Samsung S22 Ultra Screen Unlock
- 9. Unlock Samsung S25
- Samsung Screen Unlock
- 1. Best Samsung Unlock Software
- 2. Forgot Samsung Galaxy Password
- 3. Bypass Samsung Lock Screen PIN
- 4. Unlock Samsung Galaxy Phones
- 5. Unlock Bootloader on Samsung
- 6. Unlock Home Screen Layout
- 7. Unlock Samsung Password
- 8. Remove Google Account
- 9. MDM Remove Tools
- 10. Remove Samsung MDM Lock
- 11. Samsung Reactivation Lock
- Samsung SIM Unlock
- ● Manage/transfer/recover data
- ● Unlock screen/activate/FRP lock
- ● Fix most iOS and Android issues
- Unlock Now Unlock Now Unlock Now



Alice MJ
staff Editor