How to Fix Broken Face ID on iPhone: Troubleshooting and Solutions
Feb 11, 2026 • Filed to: Phone Repair Solutions • Proven solutions
Face ID is one of the most convenient and secure ways to unlock your iPhone, make payments, and access apps. But what happens when your Face ID is broken? It can be frustrating, but don't worry! In this article, we'll explore why your Face ID might be broken, how to fix common issues, and alternative solutions like Dr.Fone – System Repair (iOS) and Dr.Fone – Screen Unlock (iOS) to restore access to your device.
Part 1. Why Is My Face ID Broken?
There are several reasons why Face ID might stop working on your iPhone. Here are some of the most common causes of a broken Face ID:
- Physical Damage to Sensors: If your iPhone has been dropped or exposed to water, the Face ID sensors may have been damaged.
- Software Glitches: Updates or bugs in iOS can sometimes interfere with the Face ID functionality.
- Dirty Sensors: Dust or smudges on the TrueDepth camera can block the sensors, making it difficult for Face ID to recognize your face.
- Changes in Appearance: If you’ve made significant changes to your appearance (e.g., facial hair, wearing a mask, or new glasses), Face ID may have trouble recognizing you.
Part 2. Can Broken Face ID Be Fixed?
Yes, a broken Face ID can often be fixed, depending on the underlying cause of the problem. For instance, issues like dirty sensors or software glitches may be resolved with simple fixes such as cleaning the sensors or updating the device's software. However, if the Face ID is not functioning due to physical damage, like a cracked screen, it may necessitate professional repair services. In cases of a cracked screen Face ID not working, seeking help from an authorized technician can ensure the device is restored to its full functionality, preserving all the advanced features that Face ID offers.
Part 3. How to Fix "Face ID Not Available" Error: Common Fixes
Before you seek professional repair for a broken iPhone Face ID camera or consider more advanced solutions, here are some common troubleshooting steps you can try on your own:
Method 1. Clean the TrueDepth Camera
Make sure the top of your iPhone, where the camera is located, is clean. Use a soft, lint-free cloth to wipe away any dust or smudges.

Method 2. Restart Your iPhone
Sometimes, restarting your iPhone can fix minor software glitches that may be affecting Face ID. To do this, press and hold the side button and either volume button until the slider appears. Drag the slider, wait for the device to turn off, and then press the side button to turn it back on.
Method 3. Update iOS

Apple regularly releases iOS updates to fix bugs and improve functionality. Make sure your iPhone is running the latest version of iOS by going to Settings > General > Software Update.
Method 4. Reset Face ID

If Face ID is still not working, try resetting it. Go to Settings > Face ID & Passcode, then tap Reset Face ID. Afterward, set it up again by following the on-screen instructions.
Method 5. Check for Physical Damage
If your phone has been dropped or exposed to water, inspect it for damage. If there is visible damage near the camera area, the Face ID sensors may have been damaged, which might require professional repair.
Part 4. Fixing Face ID Issues with Dr.Fone – System Repair (iOS)
Dr.Fone - System Repair (iOS) offers several unique features that set it apart from other repair tools. Firstly, it provides a user-friendly interface, making it accessible to anyone, regardless of technical expertise. Secondly, the software is designed to fix a wide range of iOS issues, including "face ID broken iPhone 11," minor glitches, and major system failures, all without risking data loss.
Additionally, Dr.Fone offers a one-click repair option that simplifies the troubleshooting process, saving users time and effort. It also supports various iOS devices and versions, ensuring compatibility for a broad user base. Finally, the program includes a comprehensive diagnostic tool that helps identify underlying issues, enabling targeted repairs for optimal performance. Overall, Dr.Fone – System Repair (iOS) stands out for its effectiveness, ease of use, and commitment to data safety.
Dr.Fone - System Repair (iOS)
Fixing Face ID Issues Without data loss.
- Only fix your iOS to normal, no data loss at all.
- Fix various iOS system issues stuck in recovery mode, white Apple logo, black screen, looping on start, etc.
- Upgrade and Downgrade iOS without iTunes at all.
- Work for all iPhone/iPad/iPod Touch, running on all iOS versions
Steps to Fix Face ID with Dr.Fone – System Repair (iOS):
If you are facing issues in managing the system problem within the iOS device, you can try this particular feature which retains the data completely. No data loss is recorded against iOS Standard Repair. To know how it is done, follow the steps described below:
Step 1: Open the System Repair Tool
Begin by launching Wondershare Dr.Fone, having successfully downloaded it to your computer. Navigate to the Toolbox section located in the top-left corner of the screen. From the options displayed on the home screen, select System Repair.

Step 2: Select Your Device
When you connect your iOS device using a cable, you'll be directed to a new window prompting you to choose the device type. Since you're focusing on iOS system repair, select iOS in the window that appears.

Step 3: Proceed with iOS Repair
The window that appears offers various options for repairing your iOS device. Choose iOS Repair to continue with the system repair process.

Step 4: Choose Standard Mode
In the next window, you'll be prompted to select the repair mode for your iOS device. Opt for Standard Repair from the two available options, as this choice allows you to preserve your data throughout the process.

Step 5: Put Your iOS Device in Recovery Mode
To proceed, you'll need to place your iOS device into Recovery Mode. Simply follow the on-screen instructions to do this easily. Once your device is in Recovery Mode, tap Enter Recovery Mode to move forward. If you're having difficulty, click the Guide button for detailed instructions on how to put an unresponsive or malfunctioning device into Recovery Mode.

Step 6: Download the Correct iOS Firmware
After your device enters Recovery Mode, the platform will automatically identify the appropriate iOS firmware available for installation. Simply click Download next to the firmware you wish to install on your device experiencing issues.

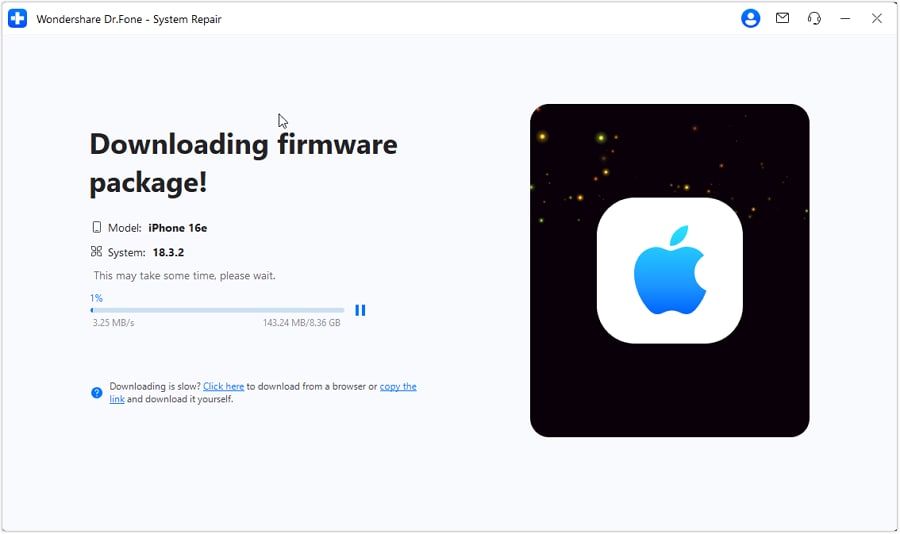
Step 7: Begin Downloading iOS Firmware
The platform will automatically initiate the download of the iOS firmware for your device. Once the download is complete, the firmware will be verified by the platform before it becomes available for updating your iOS device.
:Image alt dr.fone download firmware

Step 8: Proceed with Installation on Your iOS Device
Click Repair Now to initiate the repair process for your iOS device.

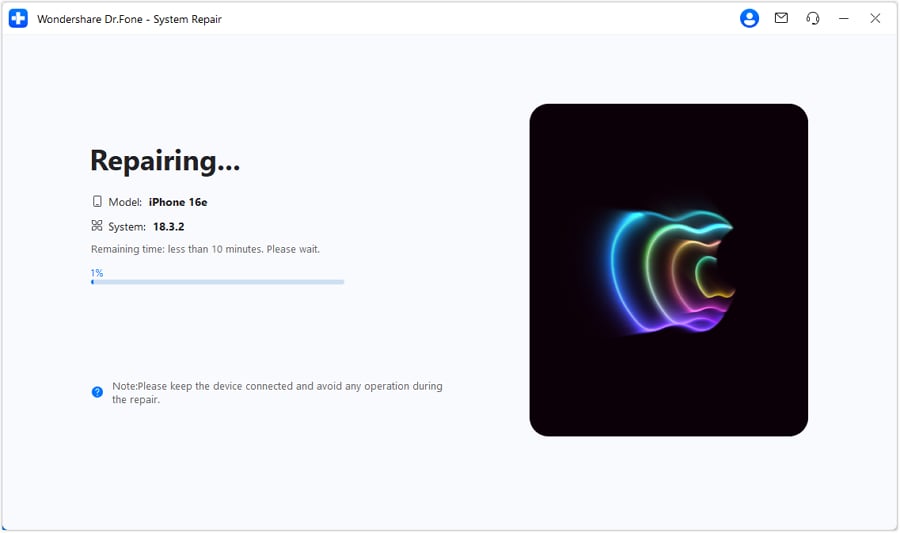
Step 9: Monitor the Installation Progress
On the following screen, you'll see a progress bar indicating the completion of the installation process. Wait patiently until the process is finished, and ensure that the iDevice remains connected to the computer throughout.

Step 10: Repair Your iOS Device Using Standard Repair
The screen below indicates that the process is complete. To finalize the repair and ensure your iOS device is ready for use, simply select the Done option.

4,624,541 people have downloaded it
Part 5. Bonus Tip: How to Unlock iPhone When Face ID is Broken
If your Face ID camera is broken and cannot be repaired or is temporarily unavailable, you can use Dr.Fone – Screen Unlock (iOS) to unlock your iPhone without using Face ID. This tool is especially useful if you forget your passcode or can’t use Face ID for any reason.
Dr.Fone - Screen Unlock (iOS)
Unlock iPhone When Face ID is Broken
- Simple, click-through, process.
- Unlock screen passwords from all iPhones and iPads.
- No tech knowledge is required, everybody can handle it.
- Supports the latest iOS version fully!

Steps to Unlock iPhone with Dr.Fone – Screen Unlock (iOS):
Dr.Fone - Screen Unlock effectively unlocks your iPhone screen and bypasses iCloud activation locks, allowing you to regain full access to your device. With no steep learning curve, you can unlock your iPhone in just a few simple steps.
Step 1: Select the Unlock Module
First, open the Dr.Fone application on your computer. Once it’s launched, locate and click on the "Screen Unlock" option from the main menu. Next, choose "Bypass Activation Lock" to initiate the process. Make sure to connect your iOS device to your computer using a USB cable, and ensure that it is recognized by the software before proceeding to the next steps. This connection is essential for the unlocking process to work effectively.
Step 2: Jailbreak Your iOS Device
Before proceeding, make sure that your iPhone, iPad, or iPod touch has successfully completed the jailbreak process. This means that you should have access to all the necessary tweaks and customizations that come with jailbreaking. Once you’ve confirmed that your device is properly jailbroken, locate and click the "Unlock Now" button to initiate the unlocking process, which will allow you to enjoy a wider range of features and functionalities on your device.
Step 3: Unlocked successfully! Congratulations!
You can now check your iOS device, as it is now completely free of any locks. This means you can enjoy full access to all features, apps, and functionalities without any restrictions. Feel free to customize your device and explore all the possibilities it offers!
Conclusion
If your Face ID is broken, it’s important to troubleshoot the issue step by step. Start with basic fixes like cleaning the camera or resetting Face ID, and if those don’t work, consider using tools like Dr.Fone – System Repair (iOS) to fix software issues or Dr.Fone – Screen Unlock (iOS) as an alternative way to unlock your device. By following the steps outlined in this guide, you can restore access to your iPhone and resolve Face ID issues quickly.
iPhone Issues
- iPhone Storage Full
- 1. Stuck on Apple Logo Storage Full
- 2. Erase Content Settings not Working
- 3. iPhone Lagging
- 4. iPhone Running Slow
- iPhone Update Problems
- 1. Stuck on Updating iCloud Settings
- 2. iPhone Frozen During iOS Update
- 3. iPhone Checking for Update Stuck
- 4. iPhone Cellular Update Failed
- 5. iPhone Software Update Failed
- 6. iPhone Stuck on Update Requested
- 7. iPhone Update Error 1110
- 8. iPhone Stuck On Verifying Update
- 9. iPhone Won't Update
- 10. Update Server Couldn't Be Contacted
- 8. iPhone & iPad Security Updates
- 9. Update iPhone with/without iTunes
- 10. Can't Download or Update Apps
- iPhone Media Problems
- 1. Apple Music Song Not Available
- 2. iPhone Not Ringing
- 3. iPhone Echo Problem
- 4. iPhone Ringer Problems
- 5. iPhone Plays Music by Itself
- 6. Ringer Volume Changes by Itself
- 7. Music Won't Play on iPhone
- 8. Blurry Photos & Videos on iPhone
- 9. iPhone Volume Problems
- iPhone Sound Problems
- 1. YouTube no Sound
- 2. iPhone Microphone Problem
- 3. Test iPhone Microphone
- 4. Headphones No Sound from iPhone
- 5. No Sound on iPhone Game
- 6. iPhone Sound Not Working
- 7. iPhone Screen Recording no Sound
- iPhone Calling Problems
- 1. iPhone No Sound on Calls
- 2. Screen Goes Black During Call
- 3. iPhone Recent Calls Not Showing
- 4. iPhone Dropping Calls Issue
- 5. iPhone Calling Problem
- iPhone Camera Problems
- 1. iPhone Camera Black
- 2. iPhone Camera Blurry
- 3. iPhone Camera Not Working
- 4. iPhone Front Camera Not Working
- 5. TrueDepth Camera Not Working
- 6.Out-of-Focus Photos on iPhone 15
- iPhone Network Problems
- 1. Airpods Won't Connect to iPhone
- 2. iPhone Disabled Connect to iTunes
- 3. iPhone Not Syncing Problems
- 4. iPhone Internet Not Working
- 5. iPhone Keep Disconnecting from Wifi
- 6. iPhone WIFI Not Working
- 7. PC Not Recognizing iPhone
- 8. iPhone Stuck on Connect to iTunes
- 9. iPhone Not Showing up in iTunes
- 10. iTunes Not Detecting Your iPhone
- 11. iPhone Bluetooth Disconnect
- 12.Apple CarPlay Keeps Disconnecting
- iPhone Screen Problems
- Other iPhone Problems


Alice MJ
staff Editor
Generally rated4.5(105participated)