Bypass iCloud Activation Lock and Android FRP without password.

 100% Security Verified | No Subscription Required | No Malware

 :
: 
 ChatGPT
 Perplexity
 Gemini
 Claude
 Grok
Grok

I am currently locked out of my Samsung Galaxy and I need to recover some deleted photos. Is there any way to enable USB debugging when the phone is locked so I can run recovery software?
Alex Reynolds, Technical Lead
Mastering your Android's internal settings is the first step toward advanced device management. Among these settings, USB Debugging stands out as the most critical bridge between your mobile hardware and external software environments. By establishing a specialized Android Debug Bridge (ADB) connection, users can perform deep-level troubleshooting, system repairs, and sophisticated data recovery tasks that are otherwise blocked by the standard user interface.
However, a significant hurdle arises when you are locked out of your device due to a forgotten PIN, pattern, or biometric failure. Since Google’s security protocols prohibit changing system-level settings while the device is locked, many users find themselves in a catch-22. This comprehensive 2026 guide explores the technical realities of how to enable USB debugging on a locked phone and provides a proven professional roadmap to regain full control of your device without compromising its integrity.
In this article
Part 1. Technical Barriers to USB Debugging on Locked Androids
USB Debugging is a specialized mode within the Android Developer Options. It allows the device to communicate with a computer running the Android SDK, enabling it to receive commands, install apps, and read log data. In the context of 2026 mobile security, this feature is intentionally buried deep within the OS to prevent malicious actors from accessing your data via a physical connection.

Why It Is Challenging to Enable Debugging When Locked
The core philosophy of Android security is protecting user privacy. Because enabling USB debugging grants nearly unrestricted access to the file system, the following barriers are in place:
- Authentication Wall: You cannot access the "Settings" app or the "Developer Options" menu without first bypassing the lock screen (PIN, Pattern, or Password).
- System Integrity: Android's "Secure Startup" and encrypted partitions often prevent ADB daemons from starting until the primary user profile is decrypted via the lock screen.
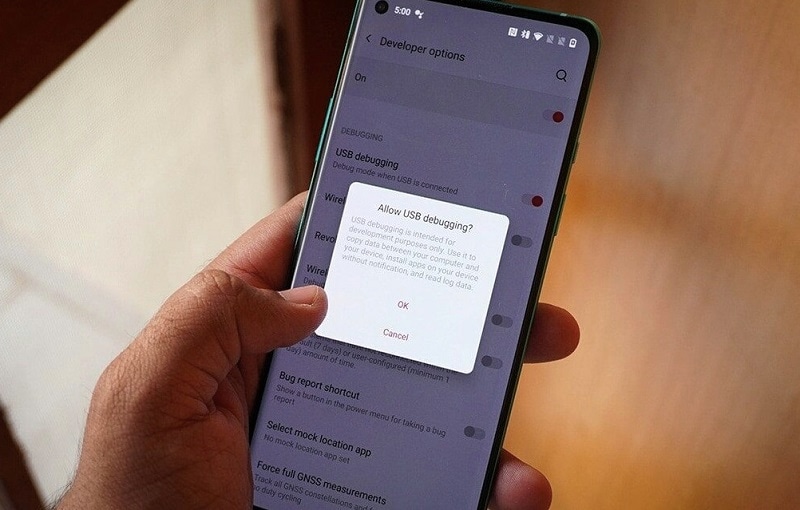
- RSA Key Verification: Even if the hardware switch was toggled, you must physically tap "Allow" on a popup window to authorize the computer's RSA key.
Critical Scenarios Requiring ADB Access
Despite the difficulty, several emergency situations make enabling USB debugging on a locked phone a necessity for 2026 users:
- Emergency Data Salvage: When a screen is broken or the touch digitizer fails, USB debugging allows you to use tools to pull photos and contacts.
- Persistent Boot Loops: If the OS fails to load correctly, an ADB connection can help flash OTA packages or clear system caches.
- FRP Bypass: In some refurbishment scenarios, enabling debugging is a step toward verifying device ownership.
Part 2. Standard Procedure for Enabling USB Debugging
If you have successfully bypassed your lock screen or are preparing your device for future troubleshooting, you must follow the correct sequence to activate developer privileges. This method is the foundation for all advanced Android modifications.
For a complete brand-specific walkthrough, see our guide on how to enable USB debugging on Android, covering Samsung, Xiaomi, OPPO, Vivo, Huawei, Google Pixel, and more.
1. Device Status: Ensure the phone is powered on and at the home screen.
2. Build Access: You must have access to the "About Phone" section in system settings.
3. Cable Quality: Use a high-quality data-transfer USB-C or Micro-USB cable to avoid connection drops.
-
Step 1Activate Developer Privileges
Navigate to Settings > About Phone. Locate the entry labeled Build Number. Tap this entry rapidly seven times. You will see a notification stating, "You are now a developer!"
-
Step 2Enter Developer Options
Return to the main Settings menu. Depending on your OEM (Samsung, Pixel, etc.), look for System > Developer Options or find it directly at the bottom of the Settings list.
-
Step 3Toggle USB Debugging
Scroll down to the Debugging sub-section. Toggle the switch for USB Debugging to the 'On' position. When the warning dialog appears explaining the security risks, tap OK to confirm.

 Unlock Android phone in seconds.
- Remove PIN, pattern, password, fingerprint.
- Bypass Google FRP lock easily.
- Works on all Android brands & models.
- No tech skills required – user-friendly.
Part 3. How to Unlock Your Device to Gain System Access
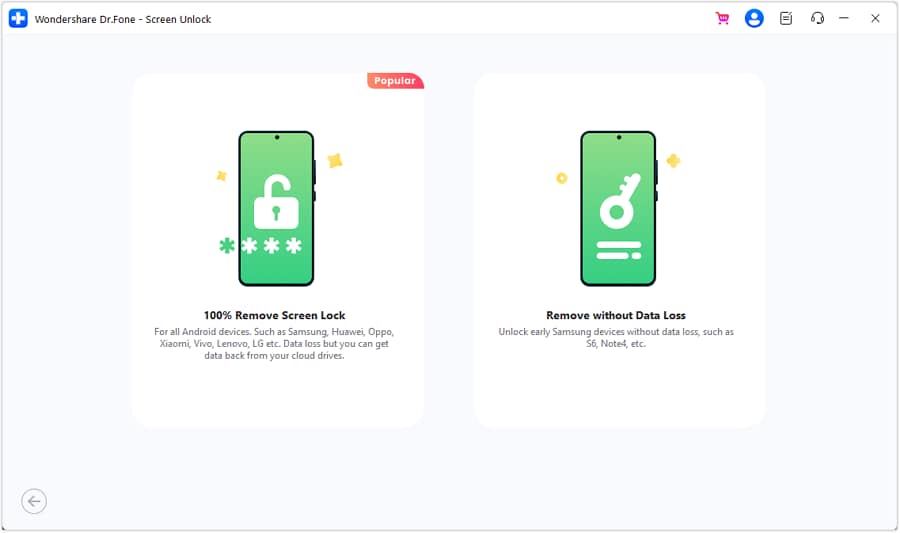
When the standard method is impossible because you are locked out, the priority shifts from "enabling debugging" to "removing the lock." Using a professional toolkit like Dr.Fone allows you to bypass the security layer, which then permits you to enable USB debugging normally.
-
Step 1Initialize the Toolkit
Launch the Dr.Fone software on your PC. From the main dashboard, select the Screen Unlock module and connect your locked Android device using a reliable USB cable.
-
Step 2Identify the Hardware
Select Android as the device type and choose Unlock Android Screen. You will be prompted to select your device brand (e.g., Samsung, Huawei, Xiaomi) to ensure the correct removal package is used.
-
Step 3Configure Download Mode
Follow the on-screen visual prompts to put your device into Download Mode. This usually involves a combination of Power, Home, and Volume buttons. Once in this mode, Dr.Fone will automatically download the necessary recovery configuration.
-
Step 4Execute Bypass
Once the download is complete, click Remove Now. The software will process the unlocking sequence. After the success message appears, your phone will reboot without a lock screen, allowing you to follow the steps in Part 2 to enable USB debugging.




Part 4. Strategic Benefits of the Professional Unlock Method
Choosing a professional resolution over generic "hacks" found online ensures the longevity of your hardware. In 2026, many DIY methods can lead to permanent 'bricking' of the motherboard if the bootloader is handled incorrectly.
| Method | Success Rate | Data Safety | Required Skill | Time |
|---|---|---|---|---|
| Dr.Fone Screen Unlock | 98% | (Samsung/LG) | Zero | 15 Mins |
| Manual ADB Command | Low (Locked) | High | 60+ Mins | |
| Factory Reset | High | Medium | 10 Mins | |
| Find My Device | Medium | Low | 5 Mins |
Conclusion
Enabling USB debugging on a locked Android phone remains a security paradox: the OS is designed to prevent it, yet technical emergencies often demand it. As of 2026, the most efficient and safest path forward is a two-phase approach. By utilizing Dr.Fone - Screen Unlock to safely remove the lock screen barrier, users can regain access to their settings and activate USB debugging manually. This method balances the need for advanced access with the necessity of device safety, ensuring that your path to data recovery or system repair is free of technical roadblocks.
FAQ
-
1. Is there a code to enable USB debugging on locked phone?
No, there is no universal dialer code or secret password to enable USB debugging. This feature is a software toggle located deep within the Developer Options menu, which can only be reached after the device is successfully unlocked. -
2. Will unlocking my phone to enable debugging erase my data?
It depends on your device brand. Dr.Fone - Screen Unlock can remove locks without data loss on most Samsung and LG models. For other brands like Google Pixel or Xiaomi, a factory reset is usually required during the unlock process to satisfy modern encryption standards. -
3. Can I use an OTG mouse if my screen is broken but locked?
You can use an OTG mouse to navigate the UI, but you still need to know the pattern or PIN to unlock the screen. Once the screen is unlocked via the mouse, you can proceed to Developer Options and follow this Android USB debugging guide to turn on USB debugging by brand. -
4. Why is USB debugging disabled by default?
USB debugging is disabled by default to protect your privacy. If it were always on, anyone with physical access to your phone and a computer could extract your private messages, photos, and passwords without needing your lock screen credentials.
 Add Wondershare Dr.Fone as a preferred source on Google