Unlock iPhone to Use Accessories: A Complete Guide with Dr.Fone [2026]

Jun 11, 2026 • Filed to: Screen Lock Removal • Proven solutions
 TL;DR:
To bypass the "Unlock iPhone to Use Accessories" security prompt, you can manually disable USB Restricted Mode in your device settings or use Dr.Fone - Screen Unlock to remove the screen lock completely if you forget your password.
● Navigate to Settings, select Face ID & Passcode or Touch ID & Passcode, and adjust the USB Accessories setting under the Allow Access When Locked section, which lowers device security by permitting external connections without authentication.
● If utilizing Dr.Fone to bypass the restriction without a passcode, you must connect the iPhone to a Windows or Mac computer via a functional USB cable to completely remove the PIN, Face ID, or Touch ID protection.
● To prevent device recognition failures or access denied errors during the software unlock process, ensure both your iOS and Dr.Fone applications are updated to their latest versions before proceeding.
Ask AI for a summary
 ChatGPT
 Perplexity
 Gemini
 Claude
 Grok
Grok
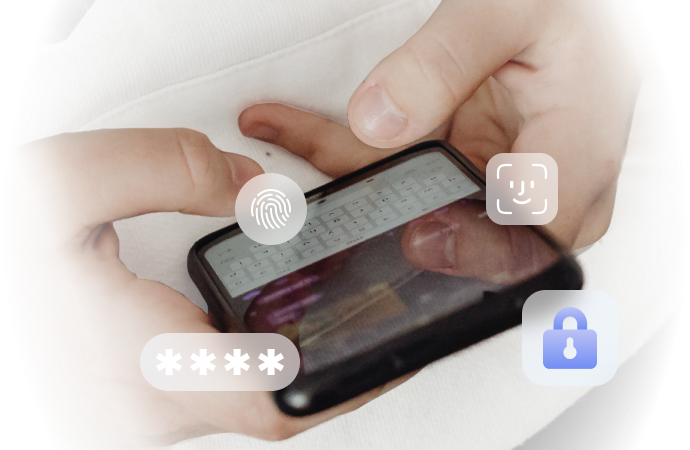
If you've ever been greeted by the frustrating "Unlock iPhone to Use Accessories" message, you're not alone. This pop-up appears when you attempt to connect USB accessories such as chargers, headphones, or other external devices to your iPhone while it’s locked. It may seem like a minor inconvenience, but it can quickly become a hassle, especially when you’re in a rush or trying to use important accessories.

In this article, we’ll discuss in detail what this message means, why Apple has put this restriction in place, and what steps should be taken to unlock the iPhone so that other accessories can be used. Additionally, we’ll explore how Dr.Fone – Screen Unlock, a trusted and effective unlocking tool, can make this process smoother and faster, helping you get back to using your iPhone with ease.
- Part 1: Understanding Accessory Restrictions on iPhone
- Part 2: How to Unlock iPhone to Use Accessories

- Part 3: Step-by-Step Guide Using Dr.Fone - Screen Unlock
- Part 4: Troubleshooting Common Issues
Part 1: Understanding Accessory Restrictions on iPhone
What Does It Mean to Unlock iPhone for Accessories?
When your iPhone displays the “Unlock iPhone to Use Accessories” prompt, it means the device is locked and requires authentication—either through a passcode, Face ID, or Touch ID—before allowing any connected USB accessories to function. Essentially, your iPhone is ensuring that no unauthorized person can access or interact with the device while it is locked, especially when it’s connected to external devices that could transfer data or make changes to your system.
This restriction includes chargers, USB drives, headphones, and even docks. The goal of this feature is to prevent potentially harmful or unauthorized devices from accessing the phone’s data without your consent. If your iPhone is locked and you try to use one of these accessories, the system will not allow the connection unless it is unlocked.
Why Accessory Restrictions Exist
Apple's accessory restrictions are designed with security in mind. These are measures incorporated in the iPhone’s protection system against extraneous devices when the phone is locked. This is good in the sense that no unauthorized data is able to be accessed or be transferred to the iPhone, but can be unfavorable if the need to utilize an accessory without unlocking the device arises.
Here’s why these restrictions are in place:
- Security Concerns: When your iPhone is locked, any connection to an accessory could potentially give unauthorized users access to personal data or even allow malicious software to transfer from the connected device to your iPhone.
- Protection Against Malicious Software: Unverified USB accessories could contain harmful software that attempts to exploit security vulnerabilities on your iPhone. Apple restricts communication with the device to only unlocked contacts by using trusted accessories for the device. Here's an excerpt from Apple support: "To make this system more secure, Apple recommends limiting USB access until the phone is unlocked."
- Privacy Measures: In addition, limiting the use of accessories when the iPhone is locked makes it possible to keep information safe, even when the phone is not used. For example, someone might take advantage of an unlocked phone to retrieve your documents through USB accessories.
While these restrictions serve important functions, they can be annoying if you need to use your iPhone while it’s locked—such as charging the device, using headphones, or transferring files. Fortunately, there are ways to bypass these restrictions and regain control over your accessories.
Part 2: How to Unlock iPhone to Use Accessories
Disabling USB Restricted Mode in Settings

One of the most effective ways to unlock your iPhone for accessories is by disabling USB Restricted Mode. This mode is responsible for preventing the use of USB accessories when your iPhone is locked for an extended period of time. Here's how you can turn it off:
- Open the Settings app on your iPhone.
- Scroll down and tap Face ID & Passcode (or Touch ID & Passcode for older models).
- Enter your device passcode when prompted.
- Scroll down to the Allow Access When Locked section.
- Toggle off USB Accessories.
Once you’ve turned off USB Restricted Mode, you’ll be able to use USB accessories even when your iPhone is locked. This setting provides a more convenient solution for users who need quick access to their accessories without having to unlock the device every time.
Note: Disabling USB Restricted Mode makes it easier to connect accessories, but it also lowers the security of your iPhone by allowing accessories to connect while it’s locked. Consider this trade-off if you frequently need to use accessories.
Using Dr.Fone to Unlock Accessory Restrictions
In some cases, you may not want to disable USB Restricted Mode or you might be unable to unlock your iPhone due to forgotten passwords or other issues. This is where Dr.Fone comes in. Dr.Fone offers a secure, quick, and reliable way to bypass iPhone restrictions and unlock your device for accessory use, even without your passcode.

Dr.Fone’s “Unlock Screen Passcode” feature allows you to unlock your iPhone by removing the passcode, Face ID, or Touch ID protection. It also helps you regain access to accessories without the need for additional steps. Dr. Fone is a good option for people who want to unlock a phone easily without compromising any security features. For less technical users as well the navigation is also easy because of the graphics user interface.
Part 3: Step-by-Step Guide Using Dr.Fone
Dr.Fone is designed to simplify the process of unlocking your iPhone for accessories. Here’s a more detailed breakdown of how you can use Dr.Fone to bypass restrictions:
Dr.Fone - Screen Unlock (Android)
The Best UnlockJunky Alternative to Bypass FRP and Solve Your Screen Locks
- Remove all Android screen locks (PIN/pattern/fingerprints/face ID) in minutes.
- Bypass the FRP lock of Samsung without a PIN or Google account.
- Everyone can handle the lock screen without any tech knowledge.
- Provide specific removal solutions to promise good success rate.


01: Launch Dr.Fone
First, you should download and install Dr.Fone on your PC. It is available for Windows next to macOS and vice versa. The program can be downloaded from the official site of Wondershare.
02: Connect Your iPhone

After installation, launch Dr.Fone and connect your iPhone to the computer using a USB cable. The UI interface will have your device which will be detected automatically by Dr.Fone.
03: Unlock Screen Passcode
You can choose the option ‘Unlock’ or the feature called ‘Unlock Screen Passcode’ on the Dr.Fone program. This will allow you to bypass any passcode, Face ID, or Touch ID restrictions so that you can use the accessories without any restrictions at all.
04: Follow and Complete
Dr. Fone will ask you to perform these actions the first time you unlock your device. It is advisable to follow these directions to avoid some problems in the future.

After going through the necessary protocols, the unlocking process with Dr. Fone will commence and this would only take a few minutes or so to accomplish. When it completes, your device will be unlocked, thus, permitting the use of all its accessories.
Part 4: Troubleshooting Common Issues
Device Not Recognized
Sometimes, your iPhone may not be recognized when trying to connect to your computer. To resolve this issue:
- Ensure that the USB cable is working properly and is not damaged.
- Try connecting to a different USB port or using another computer.
- Restart your iPhone and computer to refresh the connection.
Software Update Required
Outdated software can lead to issues with Dr.Fone and iPhone connectivity. To avoid this, always make sure both Dr.Fone and your iPhone’s software are up to date.
- For Dr.Fone, check for updates within the application.
- For iPhone updates, go to Settings > General > Software Update.
Access Denied Errors
If you’re getting access denied errors during the unlocking process:
- Double-check that USB Restricted Mode is disabled in the Settings app.
- Restart both your iPhone and Dr.Fone to troubleshoot any temporary glitches.
- Contact Dr.Fone customer support for additional help if the issue persists.
Conclusion
Unselecting accessory restrictions on your iPhone can be particularly transformative for people always on the move and looking for productivity. As you will discover in this article, it is easy to lift accessory restrictions and get back to your working methods without having to wait. With either settings to adjust or Dr.Fone’s unlock functionalities, you can have a dependable outcome.
Personally, I found Dr.Fone to be the best amongst the rest because of its amazing features and instant unlocking of iPhones to access accessories safely and quickly. Don't let security features slow you down—take control of your iPhone and enjoy uninterrupted use of all your accessories. If you’re looking for a hassle-free way to unlock your iPhone, consider Dr.Fone as your go-to solution.


iPhone Unlock
- Access Locked iPhone
- 1. Reset Locked iPhone Without iTunes
- 2. Erase Locked iPhone
- 3. Get Into Locked iPhone
- 4. Factory Reset Locked iPhone
- 5. Reset Locked iPhone
- 6. iPhone Is Disabled
- 7. Fix iPhone Unavailable Issue
- 8. Forgot Locked Notes Password
- 9. Unlock Total Wireless Phone
- 10. Review of doctorSIM Unlock
- iPhone Lock Screen
- 1. Lock Apps on iPhone
- 2. Bypass iPhone Passcode
- 3. Unlock Disabled iPhone Without PC
- 4. Disable One More Minute Screen Time
- 5. Unlock iPhone Passcode Screen
- 6. Reset iPhone Password
- 7. Disable iOS Call Recording Notification
- 8. Remove Carrier Lock/SIM Restrictions
- 9. Get iMei Number on Locked iPhone
- 10. Add a New Face ID
- 11. iPhone Passcode Expired Pop-Up
- 12. Control Display Rotation
- 13. Fix iPhone is Disabled Connect to iTunes
- 14. Fix Turn Passcode Off Greyed Out
- 15. Get iPhone out of Demo Mode
- 16. Unlock Unresponsive Screen
- 17. iPhone Ask for Passcode After Reset
- Remove iCloud Lock
- 1. Unlock an iPhone 7 Plus iCloud
- 2. iOS 18 iCloud Unlock
- 3. iOS 26 iCloud Unlock
- 4. Crack iCloud-Locked iPhones to Sell
- 5. Jailbreak iCloud Locked iPhone
- 6. What To Do If You Bought A Locked iPhone?
- 7. Fix iPhone Unavailable No Erase Option
- 8. Find iCloud Email Address on Apple Device
- 9. Broque Ramdisk iCloud Bypass
- Unlock Apple ID
- 1. Remove Payment Method on iPhone
- 2. Create a New Apple ID Account
- 3. Change Apple ID on iPad
- 4. Change Your Apple ID Password
- 5. Apple ID Not Active
- 6. Fix Wrong Apple ID Issue on iPhone
- 7. Fix This Person Is Not Active
- 8. New iCloud Terms and Conditions
- 9. Fix Apple ID Account Unavailable
- 10.Find Apple ID by IMEI
- 11. Unlink 2 iPhones with the Same Apple ID
- 12. Reset Password at appleid.apple.com
- 13. App Store Keep Asking for Password
- 14. Find Apple ID Password No Reset
- 15. Trusted Devices List Not Available
- Remove SIM Lock
- 1. Unlock iPhone Using Unlock Chip
- 2. Unlock iPhone for Free
- 3. Unlock iPhone Online
- 4. Factory Unlock iPhone
- 5. SIM Unlock iPhone
- 6. Unlock AT&T iPhone
- 7. Unlock iPhone with IMEI Code
- 8. Unlock iPhone without SIM Card
- 9. Unlock Cricket iPhone
- 10. Unlock iPhone with/without SIM Card
- 11. Unlock T-Mobile iPhone
- 12. Unlock Verizon iPhone
- 13. iPhone IMEI Checker
- 14. Unlock Xfinity iPhone
- 15. Unlock iPhone From The Carrier
- 16. Turbo SIM iPhone
- 17. Get the Sprint Unlock Codes
- 18. Unlock a Sprint Phone
- 19. Fix When iPhone Says No Sim
- Unlock iPhone MDM
- 1. Remove MDM from iPhone
- 2. Remote Management on iPhone
- 3. MDM VS MAM
- 4. Top MDM Bypass Tools
- 5. IoT Device Management
- 6. Unified Endpoint Management
- 7. Enterprise Mobility Management
- 8. Top 10 Proxy Websites
- 9. Hindilinks4u Alternatives
- Unlock Screen Time Passcode
- 1. Reset Screen Time Passcode
- 2. Turn Off Screen Time without Passcode
- 3. Screen Time Passcode Not Working
- 4. Disable Parental Controls
- 5. Bypass Screen Time on iPhone Without Password
- 6. Delete Screen Time History on iPhone
- 7. Turn Off Downtime on iPhone
- 8. Download Age Restricted Videos
- MDM Unblock Games/Websites
- 1. Basketball Stars Game Unblocked
- 2. Play Getaway Shootout Unblocked
- 3. Play Build Now GG Unblocked
- 4. BitLife Unblocked
- 5. 10 Best Unblocked Anime Websites
- 6. Best Unblocked Game Websites
- 7. 1v1 LOL Unblocked
- 8. Get Poly Track Unblocked
- 9. Music Websites Unblocked
- 10. Spotify Unblocked
- 11. Interstellar Proxy Review
- Unlock Apple Watch
- Unlock iPod Touch
- ● Manage/transfer/recover data
- ● Unlock screen/activate/FRP lock
- ● Fix most iOS and Android issues
- Free Download Free Download Free Download

James Davis
staff Editor