
The Ultimate Guide to Bypass Gmail Phone Verification
Oct 13, 2025 • Filed to: Screen Lock Removal • Proven solutions
“Google removed the option to skip the phone # verification when using the Gmail app to create a new email address.”
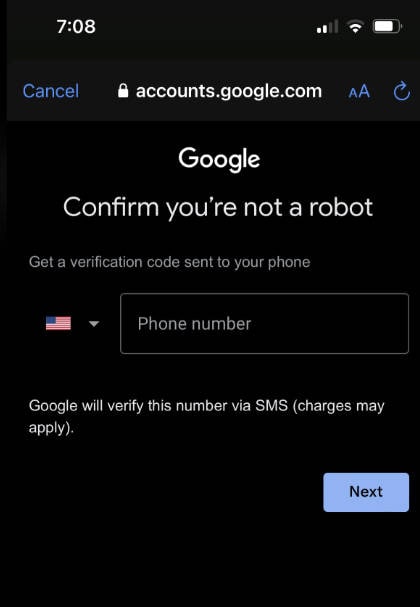
Want to learn how to bypass Gmail phone verification? This is the right page. When you create a brand-new Gmail account, you’ll usually be asked to provide your phone number for 2-Step Authentication whenever you want to log into Gmail. Google will send you a text message or a call with a four-digit code that you’ll enter to be granted access to your account. So, in this post, we want to learn how to skip this verification step on Chrome for PCs and during the FRP process on Android phones. But first, let’s know something about Google phone number verification.
Part 1: Why Google Asks for a Phone Number to Verify an Account?
As said initially, Google asks users to provide a phone number during account registration. This is where you’ll receive an SMS or phone call with the confirmation code. And the most exciting part is that you can use someone’s phone number or a fake number to verify your Google account. Just ensure that the number is available each time you want to log into your account.
So, why does Google ask for your phone number? It’s simple; the added layer of security! With passwords becoming vulnerable to hackers, most tech companies like Google and Apple use 2-Factor Authentication on most accounts. So, before you log into your Gmail account, you must prove that you’ve actually received the code.
Part 2: Can You Verify a Google Account Without a Phone Number?
The thing is that it’s almost impossible to create a new account on services like Gmail, Facebook, and YouTube without providing your phone number. But because most people believe that the company or the government will use their provided phone number to track them, Google provides you with alternative ways to verify your account. Below is a brief look:
| Phone Number Verification Methods | Yes/No |
| Another Email | Yes |
| Phone Settings | Yes |
| Chrome Settings | Yes |
| Personal Questions | Yes |
Part 3: How to Bypass Gmail Phone Verification on PC with Chrome Settings?
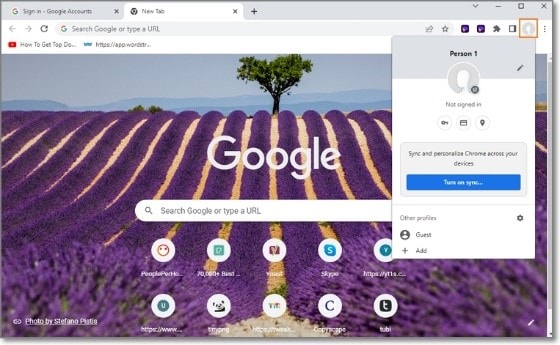
In this method, we’ll learn to skip the Google phone verification step on your PC Chrome browser. But remember to log out of your Chrome browser first. To do that, tap your profile icon and tap the “sync” icon. Then, follow these steps:
- Step 1. Open Chrome and tap the Profile icon before clicking the Turn on Sync button.
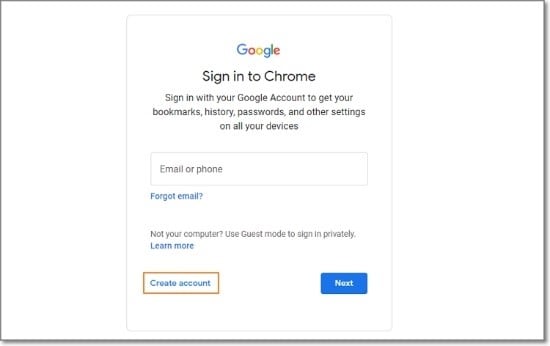
- Step 2. The Google Account page will launch. In this case, tap Create an account.
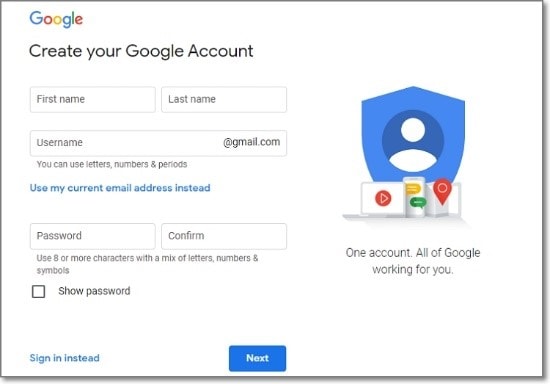
- Step 3. Now enter the account details such as username, first/last name, and password.
- Step 4. Click Next, and you won’t be asked to enter your phone number for future verifications. It’s that easy!
Bonus Tip: How to Bypass Google Account Verification?
Unfortunately, you may not have enough time to change your Gmail account before factory resetting your Android phone. Normally, you’ll need to enter your Gmail password and confirm the code before passing the FRP lock system.
If you’re stuck here, let Dr.Fone - Screen Unlock (Android) help you. It’s a desktop app that can easily bypass the Activation Lock system on your Android phone. The “Screen Unlock” feature also lets you bypass passwords, PIN, patterns, Face ID, or Touch ID. Let’s find out how it works:
Dr.Fone - Screen Unlock (Android)
Bypass Gmail Phone Verification within Minutes
- Instantly unlock Android screen locks: Pattern, PIN, Password, Fingerprint & Face Lock
- Bypass FRP lock and regain full access to your Android device effortlessly.
- 100% success rate for FRP bypass on Samsung Snapdragon devices.
- Unlock major Android brands like Samsung, Xiaomi, OPPO, Vivo, LG, OnePlus, etc.
- No tech skills required—fast, easy, and hassle-free.
How-to steps for bypassing FRP lock on your PC with Dr.Fone - Screen Unlock (Android)
- Step 1. Launch Dr.Fone on your PC and then tap Screen Unlock.
- Step 2. Next, click Android and then choose Remove Google FRP Lock.

- Step 3. Dr.Fone will start downloading the relevant driver once you have selected the device brand.
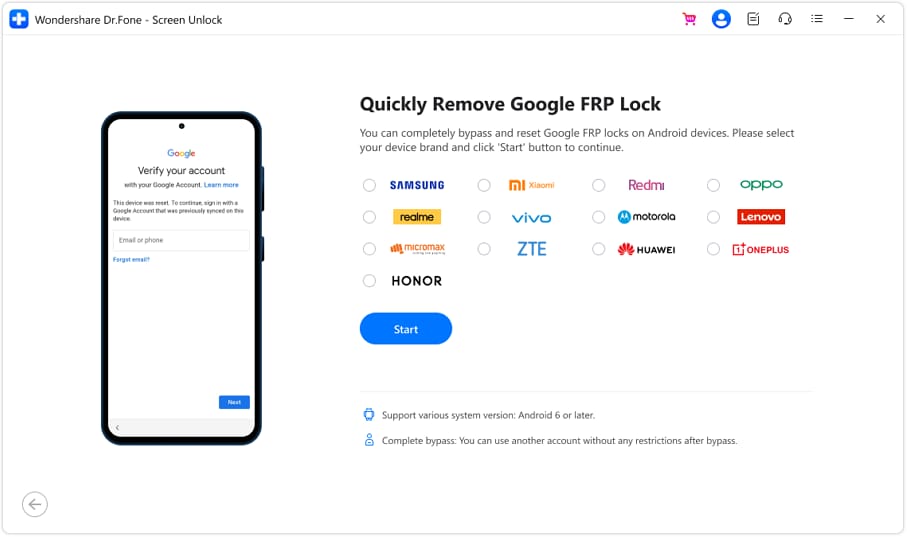
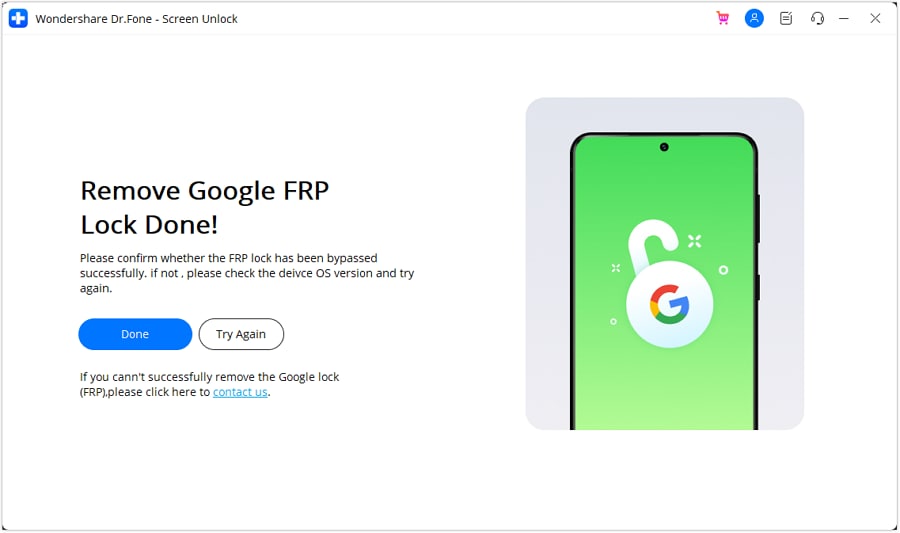
- Step 4. Lastly, apply the on-screen steps on Dr.Fone to bypass the Android Lock system effortlessly. Click bypass the FRP guide for more detailed steps.
Part 4: How to Verify a Google Account Without a Real Phone Number?
As said before, Google allows you to verify your account without necessarily receiving the virtual number SMS. You can verify your account using email, personal queries you had set earlier, or on Android settings. Let’s take an in-depth look!
Solution 1: Verify a Google Account with Another Email Account
- Step 1. Open the Google Account page and enter your email account address and password.
- Step 2. If unsuccessful, click the Forgot Password button. Now choose the email account you want Google to send the verification code to. If you don’t find it, click Try another way to sign in.
- Step 3. Open your email account and enter the verification code to log into your account.
Solution 2: Verify a Google Account with Security Questions
If you have a security question linked to your Google account, use it to recover your email account. Here are the steps:
- Step 1. Open your Google Account and then enter your email and password.
- Step 2. Then, click the Forgot Password button and tap “Try another way to sign in.” Don’t stop. Tap the “Try another way” link and answer your security question.
- Step 3. Now change the Google password and use the new one to access your Google Account.
Solution 3: Verify a Google Account with Phone Settings
Did you know you can easily bypass the phone number verification step on Google on Android settings? Below are the steps:
- Step 1. Open the Settings app on your Android phone and click the Account and sync option. In some Android versions, you may just need to select Accounts.
- Step 2. Now tap Add Account and then select Google. You may be asked to enter your password or PIN if your phone is encrypted.

- Step 3. Choose the Create account option in the bottom-left corner of the Sign-in screen and tap Next.
- Step 4. Select “For myself” and then enter the information requested, such as DOB, gender, and more.
- Step 5. If asked to provide your phone number, tap Skip and continue to set up your new Gmail account.
Tips: You can easily disable Google’s 2-step verification, although that’s not advisable. Visit Google Account, sign in, and then click Security on the left pane. Now scroll down and click 2-Step Verification before signing in to your Google Account. Lastly, tap Turn Off to disable this security feature.
Wrap it up!
I hope you’ve learned a lot up to this point. Google’s phone number verification is an important security feature that helps ensure your account is safe from unauthorized access.
But, if you lost the phone number, send the code to your email address or add a security question. Also, use Dr.Fone to bypass the whole FRP process altogether. And don’t forget to delink your phone number from Google if you’re no longer using it.
Android Unlock
- Android Password Lock
- 1. Reset Lock Screen Password
- 2. Ways to Unlock Android Phone
- 3. Unlock Wi-Fi Networks
- 4. Reset Gmail Password on Android
- 5. Unlock Android Phone Password
- 6. Unlock Android Without Password
- 7. Emergency Call Bypass
- 8. Enable USB Debugging
- 9. Unlock Asus Phone
- 10. Unlock Asus Bootloader
- Android Pattern Lock
- Android Pin/Fingerprint Lock
- 1. Unlock Android Fingerprint Lock
- 2. Recover a Locked Device
- 3. Remove Screen Lock PIN
- 4. Enable or Disable Screen Lock PIN
- 5. Pixel 7 Fingerprint Not Working
- Android Screen Lock
- 1. Android Lock Screen Wallpapers
- 2. Lock Screen Settings
- 3. Customize Lock Screen Widgets
- 4. Apps to Reinvent Your Android
- 5. Lock Screen Wallpaper on Android
- 6. Unlock Android with Broken Screen
- 7. Unlock Google Find My Device Without Problems
- 8. Forgot Voicemail Password on Android
- 9. Unlock SafeSearch on Google
- Android Screen Unlock
- 1. Android Device Manager Unlock
- 2. Unlocking Android Phone Screen
- 3. Bypass Android Face Lock
- 4. Bypass Android Lock Screen
- 5. Bypass Lock Screen By Emergency Call
- 6. Remove Synced Google Account
- 7. Unlock Android without Data Loss
- 8. Unlock Phone without Google Account
- 9. Unlock Android phone
- 10. Reset a Locked Android Phone
- 11. Unlock Doogee Phones
- 12. Best 10 Unlock Apps For Android
- 13. Remove Gmail Account
- 14. Unlock 30/30 Attempts Remaining
- 15. OEM Unlock Missing
- 16. Change Lock Screen Clock
- 17. OEM Unlocking on Android
- 18.Bypass Knox Enrollment Service
- 19. Unlock Google Pixel 6a, 6 or 7
- 20. Best Alternative to MCT Bypass Tool
- 21. Best Way to Unlock Your ZTE Phone
- Android SIM Unlock
- 1. Easily Unlock Android SIM
- 2. 5 Android Unlock Software
- 3. Carrier Unlock Phone to Use SIM
- 4. Change Android Imei without Root
- 5. How to Change SIM PIN on Android
- 6. Best Unlocked Android Phones
- Android Unlock Code
- 1. Lock Apps to Protect Information
- 2. Unlock Secret Features on Phone
- 3. Android SIM Unlock Code Generator
- 4. Ways to Sim Unlock Phone
- 5. Remove Sim Lock without Code
- 6. Updated Android Factory Reset Code
- Google FRP Bypass
- 1. Bypass Google Account Verification
- 2. Bypass Google FRP Lock On Phones
- 3. Bypass Google Pixel FRP
- 4. Huawei Bypass FRP Tools for PC
- 5. Android 16 FRP Bypass for Samsung S25
- 6. Bypass Samsung S24 FRP Lock
- 7. EDL Cable Unlock FRP
- 8. Unlock OnePlus Nord FRP
- 9. OnePlus Nord N100 FRP
- 10. EFRP ME APK FRP Bypass
- 11. RootJunky FRP Bypass
- 12. What to Do When Locked Out of Google Account
- 13. Android Utility Tool
- 14. Remove Google FRP Using Online Tools
- Unlock Bricked Phone
- 1. Restore Bricked Mobile Phone
- 2. Fix Motorola Bricked Phone
- 3. Fix Bricked Redmi Note
- 4. Unbrick Oneplus Easily
- 5. Unbrick Xiaomi Phone
- 6. Unbrick Huawei Phone
- 7. Unbrick Poco X3
- 8. Software to Unbrick Samsung
- 9. Unbrick 3DS
- 10. Unbrick PSP
- Android Unlock Tools
- 1. Griffin Unlocker Tool Review
- 2. BMB Unlock Tool Review
- 3. Android Multi Tools Review
- 4. Best Bootloader Unlock APKs
- 5. Top 5 Micromax FRP Tools
- 6. Pangu FRP Bypass
- 7. Google Account Manager APK FRP Review
- 8. D&G Password Unlocker Review
- 9. Android Multi Tools Review
- 10. Easy Samsung FRP Tool Review
- 11.Samfw FRP Tool
- Android MDM
- ● Manage/transfer/recover data
- ● Unlock screen/activate/FRP lock
- ● Fix most iOS and Android issues
- Unlock Now Unlock Now Unlock Now



Alice MJ
staff Editor