
 TL;DR:
You can automatically remove glare from photos in under a minute using AI photo enhancers like the Dr.Fone App for iOS and Android, which detects and fixes reflections on glasses or shiny surfaces without requiring manual editing skills.
● To process an image in the Dr.Fone App, upload it via the AI Photo Enhancer tool; however, for extreme glare, you must adjust the photo's brightness and contrast beforehand so the AI can effectively detect the reflections.
● Select alternative tools based on workflow constraints: Snapseed offers entirely free manual control for mobile devices, Luminar Neo provides RAW support for paying professionals, and AniEraser enables quick browser-based edits but struggles with very dark or overexposed photos.
● Prevent glare physically before shooting by utilizing diffused lighting, applying polarizing filters to DSLR or mirrorless lenses, or asking subjects to slightly tilt their glasses to alter the reflection angle.
Ask AI for a summary
 ChatGPT
 Perplexity
 Gemini
 Claude
 Grok
Grok
Glare is a common problem in digital photography. Whether you're snapping a family portrait or taking a quick selfie, unwanted reflections—especially on glasses—can distract from an otherwise perfect shot. Fortunately, recent advances in AI photo enhancement make it easier than ever to remove glare from photos. In this guide, you'll learn how to remove glare from photo using Dr.Fone App and other popular apps, discover why AI is superior to manual methods, and get tips to prevent glare in the future.
In this article
Part 1. What Causes Glare in Photos?
Imagine this: You've gathered your family for a sunny afternoon photo. Everyone smiles, the light is perfect, but when you check the picture, a glaring white streak covers your dad's glasses, obscuring his eyes and spoiling the moment. That annoying glare is like a tiny spotlight stealing attention from your loved ones. It happens when bright light sources—such as the sun or indoor lamps—hit reflective surfaces and scatter, creating unwanted bright spots or streaks in your photos.
Glare occurs because light bounces off shiny surfaces like glasses, water, or metal and directly into the camera lens. This reflection can overwhelm the camera sensor, washing out details and making parts of the image look unnaturally bright or white. Understanding this helps explain why glare is so tricky to avoid and why we need to know how to take glare out of a photo is often necessary.
Part 2. Why Use an AI Photo Enhancer for Glare Removal?
Traditional photo editing methods require time and skill, often involving complex tools and manual adjustments. AI photo enhancers such as Dr.Fone, Remove.ai, Luminar Neo, and Fotor use advanced algorithms to automatically detect and remove glare, making the process fast, accurate, and accessible to everyone.
| Feature | Manual Editing | AI Photo Enhancers |
| Time Required | 10-30 minutes | Under 1 minute |
| Skill Needed | Advanced | Beginner-friendly |
| Consistency | Varies by user | Consistently high |
| Result Quality | Mixed, can look fake | Natural, professional |
These tools provide an easier method to fix glare issues even without deep editing knowledge. Furthermore, many apps now offer additional features like noise reduction, detail enhancement, and portrait optimization.
Part 3. How to Remove Glare from Photo Using AI Phonto Enhacers?
You can remove glare from a photo using a number of AI-powered tools. This section will guide you through how to do it using Dr.Fone, one of the top-rated AI photo enhancers, but similar steps apply to other tools like Fotor or PhotoDirector.
How to Get Rid of Glare in Photos Using Dr.Fone App
Follow these simple steps to remove a glare from a photo using Dr.Fone's AI Photo Enhancer. The process is identical on both iOS and Android devices.
If you use an iPhone, Dr.Fone App's AI Photo Enhancer makes removing glare from your photos quick and easy. With just a few taps, the app automatically improves your images by reducing glare and enhancing details, even if you have no prior photo editing experience.
Dr.Fone App - AI Photo Enhancer (iOS & Android)
100% Automatic Photo Enhancement: 1-Click Fixes
- Sharpen Blurry Images
- Denoise & Enhance Low-Light Photos
- Naturally Enhance Portrait Details
- User-Friendly & Beginner-Perfect


01of 04Download and Open the Dr.Fone App
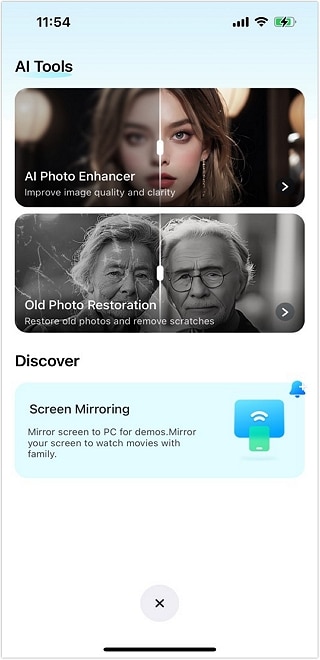
Go to the App Store, download the Dr.Fone app, and open it on your iPhone. On the main screen, look for the blue AI toolbox icon at the bottom and tap it to access the AI Tools page where all the AI-powered features are located.
02of 04Select AI Photo Enhancer and Upload Your Photo
In the AI Tools menu, tap AI Photo Enhancer. Then tap Select Photo to open your photo library. Browse and select the photo with glare that you want to fix. The app supports various image formats, so feel free to choose any photo from your gallery.
03of 04Enhance Your Photo
Tap the Enhance button to let the AI analyze your photo. The app will automatically detect glare areas, including reflections on glasses or shiny surfaces, and remove them while sharpening and improving overall image quality. This process usually takes just a few seconds.

04of 04Preview and Save
Once the enhancement finishes, use the slider to compare the before and after versions of your photo. If you're satisfied with the result, tap Save to store the enhanced, glare-free photo back to your iPhone's gallery. You can also share it directly from the app.

Alternative Tools You Can Try
While Dr.Fone offers an easy way to remove glare using AI, it's not your only option. Whether you're a beginner or a photo pro, there are other tools you can explore. Each one comes with unique features and strengths. Below is a detailed list of popular alternatives with highlights, use cases, and things to watch out for.
1. Fotor
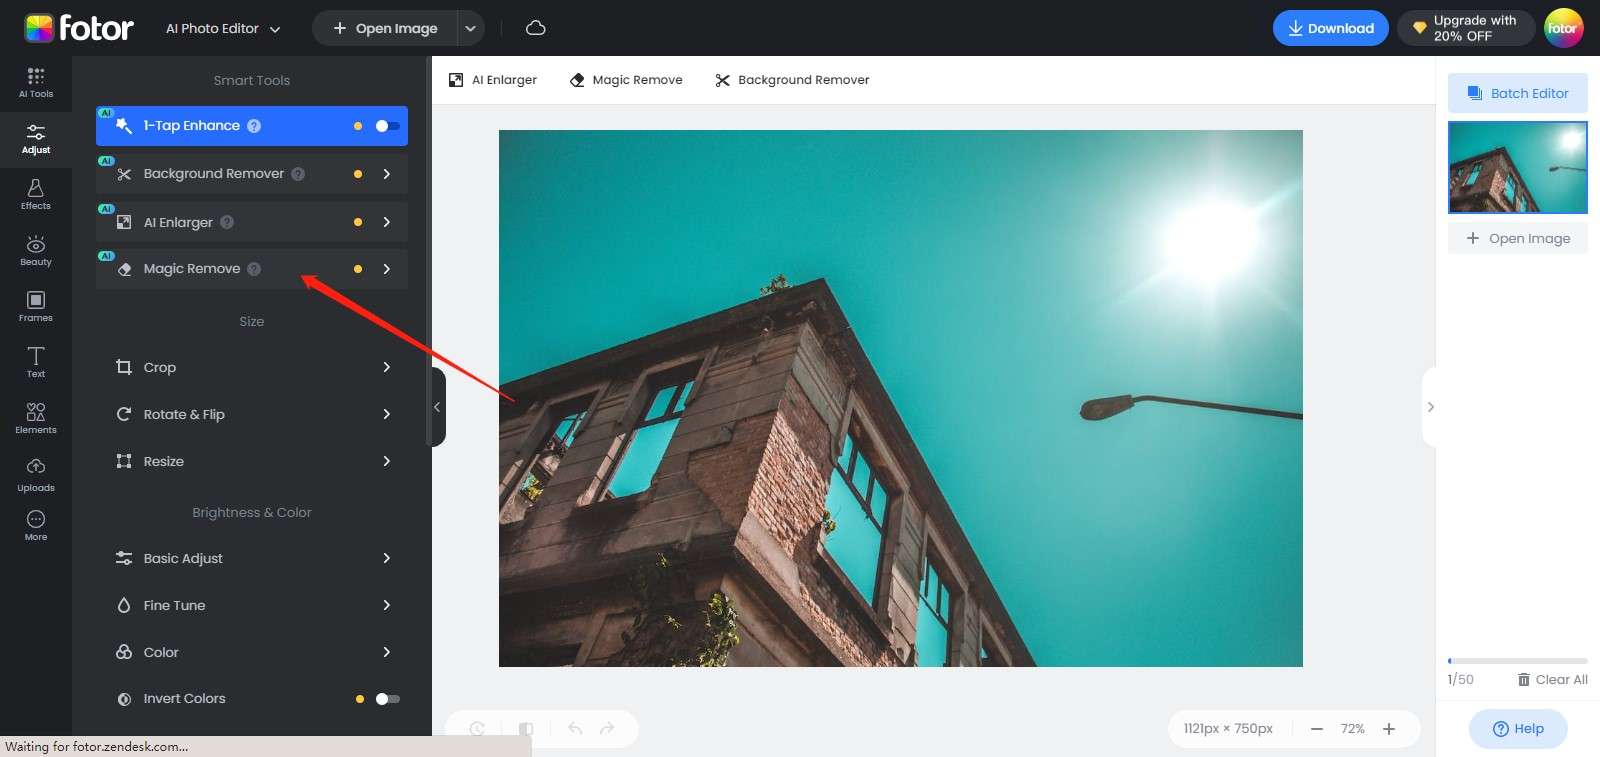
- Core Functions: AI glare reduction, skin retouching, filters, brightness adjustments, background blur, and one-click enhancements
- Best For: Users who want quick, good-looking edits without diving into complex settings
- Highlights:
- Intuitive interface that's easy to navigate even for beginners
- AI-based tools for fast results, especially in removing glare from faces and skin
- Offers templates for collages, posters, and social posts
- Limitations:
- Free version includes ads and watermarks
- Some effects might need manual fine-tuning to avoid looking unnatural
Fotor stands out because it's simple yet powerful. You don't need photo editing skills to improve your pictures. With just a few taps, glare is softened, skin looks smoother, and lighting feels more natural.
2. Luminar Neo
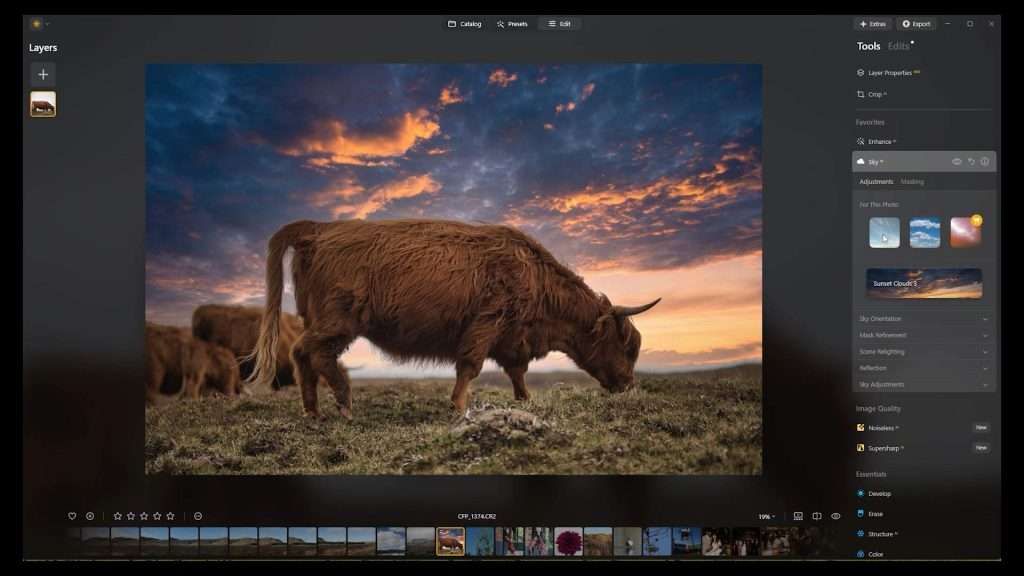
- Core Functions: AI-powered photo editing, advanced lighting controls, portrait enhancements, and layer-based editing
- Best For: Hobbyist or professional photographers who want both creative freedom and smart automation
- Highlights:
- Features like Relight AI and Face AI adjust lighting with great accuracy
- Works well with RAW files, offering high-quality results
- Layer support lets you edit non-destructively and add complex effects
- Limitations:
- No free version; you'll need to purchase or subscribe
- Interface and tools may feel overwhelming for new users
Luminar Neo is best if you're serious about photography. The AI tools reduce glare while preserving depth and detail, and the manual options give you full creative control to fine-tune your work exactly how you want it.
3. PhotoDirector

- Core Functions: AI tools for glare reduction, portrait touch-ups, object removal, filters, and motion effects
- Best For: Mobile content creators and social media users who want stylish photos with minimal effort
- Highlights:
- AI detects and removes glare on faces and reflective surfaces automatically
- Creative tools like sky replacement, dispersion effects, and motion overlays
- Supports editing across mobile and desktop with cloud syncing
- Limitations:
- Some of the best tools are behind a paywall
- Advanced users may find it too basic for serious editing projects
PhotoDirector is ideal when you want your photos to stand out fast. The AI makes smart edits in seconds, reducing glare without much work, while the creative effects help you build fun, eye-catching visuals for any platform.
4. Snapseed (by Google)
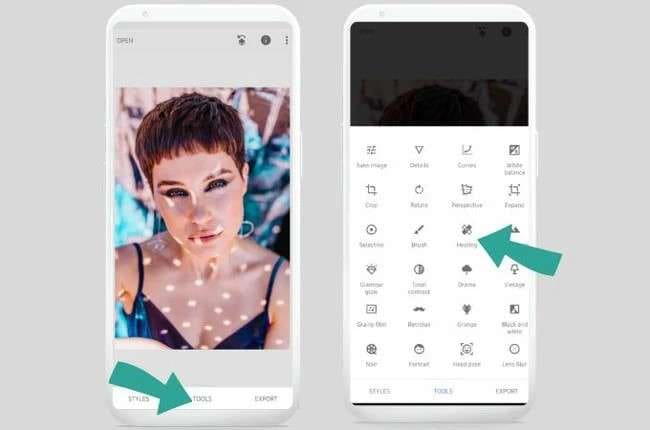
- Core Functions: Manual tools like Healing, Selective Adjust, Curves, White Balance, and brush tools
- Best For: Users who prefer to edit manually and want full control without needing a subscription
- Highlights:
- Free and ad-free, with a full range of high-quality tools
- Healing and Selective tools help you fix glare in specific areas
- Great for precise edits and creative adjustments
- Limitations:
- No AI automation; glare must be fixed by hand
- Only available as a mobile app—no desktop version
Snapseed offers freedom for users who want to dive deeper into editing. While it doesn't have AI, the Healing tool lets you remove glare with care. If you're comfortable zooming in and adjusting little by little, this app delivers beautiful results.
5. AniEraser (by Media.io)
- Core Functions: AI-powered glare removal, object eraser, watermark remover, and unwanted object cleanup
- Best For: Users who need fast, online fixes for glare and other photo distractions
- Highlights:
- Automatically removes glare on skin, glasses, and reflective surfaces
- 100% browser-based—no download or account needed for basic use
- Supports multiple file formats like JPG, PNG, and WebP
- Limitations:
- High-resolution downloads require a paid plan
- May not handle glare well on very dark or overexposed photos
AniEraser is perfect for quick and clean edits when you don't want to fuss with complex tools. Just upload your image, highlight the glare spot, and the AI will handle the rest. It's especially useful for selfies, product shots, and portraits where lighting got too harsh. You can preview the fix instantly and decide if you want to download the result.
Part 4. Tips for Preventing Glare in Future Photos
While AI tools like Dr.Fone's AI Photo Enhancer make glare removal easy, preventing glare before you shoot can save time and improve your photos even more. Here are some practical tips to help you avoid glare in your pictures:

Adjust Your Shooting Angle:
Changing the angle between your camera, the light source, and the subject can reduce direct reflections. Try moving slightly left, right, up, or down to find the spot where glare is minimized or disappears.
Use Diffused or Soft Lighting:
Harsh, direct light causes strong reflections. Using diffused light—like shooting on a cloudy day, near a shaded window, or with a softbox—softens shadows and reduces glare.
Employ Polarizing Filters (for Cameras):
If you use a DSLR or mirrorless camera, a polarizing filter can dramatically cut down reflections on glass, water, and shiny surfaces. This physical filter blocks certain light waves, helping you capture glare-free images.
Ask Subjects to Tilt Glasses Slightly:
When photographing people wearing glasses, a slight tilt or adjustment of the glasses can change the reflection angle, reducing glare on the lenses.
Clean Lenses and Glasses:
Smudges or dirt can worsen glare. Ensure your camera lens and any glasses in the shot are clean before taking photos.
Use Dr.Fone AI Photo Enhancer and Other Tools as a Backup:
Even with the best precautions, glare can still appear. When that happens, Dr.Fone's AI-powered glare removal feature can quickly fix your photos with minimal effort.
Conclusion
Glare doesn't have to ruin your best photos. With Dr.Fone's AI Photo Enhancer, you can remove glare from photos, including glasses glare, in just a few simple steps. Whether you're a casual user or a photography enthusiast, Dr.Fone makes it easy to get the glare out of a picture and restore your memories.
FAQ
-
Q: How can I easily remove glare from a photo using Dr.Fone?
A: Dr.Fone's AI Photo Enhancer uses AI to detect and remove glare automatically. Upload your photo, select the feature, and let the AI work its magic for fast, natural results without needing editing skills.
-
Q: Does Dr.Fone work on both iPhone and Android devices for glare removal?
A: Yes, Dr.Fone's AI Photo Enhancer is available and functions consistently on both iOS and Android devices.
-
Q: What if the glare in my photo is very severe? Can Dr.Fone still fix it?
A: Dr.Fone can handle most glare issues. For extreme cases, adjusting brightness/contrast beforehand may help the AI detect and correct glare more effectively.


Selena Lee
staff Editor
Generally rated4.5(105participated)