
It's frustrating to have a great photo ruined by low resolution. Whether it's a picture for your website, social media post, print ad, or personal memory, a pixelated image simply doesn't cut it in today's world. Fortunately, there are powerful solutions available & one of the best is Photoshop.
Know how to increase the resolution of the image in Photoshop, why it works, and how to improve quality without introducing blur or distortion. Plus, we'll introduce a mobile-friendly tool - Dr.Fone AI Photo Enhancer - that lets you enhance images in seconds, even if you have no editing experience.
The good news? You don't need to be a pro editor to improve image quality. This guide is your complete solution for upgrading images in both professional & personal scenarios.
Lastly, you'll understand not just how to enhance photo quality in Photoshop, but also when to choose faster AI-powered alternatives like Dr.Fone App - built specifically for mobile users.
In this article
Part 1. What Is Image Resolution and Why Is It Crucial
Before we dive into how to increase photo resolution in Photoshop, let's understand what image resolution really means.
What Does Resolution Mean?
Image resolution refers to the amount of visual detail an image holds. It is most commonly measured in:
- DPI (Dots Per Inch) - mainly used in printing
- Pixels - the total number of dots along the width and height of the image
The higher the resolution, the more detailed and sharper the image appears. Low-resolution images often look blurry, fuzzy, or pixelated when enlarged or printed.
Why Is Resolution Important?
- For Designers: Higher resolution allows more flexibility in cropping, resizing, and adjusting visuals for different screen sizes.
- For Content Creators: High-res images boost credibility and engagement on social platforms.
- For Professionals: In photography, advertising, and printing, sharp, detailed visuals are a must.
- For Mobile Viewers: On retina displays and HD phones, poor-resolution images are instantly noticeable.
Resolution defines your image's quality - and your image's quality defines the viewer's impression of your brand or content.
Part 2. Why Choose Photoshop to Enhance Photo Resolution
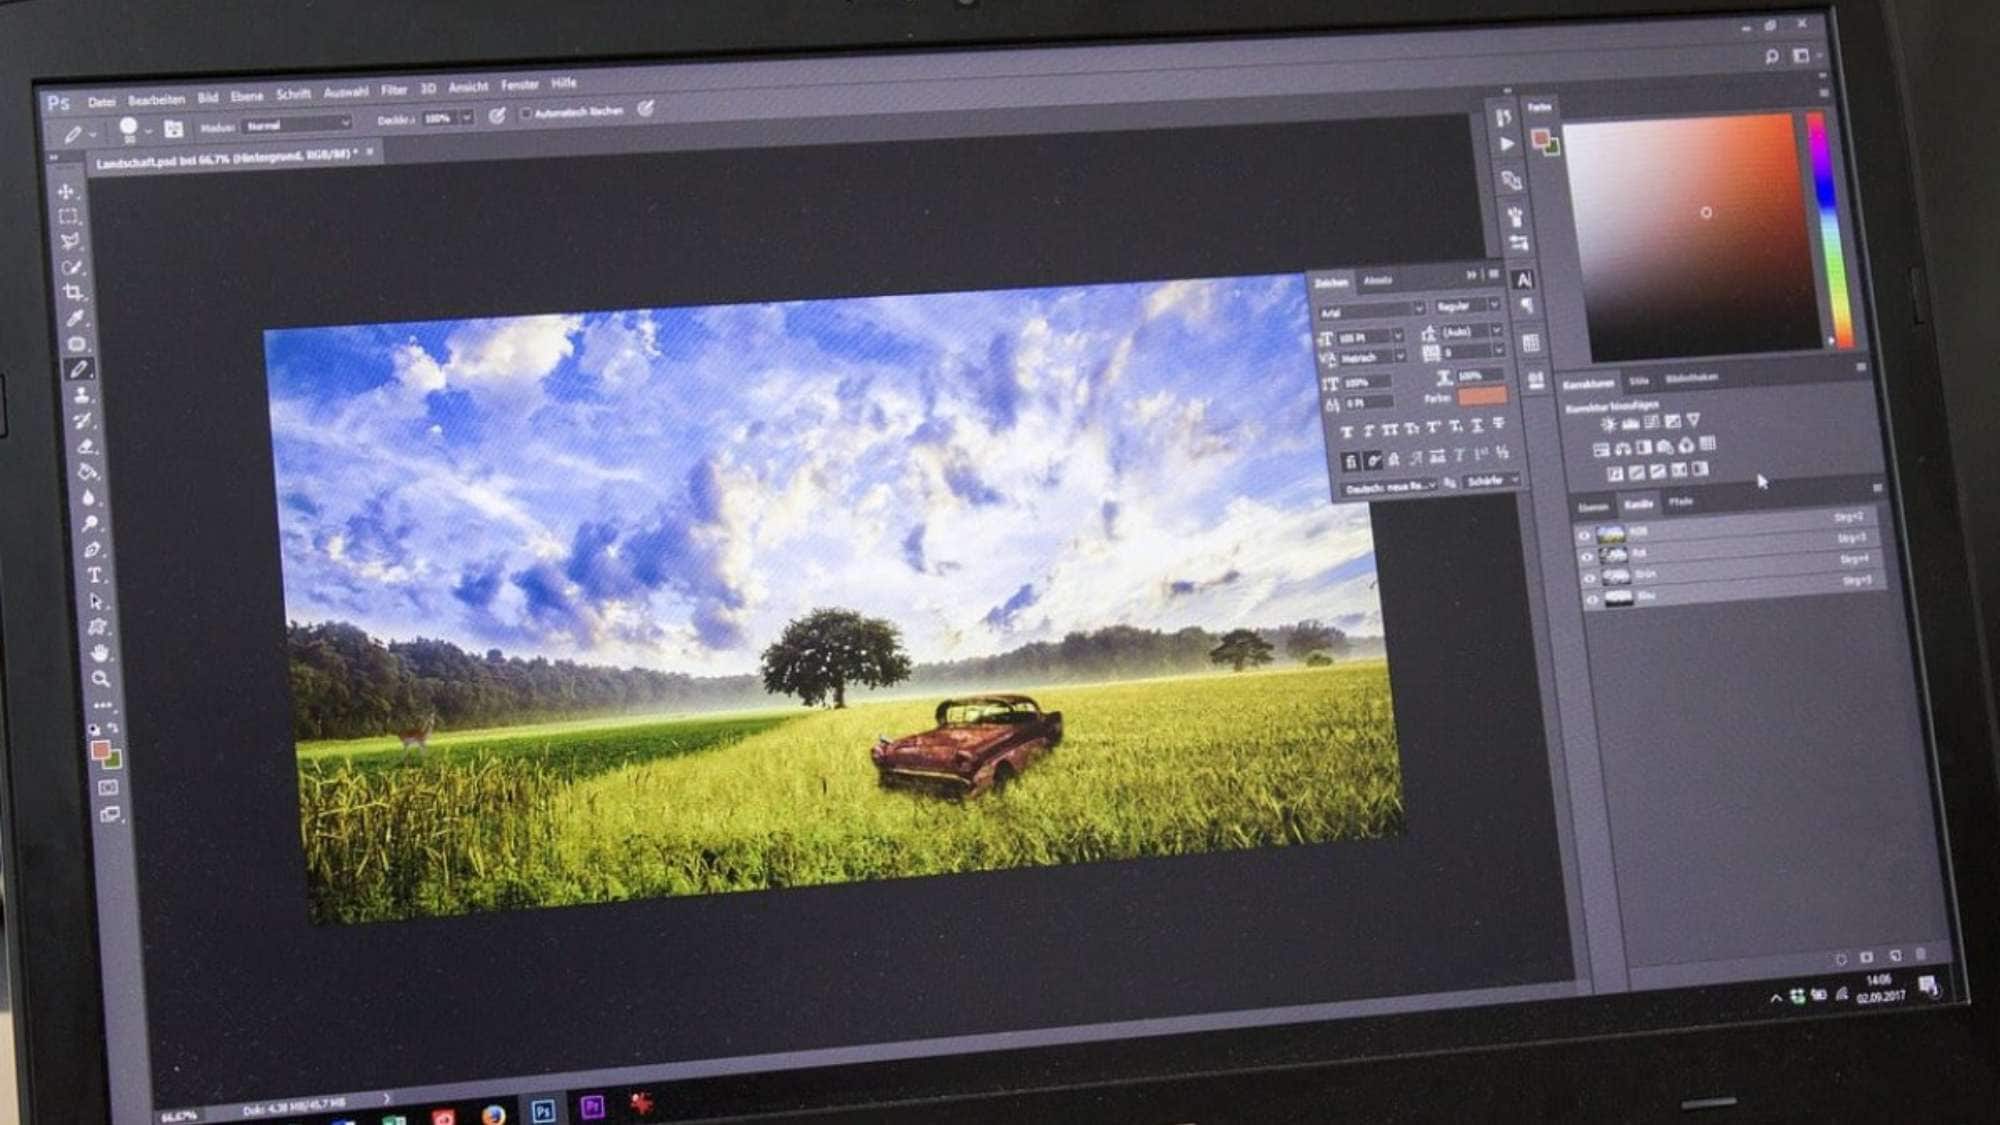
If you're searching for how to improve the resolution of a photo in Photoshop, you're already on the right track. Adobe Photoshop is trusted by millions of professionals for one reason - it works.
Here's why Photoshop remains the gold standard for resolution improvement:
Unmatched Precision
Photoshop gives you full control over dimensions, pixels, and DPI. You can fine-tune every aspect of your image.
Intelligent Algorithms
With tools like Preserve Details 2.0, Photoshop uses AI-powered enhancements to increase resolution with minimal quality loss.
Versatility
Photoshop isn't just for scaling. You can combine resolution improvements with:
- Sharpening
- Color correction
- Exposure fixes
- Artistic adjustments
Reliability
Whether you're a beginner or a pro, Photoshop's features offer consistently reliable results for print, digital, and commercial use.
Part 3. Step-by-Step: How to Increase Photo Resolution in Photoshop
Ready to improve your blurry photo? Follow these easy steps to understand how to increase photo resolution in Photoshop using the best built-in tools.
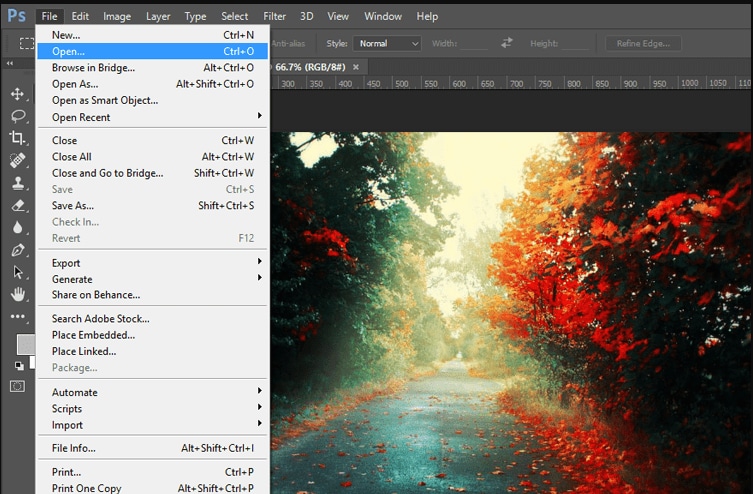
Step 1: Open the Image
- Launch Photoshop and open the image you want to upscale.
- Go to File > Open or drag and drop your file into the workspace.
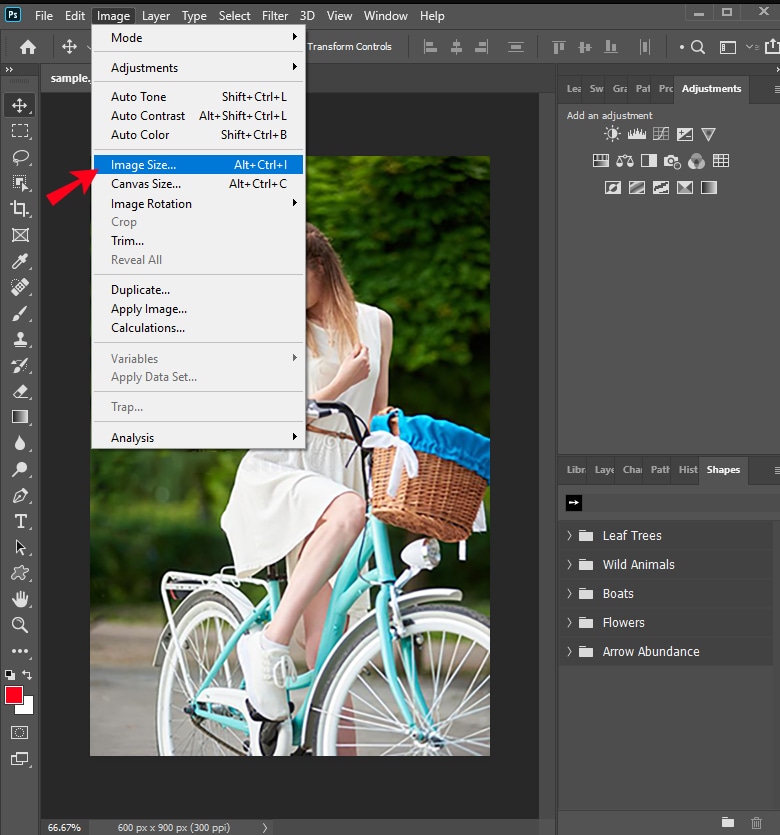
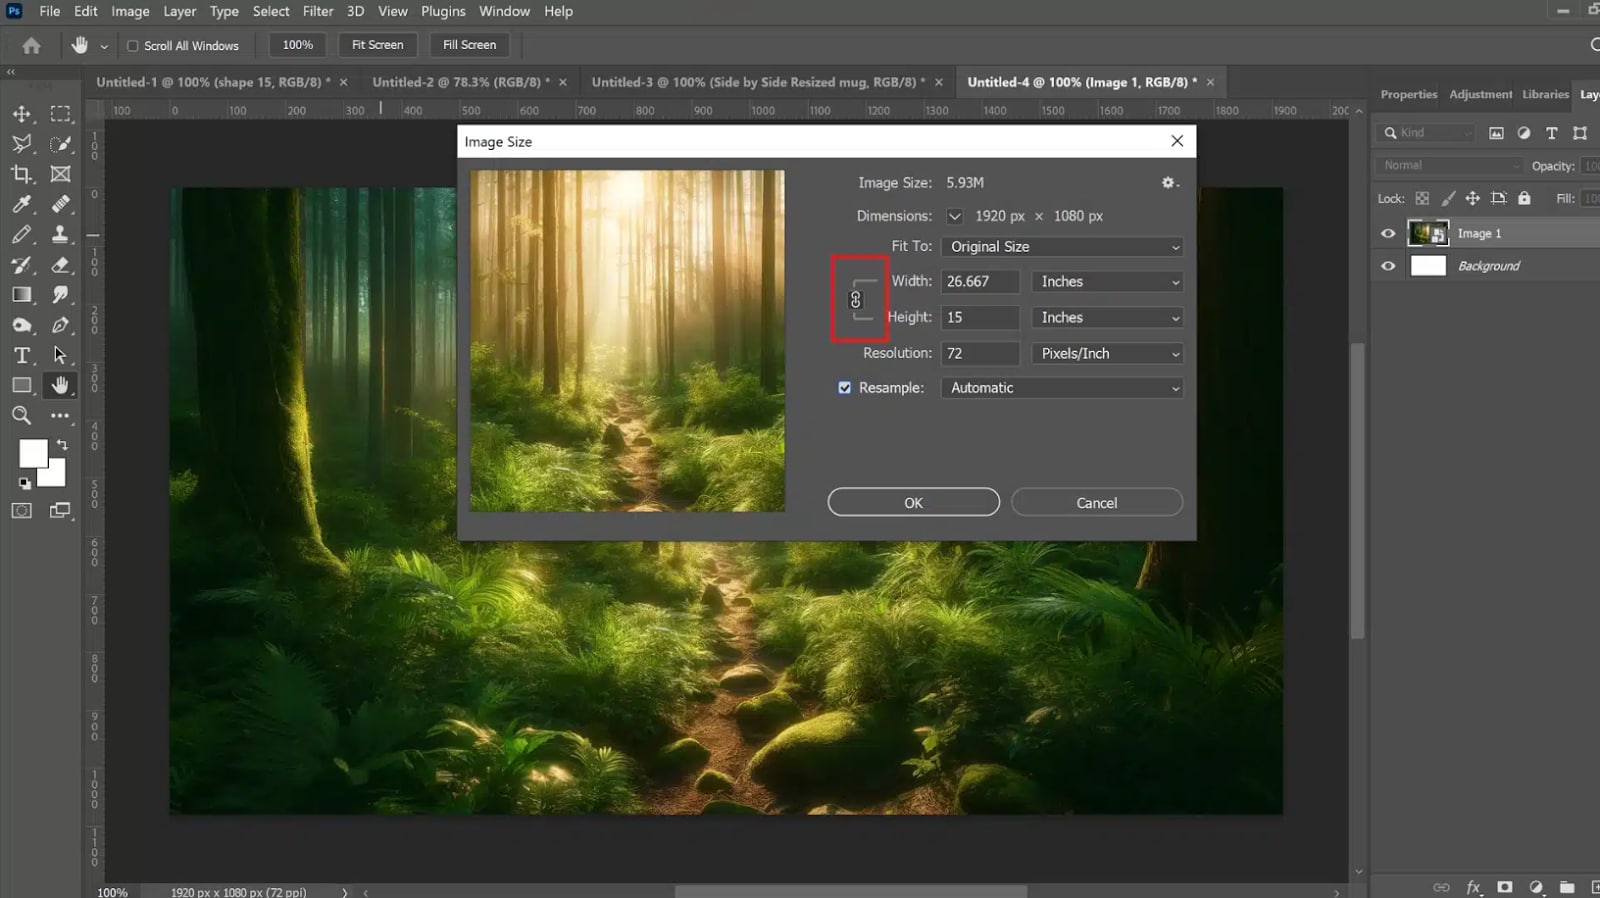
Step 2: Open Image Size Panel
- Navigate to Image > Image Size in the top menu.
- You'll see a window displaying your image's current width, height, and resolution.
Step 3: Enable "Resample"
- Check the Resample box to allow Photoshop to add new pixel data.
- From the dropdown, choose Preserve Details 2.0 for the best results.
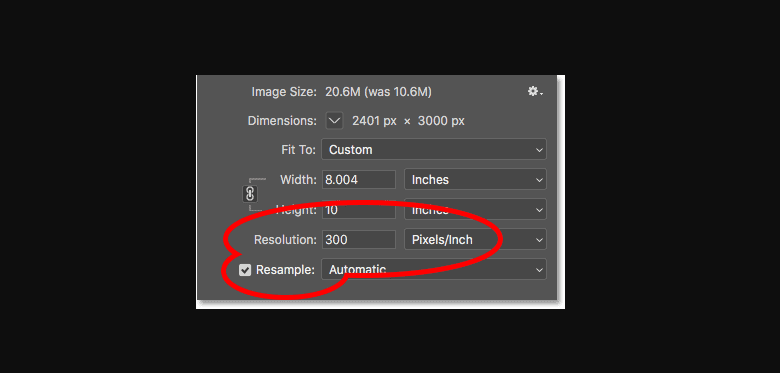
Preserve Details 2.0 uses advanced AI to fill in gaps and sharpen edges intelligently when enlarging your image.
Step 4: Adjust Size and DPI
- Increase the width and height to your desired size.
- For print, set the resolution to 300 DPI. For digital, 150 DPI or more is sufficient.
- Click OK to confirm and let Photoshop process the changes.
Step 5 (Optional): Save Your Enhanced Image
- Save the new high-res image by clicking File > Save As.
- Choose a lossless format like PNG or TIFF for best quality retention.
Part 4. Advanced Tips to Enhance Photo Quality in Photoshop
Resolution is one thing - quality is another. A photo can be high-res and still look dull if not optimized. So, how do you enhance photo quality in Photoshop after resizing?
Here are expert-level techniques:
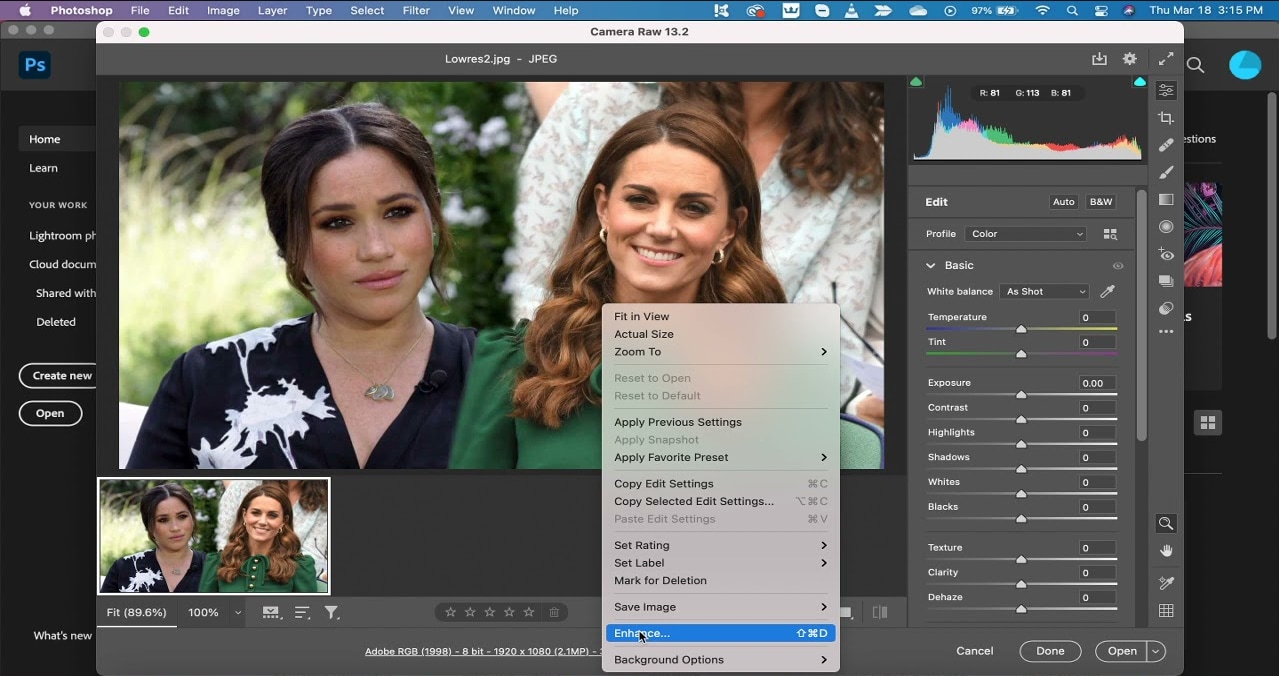
Use Camera Raw Filter
This is like having a digital darkroom at your fingertips.
- Go to Filter > Camera Raw Filter.
- Adjust clarity, contrast, sharpness, texture, and noise reduction.
- Use masking tools for localized editing.
Smart Sharpen for Clearer Edges
- Navigate to Filter > Sharpen > Smart Sharpen.
- Increase sharpness while reducing blur and halos.
Noise Reduction to Remove Grain
- Go to Filter > Noise > Reduce Noise.
- Smoothens out noisy patches caused by low light or zoom
Use Levels and Curves
- Levels adjust light and dark balance.
- Curves give you finer control over mid-tones and contrast.
- Go to Image > Adjustments > Levels/Curves
Convert Layers to Smart Objects
This allows you to apply filters non-destructively and easily tweak them later.
Part 5. Real-World Importance of High-Resolution Photos
Still wondering why all of this matters? Let's bring this into a real-world context.
Consider These Situations:
- You're posting product photos on Amazon - low resolution can lose sales.
- You're creating a resume - a low-res headshot looks unprofessional.
- You're designing an event flyer - blurry logos and images reduce impact.
- You're building a website - HD images look more polished and trustworthy.
Mobile Devices Need Better Images
Modern smartphones like iPhone 15 Pro and Samsung Galaxy S24 Ultra have stunning OLED displays. They're designed for crisp visuals. Uploading low-resolution images on such devices feels outdated and unattractive.
High resolution = higher impact, better engagement, more conversions.
Part 6. Bonus Tip: Use Dr.Fone App - AI Photo Enhancer for Instant Mobile Results
Let's face it - not everyone has Photoshop or the time to manually edit photos. That's why we love recommending the Dr.Fone App - AI Photo Enhancer - a quick, smart, and mobile-first solution.
Whether you're traveling, managing social media, or just want to improve an old photo, this tool does the heavy lifting with one tap.
Why Dr.Fone App Is a Game-Changer
- No design skills needed
- Instant results using AI-powered enhancement
- Ideal for Instagram posts, profile pictures, scanned old photos
- Available on iOS and Android
Dr.Fone App - AI Photo Enhancer (iOS & Android)
100% Automatic Photo Enhancement: 1-Click Fixes
- Sharpen Blurry Images
- Denoise & Enhance Low-Light Photos
- Naturally Enhance Portrait Details
- User-Friendly & Beginner-Perfect


How to Use Dr.Fone App - AI Photo Enhancer in 4 Simple Steps
01of 04Download the app from the App Store or Google Play Store.
02of 04Choose AI Photo Enhancer and Upload your image directly from your phone.

03of 04Tap Enhance to upscale and enhance the image.

04of 04Save the high-quality result instantly.

It's the perfect mobile companion for users who want clear, sharp photos in seconds.
Final Thoughts: Photoshop vs AI 'sWhich One Suits You?
You now know how to enhance photo quality in Photoshop, and you're explored a fast AI-based alternative in Dr.Fone app. So, which is better?
Use Photoshop If:
- You need precision editing.
- You're preparing images for professional or print work.
- You're comfortable with creative software.
Use Dr.Fone App If:
- You need quick results on mobile.
- You're editing for social media, resumes, or sharing.
- You're not tech-savvy but want great results.
There's no wrong choice. The best tool is the one that meets your needs efficiently.
🎯 Ready to give your photos a serious upgrade? Try Dr.Fone App - AI Photo Enhancer - the smarter, faster way to go from blurry to brilliant.
FAQ
-
Q: What is the best method to increase resolution in Photoshop?
A: Use Image Size > Resample > Preserve Details 2.0. It adds pixel data intelligently while preserving sharpness.
-
Q: Can I improve photo resolution in Photoshop without losing quality?
A: Yes. By combining Preserve Details with Smart Sharpen and noise reduction, you can upscale with minimal quality loss.
-
Q: How to enhance photo quality in Photoshop if it's too blurry?
A: Apply Smart Sharpen, Noise Reduction, and Camera Raw adjustments to reduce blur and enhance clarity.
-
Q: Is there a faster or mobile-friendly alternative to Photoshop?
A: Yes! Try the Dr.Fone AI Photo Enhancer. It's easy to use and delivers stunning results without needing a computer.
-
Q: Can I enhance photo resolution on iPhone or Android?
A: Absolutely. Just download the Dr.Fone app, upload your image, and let AI do the rest.


James Davis
staff Editor
Generally rated4.5(105participated)