

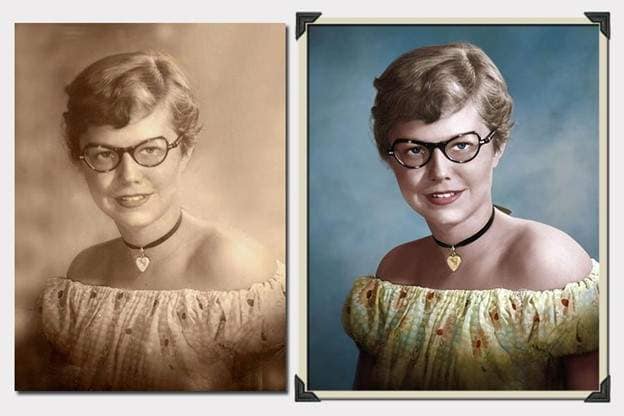
Old photographs are full of memories. However, when they are in black and white, they can seem distant and old. Adding color helps them feel more alive. You can add color to the black and white photos to bring the past closer.
Why colorize old photos? Because it helps preserve family memories. Color adds emotion and allows us to better connect with old stories. In the past, photo colorization was done manually. It took hours and required skills. Now, anyone can easily colorize a black-and-white image. Thanks to AI tools, the process is made fast and easy.
This article covers both alternatives. You will learn how to convert a black and white photo to color easily. We'll also demonstrate how tools like Dr.Fone App - Old Photo Restoration can restore old photographs before coloring them. This guide will help you improve a family portrait or a historical picture. Let's dive in.
In this article
Part 1. Understanding Photo Colorization
Before learning how to colorize black and white images, it's important to grasp what colorization is. Colorizing a photograph entails adding color to a black-and-white photo. This makes the picture appear more real and lively. However, there is more to it than simply adding color. Let us begin by discussing the difference between colorization and restoration.
Colorization versus Restoration
Colorization adds color to black and white photographs. Restoration repairs damage such as scratches or fading. Colorization is used to change the color of a black and white photo. When a photo is damaged or unclear, restore it. Both steps frequently occur together. You recover a photo first, then colorize it.
How Colourization Works
Colourizing a photograph is more than just random colouring. There is a step-by-step procedure.
- Research: Determine the colors employed during the photo's production period.
- Color Mapping: Select appropriate colors for skin, clothing, and background.
- Layer Blending: Using tools, mix the colors into the shot naturally.
Colorization challenges
Sometimes, photographs are too small or fuzzy. This complicates colorization. If you don't study, you can easily apply the wrong color. That is why you should avoid making color blunders.
AI tools can help with these issues. However, they are not always flawless. Manual tools provide you with more control, especially when you require precision.
Ethical considerations
There are also moral issues to consider. If the photograph is very ancient, it could be part of history. Changing it too much may be disrespectful. Always strive to maintain a period-appropriate appearance and atmosphere.
Also, ensure you can change it if it's a personal photo. Respecting people and their stories is always crucial. Learning how to change a black and white photo to color is enjoyable. But it must also be done with care and consideration.
Part 2. Tools & Software for Colorization
Now that you understand the procedure, let's look at tools for converting black and white photos to color. There are two major types: manual and AI-powered.
Traditional Manual Tools
These are ideal for individuals who want complete control. You can color each section by hand.
- Adobe Photoshop
- Use the Brush Tool to apply colors.
- Use Gradient Maps to match shadows.
- To fine-tune the tones, use Selective Colour.
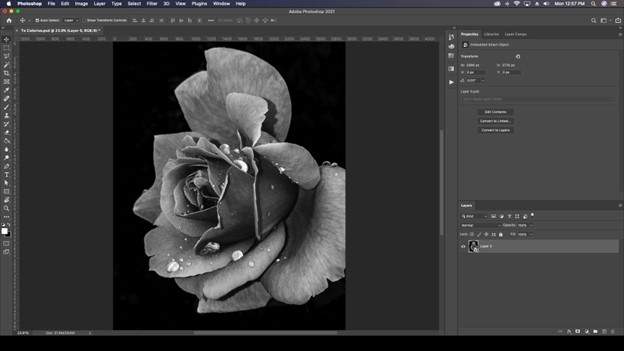
Learning how to colorize a black and white photo in Photoshop is time-consuming, but the results are impressive.
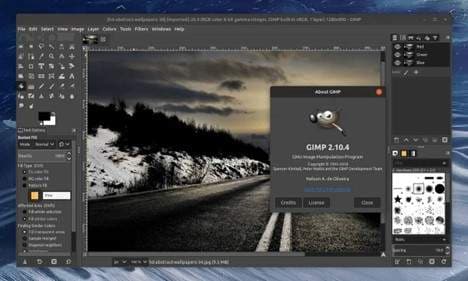
- GIMP
- Free and open-source.
- It shares many of the same features as Photoshop.
- Ideal for novices with a limited budget.
These tools are ideal for gradually and accurately converting a black-and-white photo to color.
AI-powered solutions
AI tools are quick and simple. They function in seconds with a single click. Following are some commonly used web-based and mobile applications for photo restoration:
Web-based Tools
If you have black-and-white family photographs that you'd prefer to give new life to, in terms of color, web-based software is an attractive choice. Websites such as MyHeritage InColor, Algorithmia, and VanceAI employ sophisticated AI algorithms to professionally colorize the older photographs in almost instantaneous fashion.
These are ideal for old family photos. They allow you to add color to a black-and-white image easily.
Mobile Applications
For people who enjoy editing while on-the-go, apps such as Remini and Colourize using Photomyne do an amazing job of coloring black-and-white photographs directly from your phone. Such apps become incredibly handy when you need to bring back fond family portraits while scrolling through your photo album.
Upload your shot, and AI will add color rapidly. Ideal for those with no editing abilities.
Comparison Table
| Tool Type | Best For | Key Feature | Skill Needed |
| Photoshop | Full control | Layer blending, precise brushwork | High |
| GIMP | Free option | Similar to Photoshop | Medium |
| MyHeritage | Family photos | AI-powered, quick results | Low |
| Algorithmia | Quick fixes | Online tool, no installation needed | Low |
| VanceAI | Auto color and retouch | AI enhancement | Low |
| Remini | Mobile users | Fast photo colorization | Very Low |
| Photomyne | Old photo scanning & color | All-in-one mobile app | Very Low |
AI vs. Manual Methods
- AI works faster. You can color a picture in seconds.
- The manual is more accurate. Ideal for intricate detailing and small tweaks.
- Use AI to get quick results. If you want excellence, use hand tools.
You now know how to colorize black and white photos using simple and professional techniques. Choose what is most appropriate for your needs.
Bonus Tip: Dr.Fone App - Old Photo Restoration
Restoring aged pictures enables us to preserve dear memories and be in touch with our past. Physical photographs can deteriorate over time through scratches, tears, and fading. Dr.Fone App - Old Photo Restoration offers an easy solution for fixing and enhancing current photographs so they look brand new.
The Dr.Fone App is an easy-to-use mobile software for fixing broken pictures and enhancing their clarity. It quickly eradicates scratches, tears, and stains, and is ideal for quick restorations prior to coloring using software such as Photoshop or MyHeritage. Its intuitive user-friendly nature can guide even those who lack technical knowledge through the restoration process effortlessly.
Key Features:
- Damage Repair: Automatically detects and eliminates cracks, dust, and stains to restore the photo's original appearance.
- Face Enhancement: Improves blurred faces and adjusts lighting to highlight facial details.
- Noise Reduction: Removes grainy textures, resulting in smoother and clearer photos.
- One-Click Export: Users can easily save recovered photographs to their smartphones.
Dr.Fone App - Old Photo Restoration (iOS & Android)
1-Click Restoration: Bring Old Photos Back to Glory
- Intelligent defect identification and automatic optimization
- Targeted repairs for scratches, stains, fading, and more
- Professional-grade restoration quality
- Efficient & user-friendly


Step-by-Step Guide for Restoring Old Photos with Dr.Fone App
Restoring old images with the Dr.Fone App is a simple process. Follow these simple steps to bring new life to your treasured memories:
01of 04Launch the Dr.Fone app and Access the AI Tools section
Start by launching the Dr.Fone app on your mobile device. You may receive an update prompt if this is your first app use. To use the latest version, click "Try Now." To navigate to the "AI Tools" tab, hit the toolbox symbol at the bottom of the main screen. This area includes a variety of AI-powered capabilities for enhancing and restoring photographs.

02of 04Select Old Photo Restoration
Look for and press the "Old Photo Restoration" option on the AI Tools page. The software will guide the selection of appropriate photographs for restoration, assuring the best outcomes.

03of 04Choose and Restore Your Photograph
Click "Select Photo" to access your device's gallery and select the image you want to recover. Once you've made your selection, press the "Restore" button. The program will analyze the image and automatically detect and correct flaws such as scratches, fading, and grainy textures.

04of 04Preview & Save
Once the restoration is finished, use the slider to compare the original and enhanced photos. If you are satisfied with the results, click the "Save" option to save the restored photo to your device.

Following these procedures, you may easily restore your vintage images and keep them for future generations. The Dr.Fone App combines cutting-edge AI technology with a user-friendly interface, making photo restoration accessible to anyone.
Tips & Tricks for Professional Results
Colourizing antique photos requires expertise, time, and some practice. Whether using AI or manual tools like Photoshop, these easy methods will help you get cleaner, more realistic outcomes. Try these tips before learning how to turn a black and white photo into color to resolve frequent issues and improve photo quality.
Enhance Realism
To make a black-and-white photo appear natural after adding color, use these methods:
- Adding some grains makes the new colors match the previous photo texture.
- When blending color layers in Photoshop, use settings such as "Colour" or "Soft Light."
- Use layer masks to add color to select regions. This helps to prevent untidy edges.
These techniques are essential for learning how to change a black and white photo to color without making it appear false.
Fix Damage First
Before attempting to convert a black and white photo into color, tidy up the image:
- Open the photograph in Adobe Photoshop.
- Use the Healing Brush Tool to repair cracks and stains.
- Remove dust, stains, and minor scratches.
Clean images are easy to color. This is useful for figuring out how to colorize black and white photos in Photoshop.
Troubleshooting Common Issues
Sometimes, the findings don't appear properly. Here's how to remedy that:
- To prevent color bleeding, apply masks to specific areas.
- To fix washed-out tones, use more saturated colors or adjust the contrast.
- To reduce over-saturation, lower the saturation setting in your editing tool. Keep the colors smooth and natural.
- When employing an AI tool, perform a shorthand touch-up. AI does not always get details correct.
All of these techniques can be useful when learning how do you colorize a black and white photo using clever technologies.
Advanced Post Processing
After coloring your photo, take a few final steps to polish it:
- Use Photoshop's Curves tool to fine-tune shadows and highlights.
- Use Vibrance and Saturation tools to alter the brightness and softness of your colors.
- Save the image in PNG or TIFF format for printing or sharing.
These final adjustments are essential for determining how to turn a black and white photo into color that looks natural.
Conclusion
Bringing old images back to life has never been easier. Today's tools have made it simple if you're looking to learn how to add color to a black and white photo.
You can utilize AI programs to achieve rapid outcomes or use Photoshop manually. Both teach you how to colorize and make black and white photos appear realistic. Clean your image first, repair any damage, and carefully follow the instructions. This is useful for figuring out how to convert a black and white photo to color without errors.
If you want complete control, learn how to colorize black and white photos in Photoshop. Dr.Fone App - Old Photo Restoration or MyHeritage are good apps for speed. You now understand how to make a black and white photo color. Give your old memories a new, colorful appearance!


Ahmed Absal
staff Editor
Generally rated4.5(105participated)