How to Stop Sharing Location without Notifying iMessage
Oct 13, 2025 • Filed to: Screen Lock Removal • Proven solutions
If you ever wonder how to stop sharing a location without letting them know in the iMessage, you're not alone. Many of the people who have an iPhone want to keep themselves private and not notify others about it. It might be a learned behavior when sharing a location with a friend, family member, or colleague without sending alerts.
In this guide, we will help you learn to stop sharing your location without letting the other person know in iMessage. We will also talk about an unlocking solution for your iPhone when the time comes that you can't change the permission settings of location sharing. Read on for methods that will make this easy for you step by step.
Part 1. Why do You Share Location on iPhone?
Sharing where you are on your iPhone lets your friends and family quickly find you or your device. There are many situations when it comes in handy.
- A family member's iPhone can help you find yours if you lose it.
- You can let your friends know where you are at a hangout if they can't find you.
- You can also use the Find My Location sharing tool to keep an eye on your kids if you're worried about their safety.
Part 2. Can I Stop Sharing Locations without Notifying?
You can stop notifying iMessage where you are without telling them however there is a twist.
You can stop sharing your location without notifying iMessage in several ways.
Putting your iPhone into "Airplane Mode" or turning off Location Services in the Settings app might be all you need to do this.
You can stop telling iMessage where you are without telling them, but it's important to know that when you start telling people again, the iMessage app will let them know. So, iMessage users won't be told right away that you stopped sharing your location, but they will find out in the end.
Part 3. Solutions to iPhone Stop Sharing Location without Notifying
Sometimes, it's great that one's location can be shared through iMessage, but other times, you wish to just turn it off without letting the other party know.
Fortunately, there are several methods you can use to do this on your iPhone. The following are methods that can help you stop sharing locations without notifying the other person.
Solution 1: Use Another iOS or iPadOS Device as Your Location
If you have more than one device, you can use another Apple device to set a different location for where you are when people are tracking your location using iMessage. This is helpful in cases where you want to go somewhere but make them believe you are still at home.
How to stop sharing location without notifying:
Step 1: Locate Settings in the device that you will use as your location.
Step 2: click on your Apple and your name at the top.
Step 3: Select Find My.
Step 4: Choose to Use This iPhone/iPad as My Location.

Solution 2: Enable Airplane Mode
Putting your phone into airplane mode is a quick and easy way to stop sharing your location with other people. This turns off all wireless links, like Wi-Fi and Bluetooth, so the chosen service won't be able to see where your phone is right now.
Even though your iPhone stopped sharing location without notifying anyone through iMessage, someone checking the Find My app will see that your location was last updated a while ago instead of showing “Live.”
How to stop sharing location without notification on iPhone:
Step 1: Swipe down from the top edge of the screen to open the Control Center.
Step 2. Click on the Airplane Mode icon.
Step 3: Switch the toggle ON.

Solution 3: Turn Off Location Services
To stop sharing your location quickly and without notifying, turning off Location Services is a great choice. When this setting is off, apps and others can no longer track your live location.
How to stop sharing location on iPhone without notification:
If you want to prevent sharing your location without letting the people around know, then switching Location Services off is quite a good option.
Step 1: Go to Settings and Scroll down.
Step 2: After selecting Privacy, select Location Services.
Step 3: Turn off Location Services.

Solution 4: Stop Sharing Location via Find My App
You can also use the Find My app to prevent sharing your location with specific people. That's a perfect way to discontinue without affecting some individuals, though they might become aware by manually checking.
How to stop sharing location without notifying to the recipient
Step 1: First, you need to open the Find My app and click on the People menu.

Step 2: Choose the people to stop sharing your location with.
Step 3: Scroll down and click on Stop Sharing My Location.

Solution 5: Block and Unblock the Contact
Blocking someone and then instantly unblocking them is a creative approach to stop sharing your location without knowing them. This method prevents notifications, but if they check the Find My app, they may notice your name is missing.
How to stop sharing location without notifying the other person:
Step 1: Open the Contacts application. Locate the contact to whom you want to stop sharing your location.
Step 2: Tap their name to open their contact details.
Step 3: Scroll down and tap Block Caller.
Step 4: After a second, tap Unblock Caller.

Bonus Part: How to Turn Off Shared Location without Notifying using Dr.Fone
You may need a tool like Dr.Fone - Screen Unlock (iOS) to first unlock your iPhone if it is locked or if you can't get to the location settings. Dr.Fone gives you an easy way to bypass any screen lock, so you can get back in and stop sharing locations without notifying.

Dr.Fone - Screen Unlock (iOS)
Turn Off Shared Location without Notifying.
- Simple, click-through, process.
- Unlock screen passwords from all iPhones and iPads.
- No tech knowledge is required, everybody can handle it.
- Supports the latest iOS version fully!

With Dr.Fone - Screen Unlock (iOS), here's how to get into your iPhone:
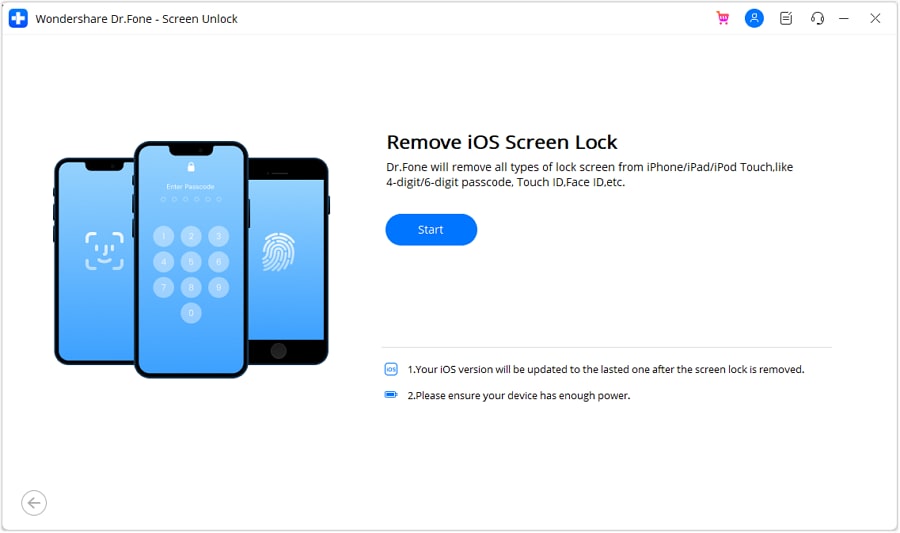
Step 1: Start by running Wondershare Dr.Fone on your Mac or Desktop. Choose Screen Unlock from the tool list. After that, choose iOS devices to start the process.

Step 2: If you are asked, click on Unlock iOS Screen to start unlocking your iPad. In this step, the software gets ready to remove the screen lock.

Step 3: To start, press the Start button. Make sure your iPad has enough power so that the unlocking process doesn't get interrupted.
Step 4: To get into Recovery Mode on your iPad, follow the steps shown on the screen. Click on Try DFU Mode for more help if this doesn't work.

Step 5: Once in Recovery Mode, the software will automatically detect your iPad’s model and system version. Check that the information is correct, then click Start to proceed.

Step 6: The necessary iOS firmware will start downloading. Monitor the progress bar. If the download is slow, click Copy to manually download the file using the provided link.

Step 7: After the firmware is verified, click Unlock Now to start unlocking your device.

Step 8: A prompt will appear for confirmation. Enter the code shown on-screen, then press Unlock to finalize the screen lock removal.
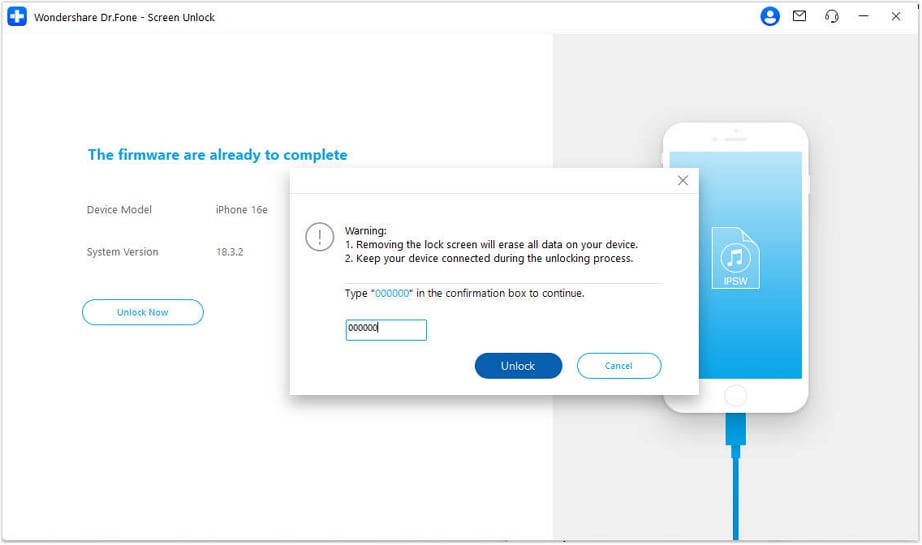
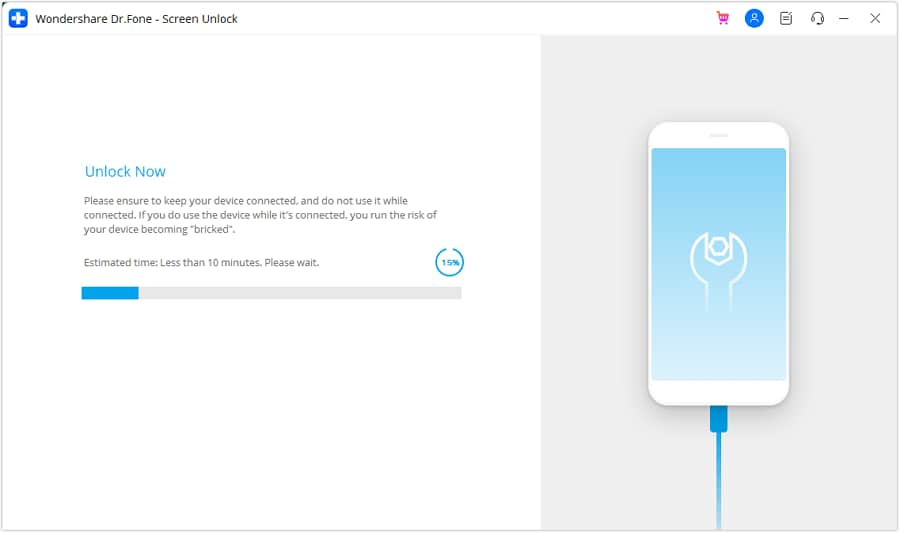
Step 9: Ensure your device stays connected during the firmware installation. Disconnecting could cause issues, so watch the progress carefully.
Step 10: Once the unlocking is complete, click Done. If your iPad remains locked, click Try Again to repeat the process.

Conclusion:
If you want to know how to stop sharing locations without notification on an iMessage, then you have several options to keep things simple. Among the solutions you would need to do, it could be disabling your location services, turning off iMessage sharing, or using airplane mode to exercise control over your privacy.
This is especially important when you are locked out of your iPhone and must have an assured way to gain access by stopping location sharing from anyone else's knowledge. Keep control of your location-sharing options with these simple steps, and keep yourself safe.
FAQs
iPhone Unlock
- Access Locked iPhone
- 1. Reset Locked iPhone Without iTunes
- 2. Erase Locked iPhone
- 3. Get Into Locked iPhone
- 4. Factory Reset Locked iPhone
- 5. Reset Locked iPhone
- 6. iPhone Is Disabled
- 7. Fix iPhone Unavailable Issue
- 8. Forgot Locked Notes Password
- 9. Unlock Total Wireless Phone
- 10. Review of doctorSIM Unlock
- iPhone Lock Screen
- 1. Lock Apps on iPhone
- 2. Bypass iPhone Passcode
- 3. Unlock Disabled iPhone Without PC
- 4. Disable One More Minute Screen Time
- 5. Unlock iPhone Passcode Screen
- 6. Reset iPhone Password
- 7. Auto Lock Never on iPhone
- 8. Remove Carrier Lock/SIM Restrictions
- 9. Get iMei Number on Locked iPhone
- 10. Add a New Face ID
- 11. iPhone Passcode Expired Pop-Up
- 12. Control Display Rotation
- 13. Fix iPhone is Disabled Connect to iTunes
- 14. Fix Turn Passcode Off Greyed Out
- 15. Get iPhone out of Demo Mode
- 16. Unlock Unresponsive Screen
- 17. iPhone Ask for Passcode After Reset
- Remove iCloud Lock
- 1. Unlock an iPhone 7 Plus iCloud
- 2. iOS 18 iCloud Unlock
- 3. iOS 26 iCloud Unlock
- 4. Crack iCloud-Locked iPhones to Sell
- 5. Jailbreak iCloud Locked iPhone
- 6. What To Do If You Bought A Locked iPhone?
- 7. Fix iPhone Unavailable No Erase Option
- 8. Find iCloud Email Address on Apple Device
- 9. Broque Ramdisk iCloud Bypass
- Unlock Apple ID
- 1. Remove Payment Method on iPhone
- 2. Create a New Apple ID Account
- 3. Change Apple ID on iPad
- 4. Change Your Apple ID Password
- 5. Apple ID Not Active
- 6. Fix Wrong Apple ID Issue on iPhone
- 7. Fix This Person Is Not Active
- 8. New iCloud Terms and Conditions
- 9. Fix Apple ID Account Unavailable
- 10.Find Apple ID by IMEI
- 11. Unlink 2 iPhones with the Same Apple ID
- 12. Reset Password at appleid.apple.com
- 13. App Store Keep Asking for Password
- 14. Find Apple ID Password No Reset
- 15. Trusted Devices List Not Available
- Remove SIM Lock
- 1. Unlock iPhone Using Unlock Chip
- 2. Unlock iPhone for Free
- 3. Unlock iPhone Online
- 4. Factory Unlock iPhone
- 5. SIM Unlock iPhone
- 6. Unlock AT&T iPhone
- 7. Unlock iPhone with IMEI Code
- 8. Unlock iPhone without SIM Card
- 9. Unlock Cricket iPhone
- 10. Unlock iPhone with/without SIM Card
- 11. Unlock T-Mobile iPhone
- 12. Unlock Verizon iPhone
- 13. iPhone IMEI Checker
- 14. Unlock Xfinity iPhone
- 15. Unlock iPhone From The Carrier
- 16. Turbo SIM iPhone
- 17. Get the Sprint Unlock Codes
- 18. Unlock a Sprint Phone
- 19. Fix When iPhone Says No Sim
- Unlock iPhone MDM
- 1. Remove MDM from iPhone
- 2. Remote Management on iPhone
- 3. MDM VS MAM
- 4. Top MDM Bypass Tools
- 5. IoT Device Management
- 6. Unified Endpoint Management
- 7. Enterprise Mobility Management
- 8. Top 10 Proxy Websites
- 9. Hindilinks4u Alternatives
- Unlock Screen Time Passcode
- 1. Reset Screen Time Passcode
- 2. Turn Off Screen Time without Passcode
- 3. Screen Time Passcode Not Working
- 4. Disable Parental Controls
- 5. Bypass Screen Time on iPhone Without Password
- 6. Delete Screen Time History on iPhone
- 7. Turn Off Downtime on iPhone
- 8. Download Age Restricted Videos
- MDM Unblock Games/Websites
- 1. Basketball Stars Game Unblocked
- 2. Play Getaway Shootout Unblocked
- 3. Play Build Now GG Unblocked
- 4. BitLife Unblocked
- 5. 10 Best Unblocked Anime Websites
- 6. Best Unblocked Game Websites
- 7. 1v1 LOL Unblocked
- 8. Get Poly Track Unblocked
- 9. Music Websites Unblocked
- 10. Spotify Unblocked
- 11. Snow Rider 3D Unblocked
- Unlock Apple Watch
- Unlock iPod Touch
- ● Manage/transfer/recover data
- ● Unlock screen/activate/FRP lock
- ● Fix most iOS and Android issues
- Unlock Now Unlock Now Unlock Now



James Davis
staff Editor