
Touch ID Requires Passcode When iPhone Restarts: Why and How to Fix

Jun 11, 2026 • Filed to: Screen Lock Removal • Proven solutions
 TL;DR:
Apple enforces a passcode requirement instead of Touch ID when an iPhone restarts, remains locked for over 48 hours, or detects five failed fingerprint attempts, though users can bypass a forgotten code by erasing the device via iTunes, iCloud, iOS 15.2 lock screen features, or Dr.Fone - Screen Unlock.
● Restoring the locked device through iTunes, the iCloud website, or the iOS 15.2 on-screen erase button will permanently wipe all local data, requiring a previous backup to restore your files.
● Troubleshooting intermittent Touch ID prompts by resetting feature toggles or re-registering fingerprints is only applicable if you currently know the passcode to authenticate within the settings menu.
● Removing the screen lock via Dr.Fone - Screen Unlock (iOS) requires connecting the device to a PC or Mac, manually placing it into Recovery or DFU Mode, and downloading the corresponding iOS firmware.
Ask AI for a summary
 ChatGPT
 Perplexity
 Gemini
 Claude
 Grok
Grok
If you've never set a passcode but after an iOS update, your iPhone keeps asking for one, it can be frustrating. You may need assistance unlocking your phone. Why does your touch ID require a passcode when your iPhone restarts? We're here to help you fix it.
Your iPhone has a passcode that was likely inactive before, and there could be various reasons for this, like forgetting the passcode or someone changing it as a joke. While being locked out is inconvenient, there are multiple ways to regain access. In this article, we will discuss the best ways to get around the fact that Touch ID requires your passcode when your iPhone restarts. This will let you use your phone openly again.
- Part 1: Why does Touch ID need a PIN when the iPhone starts up again?
- Part 2: Problems with "Touch ID Requires Passcode" Fixed
- Method 1: Use iTunes to restore your iPhone and unlock it
- Method 2: Regain Access via iCloud (No PC Needed)
- Method 3: Remove Data and Reset Without Using a Computer with iOS 15.2
- Method 4: Keep Your iOS Updated for Optimal Touch ID Performance
- Method 5: Reset Touch ID for a Fresh Start
- Method 6: Re-register Your Fingerprints for Better Accuracy

- Method 7. Use Dr.Fone - Screen Unlock (iOS) to Unlock the Touch ID-Recommended
Part 1: Why does Touch ID need a PIN when the iPhone starts up again?

"Whenever I restart my iPhone, I see a message on the lock screen that says Touch ID requires passcode." Why do you need to enter your passcode to use Touch ID? Since iOS 9, Apple updated the rules governing Touch ID. Here's why you're asked to enter a passcode:
- iPhone Restarted or Powered Off: If your iPhone has been turned off or restarted
- Device Unlocked After 48 Hours: If your iPhone has not been unlocked within 48 hours
- Failed Fingerprint Attempts: Five consecutive failed fingerprint attempts will lead to a prompt to enter the passcode.
- Remote Lock from iCloud: If you receive a remote lock command through iCloud, Touch ID requires a passcode.
- Emergency SOS On: Pressing Emergency SOS will set off an automatic response.
- Fingerprint Changes: If you enrolled or deleted a fingerprint from your device, you'll need to enter your passcode.
- Inactivity with Touch ID: If you haven't used Touch ID to unlock your screen for more than 8 hours, Touch ID requires a passcode
- Passcode Not Used in 6 Days: If your passcode hasn’t been used to unlock the iPhone in the last 6 days, Touch ID requires a passcode. It will not work until the passcode is entered.
Part 2: Problems with "Touch ID Requires Passcode" Fixed
Finally, you understand why your touch ID requires your passcode when your iPhone restarts. We will talk about different ways to get past iPhone passcodes in this section.
Method 1: Use iTunes to restore your iPhone and unlock it
If Touch ID requires passcode when iPhone restarts and you can't remember it, you can use iTunes to restore your device. This method will allow you to regain access to your iPhone, but it comes with a drawback: all data on your iPhone will be erased, leaving it as a blank slate. Therefore, it's crucial to back up your data beforehand to avoid losing important information.
Step 1: Install and Launch iTunes
Initially, confirm that iTunes is installed on your Windows computer to the most recent version. It's available for download on the Apple official page. Then, connect your iPhone to your computer using a genuine USB cable.
Step 2: Select Your Device and Restore
Once iTunes detects your iPhone, click on the device icon, go to the Summary tab, and select Restore iPhone. Confirm the action, but be cautious – if your iPhone disconnects during the process, it could lead to complications.
Step 3: Complete the Restoration
After the restoration finishes, your iPhone will restart. You can now access your iPhone without entering a passcode.

Method 2: Regain Access via iCloud (No PC Needed)
If using iTunes feels too complicated, you can opt for iCloud, which also erases your iPhone’s data but offers the added benefit of clearing any software bugs. This method can help if Touch ID requires your passcode when iPhone restarts and you forgot the passcode.
Step 1: Access iCloud Website: Open your browser and head to iCloud’s official website.
Step 2: Sign in to iCloud: Enter your Apple ID and password to log in.
Step 3: Use Find My iPhone: From the dashboard, select Find My iPhone.
Step 4: Choose Your iPhone: Select your iPhone from the list of devices that appear.
Step 5: Erase iPhone: Click on Erase iPhone to begin the restoration process. Once completed, you can set up a new passcode and Touch ID.

Method 3:Remove Data and Reset Without Using a Computer with iOS 15.2
If you've tried entering your passcode several times and still can’t unlock your iPhone, iOS 15.2 offers a unique solution. This update allows you to erase and reset a locked iPhone without needing a computer, which can come in handy if Touch ID requires passcode when iPhone restarts but forgot passcode.
Step 1: Press Erase Button: If your passcode attempts have been unsuccessful, you will see the Erase iPhone option pop up.
Step 2: Select Erase iPhone: Tap the Erase iPhone option and confirm your decision.
Step 3: Log Out of Your Apple ID: Sign out of your Apple ID and select Erase to remove all settings and data from the device.
Step 4: Set Up Your Device: After the process is complete, your iPhone will restart. You can then set a new passcode and restore your data from your backup.

Important Reminders
- Always back up your data before restoring or erasing your iPhone.
- If still, your Touch ID requires a passcode when the iPhone restarts, so ensure your device has the latest iOS update installed.
- Be cautious when attempting to bypass your iPhone, as it may lead to data loss or even permanent damage to your device.
Method 4: Keep Your iOS Updated for Optimal Touch ID Performance
One effective way to address Touch ID requires a passcode when the iPhone restarts or if it’s not functioning properly is by updating your iOS. Here's how to ensure your device is up to date:
Steps: Go to Settings, select General, and click on Software Update. When an update is available, install it by following the on-screen prompts.
Method 5: Reset Touch ID for a Fresh Start
If your Touch ID requires your passcode when the iPhone restarts or occasionally asks for it even without a reboot, resetting it might solve the problem. Follow these steps:
Step 1: Disable Touch ID Functions
- Open Settings on your iPhone or iPad.
- Go to Touch ID & Passcode.
- Enter your passcode when prompted, then toggle off iPhone Unlock, Apple Pay, and iTunes & App Store.

Step 2: Re-enable Touch ID Functions
- Return to Settings and select Touch ID & Passcode.
- After entering your passcode again, switch on iPhone Unlock, Apple Pay, and iTunes & App Store.

Method 6: Re-register Your Fingerprints for Better Accuracy
If you’re still experiencing issues after resetting Touch ID, removing and re-adding your fingerprints may help, especially when Touch ID requires a passcode when the iPhone restarts. Follow these steps:
Step 1: Remove Existing Fingerprints
- Select Touch ID & Passcode from the Settings menu.
- Enter your passcode when asked, and a list of your registered fingerprints will appear.
- Tap each fingerprint and select Delete Fingerprint.
Step 2: Restart and Re-add Fingerprints
- Restart your iPhone after deleting the fingerprints.
- After entering your passcode, return to Settings, choose Touch ID & Passcode, and finally, press Add Fingerprint.
- Follow the prompts to register your fingerprint.

Method 7. Use Dr.Fone - Screen Unlock (iOS) to Unlock the Touch ID-Recommended
When Touch ID requires a passcode when the iPhone restarts, one of the best ways to bypass it without entering the passcode is by using Dr.Fone - Screen Unlock (iOS). This tool is a powerful third-party solution for unlocking iPhones, iPads, and iPods. Whether your iPhone is disabled, you forgot your iPhone passcode, or the screen is frozen or broken, this software offers a way to unlock your device. It also allows you to remove Apple ID, Screen Time, or MDM restrictions without a passcode. With its simple and straightforward steps, you can unlock your iPhone on your own, right from home.
Unlocking your iPhone or iPad when Touch ID prompts for a passcode after a restart can be challenging, especially if you still need to remember the code. Fortunately, tools like Wondershare Dr.Fone - Screen Unlock (iOS) offer a solution. Here's a step-by-step guide to help you regain access to your device:
Dr.Fone - Screen Unlock (iOS)
Fix Touch ID Requires Passcode When iPhone Restarts.
- Simple, click-through, process.
- Unlock screen passwords from all iPhones and iPads.
- No tech knowledge is required, everybody can handle it.
- Supports the latest iOS version fully!


Step 1: Launch Wondershare Dr.Fone on PC
Start by launching Wondershare Dr.Fone on your PC or Mac. Pick Screen Unlock from the Toolbox menu. Then, choose the option specifically for iOS devices to get started.

Step 2: Select the iOS Unlock Option
When prompted, select "Unlock iOS Screen" to begin unlocking your iPad.This will prepare the software to bypass the lock on your device.

Step 3: Start the Unlocking Process
Press ""Start"" to kick off the unlocking procedure. Ensure your iPad has enough battery charge to avoid interruptions during the process.

Step 4: Enter Recovery Mode on Your iPad
Follow the on-screen instructions to place your iPad into Recovery Mode. If you encounter issues, opt for the ""Try DFU Mode"" button to access additional guidance.

Step 5: Verify Your Device Information
Once in Recovery Mode, the tool will automatically detect your iPad’s model and system version. Verify that the details are accurate, then click ""Start"" to continue.

Step 6: Download the Necessary iOS Firmware
Keep an eye on the progress bar as the required iOS firmware downloads. If the download takes too long, you can manually download it by clicking the ""Copy"" button and using the provided link.

Step 7: Confirm Firmware and Proceed with Unlocking
The download of the firmware will be followed by the tool's verification. After verification, press ""Unlock Now"" to begin the unlocking procedure for your device.

Step 8: Confirm Your Unlocking Action
A confirmation prompt will appear. Enter the displayed code to verify, then hit ""Unlock"" to finalize the process and remove the screen lock from your iPad.

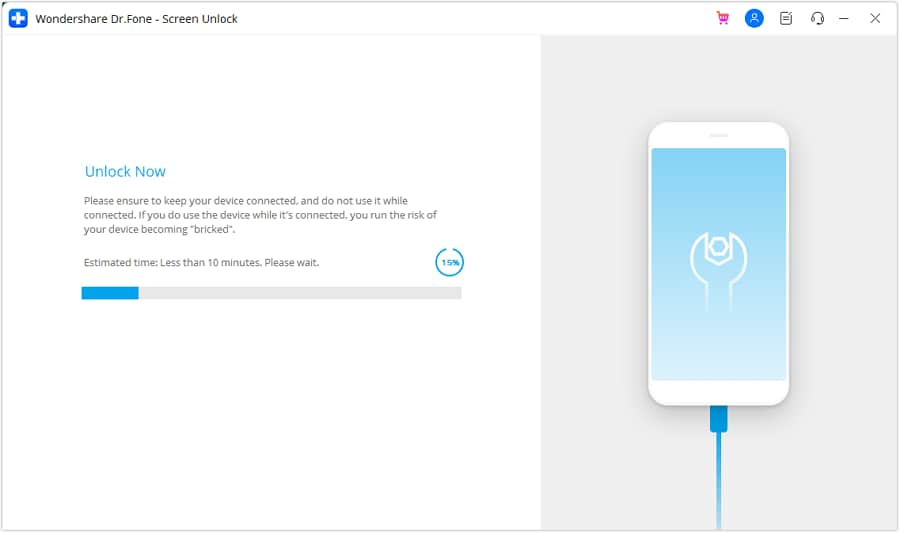
Step 9: Monitor Firmware Installation
During the firmware installation, ensure your device remains connected. Disconnecting during this phase could cause complications, so watch the progress carefully.
Step 10: Complete the Unlocking Process
To conclude the process, click "Done" once the unlock is finished.If your device remains locked for any reason, select ""Try Again"" to repeat the process and unlock your iPad.

Conclusion:
When you restart your iPhone, you will always see the message "Touch ID requires passcode." There are a few ways to fix this. The problem can be fixed by doing simple resets, like turning off and on Touch ID or clearing fingerprint info. However, Dr.Fone - Screen Unlock (iOS) is the best way to quickly and safely get into your device if you've lost your passcode. If you're having trouble with the "Touch ID requires passcode when iPhone restarts" message or are just looking for a reliable way to get around it, this tool is a great choice.


iPhone Unlock
- Access Locked iPhone
- 1. Reset Locked iPhone Without iTunes
- 2. Erase Locked iPhone
- 3. Get Into Locked iPhone
- 4. Factory Reset Locked iPhone
- 5. Reset Locked iPhone
- 6. iPhone Is Disabled
- 7. Fix iPhone Unavailable Issue
- 8. Forgot Locked Notes Password
- 9. Unlock Total Wireless Phone
- 10. Review of doctorSIM Unlock
- iPhone Lock Screen
- 1. Lock Apps on iPhone
- 2. Bypass iPhone Passcode
- 3. Unlock Disabled iPhone Without PC
- 4. Disable One More Minute Screen Time
- 5. Unlock iPhone Passcode Screen
- 6. Reset iPhone Password
- 7. Disable iOS Call Recording Notification
- 8. Remove Carrier Lock/SIM Restrictions
- 9. Get iMei Number on Locked iPhone
- 10. Add a New Face ID
- 11. iPhone Passcode Expired Pop-Up
- 12. Control Display Rotation
- 13. Fix iPhone is Disabled Connect to iTunes
- 14. Fix Turn Passcode Off Greyed Out
- 15. Get iPhone out of Demo Mode
- 16. Unlock Unresponsive Screen
- 17. iPhone Ask for Passcode After Reset
- Remove iCloud Lock
- 1. Unlock an iPhone 7 Plus iCloud
- 2. iOS 18 iCloud Unlock
- 3. iOS 26 iCloud Unlock
- 4. Crack iCloud-Locked iPhones to Sell
- 5. Jailbreak iCloud Locked iPhone
- 6. What To Do If You Bought A Locked iPhone?
- 7. Fix iPhone Unavailable No Erase Option
- 8. Find iCloud Email Address on Apple Device
- 9. Broque Ramdisk iCloud Bypass
- Unlock Apple ID
- 1. Remove Payment Method on iPhone
- 2. Create a New Apple ID Account
- 3. Change Apple ID on iPad
- 4. Change Your Apple ID Password
- 5. Apple ID Not Active
- 6. Fix Wrong Apple ID Issue on iPhone
- 7. Fix This Person Is Not Active
- 8. New iCloud Terms and Conditions
- 9. Fix Apple ID Account Unavailable
- 10.Find Apple ID by IMEI
- 11. Unlink 2 iPhones with the Same Apple ID
- 12. Reset Password at appleid.apple.com
- 13. App Store Keep Asking for Password
- 14. Find Apple ID Password No Reset
- 15. Trusted Devices List Not Available
- Remove SIM Lock
- 1. Unlock iPhone Using Unlock Chip
- 2. Unlock iPhone for Free
- 3. Unlock iPhone Online
- 4. Factory Unlock iPhone
- 5. SIM Unlock iPhone
- 6. Unlock AT&T iPhone
- 7. Unlock iPhone with IMEI Code
- 8. Unlock iPhone without SIM Card
- 9. Unlock Cricket iPhone
- 10. Unlock iPhone with/without SIM Card
- 11. Unlock T-Mobile iPhone
- 12. Unlock Verizon iPhone
- 13. iPhone IMEI Checker
- 14. Unlock Xfinity iPhone
- 15. Unlock iPhone From The Carrier
- 16. Turbo SIM iPhone
- 17. Get the Sprint Unlock Codes
- 18. Unlock a Sprint Phone
- 19. Fix When iPhone Says No Sim
- Unlock iPhone MDM
- 1. Remove MDM from iPhone
- 2. Remote Management on iPhone
- 3. MDM VS MAM
- 4. Top MDM Bypass Tools
- 5. IoT Device Management
- 6. Unified Endpoint Management
- 7. Enterprise Mobility Management
- 8. Top 10 Proxy Websites
- 9. Hindilinks4u Alternatives
- Unlock Screen Time Passcode
- 1. Reset Screen Time Passcode
- 2. Turn Off Screen Time without Passcode
- 3. Screen Time Passcode Not Working
- 4. Disable Parental Controls
- 5. Bypass Screen Time on iPhone Without Password
- 6. Delete Screen Time History on iPhone
- 7. Turn Off Downtime on iPhone
- 8. Download Age Restricted Videos
- MDM Unblock Games/Websites
- 1. Basketball Stars Game Unblocked
- 2. Play Getaway Shootout Unblocked
- 3. Play Build Now GG Unblocked
- 4. BitLife Unblocked
- 5. 10 Best Unblocked Anime Websites
- 6. Best Unblocked Game Websites
- 7. 1v1 LOL Unblocked
- 8. Get Poly Track Unblocked
- 9. Music Websites Unblocked
- 10. Spotify Unblocked
- 11. Interstellar Proxy Review
- Unlock Apple Watch
- Unlock iPod Touch
- ● Manage/transfer/recover data
- ● Unlock screen/activate/FRP lock
- ● Fix most iOS and Android issues
- Free Download Free Download Free Download


Daisy Raines
staff Editor