

 TL;DR:
Choose the lowest upscale factor that meets your required dimensions: 2x for moderate enlargement, 4x for substantially larger output, and 8x when 4x is not enough.
- 2x creates 4 times the total pixels, 4x creates 16 times, and 8x creates 64 times.
- Higher factors generate more estimated detail and may make artifacts, softness, or artificial textures more visible.
- Dr.Fone App supports 2x, 4x, and 8x enlargement on iOS and Android, with comparison before saving.
Ask AI for a summary
 ChatGPT
 Perplexity
 Gemini
 Claude
 Grok
Grok
Photos can lose clarity when small subjects are cropped heavily or captured from a distance. Upscaling increases image dimensions, but higher factors require software to generate more pixel information rather than recover detail that was never captured.
This guide compares 2x, 4x, and 8x scale factors to help you choose the right level for your source image and intended output. You’ll learn how dimensions, pixel growth, and source quality affect the result. It also explains how Dr.Fone App handles image upscaler 8x tasks directly on your phone while helping you review the enhanced result before saving.
- Part 1. What Do 2x, 4x, and 8x Image Upscaling Mean?
- Part 2. How Much Larger Does an Image Become at 2x, 4x, and 8x?
- Part 3. When Should You Use 2x, 4x, or 8x Upscaling?
- Part 4. How to Upscale an Image with Dr.Fone App
- Part 5. Which Upscale Factor Fits Different Image Types?
- Part 6. What Changes as You Move From 2x to 8x?
- Part 7. How to Choose the Right Upscale Factor Without Overprocessing
- Frequently Asked Questions
Part 1. What Do 2x, 4x, and 8x Image Upscaling Mean?
An image upscaler 2x, 4x, or 8x enlarges a photo by multiplying its width and height. A 2x upscaler doubles each side, 4x quadruples each side, and 8x multiplies each side by 8. Pixel count grows much faster than the scale button suggests, and the given details explain further:
| Upscale Factor | Width | Height | Total Pixel Count |
|---|---|---|---|
| 2x | x2 | x2 | x4 |
| 4x | x4 | x4 | x16 |
| 8x | x8 | x8 | x64 |
Does 8x Upscaling Mean Eight Times More Pixels?
No, an 8x upscale means multiplying both width and height by 8, creating 64 times the total pixels. Pixel multipliers grow exponentially:
- 2² = 4x pixels
- 4² = 16x pixels
- 8² = 64x pixels
This difference matters because an 8x setting creates a significant increase in output dimensions and total pixel count compared with lower upscale factors.
Does a Higher Upscale Factor Improve Image Quality?
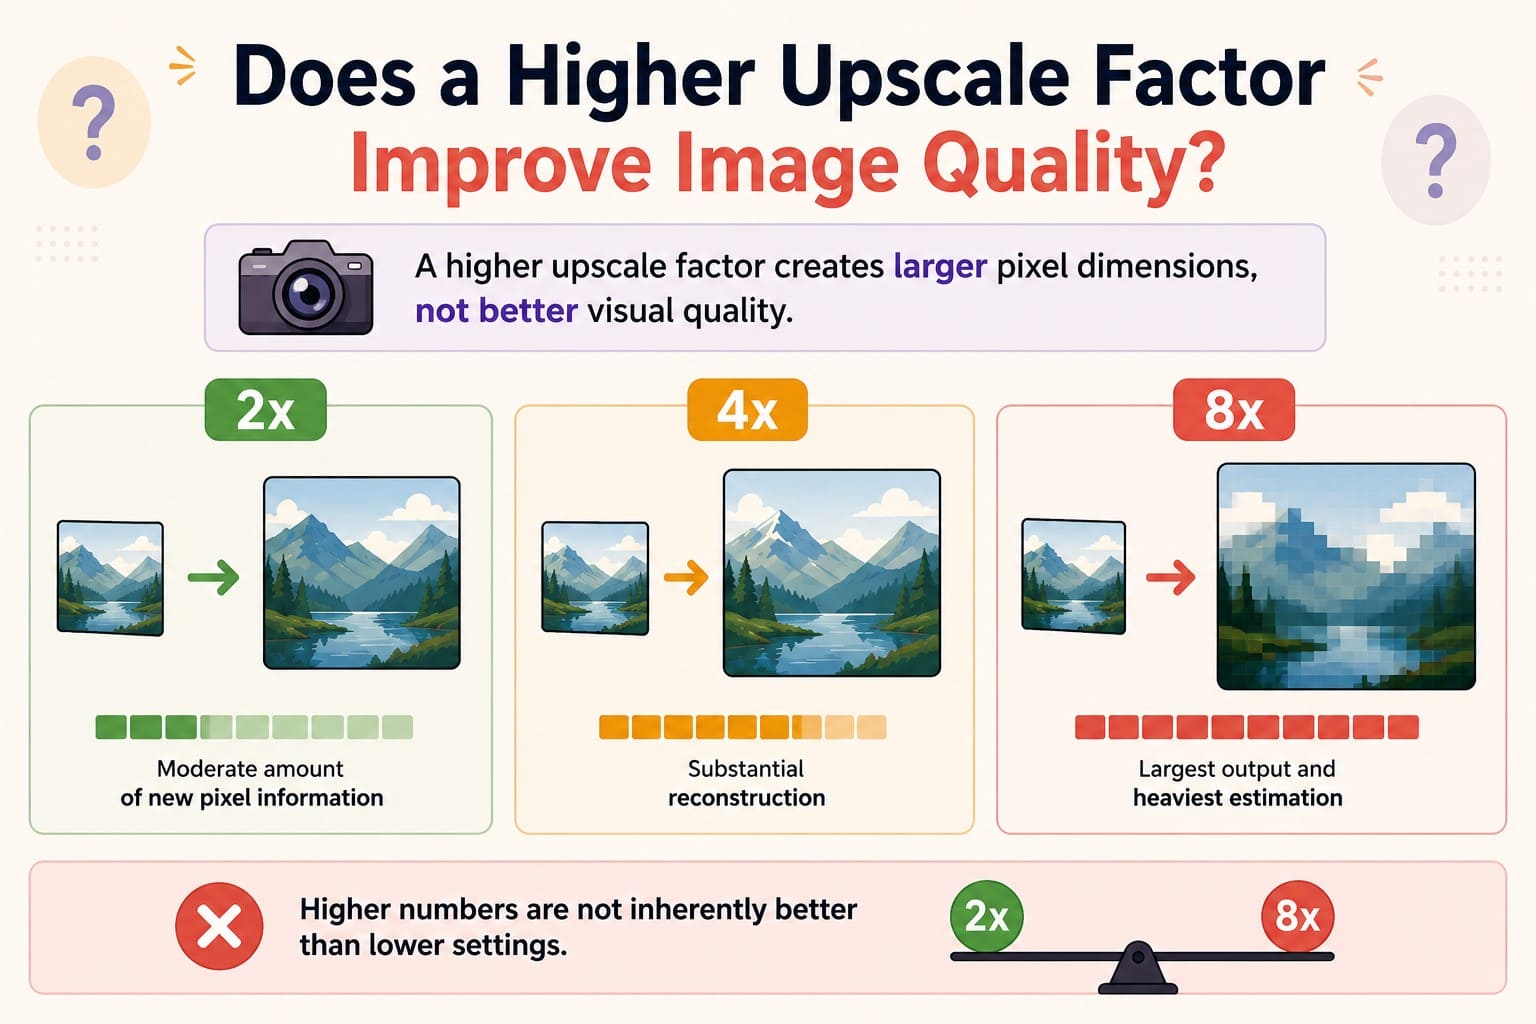
A higher upscale factor increases pixel dimensions, but it does not automatically improve visual quality. If the original photo is blurry or lacks detail, an image upscaler 8x cannot recover information that was never captured. Adobe explains that upsampling adds new pixels by estimating values from existing image data:
- 2x asks for a moderate amount of new pixel information.
- 4x requires substantial reconstruction.
- 8x creates the largest output and demands the heaviest estimation.
Higher upscale factors are not automatically better, since the best setting depends on your source quality and required output size.
How Does AI Upscaling Create Extra Pixels?
Traditional resizing creates new pixels by interpolating values from nearby existing pixels. Modern image upscaler 4x tools go further by using trained models to generate plausible edges, textures, and fine details during enlargement.
Super-resolution research shows that these systems can produce natural-looking patterns. However, generated details may introduce artifacts and should not be treated as information genuinely recovered from the original image.
Part 2. How Much Larger Does an Image Become at 2x, 4x, and 8x?
If you use a 2x or 4x upscaler, it's important to know how much the image multiplies. A 2x, 4x, or 8x upscale multiplies both width and height by that factor. Since pixel count is width × height, the total number of pixels grows by 4x, 16x, and 64x, respectively, as shown in the table:
| Original Resolution | 2x Output | 4x Output | 8x Output | Pixel Growth at 8x |
|---|---|---|---|---|
| 500 × 500 | 1000 × 1000 | 2000 × 2000 | 4000 × 4000 | 250K → 16M pixels |
| 800 × 600 | 1600 × 1200 | 3200 × 2400 | 6400 × 4800 | 480K → 30.7M pixels |
| 1280 × 720 | 2560 × 1440 | 5120 × 2880 | 10240 × 5760 | 0.92M → 59M pixels |
| 1920 × 1080 | 3840 × 2160 | 7680 × 4320 | 15360 × 8640 | 2.07M → 132.7M pixels |
Run the same check on your own file before choosing anything. Multiply your width by each factor and compare the three results against the size you need, because that comparison usually rules out at least one option immediately.
Part 3. When Should You Use 2x, 4x, or 8x Upscaling?
Whether you use upscale image 4x, 2x, or 8x, compare your current image dimensions with the final size you actually need. Start with the smallest factor that meets your target, then increase it only when necessary. For a quick guide on when each upscale factor works best, review the options below.
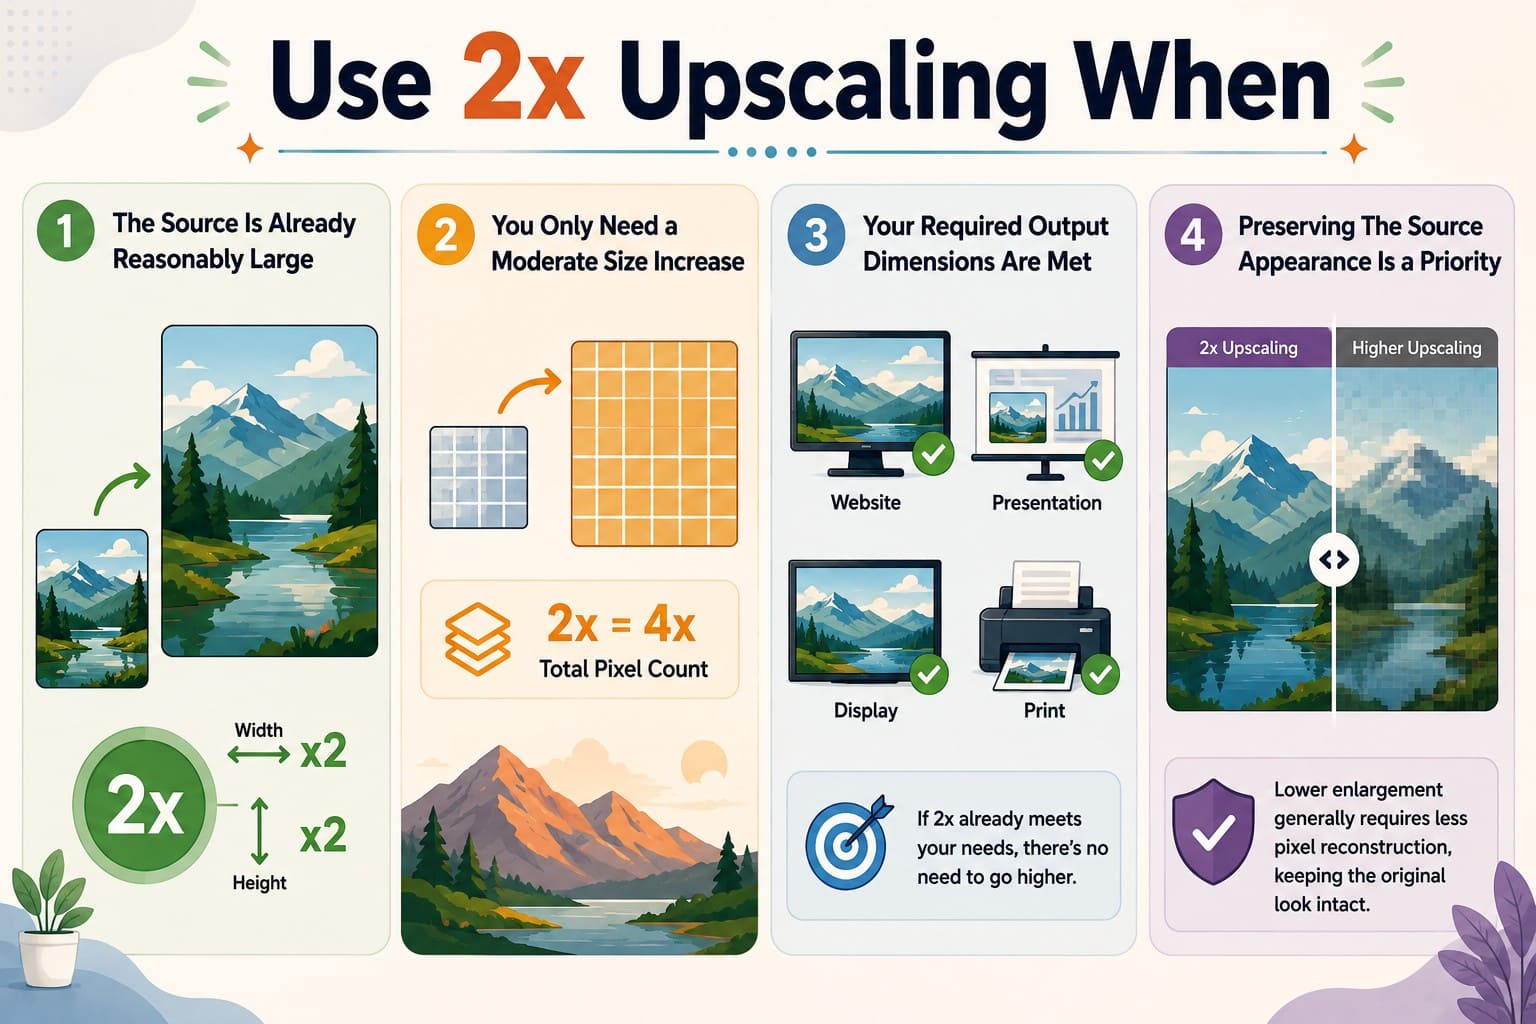
Use 2x Upscaling When
- The Source is Already Reasonably Large: A 2x scale doubles both width and height, which is often enough when the photo only needs moderate enlargement.
- You Only Need a Moderate Size Increase: A 2x factor creates four times the total pixel count, providing additional working resolution without excessive enlargement.
- Your Required Output Dimensions are Met: If 2x already meets your website, presentation, display, or print requirements, there is usually no need to choose a higher factor.
- Preserving the Source Appearance is a Priority: Lower enlargement requires less pixel generation than stronger scaling, which can help maintain an appearance closer to the original.
A 2x image upscaler works well when doubling the image dimensions already meets your target, while requiring less pixel generation than stronger upscale factors.
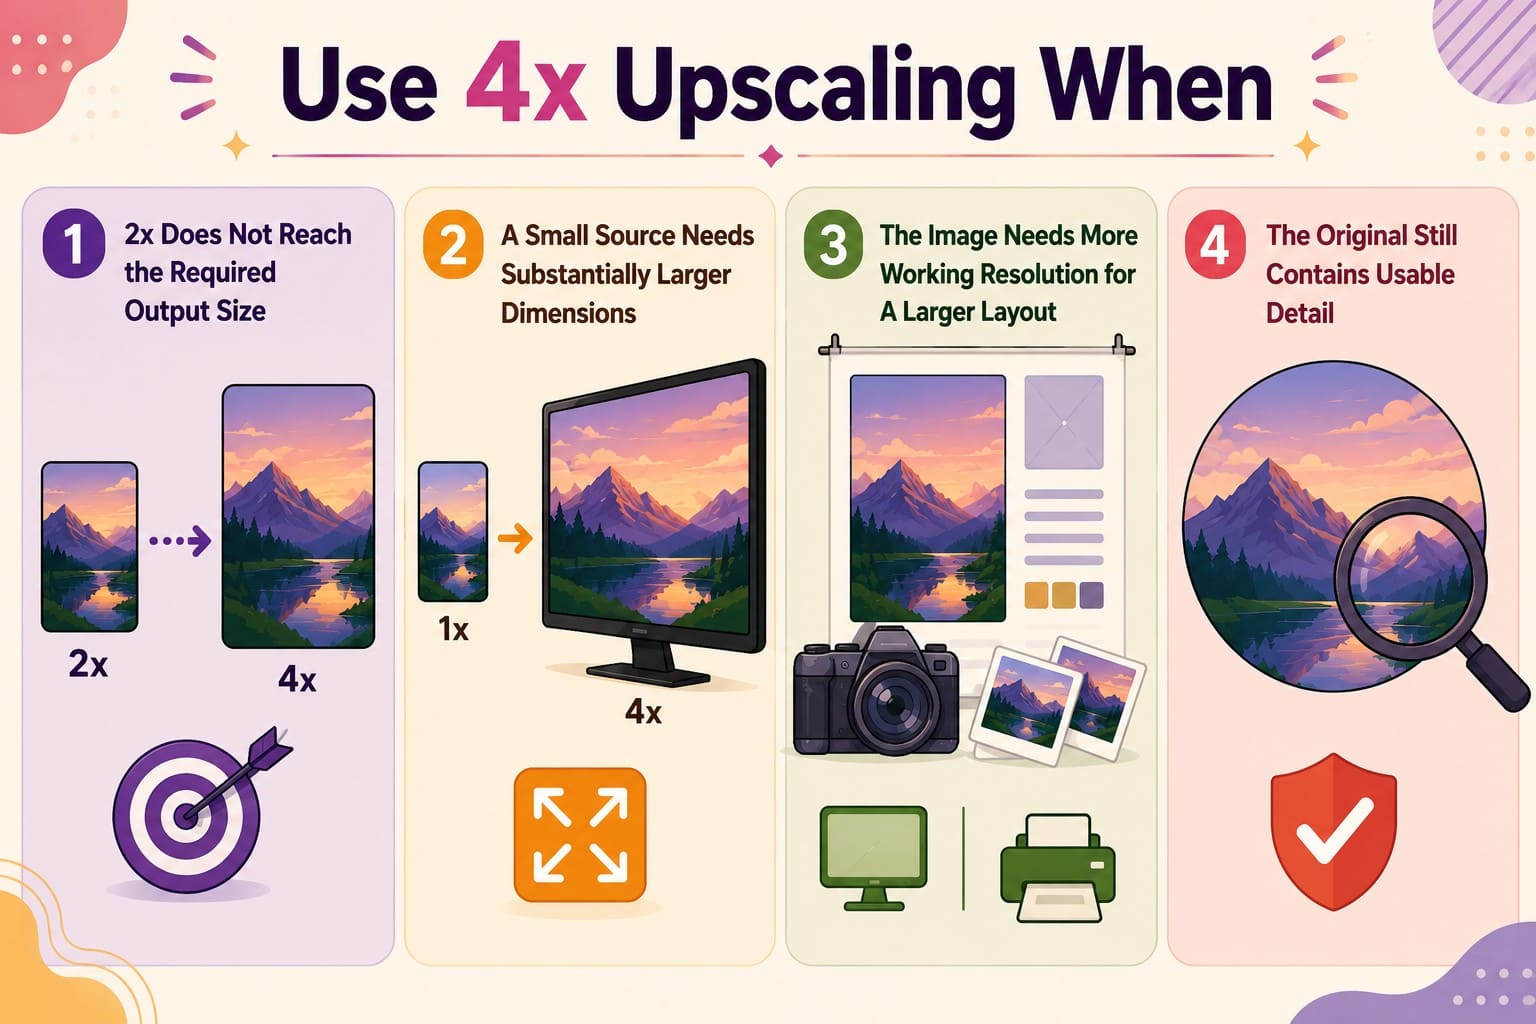
Use 4x Upscaling When
- 2x Does Not Reach the Required Output Size: Move to 4x when doubling the image dimensions still falls short of your required output size.
- A Small Source Needs Substantially Larger Dimensions: A 4x factor multiplies both width and height by four, producing 16 times the original pixel count.
- The Image Needs More Working Resolution for a Larger Layout: This can suit larger displays, print layouts, or heavily cropped images, depending on the source resolution and final requirements.
- The Original Still Contains Usable Detail: Stronger enlargement works better when the source is reasonably clear. A blurry or heavily cropped image may remain soft after upscaling.
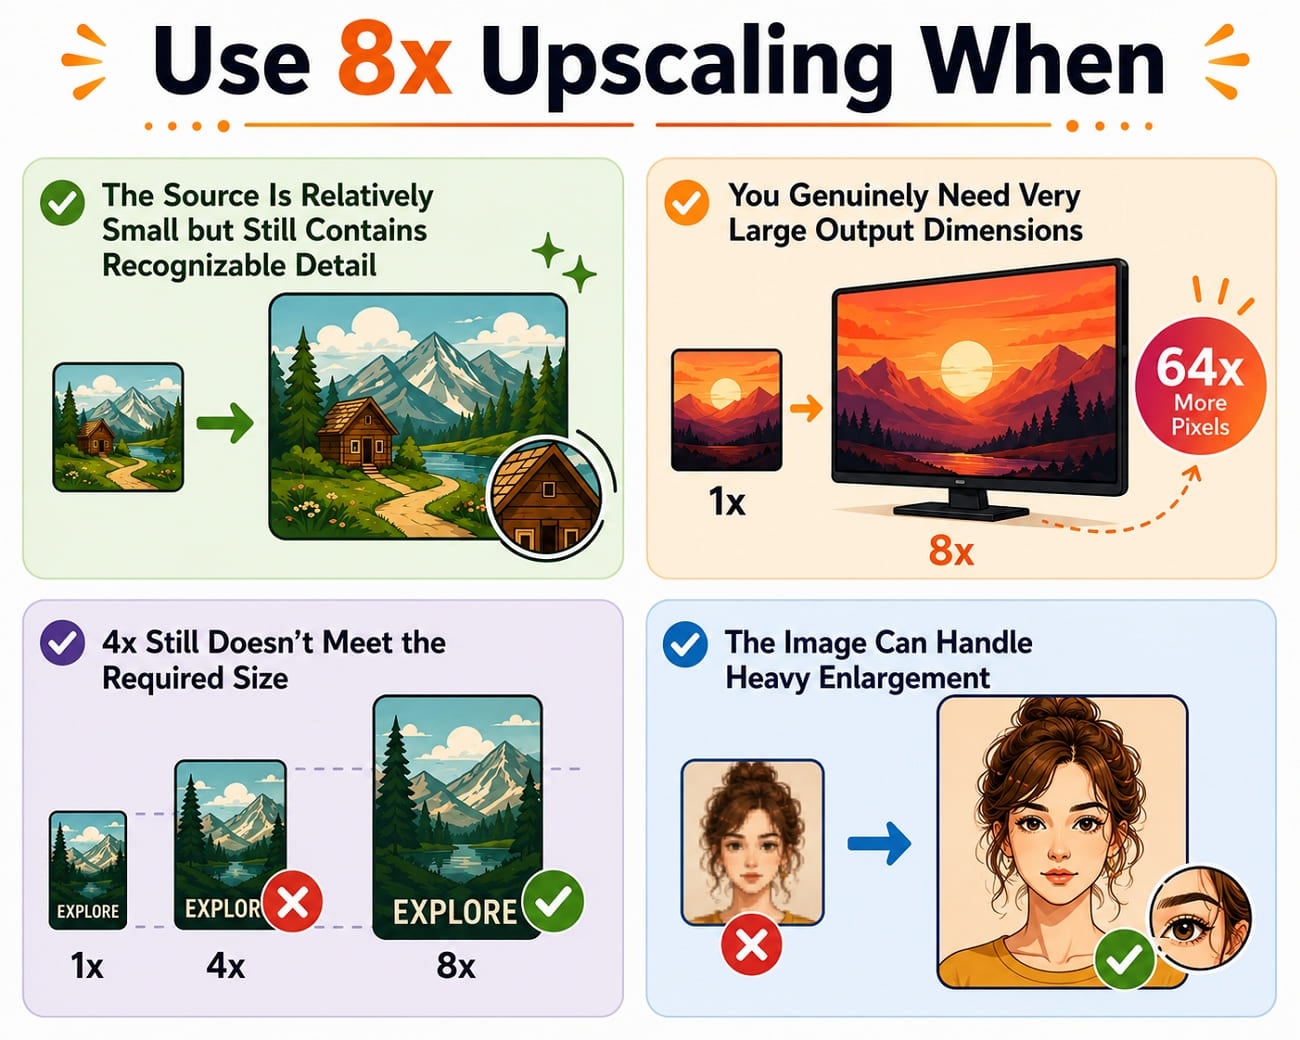
Use 8x Upscaling When
- The Source Is Small but Still Contains Recognizable Detail: Starting quality becomes more important at 8x because the upscaler must generate substantially more pixel information.
- You Need Very Large Output Dimensions: An 8x upscale multiplies both width and height by eight, producing 64 times the original total pixel count.
- 4x Still Does Not Meet the Required Size: Choose an 8x upscaler when 4x falls short of your target dimensions, rather than treating 8x as an automatic quality improvement.
- The Image Can Handle Heavy Enlargement: Use 8x when the source is clear enough to support stronger enlargement without making artifacts or artificial-looking details overly noticeable.
Part 4. How to Upscale an Image with Dr.Fone App
Once you choose the right scale factor for your target size, an image upscaler 8x can help achieve much larger dimensions when lower factors fall short. Dr.Fone App brings this capability directly to iOS and Android, so you can upscale photos on your phone without first moving them to a desktop. This makes high-resolution enlargement more convenient when working primarily with mobile images.
Its AI Photo Enhancer supports up to 8x enlargement through Ultra HD mode, with 2x, 4x, and 8x options for different output needs. After processing, you can compare the original and enhanced versions to examine sharpness, textures, edges, and overall clarity before saving the final image.
Dr.Fone App - AI Photo Restorer & Enhancer (iOS & Android)
Restore, Colorize, Enhance, and Upscale Photos with AI
- Restore Old Photos by Fixing Creases, Tears, and Scratches
- Colorize Black-and-White Photos with AI
- Auto-Enhance Photos and Improve Portrait Details to HD Quality
- Upscale Images to 2x, 4x, or 8x for Clearer Results



Complete Guide to Upscale an Image on Dr.Fone App
To upscale your image with the Dr.Fone App using 2x, 4x, or 8x options, follow these steps:
-
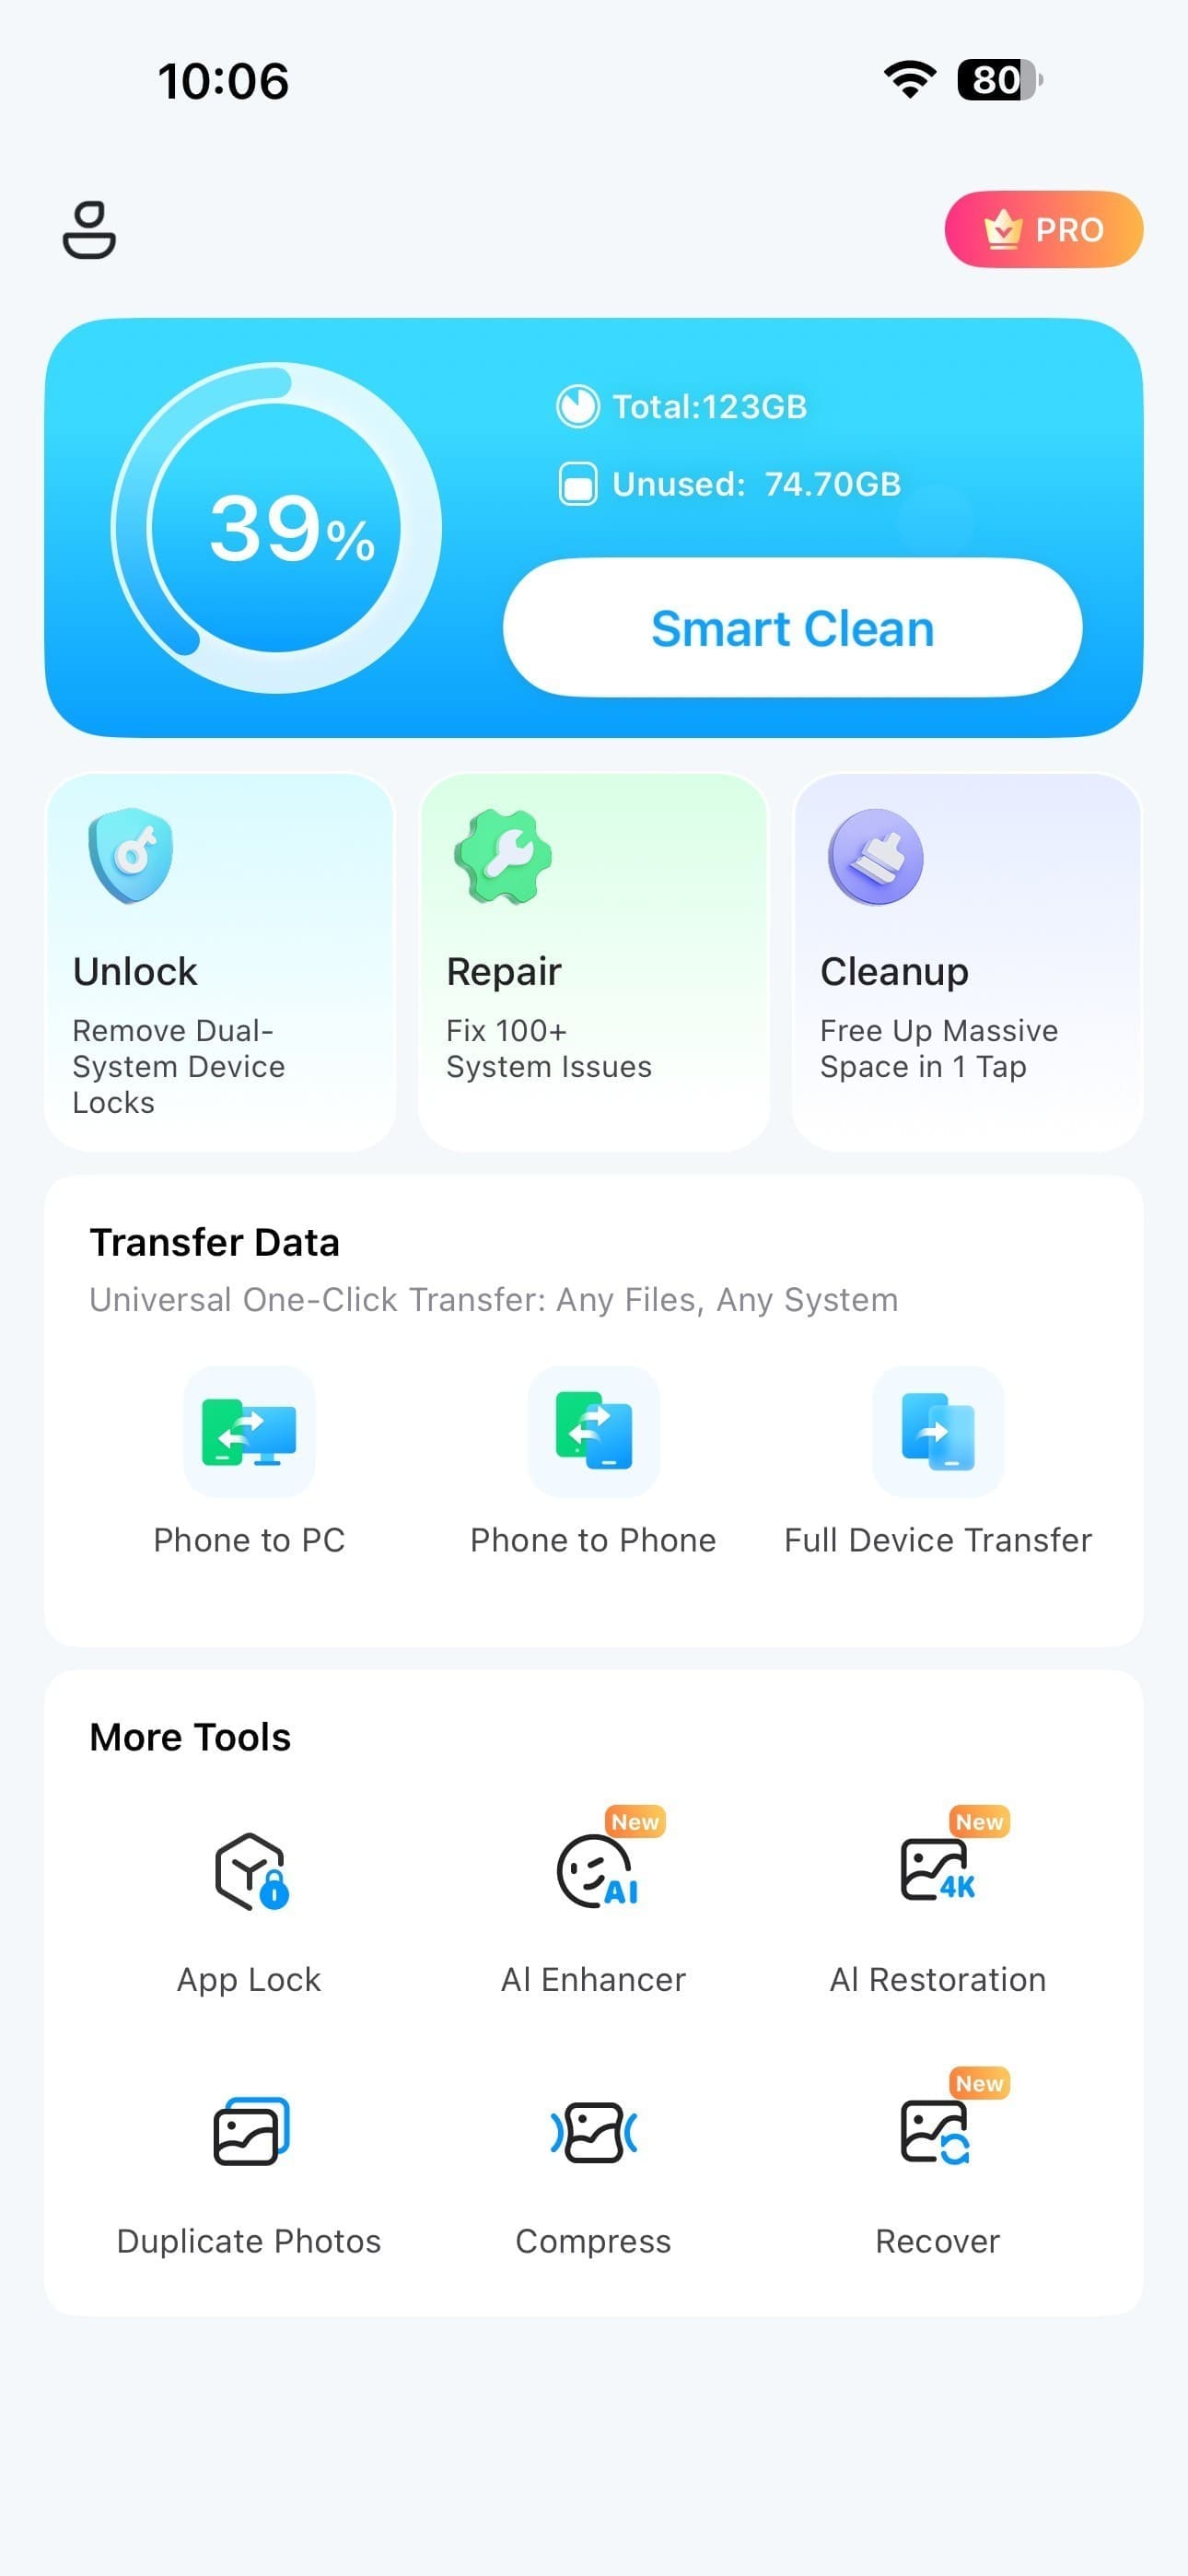
Step 1 Access the AI Enhancer Tool
Access the “AI Enhancer” tool in the Dr.Fone App and proceed to the available photo enhancement options.
-
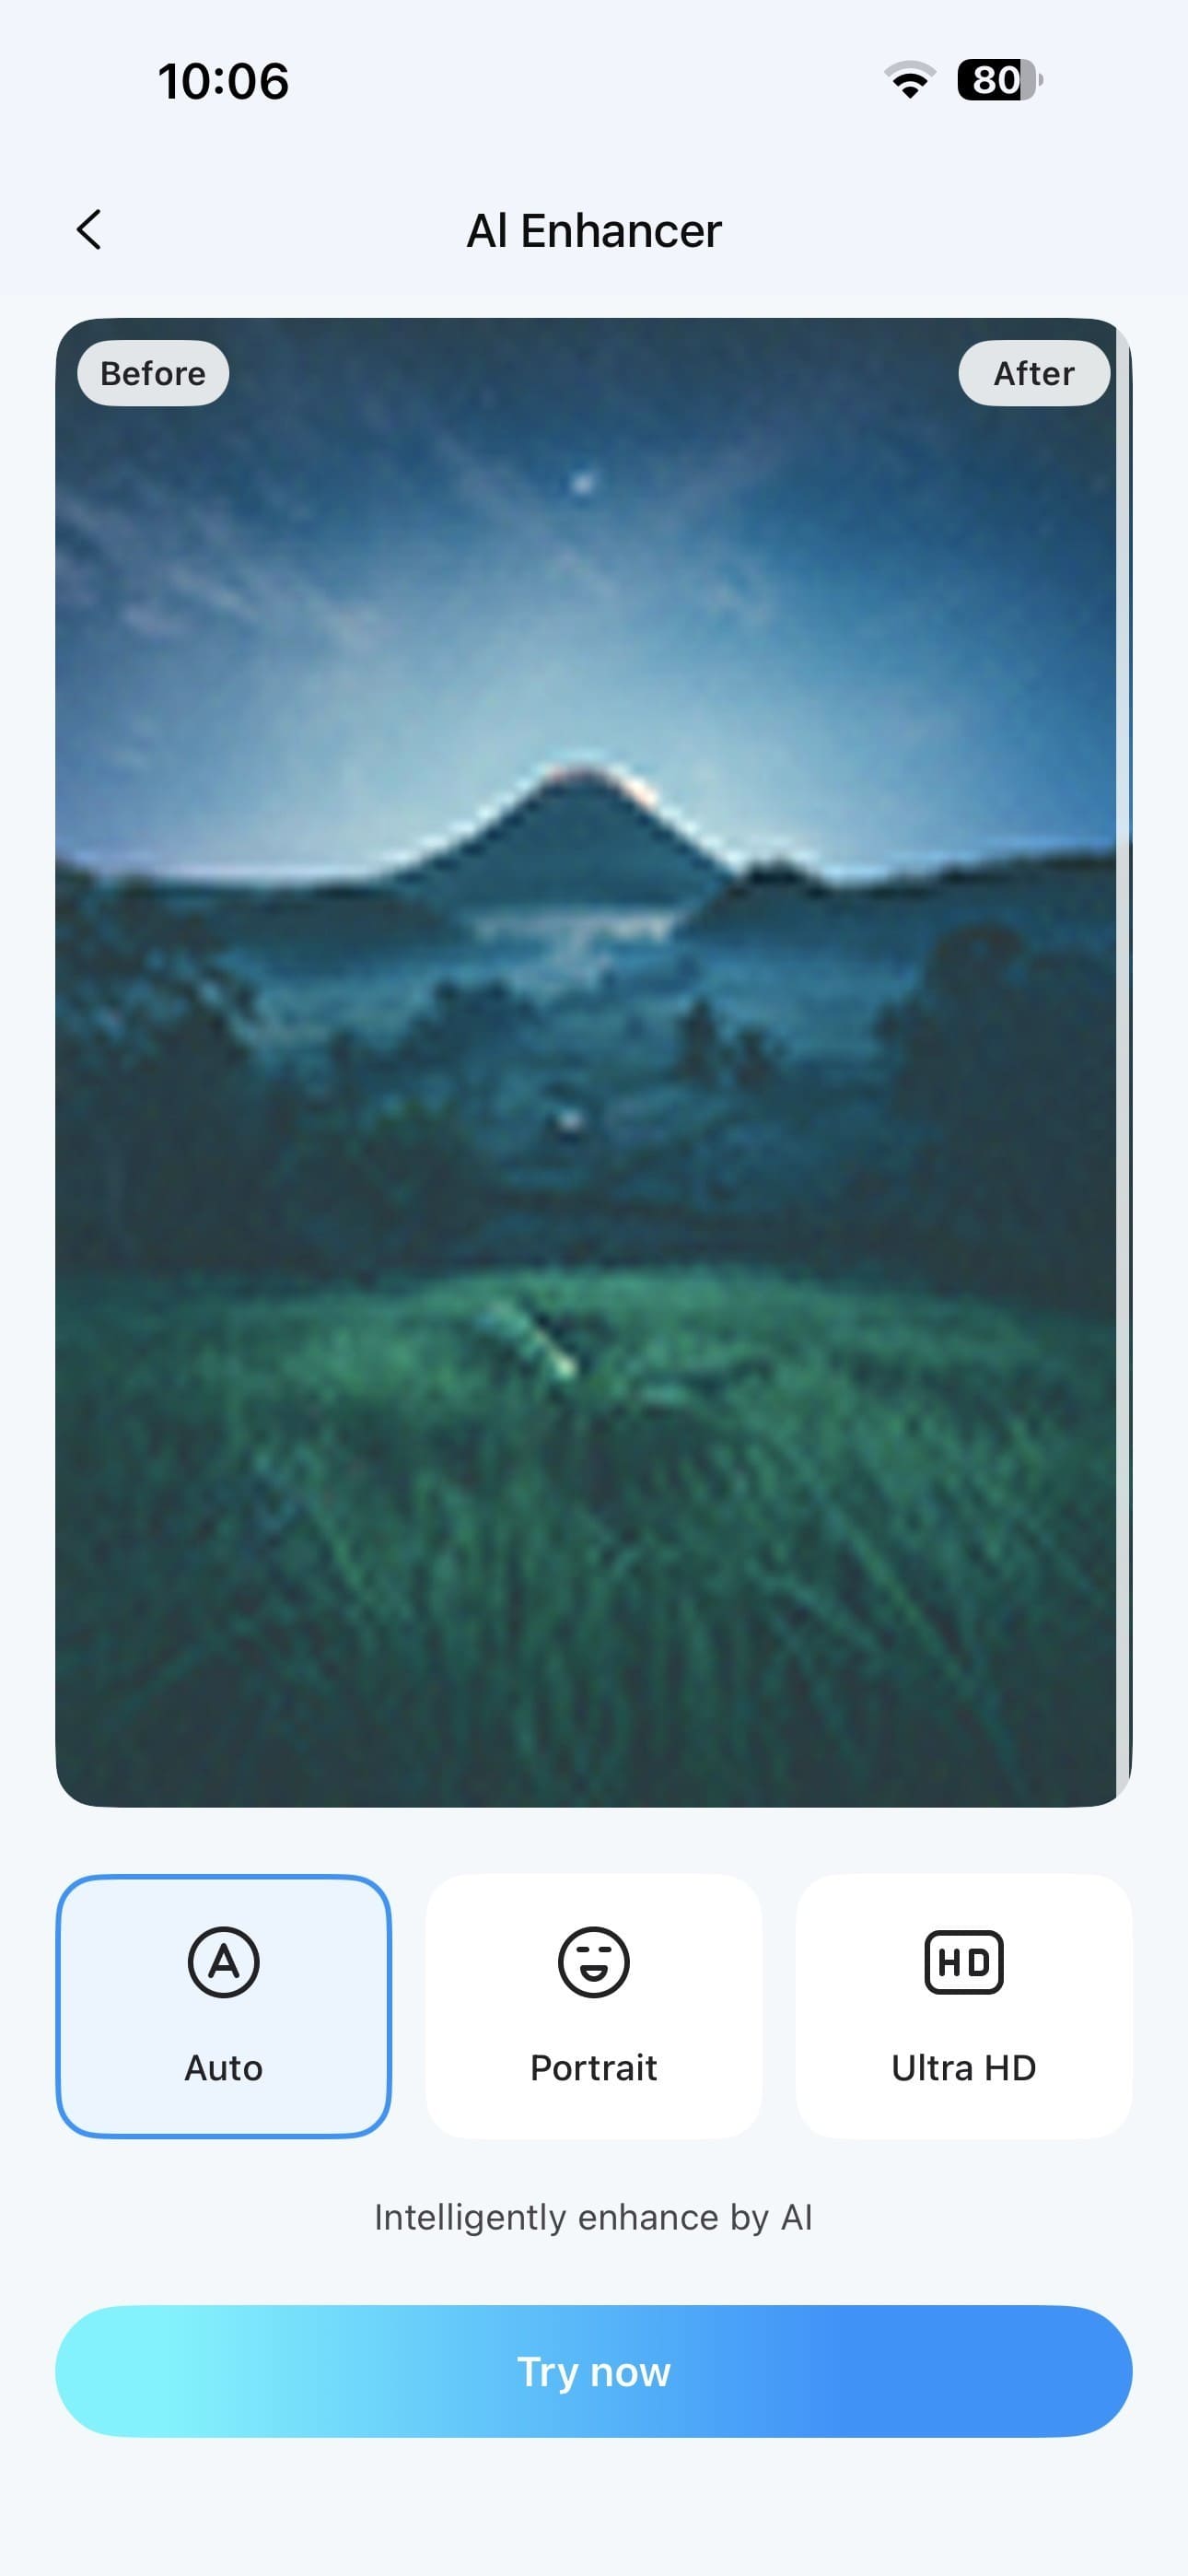
Step 2 Choose Ultra HD and Load Your Image
Select “Ultra HD,” tap “Try Now,” and then upload the image you want to upscale from your device.
-
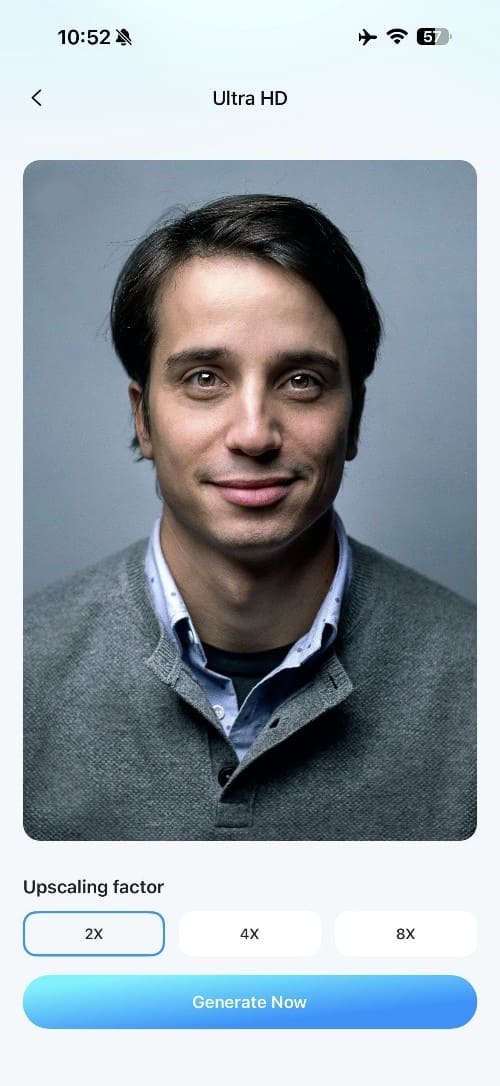
Step 3 Process It and Compare the Output
Choose your preferred 2x, 4x, or 8x upscale factor and tap “Generate Now.” Once processing is complete, review the enhanced result and tap “Save” to store it on your device.
Part 5. Which Upscale Factor Fits Different Image Types?
So far, you know all the details about image upscaler 4x, including 2x and 8x. Nonetheless, the right upscale factor depends on the image type, its current size, and where you plan to use it. The table below gives a practical starting point rather than a fixed rule:
| Image Type | Main Need | Suggested Starting Factor | What to Check |
|---|---|---|---|
| Social Media Image | Increase usable size | 2x | Compression artifacts |
| Small Web Image | More working pixels | 2x to 4x | Edge sharpness |
| Portrait | Larger facial detail | 2x to 4x | Skin texture, eyes |
| Product Photo | Larger output size | 2x to 4x | Logo and text edges |
| Old Photo | Enlargement after restoration | 2x to 4x | Grain becoming artificial texture |
| Low-Resolution Graphic | Cleaner appearance at scale | 2x to 4x | Straight edges, lettering |
| Large Display Image | Very large output | 4x to 8x | Artificial fine detail |
Part 6. What Changes as You Move from 2x to 8x?
The table highlights what to check for different image types. As you move from a 2x image upscaler to 4x and 8x, several aspects of the output change. Here are six key differences to consider.
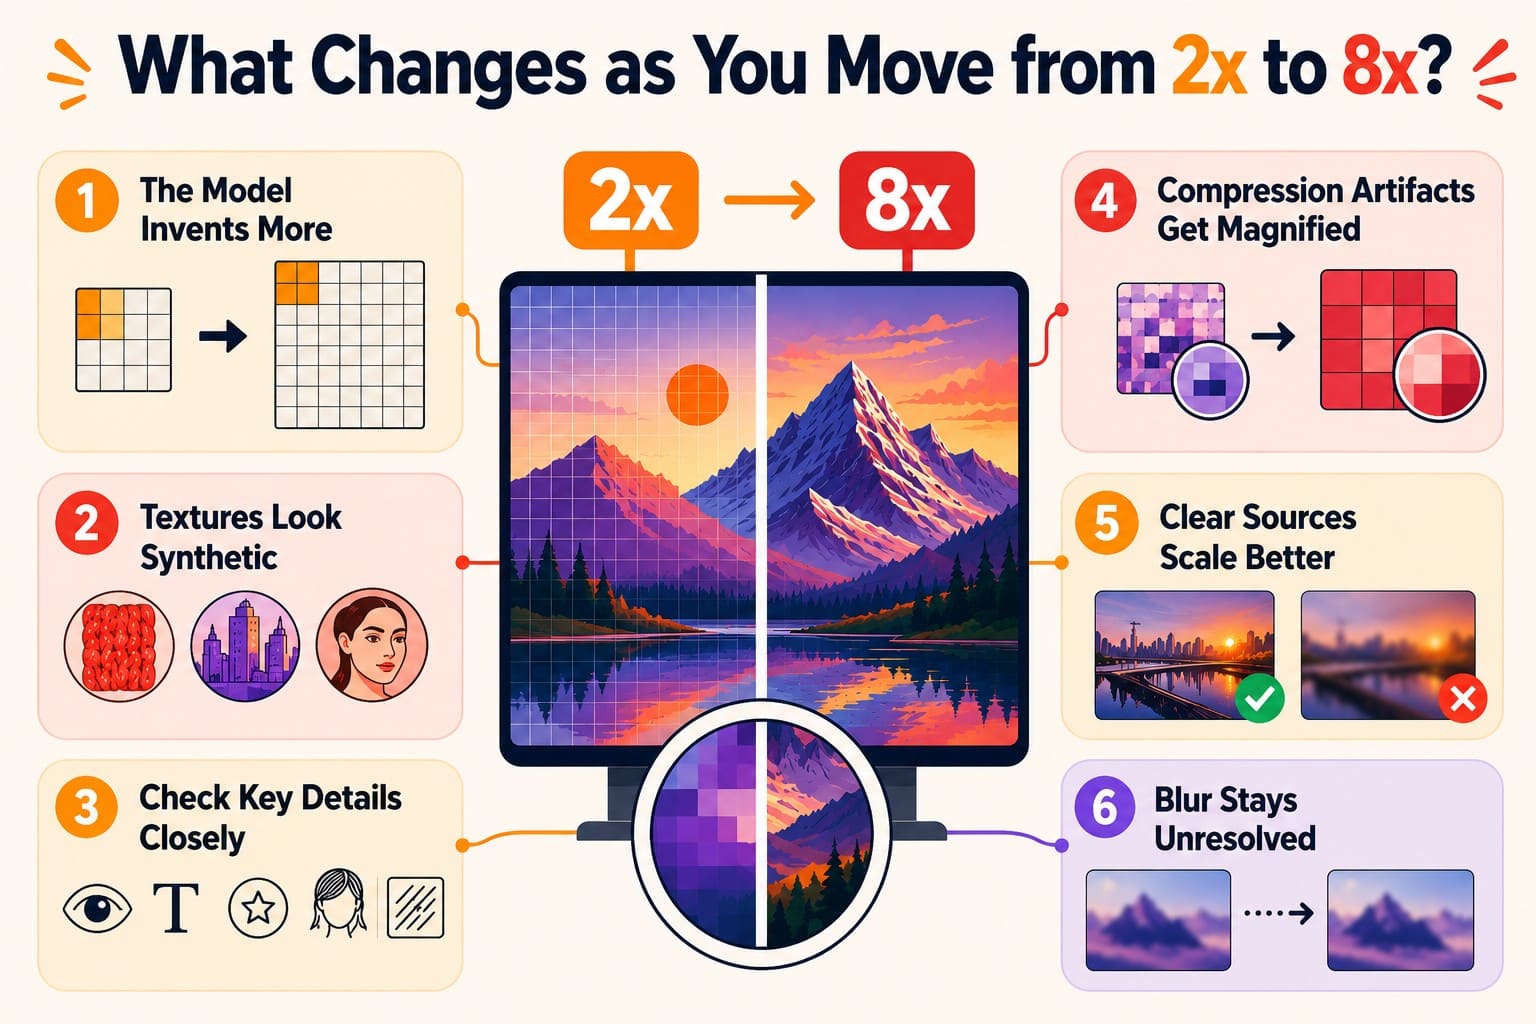
- The Model Generates More Pixels: At 2x, 3 of every 4 output pixels are newly generated. At 8x, that rises to 63 of 64, increasing reliance on estimated detail.
- Textures Can Look More Synthetic: Fabric, foliage, and skin become harder to reproduce naturally at stronger enlargement because their fine textures require greater reconstruction.
- Key Details Need Closer Inspection: Faces, text, logos, hair, and thin edges deserve closer inspection at 8x because reconstruction errors become more noticeable at higher enlargement.
- Compression Artifacts Become More Visible: Existing blocking, ringing, and other compression artifacts can become increasingly noticeable as dimensions grow, especially when an upscaler interprets them as real detail.
- Clear Sources Scale Better: Two photos with identical dimensions can produce different results when one is sharper or cleaner. Adobe recommends starting with the highest-quality source available.
- Blur Can Remain Visible: Upscaling can improve perceived sharpness, but it cannot guarantee recovery of missing source information. An image upscaler 8x may make existing softness more noticeable.
Part 7. How to Choose the Right Upscale Factor Without Over-Processing?
This section explains how to choose between image upscaler 4x, 2x, and 8x based on your source image, required output size, and intended use:
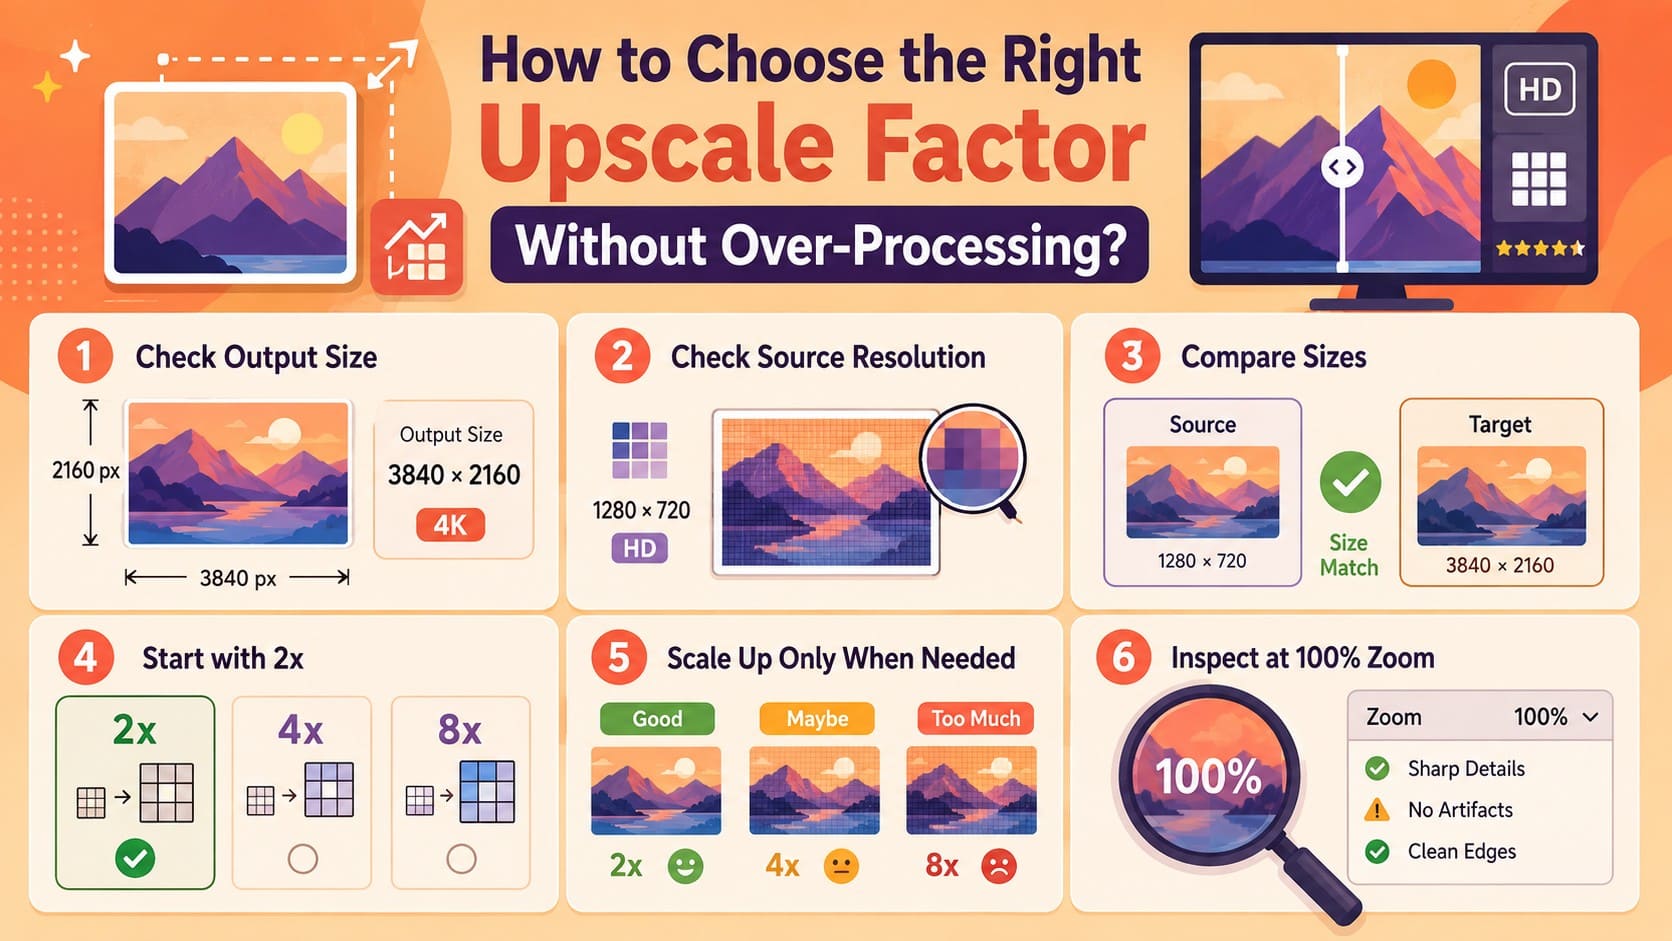
- Check Output Size: Verify the exact pixel dimensions required for your website, print layout, or upload platform. Adobe explains that pixel dimensions determine the amount of image data available.
- Check Source Resolution: Review your original photo’s width and height before choosing an upscale factor. You can find these dimensions through your device’s image details, properties, or photo editing software.
- Compare Source and Target Sizes: Compare your source dimensions with the required output dimensions to determine how much enlargement you need. Check both width and height when your destination requires specific dimensions.
- Start with 2x: Choose 2x when doubling the dimensions already meets your target. Adobe explains that upsampling creates additional pixels through interpolation, so unnecessary enlargement should be avoided.
- Scale Up Only When Needed: Move to 4x or 8x only when lower factors do not meet your required dimensions. Higher factors create larger outputs but do not automatically deliver better image quality.
- Inspect at 100% Zoom: Examine faces, text, hair, logos, edges, and textures at 100% zoom before keeping a stronger upscale. Adobe recommends reviewing enlarged results at 100% to identify artifacts and unnatural details.
Conclusion
Choosing the right upscale factor starts with comparing your source dimensions with the output size you actually need. Higher scaling is not always better, as an image upscaler 8x generates substantially more pixel information.
Tools like Dr.Fone App make 2x, 4x, and 8x enlargement convenient directly on your phone. For the best result, use the lowest factor that meets your target and inspect the enhanced image carefully for clarity, natural textures, and unwanted artifacts before saving.
FAQ
-
1. Is 8x image upscaling better than 4x?
It produces a larger image, but whether it looks better depends on the source quality. At 8x, 63 of every 64 output pixels are newly generated, compared with 15 of 16 at 4x, so artifacts and artificial details may become more noticeable. -
2. What happens when I upscale an image 4x?
Both width and height multiply by four, so a 500 × 500 image becomes 2000 × 2000. That produces 16 times the original pixel count, with 15 of every 16 output pixels newly generated rather than directly present in the source image. -
3. Does 8x upscaling increase width and height eight times?
Yes, each dimension multiplies by eight, while the total pixel count increases by 64 times. Most output pixels are newly generated, so the result should be evaluated for accuracy, artifacts, and natural-looking detail. -
4. Can I upscale an image 8x without losing natural detail?
Sometimes, especially with a small, sharp original. Dr.Fone App supports up to 8x enlargement on iOS and Android, with multiple enhancement modes and comparison tools for reviewing results before saving them.









Selena Lee
staff Editor
Generally rated4.5(105participated)