
Too Many Redirects on Safari: Step-by-Step Guide to Solve It Now

Jun 30, 2026 • Filed to: Data Wipe Solutions • Proven solutions
 TL;DR:
Resolving the too many redirects error on Safari requires clearing corrupted session data or fixing device configurations that trap the browser in an endless page loop.
● Clear Safari history or target specific website data to remove expired login info and force the site to establish a fresh redirect path.
● Enable the Set Automatically option under Date & Time to fix HTTPS certificate checks, and temporarily disable extensions that might block cross-site cookies.
● For persistent errors, reset the iPhone or iPad network settings to drop old DNS data, or use Dr.Fone - Data Eraser to delete hidden leftover cache files.
Ask AI for a summary
 ChatGPT
 Perplexity
 Gemini
 Claude
 Grok
Grok
Sometimes, you open a website on Safari, but the page keeps looping and shows a "too many redirects" error. With this ongoing issue, you cannot access the site, and this can be very frustrating. Even though many factors may be the root cause, you can fix this issue on your device with a few simple steps.

Therefore, this guide explains how you can resolve the too many redirects on Safari issue and make websites load properly again. While adhering to all the basic solutions, learn how deep data clearing of Safari via Dr.Fone can be the most effective solution.
Part 1. What Does Too Many Redirects Mean on Safari?
If one asks what does too many redirects mean, know that in Safari, it implies that the website keeps sending Safari between pages in a loop. To put it simply, Page A sends you to Page B and Page B sends you back to Page A, repeating multiple times.
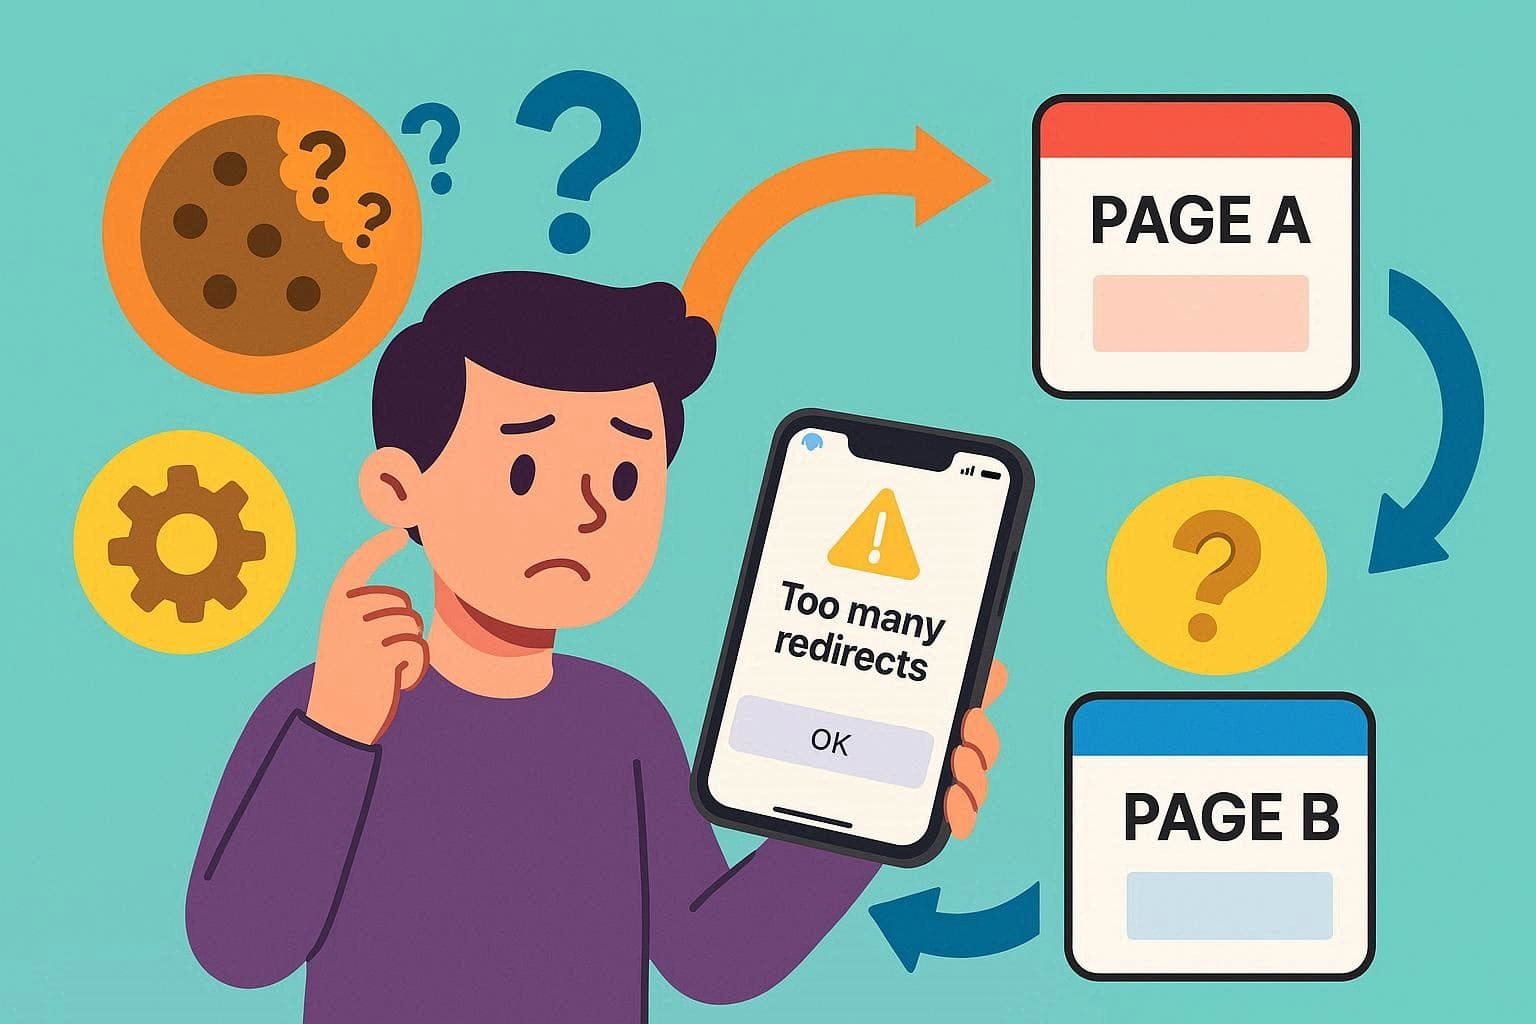
As a result, you see the message "Safari cannot open the page because too many redirects occurred on iPhone." This usually happens because of website settings or old cookies that confuse the browser.
Too Many Redirects on Safari: Common iPhone & iPad Scenarios
To further know when you face the too many redirects on Safari error, review the listed table:
| Scenario Type | What You See in Safari |
|---|---|
| Logging Into a Website (Google, School Portal, Game, etc.) | “Safari cannot open the page because too many redirects occurred” on the login page |
| Opening a Site You Often Visit | The site never loads, and the same error occurs every time on that domain |
| Switching Between http/https or www/non‑www | The URL keeps changing between different versions, and then there is an error |
| Using Content Blockers/VPN/Ad blockers | Page partly loads, then an error occurs after a few seconds |
| After Changing Time, Region, or iCloud Settings | Some logins (Apple ID, iCloud, banking) throw redirect errors |
Part 2. 4 Quick Fixes for Too Many Redirects on Safari
This section will now cater to Safari, which cannot open the page because too many redirects occurred on the iPhone. Here, get to know how you can fix it by trying the 4 simple ways given below in detail:
Way 1: Check Date and Time Settings
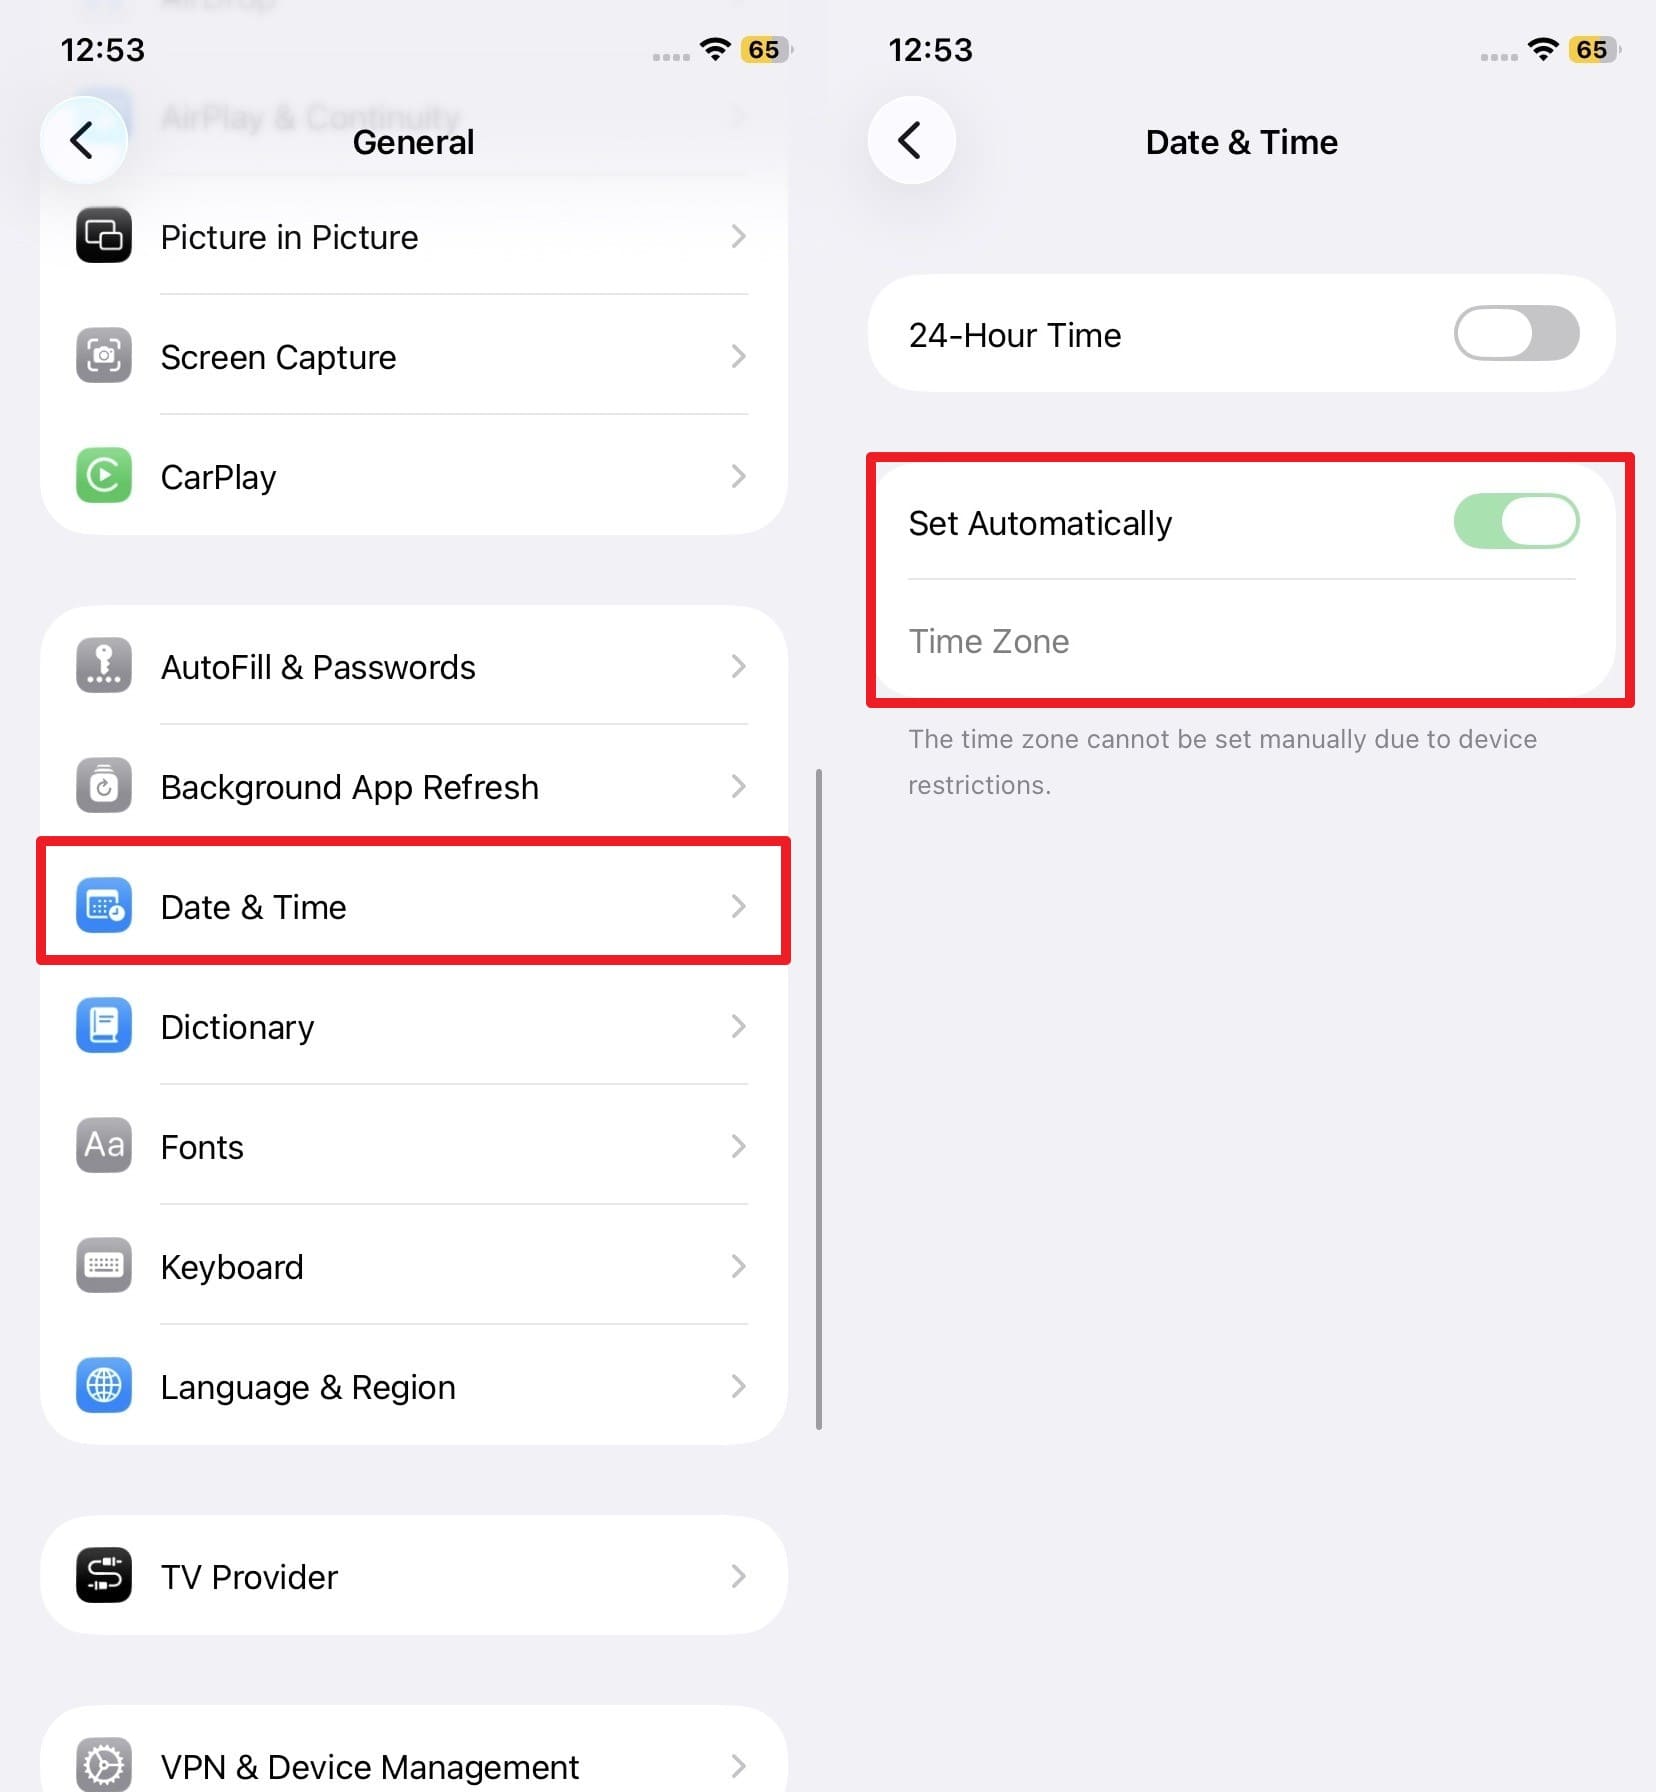
Know that wrong clock settings break secure connections and login redirects. Therefore, correct time fixes HTTPS certificate checks, so sites like Google or Banking pages work. It also stabilizes login cookies, which may look expired if the clock is wrong, stopping repeated redirects. So, since false time can also confuse region-based redirects, here is how you can adjust and verify the date and time:
Instructions: In the General settings, select "Date & Time," then toggle on the "Set Automatically" option. Make sure the "Time Zone" is set to your current location and reopen Safari to see if the issue persists.
Way 2: Disable Extensions or Content Blockers Temporarily
If you still get too many redirects on Safari, disable the extensions and content blockers. This can help, as some blockers can interfere with cookies, ads, or login redirects, causing loops. Hence, as you disable them, it shows whether the problem comes from a specific extension or the site itself. Additionally, this fixes broken login or SSO pages that rely on cross-site cookies, as guided below:
- Step 1. Go to the Apps settings, choose "Safari" and tap on the "Extensions" option.
- Step 2. In the "Allows These Extensions" section, pick the extension you seek to disable and toggle off the "Allow Extension" option.


Way 3: Restart Your iPhone & Retry Loading the Page
Despite trying the above ways, you might still ask how do I fix too many redirects on Safari. So, it is suggested to restart the device because a reboot resets network processes, DNS, and background services that may cause redirect loops. Not just that, it drops in-memory cookies and session data to stop broken logon or redirect chains, once done via the mentioned steps:
- Step 1. Close the Safari app and maintain pressure on the "Power & Volume Up" button to access the "Slide to Power Off" slider.
- Step 2. Slide this, wait for a while, and press the "Power" button until the Apple logo appears to restart, and reopen Safari.


Way 4: Clear Safari Cookies and Website Data
As you clear cookies and website data in Safari, it can resolve the too many redirects on Safari error. This will remove the old login info, bad redirects, and corrupted cache. You can clear data for just the problem site or all sites, which often solves the issue without affecting everything else. In addition, this forces the site to build a fresh redirect path and resets broken session cookies, as demonstrated:
Option 1: Clear All Safari History & Data
Instructions: In the "Apps" settings, as you choose Safari, head to the "History and Website Data" section and choose the "Clear History and Website Data" option.

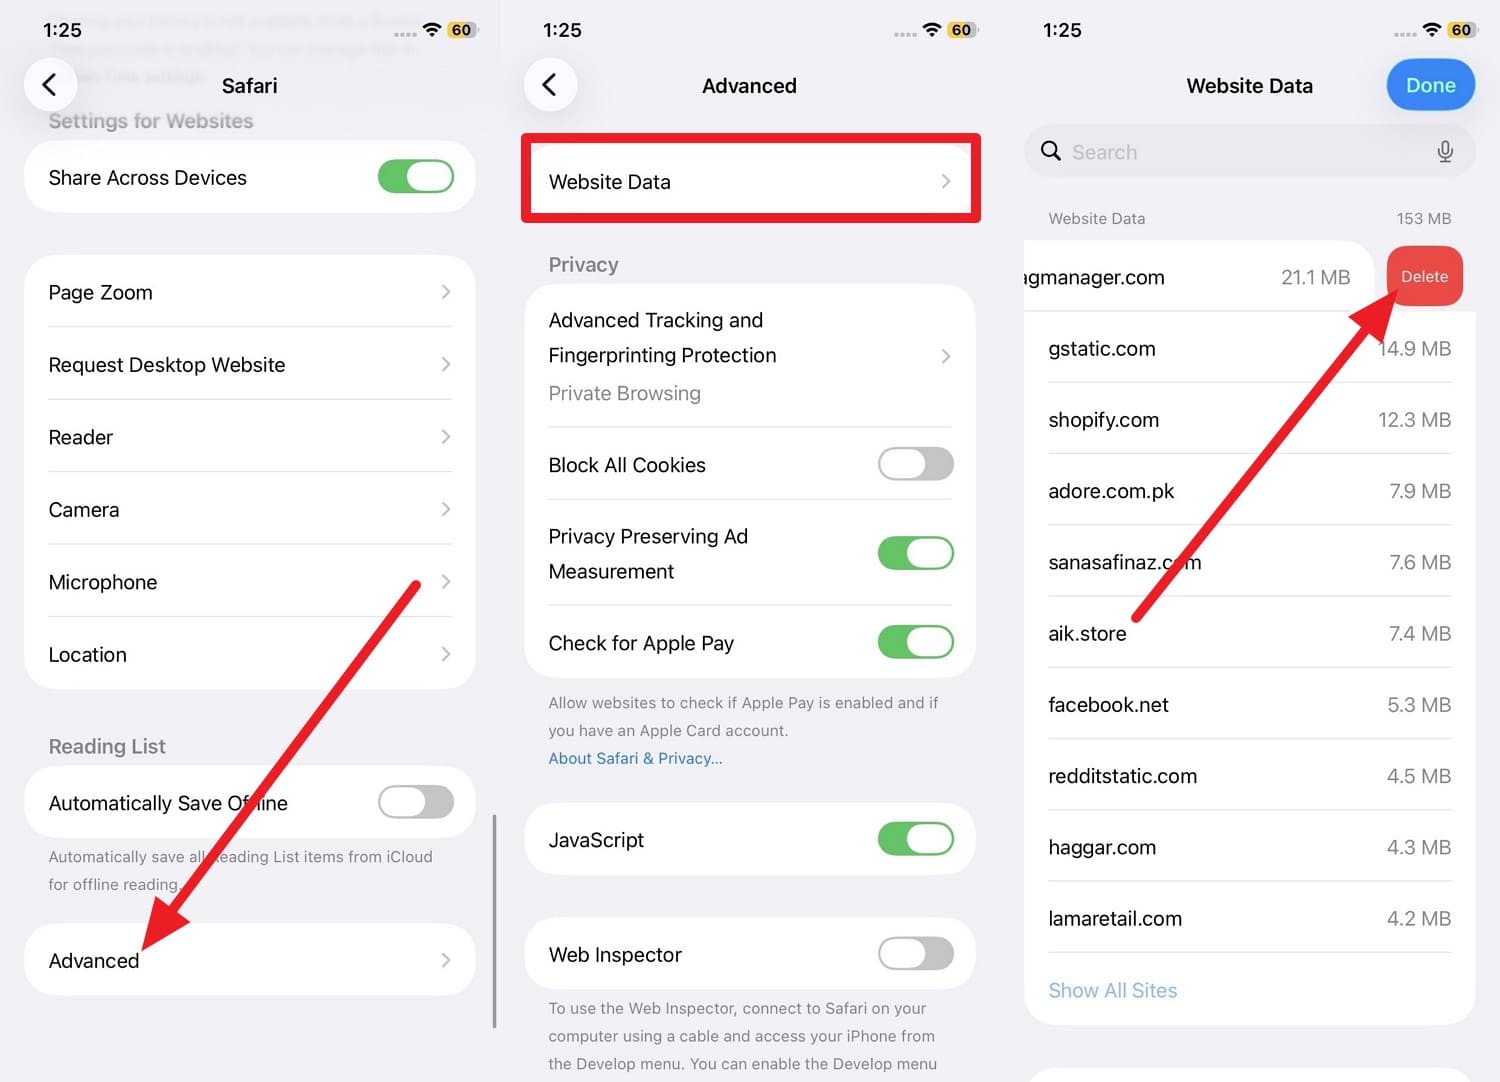
Option 2: Clear Data for One Specific Site
Instructions: Within the Safari settings, pick the "Advanced" option at the bottom and tap on "Website Data." There, search for the site name and swipe left to choose the "Delete" option.
Part 3. 4 Advanced Fixes: If the Redirect Error Keeps Returning
There is a chance you still face the issue that Safari cannot open the page because too many redirects occurred on the iPad or iPhone. If so, try the 4 innovative methods mentioned below, along with their detailed guides:
Fix 1: Perform a Deep Safari Data Clean
When normal clearing fails, use Dr.Fone - Data Eraser for iOS/iPad to fix the too many redirects on Safari error. It removes leftover cache, cookies, and hidden data that cause stubborn redirects or login loops. You can choose selective cleaning for just browser junk or a full device wipe. While doing that, it clearly highlights how much junk will be removed to help users make informed decisions.
Unlike other methods, the process is effortless and can be completed in 3 simple steps, making it an ideal choice for novices. In addition, the separate tabs to remove junk files or apps make navigation and data erasing effortless. So, with the success rate of 100%, you can also get a weekly update for all upcoming iOS/iPadOS versions.
Dr.Fone - Data Eraser
One-click tool to erase iPhone permanently
- It can delete all data and information on Apple devices permanently.
- It can remove all types of data files. Plus it works equally efficiently on all Apple devices. iPads, iPod touch, iPhone, and Mac.
- It helps enhance system performance since the toolkit from Dr.Fone deletes all junk files completely.
- It provides you with improved privacy. Dr.Fone - Data Eraser with its exclusive features will enhance your security on the Internet.
- Apart from data files, Dr.Fone - Data Eraser can permanently get rid of third-party apps.


Simple Guide to Erase Your iPhone Junk Files with Dr.Fone
If you ask how to fix too many redirects on Safari by clearing cache or temporary files, follow this comprehensive guide for Dr.Fone:
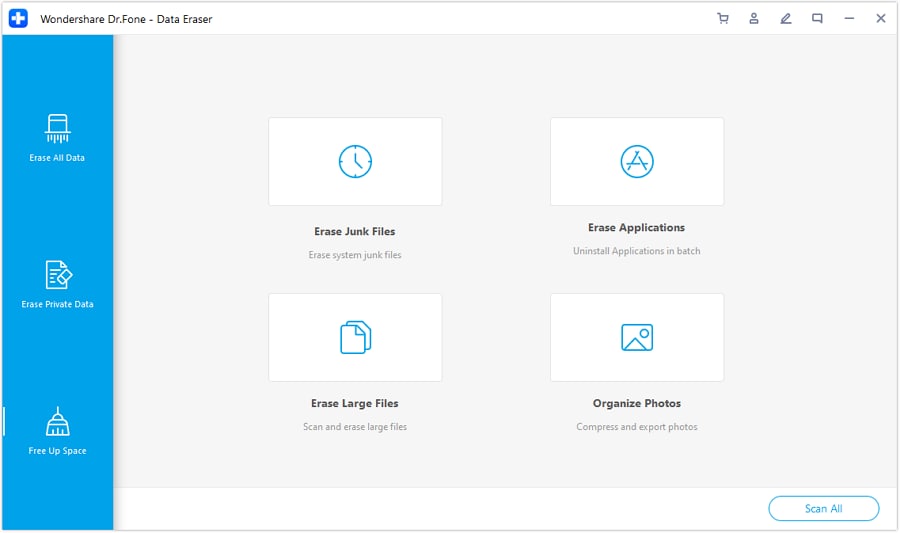
- Step 1. Choose the Data Eraser Tool and Connect iPhone
- Step 2. Pick the Junk and Cache Files
- Step 3. Confirm the Process to Optimize iPhone
Connect your iPhone having the Safari issue and locate the "Data Eraser" in the Toolbox tab. Then, access the "Free Up Space" tab from the left panel, and press the "Erase Junk Files" feature.
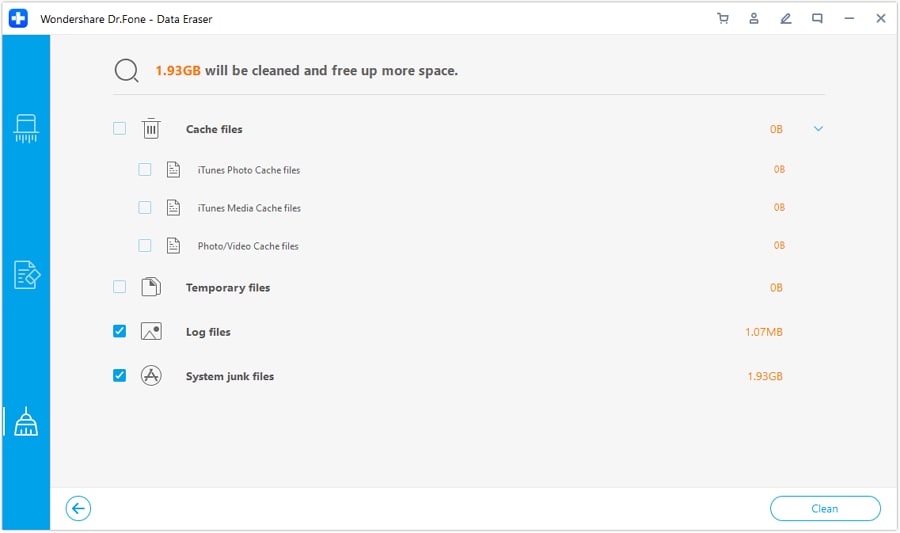
Now, tick "Cache Files" and other junk files and pick the "Clean" button to start the process.
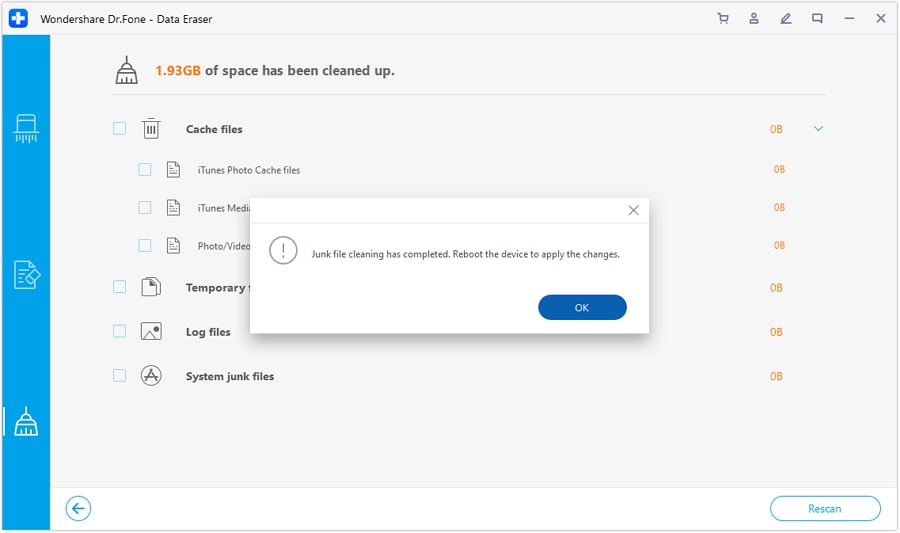
Once done, you will get a completion prompt; press "Ok" and reopen Safari to see if you still get a redirect issue.
Fix 2: Reset Network Settings on iPhone/iPad
This can also fix the Safari cannot open the page because too many redirects occurred on iPad/iPhone issues. It removes old Wi-Fi, cellular, and DNS data that may send Safari to the wrong URLs. Additionally, it forces your device to fetch fresh DNS and routing information, which can prevent redirect loops. Hence, follow the mentioned guide and learn how it's done on iPhone/iPad:
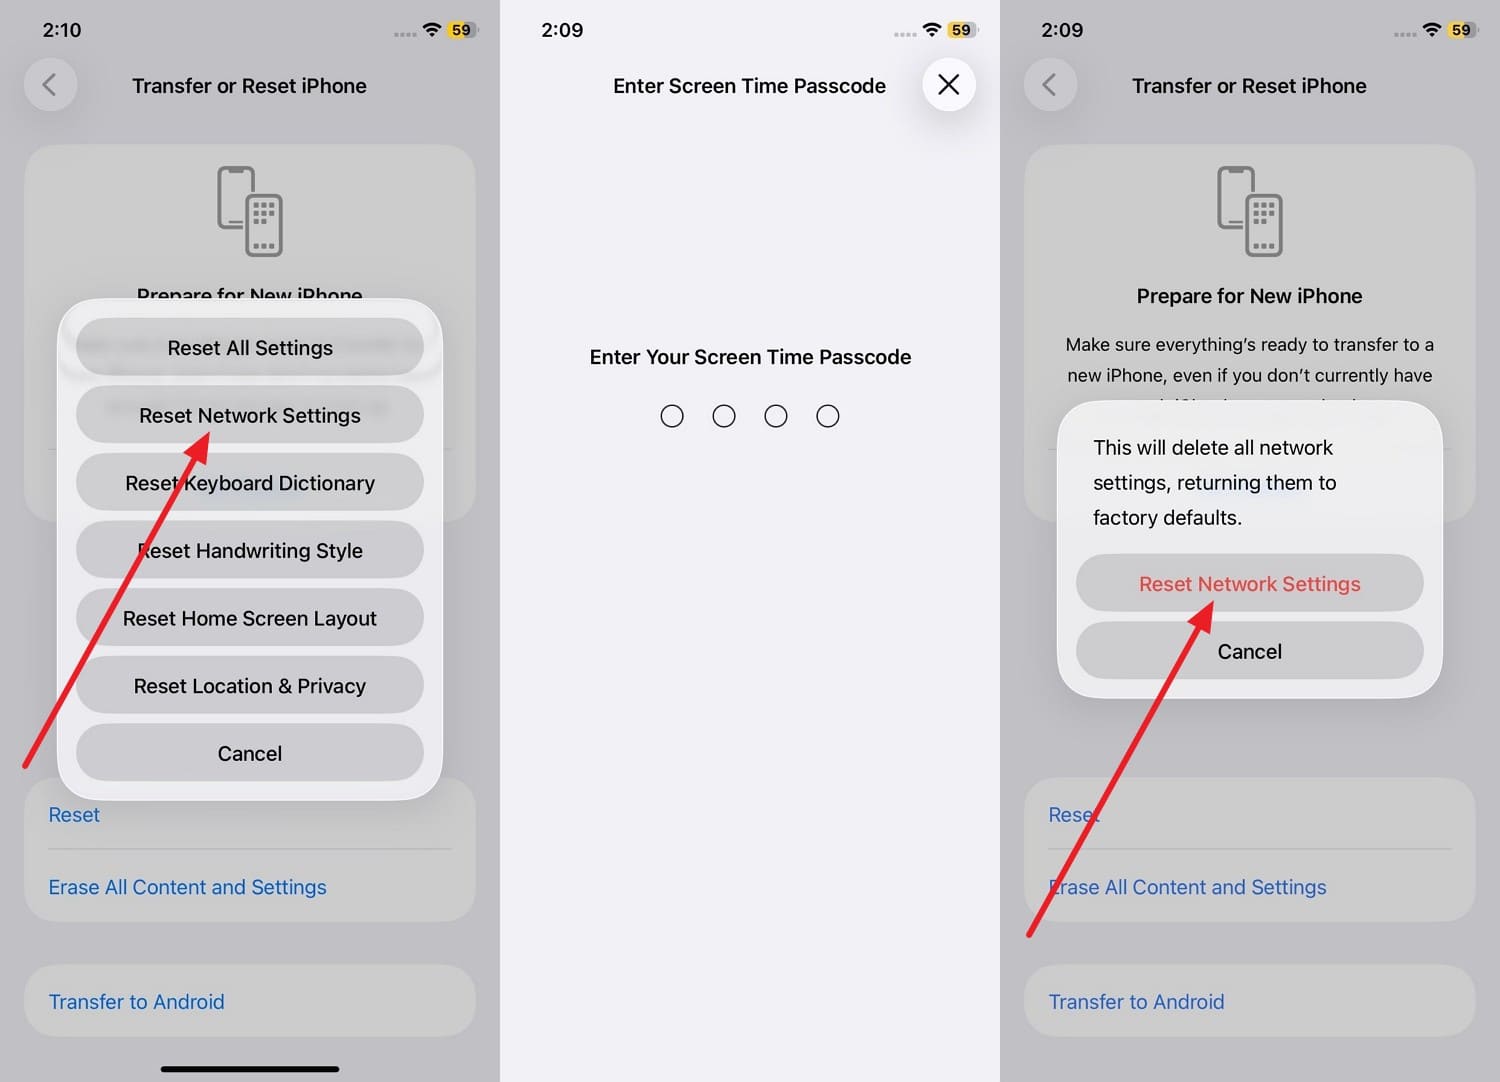
- Step 1. Go to "General" settings and choose the "Transfer & Reset iPhone" option. After that, pick the "Reset" option on the new interface to continue.
- Step 2. When the popup appears, tap on the "Reset Network Settings" option. Then, enter the device passcode when asked and confirm it by selecting the "Rest Network Settings" option.

Fix 3: Update iOS/iPadOS and Safari to the Latest Version
The new update can fix the too many redirects on Safari error because the latest updates patch known Safari bugs that affect cookies and redirects. In addition, they also improve support for modern websites, logon systems, and security standards. They also adjust privacy features, such as tracking, which can sometimes trigger a false redirect error. Thus, the simple guide to update iOS/iPad is mentioned below for guidance:
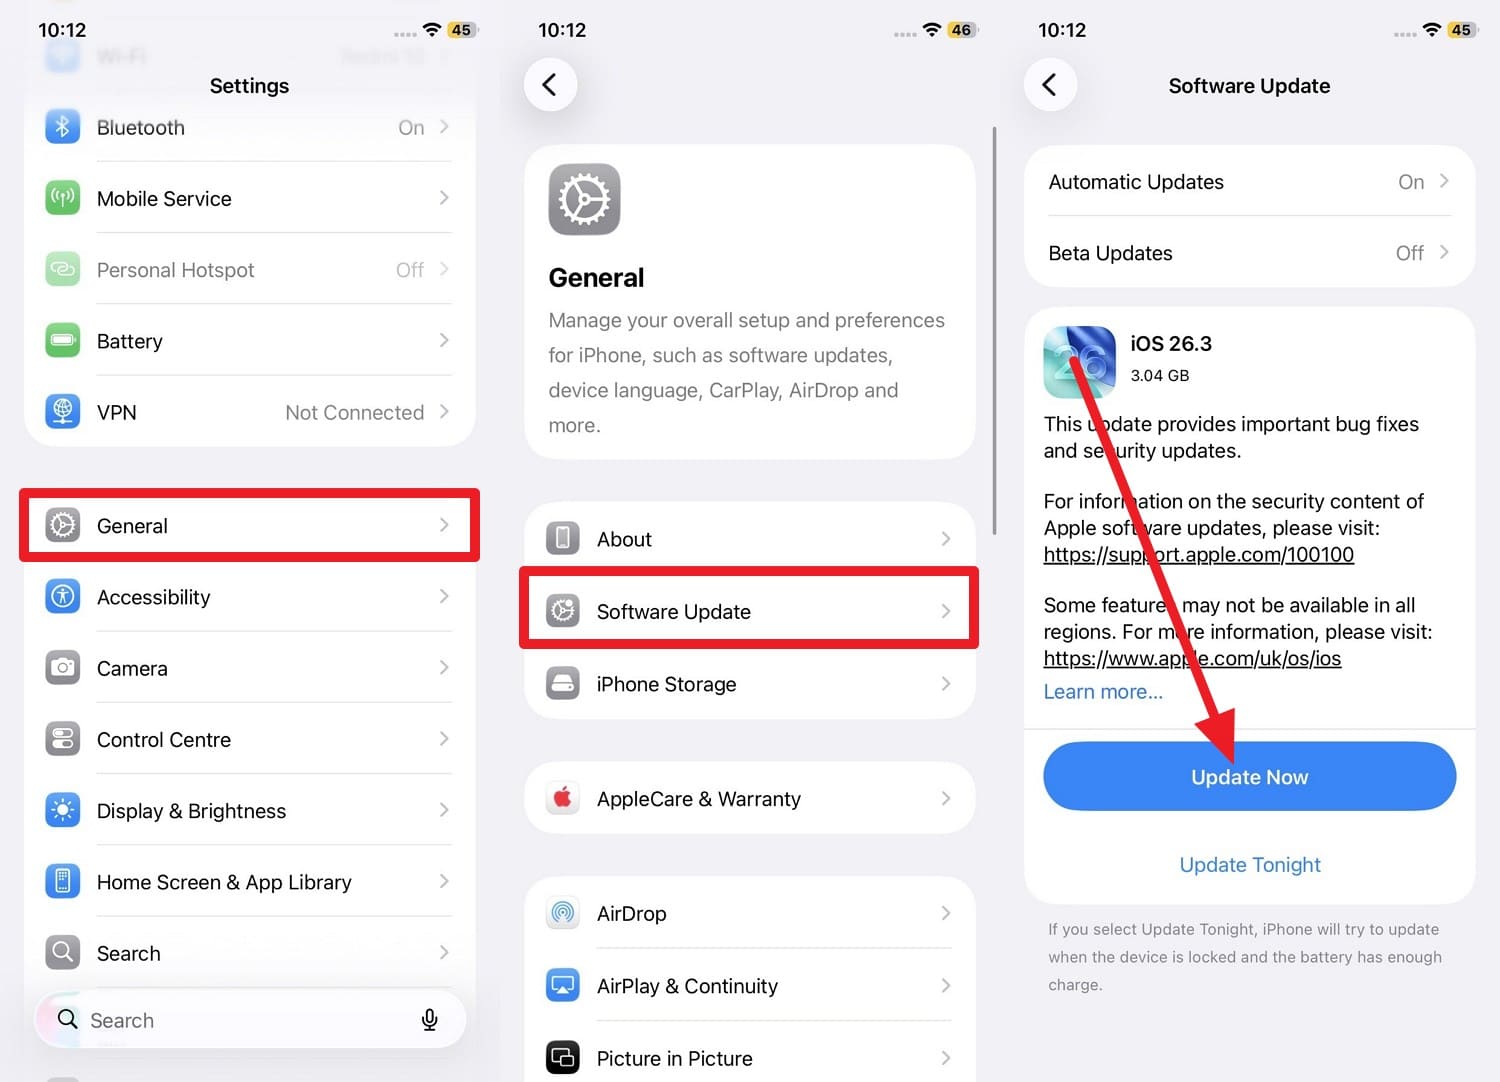
Instructions: Head to the "General" settings on iPhone/iPad and tap on the "Software Update" option. If you get a recent update, tap "Update Now" to fix Safari redirect loops.
Fix 4: Use Another Browser Temporarily to Isolate the Issue
As a last resort, use another browser, such as Google Chrome, Mozilla Firefox, or Microsoft Edge. This can fix Safari cannot open the page because too many redirects occurred on iPad/iPhone. Additionally, this also gives quick access to the site while you fix Safari. If the site works in another browser, Safari cookies, cache, or privacy settings likely cause the loop.
Conclusion
To wrap up, when you try to search for something, you might get too many redirects on Safari, which is quite common. Therefore, this guide has explained why one faces this redirect loop and how to resolve it with simple and innovative ways.
Among all, Dr.Fone - Data Eraser seems to be the reliable choice when old cache and junk files are the cause of this issue. So, use this innovative tool to selectively remove unwanted data and make sure Safari works smoothly.
FAQs


iPhone Erase
- Clear iPhone
- Delete iPhone
- 1. Delete Albums on iPhone
- 2. Delete Apps from iPhone
- 3. Delete Calendar Event on iPhone
- 4. Delete Documents on iPhone
- 5. Delete Email Account on iPhone
- 6. Delete Visited Sites on iPhone
- 7. Delete Music from iPhone
- 8. Delete Snapchat Messages on iPhone
- 9. Delete Songs from iCloud
- 10. Delete Voicemail on iPhone
- 11. Delete WhatsApp Message for Everyone
- 12. Delete WhatsApp Message Permanently
- 13. Delete Downloads on iPhone
- 14. Delete Calendars from iPhone
- 15. Delete History on iPhone
- 16. Delete Snapchat Story/History
- 17. Delete Call History on iPhone
- 18. Delete Kik on iPhone
- 19. WhatsApp Delete Message Tips
- 20. Anti Spyware for iPhone
- 21. Get Rid of Virus on iPhone
- 22. Delete Other Data on iPhone/iPad
- 23. Remove Subscribed Calendar iPhone
- Erase iPhone
- 1. Erase an iPhone without Apple ID
- 2. iPhone Data Erase Softwares
- 3. Remove Cydia from iPhone/iPad
- 4. Erase All Content and Settings
- 5. Erase Old iPhone
- 6. Erase iPhone 13 Data
- 7. Erase Data Old Device
- 8. Erase iPhone without Apple ID
- 9. Empty Trash on iPhone
- 10. Sell My Old iPhone
- 11. Sell A Used Phone
- 12. Safely Sell Used Phones
- 13. Apple Trade in Program
- iPhone Storage Full
- 1. iPhone Cleaners to Clean iPhone
- 2. Clean Master for iPhone
- 3. Clean Up iPhone
- 4. Free Up Storage on iPhone
- 5. Make iPhone Faster
- 6. Speed Up iPhone/iPad
- Wipe iPhone
- Sell Old iPhone
- ● Manage/transfer/recover data
- ● Unlock screen/activate/FRP lock
- ● Fix most iOS and Android issues
- Free Download Free Download Free Download


Alice MJ
staff Editor