100% Security Verified | No Subscription Required | No Malware

 :
: 
 ChatGPT
 Perplexity
 Gemini
 Claude
 Grok
Grok
Your MacBook holds all sorts of essential data like pictures, text files, password information, app data, and work submissions. Deleting something unintentionally or a failure in hardware can lead to the loss of data very rapidly. That is why having one of the avenues for protecting your files through backing up your MacBook regularly is very important. Wondering "how do I backup Mac to iCloud"?
Lots of users mistake iCloud syncing for a full MacBook backup. This article will help you learn how to backup your MacBook to iCloud. If you lose any files or backup data, tools like Dr.Fone - Data Recovery can also help recover data from iCloud backup files.
In this article
- What You Can and Cannot Backup to iCloud from a Mac
- Prerequisites: What You Need Before You Start
- How to Backup MacBook to iCloud
- Method 1. Enabling iCloud on Your Mac (First-Time Setup)
- Method 2. Backing Up Desktop and Documents Folder to iCloud Drive
- Method 3. Backing Up Files to iCloud Drive Manually
- Method 4. Backing Up Photos with iCloud Photos
- Method 5. Syncing Contacts, Calendars, and Notes with iCloud
- Method 6. Syncing Messages with iCloud
- How to Check If MacBook Files Are Backed Up to iCloud
- How to Optimize iCloud Storage on Mac
- How to Recover iCloud Backup Data with Dr.Fone

- Common Issues & Troubleshooting When Backing Up MacBook Files to iCloud
Part 1. What You Can and Cannot Backup to iCloud from a Mac
No. Apple does not provide a feature for MacBook users to back up their whole devices directly to iCloud. On macOS, iCloud is mainly used for syncing and storing selected files, apps, and personal data.
What can Be Stored/Synced to iCloud from Mac
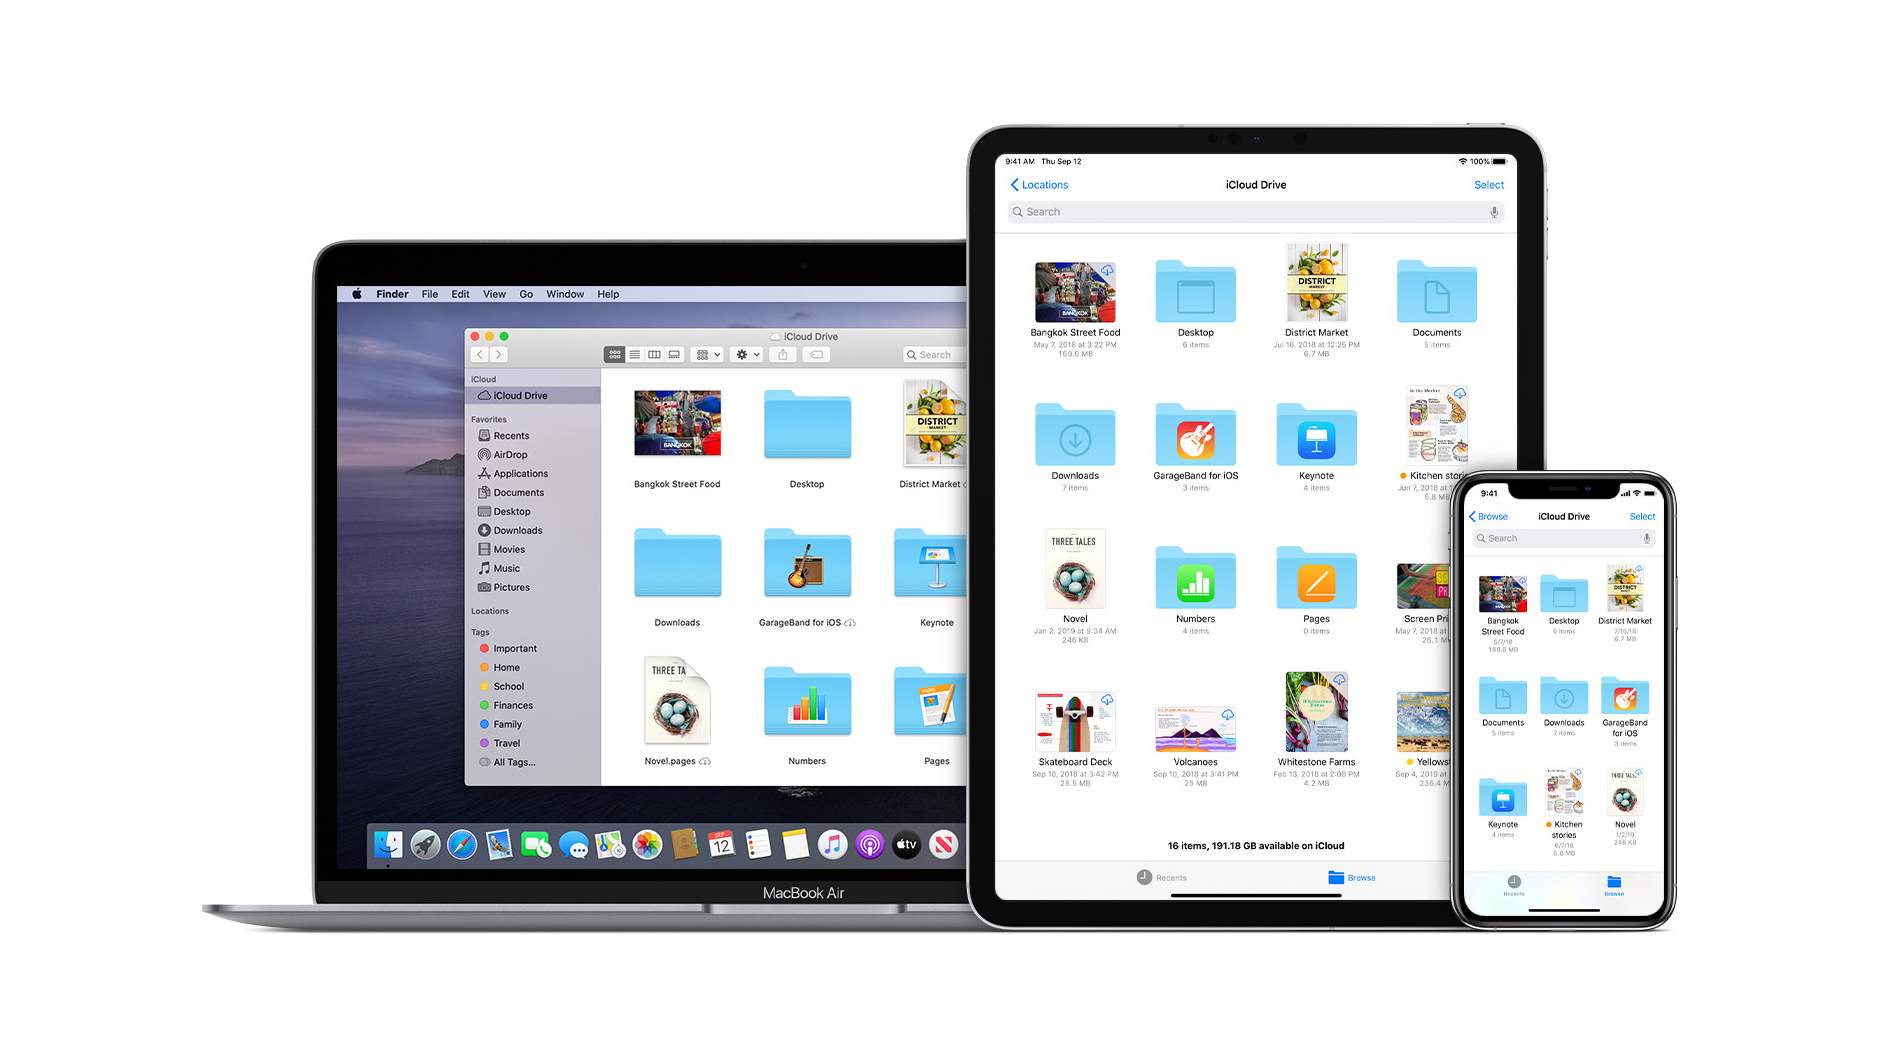
- Documents and files — via iCloud Drive (including Desktop & Documents folders)
- Photos and videos — via iCloud Photos
- Contacts, Calendars, Reminders, Notes
- Messages — via Messages in iCloud
- Safari bookmarks, history, and tabs
- Passwords and Keychain
- Mail (if using iCloud Mail)
- App data — for apps that support iCloud sync
What cannot Be Backed Up to iCloud from Mac
- Full system backup — macOS applications, system settings, user accounts, installed software
- Time Machine backups — cannot be stored in iCloud
- Entire disk image — iCloud does not support full disk backup for Mac
- Third-party app data that does not support iCloud sync
Part 2. Prerequisites: What You Need Before You Start
Before backing up your MacBook to iCloud, make sure the following requirements are in place:
- Apple ID signed in via System Settings > Apple ID
- Enough iCloud storage
- Compatible macOS version (macOS High Sierra 10.13 or later recommended)
- iCloud Drive is enabled for file and folder syncing
- Stable Wi-Fi connection for smooth and fast uploads
Part 3. How to Backup MacBook to iCloud
If you are planning to switch over, it is necessary to know the differences of cloud services of Apple.
Normally, iCloud Backup is known as an iPhone/iPad feature. But a Mac cannot do a full system backup to iCloud. Mac's way of functioning with iCloud is in storing files on iCloud Drive and using iCloud-synced data for apps like Photos, Notes, and Contacts. All these assist in data protection and the syncing process of one device with another.
Method 1. Enabling iCloud on Your Mac (First-Time Setup)
Doing this will allow your Mac to use the iCloud features, including syncing all supported data types without your intervention. It is actually the initial step to go through before you can make a backup of any files or app data.
Let's find out how to backup Mac to iCloud:
Here are the steps:
-
Step 1 Open System Settings on your Mac
-
Step 2 Click on your Apple ID at the top
-
Step 3 Sign in with your Apple ID (if you were not already signed in)
-
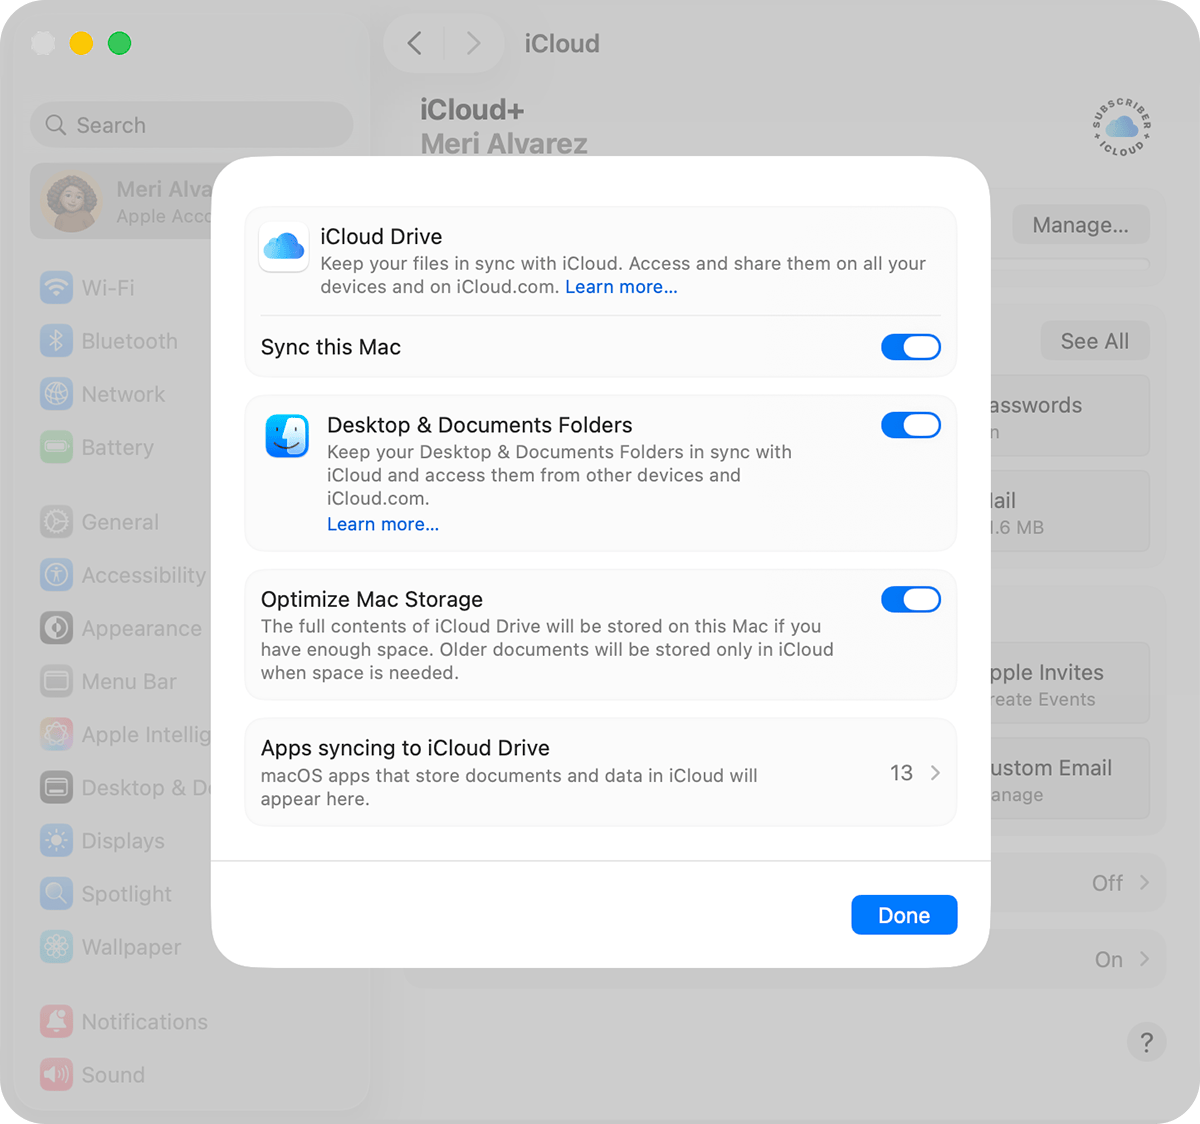
Step 4 To enable iCloud Drive, click and toggle on the "Sync this Mac".

Method 2. Backing Up Desktop and Documents Folder to iCloud Drive
This method corresponds to iCloud Drive (file sync) type. This will automatically back up your Desktop and Documents folders to iCloud Drive so that your important files will always be accessible and up to date on all your devices.
-
Step 1 Go to System Settings > Apple ID > iCloud.
-
Step 2 Click on the iCloud Drive.
-
Step 3 Turn on Desktop & Documents Folder. Wait for files to be uploaded and synchronized automatically.
Method 3. Backing Up Files to iCloud Drive Manually
This method corresponds to iCloud Drive (manual file storage) type. With this approach, you totally control what gets saved in iCloud Drive. Rather than syncing all, you only decide which files or folders to upload to the cloud. Perfect for your important documents, work, or selective backup.
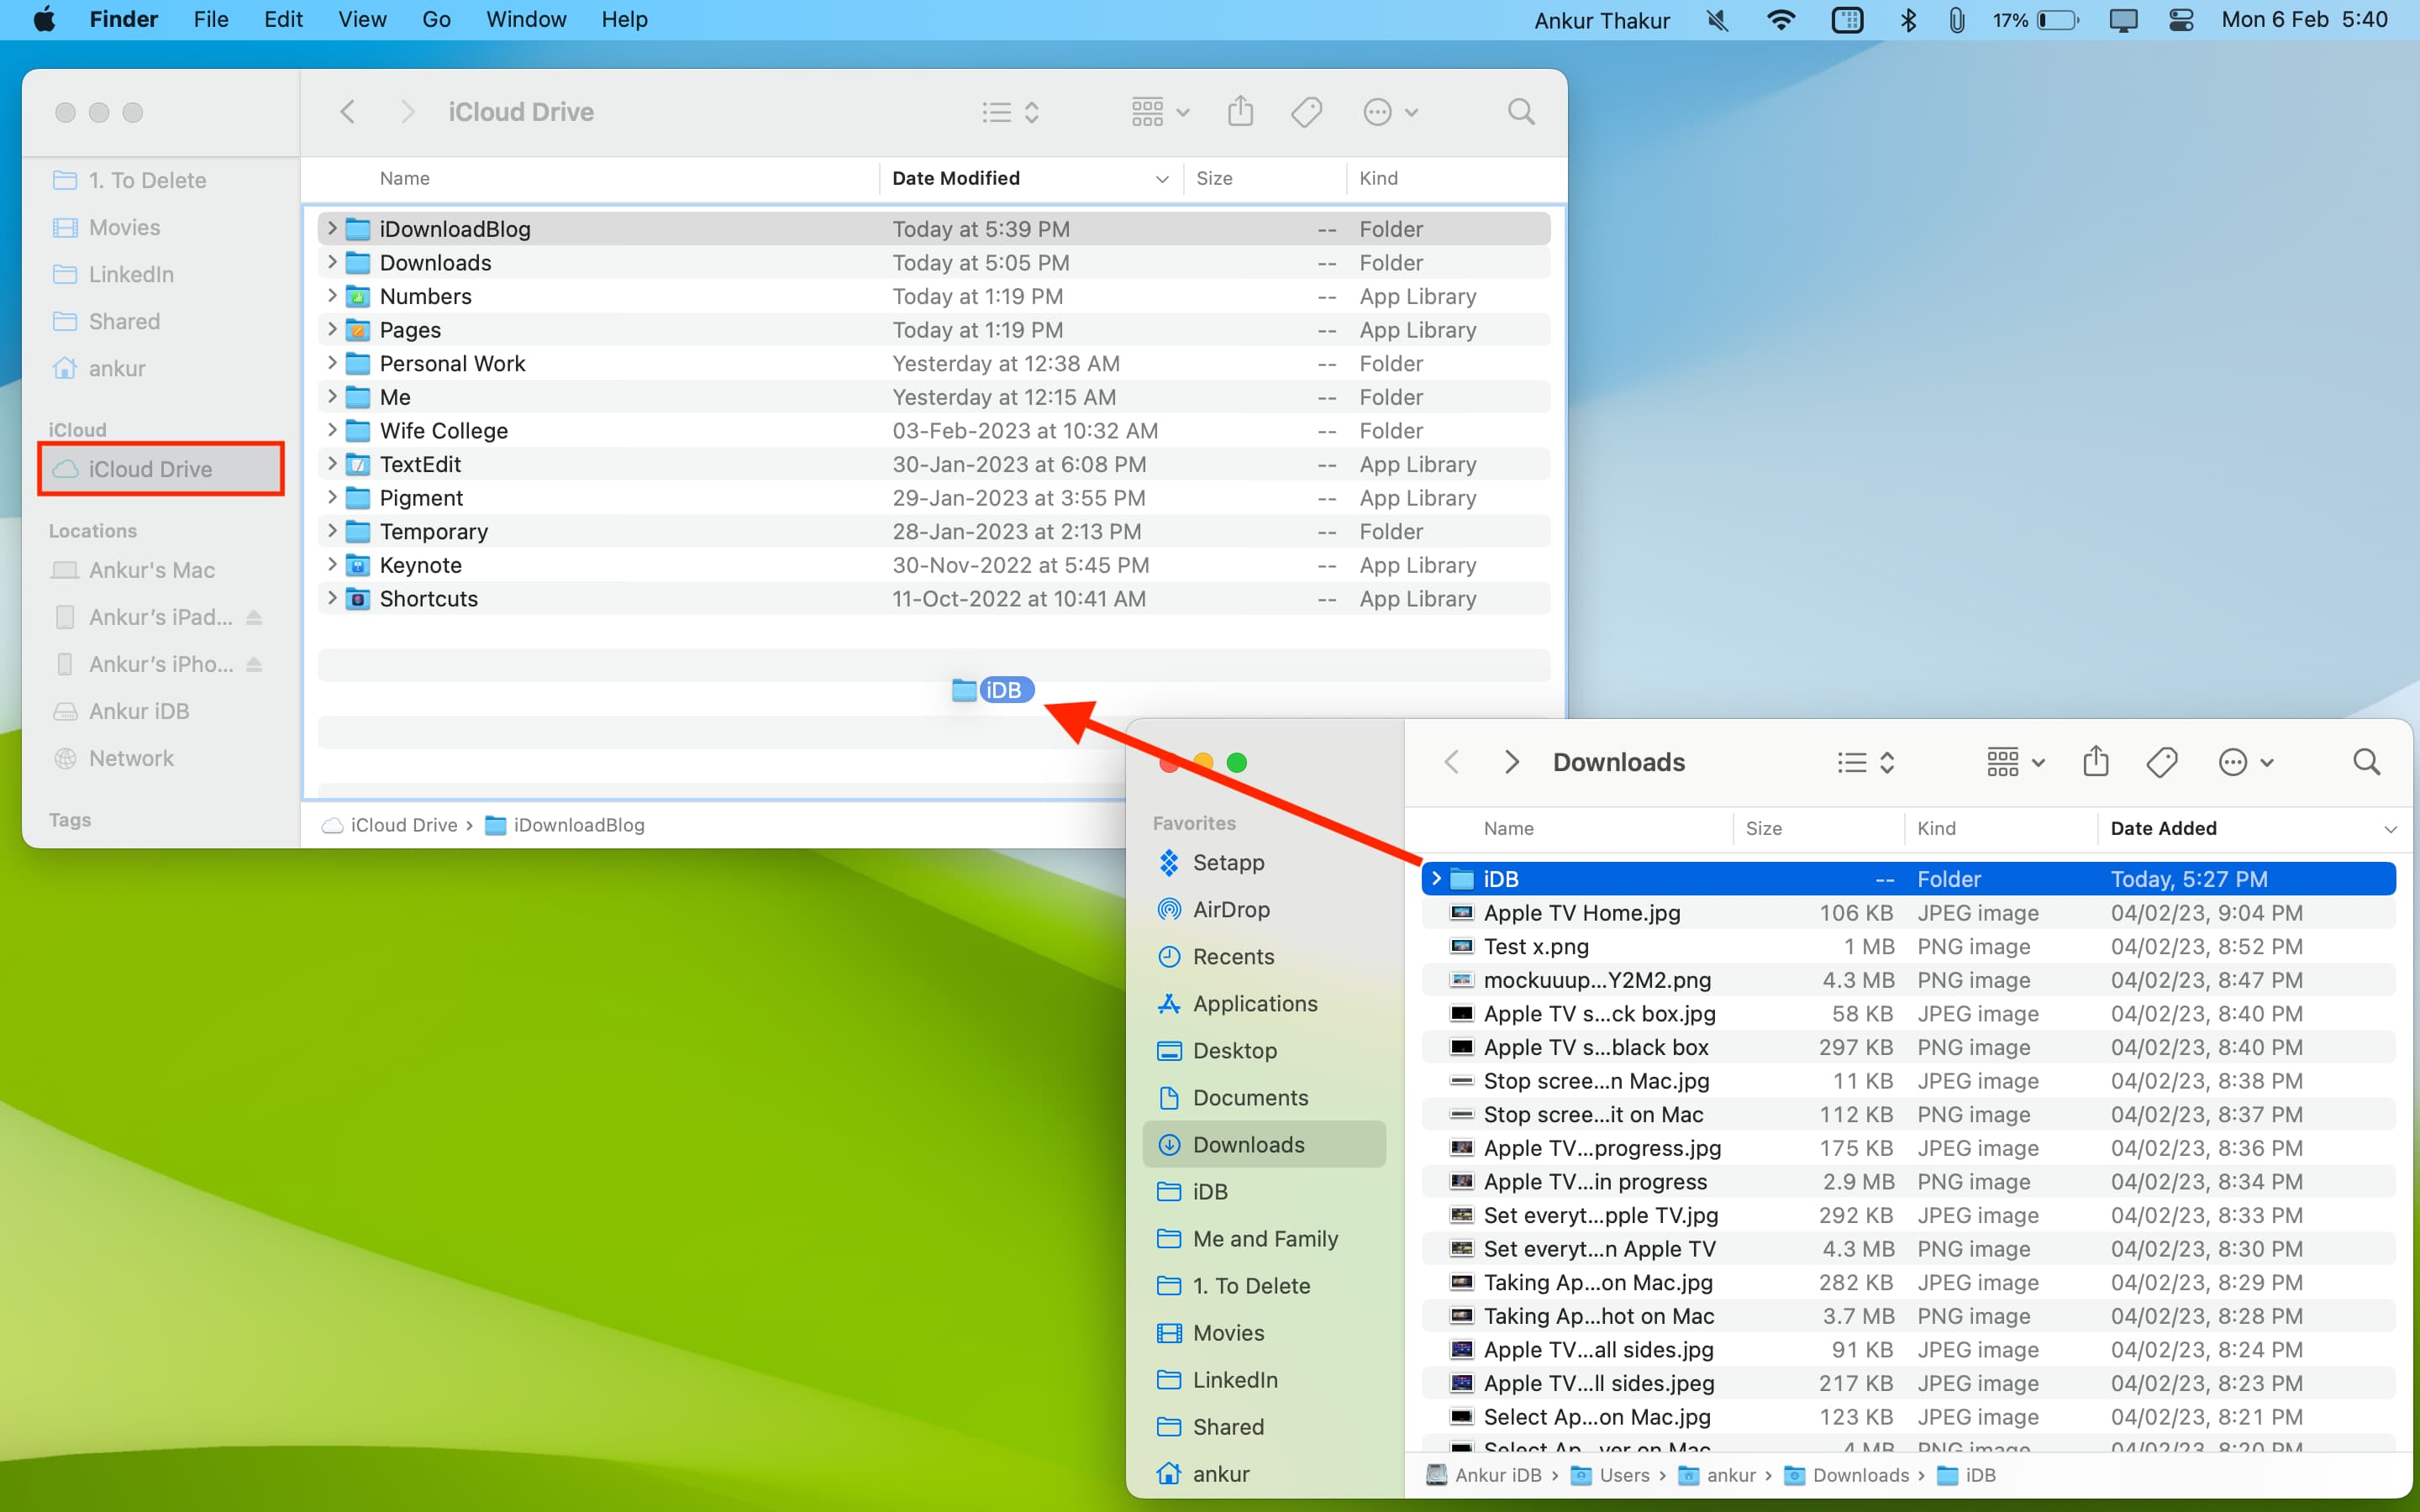
Via Finder drag and drop
-
Step 1 Open Finder on your Mac.
-
Step 2 Select iCloud Drive from the sidebar.
-
Step 3 Drag and drop your selected files into iCloud Drive.
Via copy and paste
-
Step 1 Locate the file in Finder.
-
Step 2 Copy the file using Command + C.
-
Step 3 Paste it into iCloud Drive using Command + V
Via iCloud.com
-
Step 1 Go to iCloud.com and sign in with your Apple ID.
-
Step 2 Open iCloud Drive from the dashboard.
-
Step 3 Upload files directly from your Mac to the cloud.
Method 4. Backing Up Photos with iCloud Photos
This method is part of iCloud Synced Data type. iCloud Photos is not the same as a typical backup system that only saves a copy of your data. It synchronizes your full photo and video library in real-time across all your Apple devices.
-
Step 1 Launch the System Settings.
-
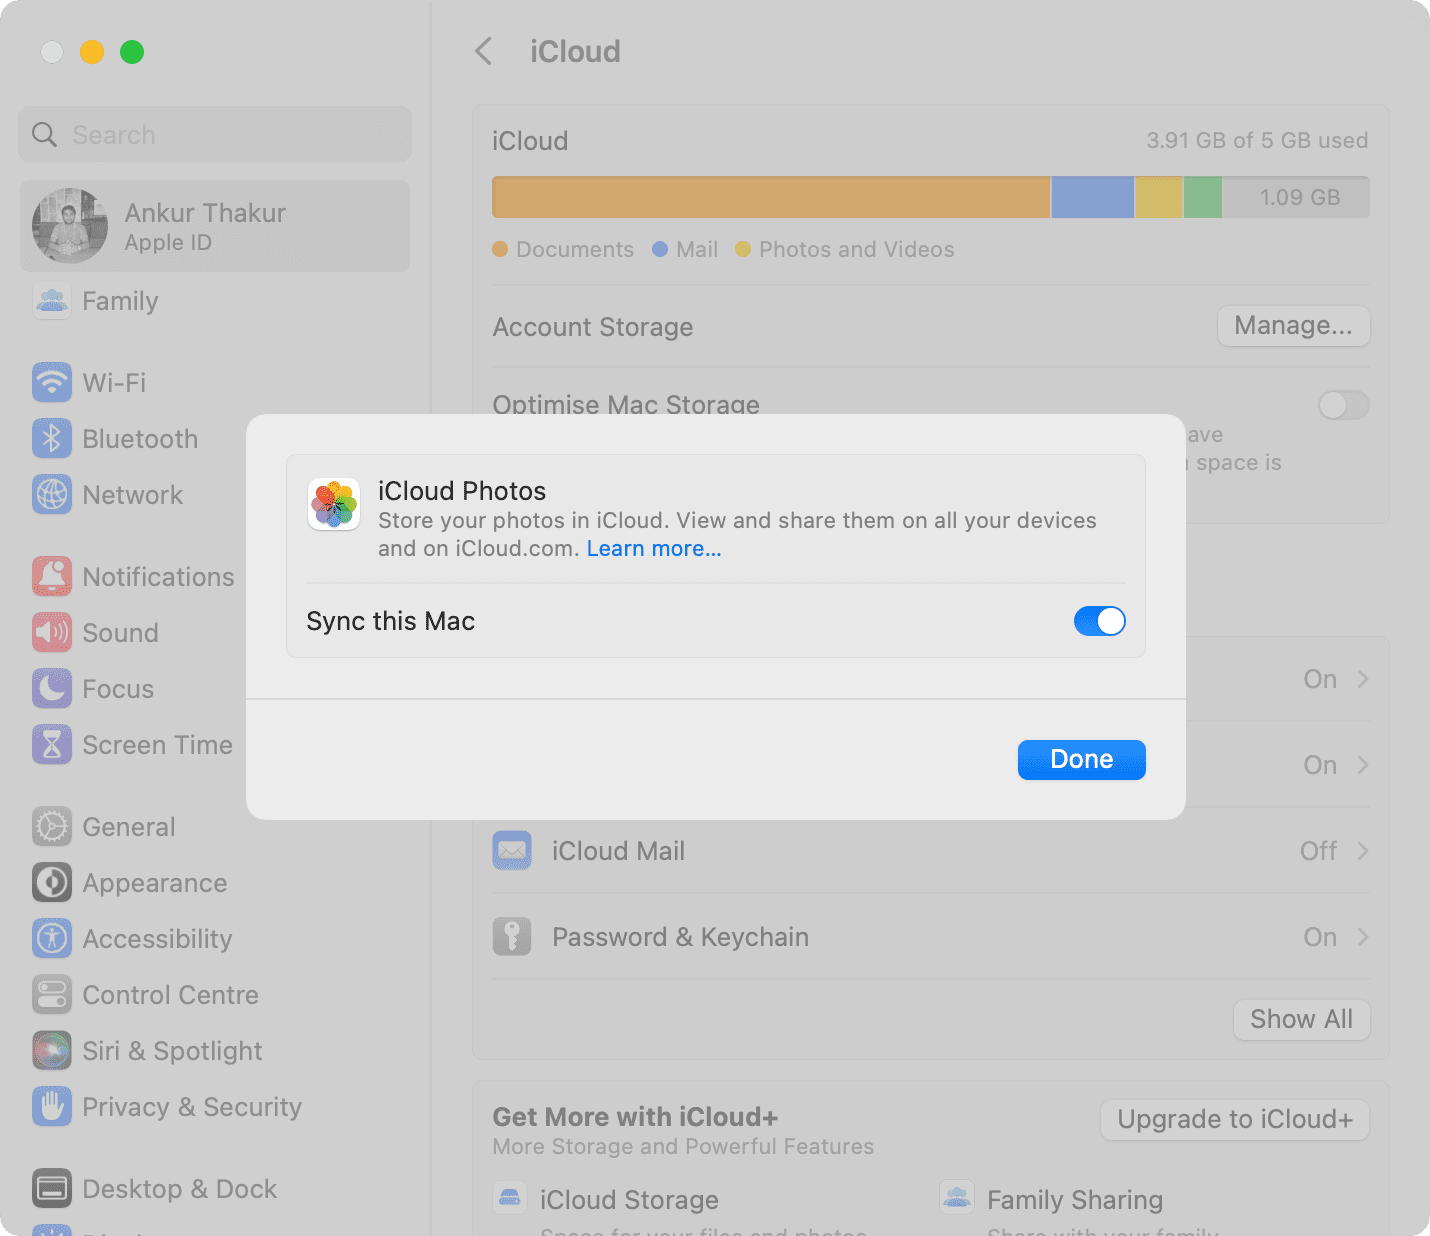
Step 2 At the very top of the sidebar, click your Apple ID. Click iCloud and then select Photos.
-
Step 3 Toggle on "Sync this Mac" to allow iCloud photos syncing.
Method 5. Syncing Contacts, Calendars, and Notes with iCloud
This method safeguards sensitive info like your contacts, calendar events, reminders and notes from being exposed, rather, it also keeps them updated and consistent on all your Apple devices. It is not a backup, but a live synchronization method that keeps the data identical everywhere.
-
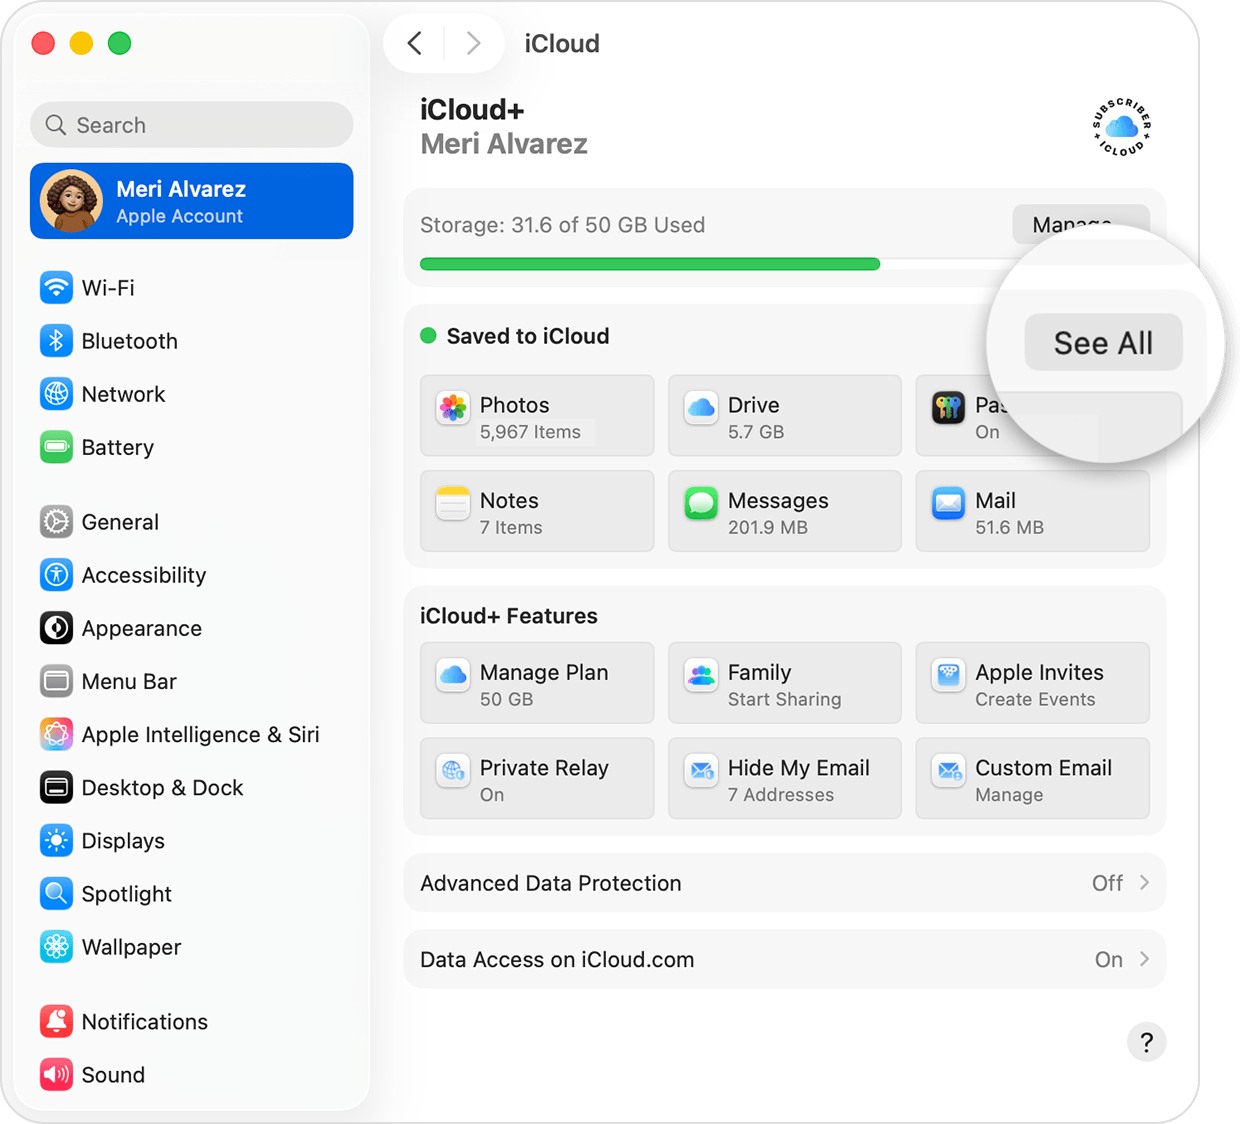
Step 1 Open System Settings > Apple ID > iCloud. Click on See All.
-
Step 2 Enable Contacts, Calendars, Notes, and Reminders.
-
Step 3 Give permission to macOS for automatic background data syncing. If necessary, verify the synced data on other Apple devices
Method 6. Syncing Messages with iCloud
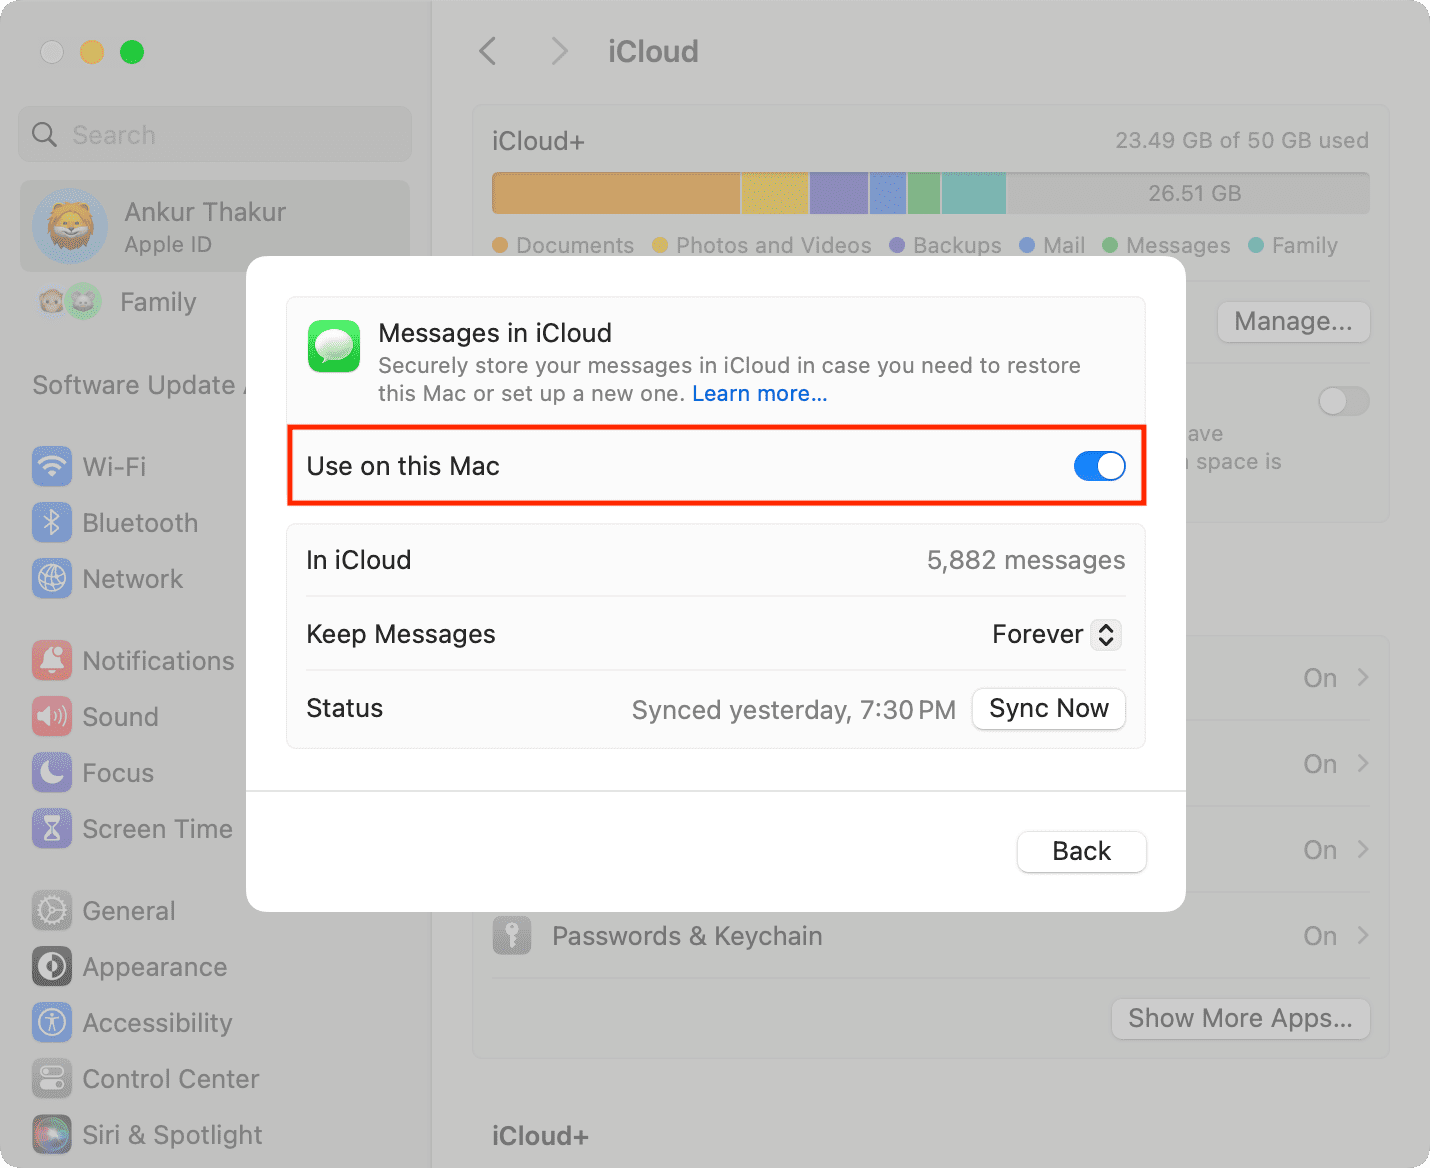
Thanks to Messages in iCloud, your iMessage conversations will always be in sync and updated on all of your Apple devices where you have signed in using the same Apple ID.
-
Step 1 Launch the Messages application on your Mac.
-
Step 2 On the primary menu bar, click Messages > Settings.
-
Step 3 Turn on "Use on this Mac" to enable message syncing with iCloud.
Part 4. How to Check If MacBook Files Are Backed Up to iCloud
To ensure that your files are syncing and safe in the cloud after setting up iCloud on your Mac, check the methods below:
Verify through Finder
Open Finder and click iCloud Drive from the sidebar. Here, you can see your synced files and folders, like Desktop and Documents. Cloud icons beside files show whether they are uploaded or still syncing.
Verify through iCloud website
Checking through iCloud.com is a good move to make certain that your files are not simply saved on your local hard drive but uploaded to Apple's cloud servers.
Confirm storage usage
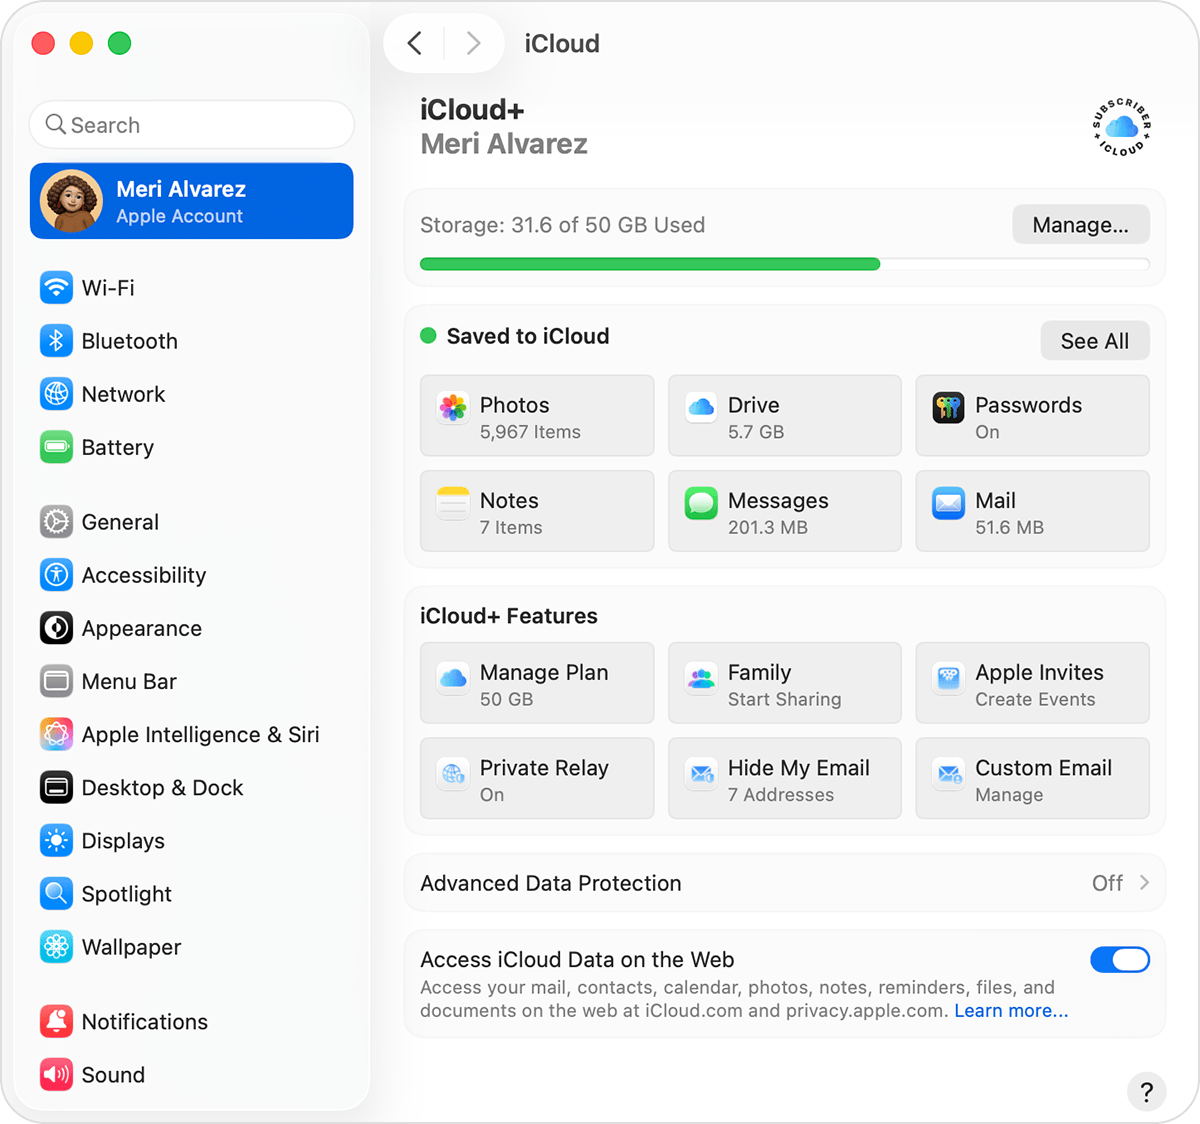
Open System Settings > Apple ID > iCloud > Manage to see how much iCloud storage is being used by your files, photos, and other synced data.
Part 5. How to Optimize iCloud Storage on Mac
It's a wise idea to manage your iCloud storage because the free 5GB space gets used up very fast if you are syncing files, photos, and app data from your Mac. Optimizing storage not only helps with smoother syncing but also prevents backup interruptions and assists you in making good use of your remaining space even while keeping your important data safe.
Get rid of large unnecessary files
Old videos, downloads, ZIP files, and even unused folders may take up a lot of space in your iCloud. Opening iCloud Drive and removing those files that you no longer need is a very fast way to free up your storage.
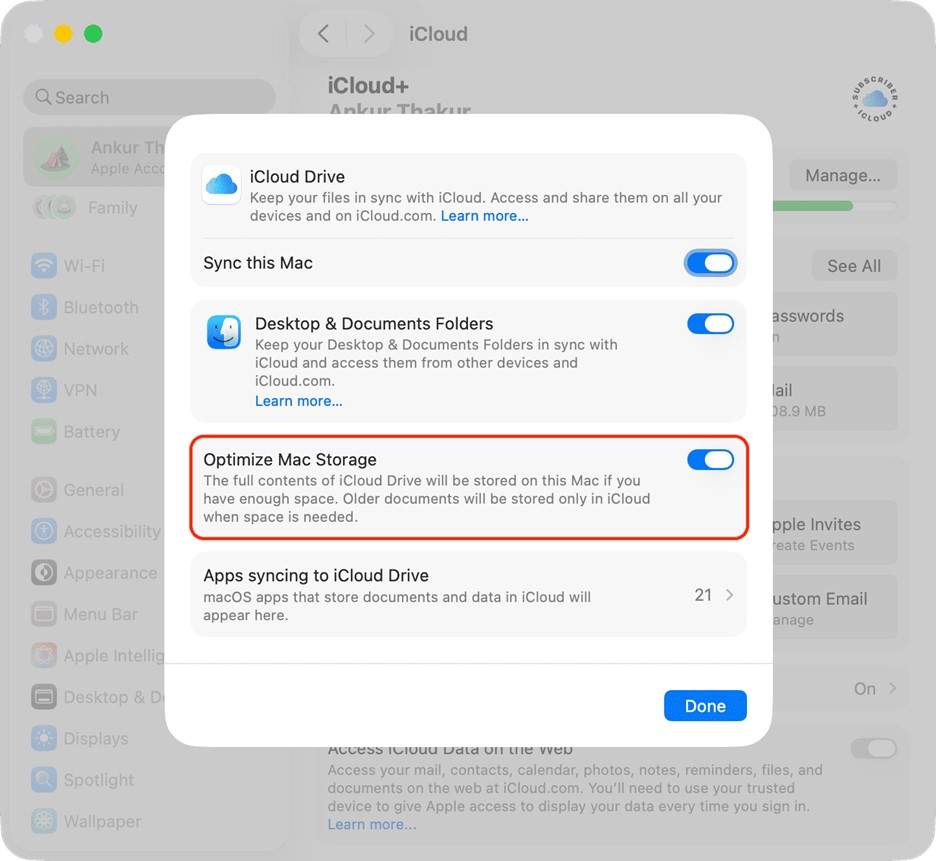
Enable Optimize Mac Storage
With this function, your Mac will have more free space as only small-sized files of older items will be kept on the Mac while the original files will be stored in the cloud. This function is enabled by going to System Settings > Apple ID > iCloud > iCloud Drive > Optimize Mac Storage.
Delete Duplicate Photos and Attachments
The biggest chunk of iCloud space is often occupied by duplicate photos/videos and message attachments. One way to reclaim space is by identifying duplicate photos in the Photos app and clearing message attachments, especially iMessage conversations synced across devices via iCloud.
Upgrade to iCloud+
The most efficient way out when you need more space than the free tier is to get on board with iCloud+. It offers increased storage levels for your backups, photos, and files, and adds more privacy and security features so that all your Mac data is kept safe and the syncing is always uninterrupted.
Part 6. How to Recover iCloud Backup Data with Dr.Fone
Dr.Fone - Data Recovery serves as a powerful recovery solution that aids iPhone, iPad, and iPod touch users in retrieving deleted or lost data. It supports iCloud restore, extracting from iCloud Drive and iTunes backup. Users can recover photos, messages, contacts, WhatsApp chats, notes, and over 35 data types without the need to factory reset their device.
Besides scanning, Dr.Fone goes further to process the data locally in a secure way. It supports many iOS/iPadOS versions (including newest iOS) and provides a safe environment for the recovery of files.
 Recovers data after deletion, crashes, or device damage.
- Supports photos, messages, contacts, WhatsApp, and more.
- Supports all major iPhone, iPad, and iPod models.
- Preview and recover only what you need.
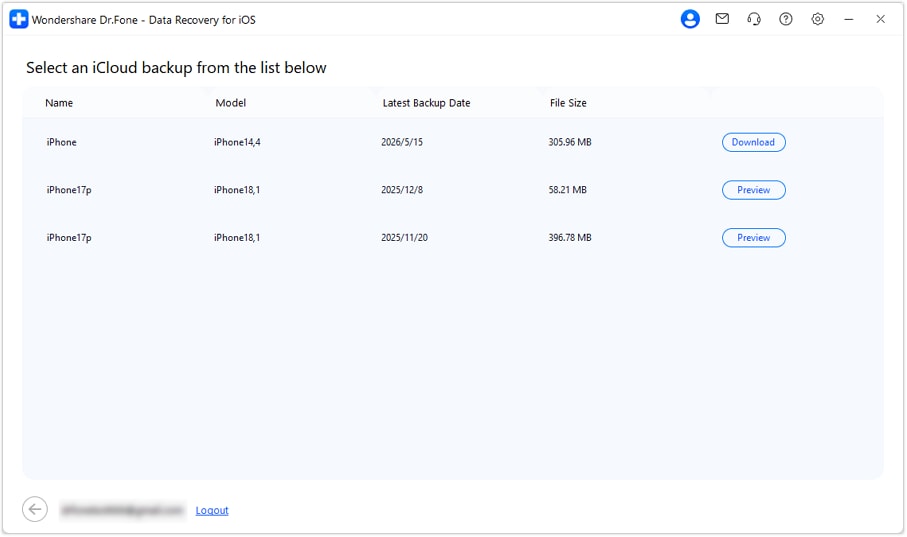
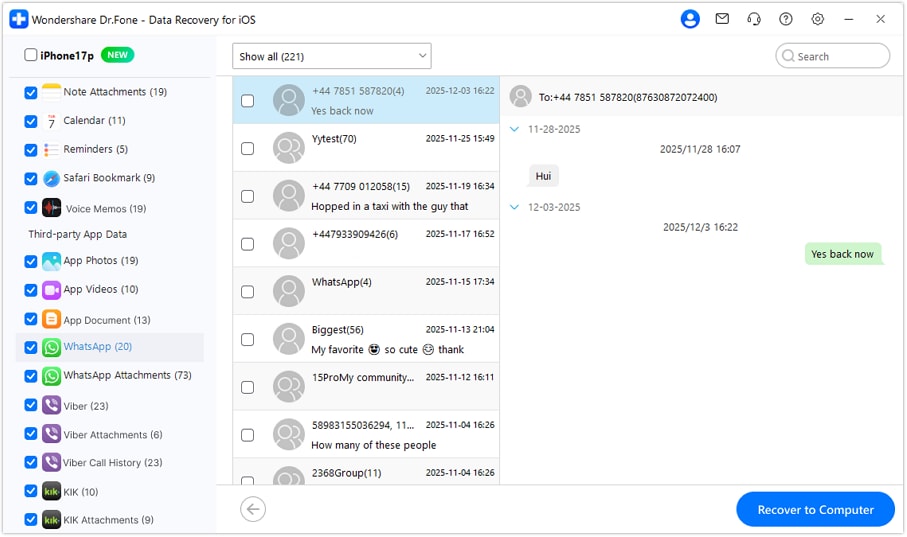
Steps to Selectively Recover WhatsApp Data from iCloud Backup
-
Step 1 Download and install Dr.Fone. Click Toolbox > Data Recovery from the main dashboard.

-
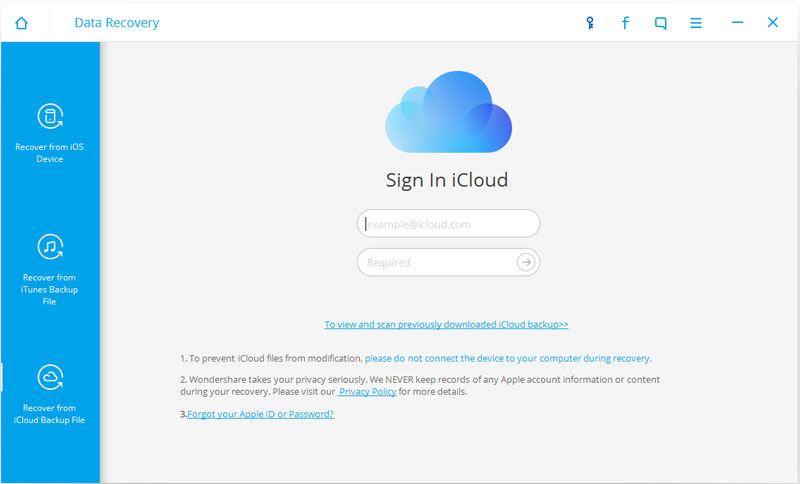
Step 2 On the recovery screen, click iOS Data Recovery, then select Recover data from iCloud Backup from the available options.

-
Step 3 After login, wait for the software to load backup files, then click to select the required Backup and press Download.
-
Step 4 Once downloaded, preview files, select items, and click Recover to Computer to save them locally.


Part 7. Common Issues & Troubleshooting When Backing Up MacBook Files to iCloud
Using iCloud on Mac can trigger various problems which block syncing or backing up files. Mainly, these issues concern storage capacity, network connectivity, or account settings, and fixing them involves mostly simple checks.
- If backup is halted or hanging, restart iCloud by rebooting your Mac and consult Apple System Status page to see whether iCloud infrastructure is operating without any problem.
- Sometimes iCloud backup is not displayed. So, check iCloud Drive or settings whether syncing is turned on and ascertain the last successful sync time. Upload is simply not finished sometimes.
- "No sufficient iCloud storage space" can be managed by removing big files from iCloud Drive or Photos or subscribing to an iCloud+ plan with larger space.
- "iCloud backup failed" message is generally a sign of iCloud storage being almost full, a very weak internet connection, or issues with Apple ID authentication. You can solve the problem by getting more storage, using a reliable Wi-Fi network and signing out and signing in of your Apple ID.
- If two-factor authentication consequently stops backup, first make sure that you come with the proper verification code and trusted device. Then do the sync again.
Next time your attempts to sync/restore iCloud fail, you can always count on Dr.Fone - Data Recovery to help you recover or extract data from iCloud backups and iCloud Drive without doing full system restore.
Conclusion
Backing up your MacBook to iCloud is an easy and reliable method to safeguard documents, photos, notes, app data, etc. And, to have them available on any Apple device. Besides, iCloud is designed mostly as a syncing service and not a system backup. So, it isn't a complete substitute for a Mac-level backup solution.
Therefore, for the best protection, it is advisable to combine iCloud with other ways such as Time Machine. Besides, if data is lost or iCloud recovery is not available or very limited, programs like Dr.Fone - Data Recovery may locate and retrieve important files from iCloud backups and synced data without a full device restoration.
FAQ
-
Can I back up my entire MacBook to iCloud?
No. iCloud cannot be used to back up entire MacBook as one can do for iPhone or iPad. Rather, the service is mostly used to sync files, photos, passwords, notes, and other supported data. If you want a complete backup of macOS, apps, and settings, the best choice is Time Machine. -
Does iCloud automatically back up files on my Mac?
Yes, if you enable iCloud Drive, iCloud Photos, or other iCloud services, the supported files will be automatically synced in the background whenever your Mac is connected to the internet. Any changes made on one device are also reflected on other Apple devices. -
How much iCloud storage do I need for my MacBook?
This will depend on what you want to sync. The free iCloud plan comes with 5GB of storage, which might be sufficient if you only want to store contacts, notes, and a few files. However, if you sync large files, you will probably require an iCloud+ storage plan.
 Add Wondershare Dr.Fone as a preferred source on Google