How to Get Water Out of iPhone [Ultimate Tested Guide]

Jun 11, 2026 • Filed to: Data Recovery Solutions • Proven solutions
 TL;DR:
To safely get water out of an iPhone, immediately power off the device, remove the case and SIM tray, extract moisture using silica gel or low-frequency sound tools, and let it air-dry for at least 24 hours before attempting a restart.
● Wait 5 hours for serious spills or up to 24 hours for minor splashes before plugging the device into a charger, and completely avoid using rice or freezers to prevent permanent internal damage.
● Expel trapped droplets from the speakers by holding the phone face down and playing low-frequency vibrations using the Water Eject Shortcut, Fixmyspeakers.com, or the Sonic App.
● If the iPhone fails to turn on after the drying period but is still detectable by a computer, use Dr.Fone - Data Recovery to selectively retrieve local, iCloud, or iTunes files before seeking professional hardware repair.
Ask AI for a summary
 ChatGPT
 Perplexity
 Gemini
 Claude
 Grok
Grok
While you were in the kitchen or at the pool, imagine you accidentally dropped your iPhone. Panic sets in as you see the screen go black or hear strange sounds. Water inside your iPhone can damage circuits and stop it from working, and facing this situation, many people feel lost and unsure of what to do first.
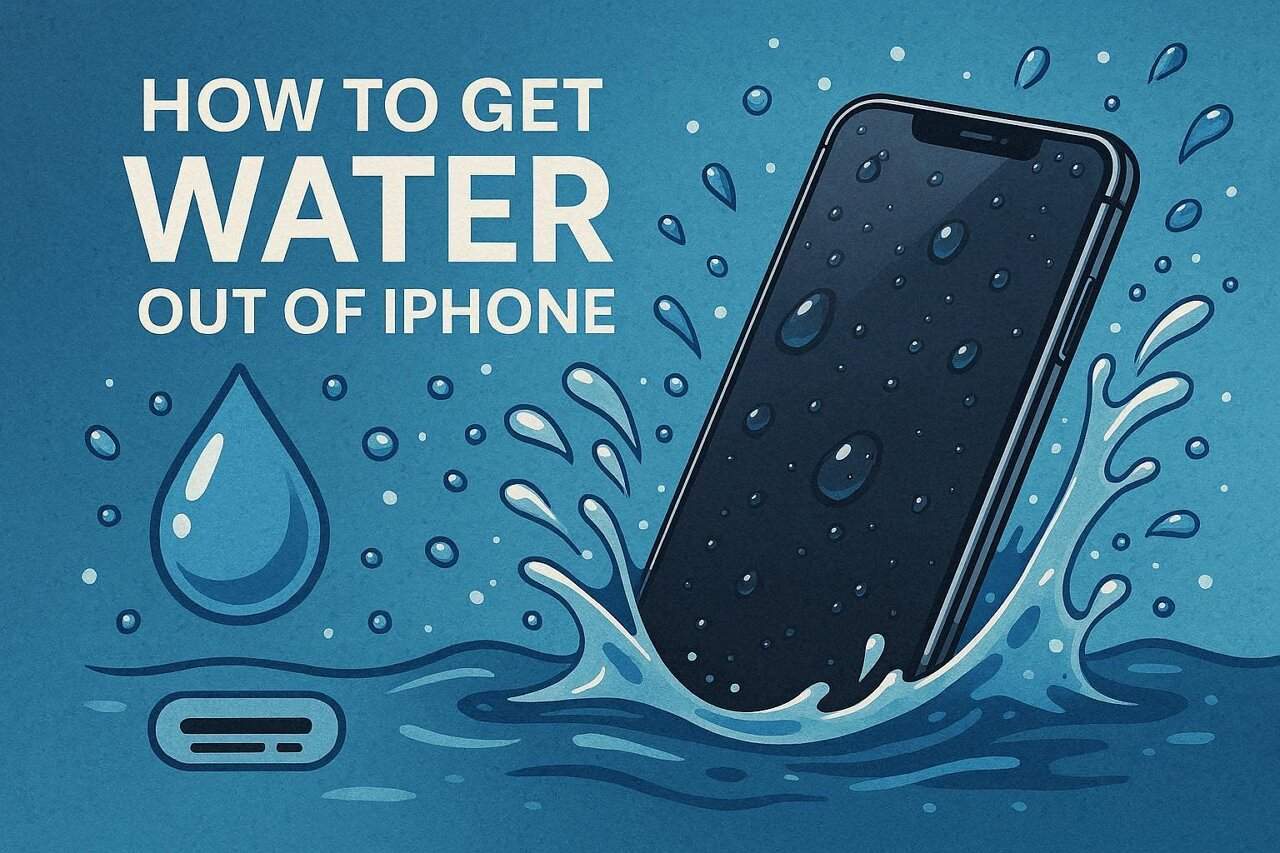
Therefore, this simple guide shows how to get water out of an iPhone with quick tricks or innovative workarounds. So, follow these simplified instructions thoroughly and learn how Dr.Fone - Data Recovery can help when your phone won't turn on.
Part 1. How Do You Get Water Out of an iPhone: What to Do Immediately
For users who seek to know how to get water out of an iPhone, first try the listed quick steps and see if they can be of any help:
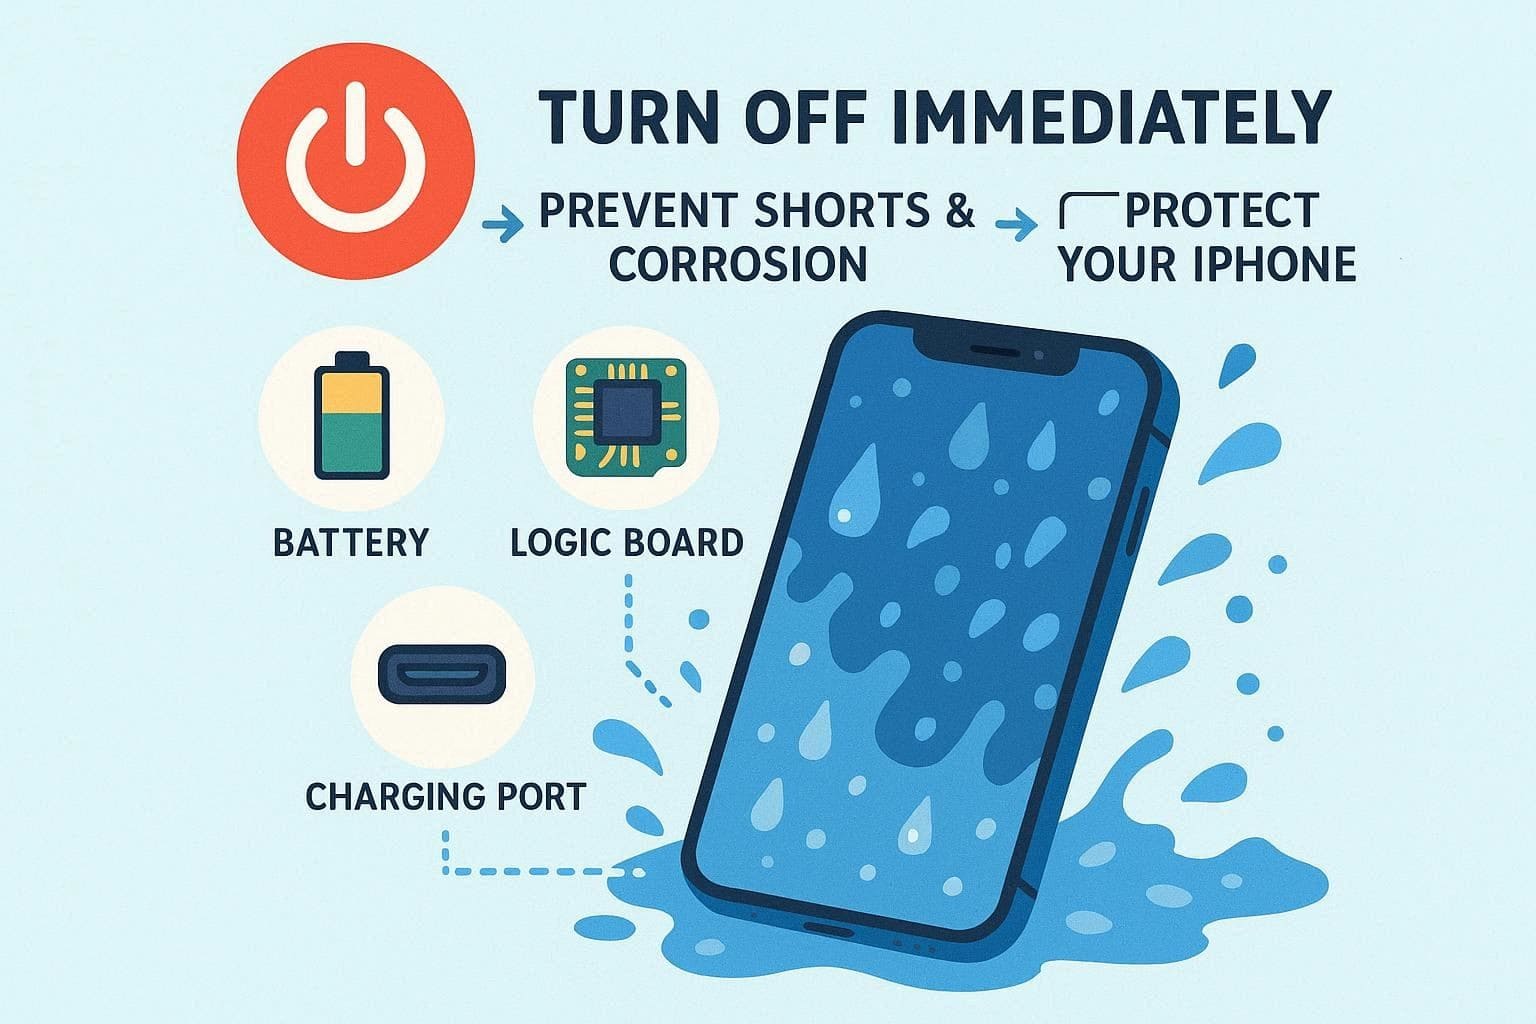
1. Power Off
Turning the phone off immediately stops electricity from flowing through wet components, which helps reduce short-circuit risks and further damage after the device becomes wet. This solution also slows corrosion on tiny metal contacts inside the phone, and protects the battery, logic board, and charging ports.
2. Remove Case & SIM
As another solution for how to get water out of the charger port on the iPhone, remove the case and SIM as you power off. Know that a case can hold water against the phone, and keep moisture in ports and seams. Hence, as you remove the case and SIM tray, it allows water to escape from inside and protects the SIM card from damage.
3. Dry Exterior
Now that the main parts have been removed, use a soft cloth to try the exterior parts. While doing so, wipe away water from the screen, buttons, ports, and seams to prevent more water from getting inside. This way, your speaker and charging port will be safe and prevent the water from further moving deeper. In addition, it reduces the risk of short circuits on metal parts such as the SIM slot.
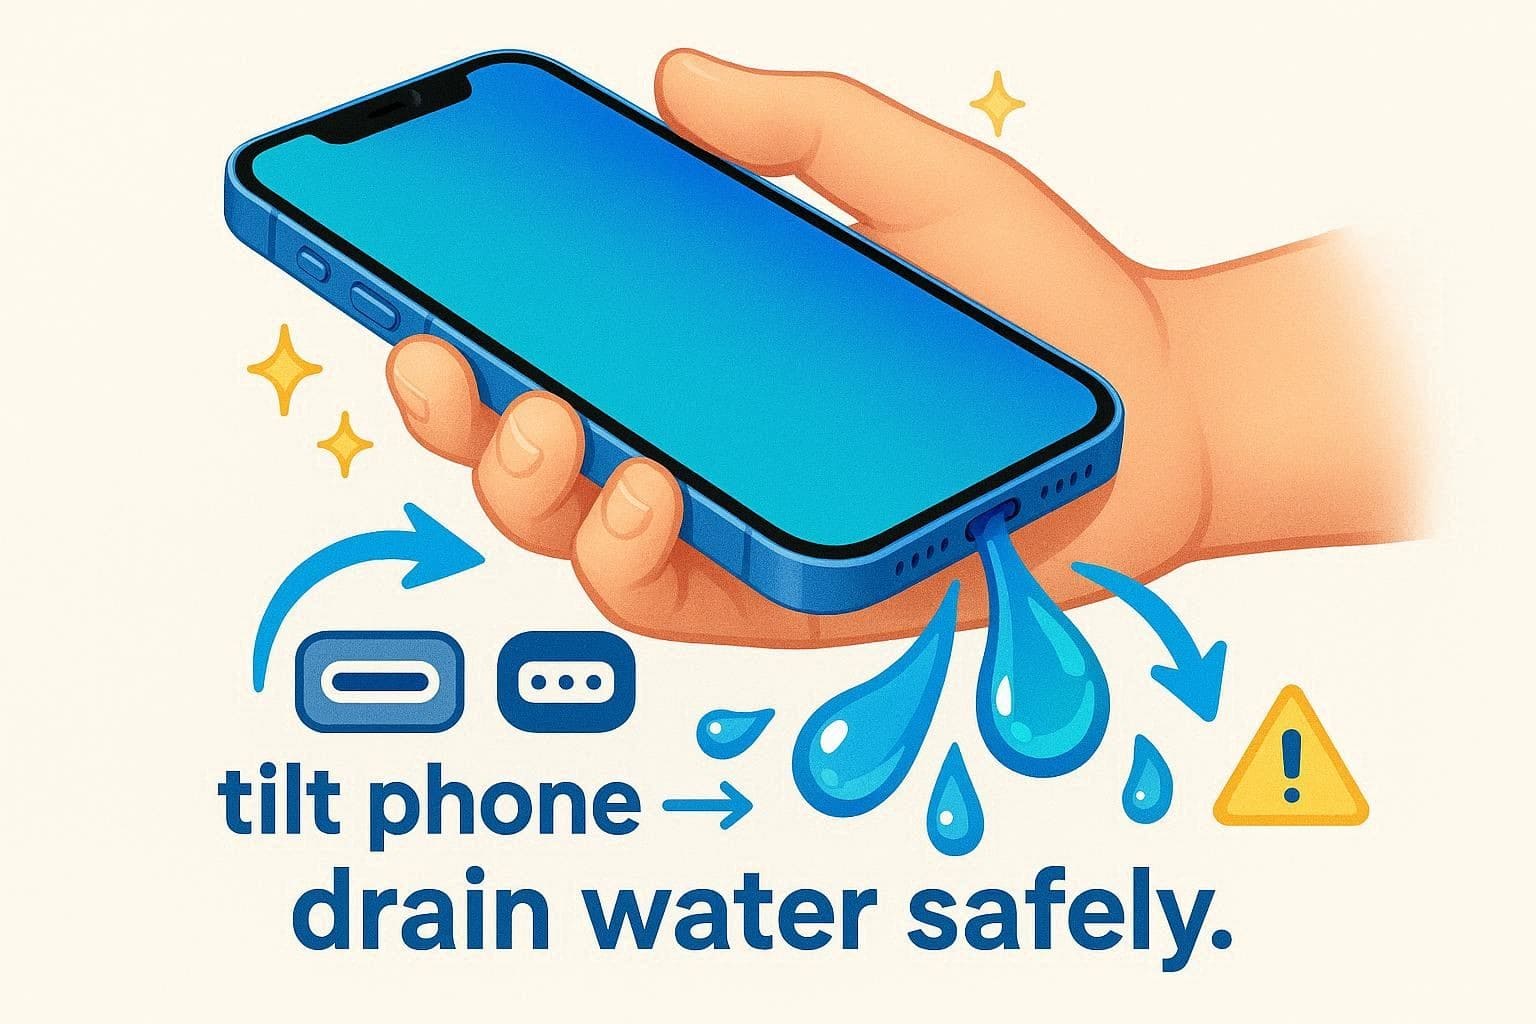
4. Tilt Phone to Let Water Drain
If you still want to know how to get liquid out of the charging port or other parts, tilt the phone slightly. This helps water flow out of the openings instead of moving deeper inside. Hold the phone with the charging port facing downward so gravity can guide moisture toward the opening. You can also change the phone's angle occasionally to release trapped water from corners, ports, and small internal gaps more easily.
5. Let It Air-Dry in a Dry Place
Now that you have tried all the possible ways, let the phone air-dry in a cool, dry, well-ventilated spot. This will help trapped water to evaporate safely through the ports, speaker holes, and seams. Even after you wipe and dry, tiny droplets can stay inside, so it is also suggested to leave the phone untouched for 24-28 hours.
6. Contact Apple or a Repair Shop If the Issue Persists
While learning how to get water out of the iPhone speaker and charging ports, contact support if the phone is still not working after 24-28 hours. Since home drying cannot fix internal damage, professionals use tools such as ultrasonic cleaners and controlled drying systems to remove moisture from areas you cannot reach. Most of the time, they safely open the phone, inspect parts, and replace the components without causing more damage.
Note: Apple's one-year warranty does not cover liquid damage, but consumer laws may still give you protection.
Part 2. How Do I Get Water Out of iPhone Charging Port and Speakers?
Since liquid damage can complicate warranty claims, you might still ask how to dry the iPhone charger port or speaker. In this case, review the given subsection and learn which shortcuts or repair sites you can consider before or alongside professional repair.
How to Get Liquid Out of Charger Port?
Here are some ways you can use to learn how to get water out of the iPhone charging port:
1. Use a Low‑Suction Vacuum
A low-suction vacuum will extract moisture and droplets, reduce time on metal contacts, and lower the risk. So, rather than blowing with your mouth, use this vacuum since it doesn't push the water deeper and is safer.

2. Seal with Silica Gel Drying Packs
You can also place your iPhone in a sealed container with silica gel packs to remove moisture without further harm. This gel can absorb water from the air and lower the humidity to help the liquid inside the phone evaporate. Hence, as the air gets drier, the moisture in the charging port and inside the phone moves into the silica gel instead of staying on the metal parts.
How to Get Water Out of an iPhone Speaker?
For those who seek to know how to get water out of an iPhone speaker, this section offers some innovative ways:
1. Water Eject Shortcut
This shortcut produces a low-frequency sound that makes the speaker vibrate and expel tiny water droplets. It only affects the speaker, so it does not push moisture deeper or overheat other parts. Since it's safe, you can repeat until the sound is cleared by following the simple guide mentioned below:
- Step 1. If your phone screen is not black and touch is working, search for "Water Eject Shortcut" on Safari and tap on the first link. After that, choose the "Get Shortcut" option and press the "Add Shortcut" option to enable it.
- Step 2. Now that it's displayed in the Shortcut app, tap it to select the "Start" option, then choose the "Intensity Level." A humming side will be produced for a set duration to safely eject the water from the speaker.
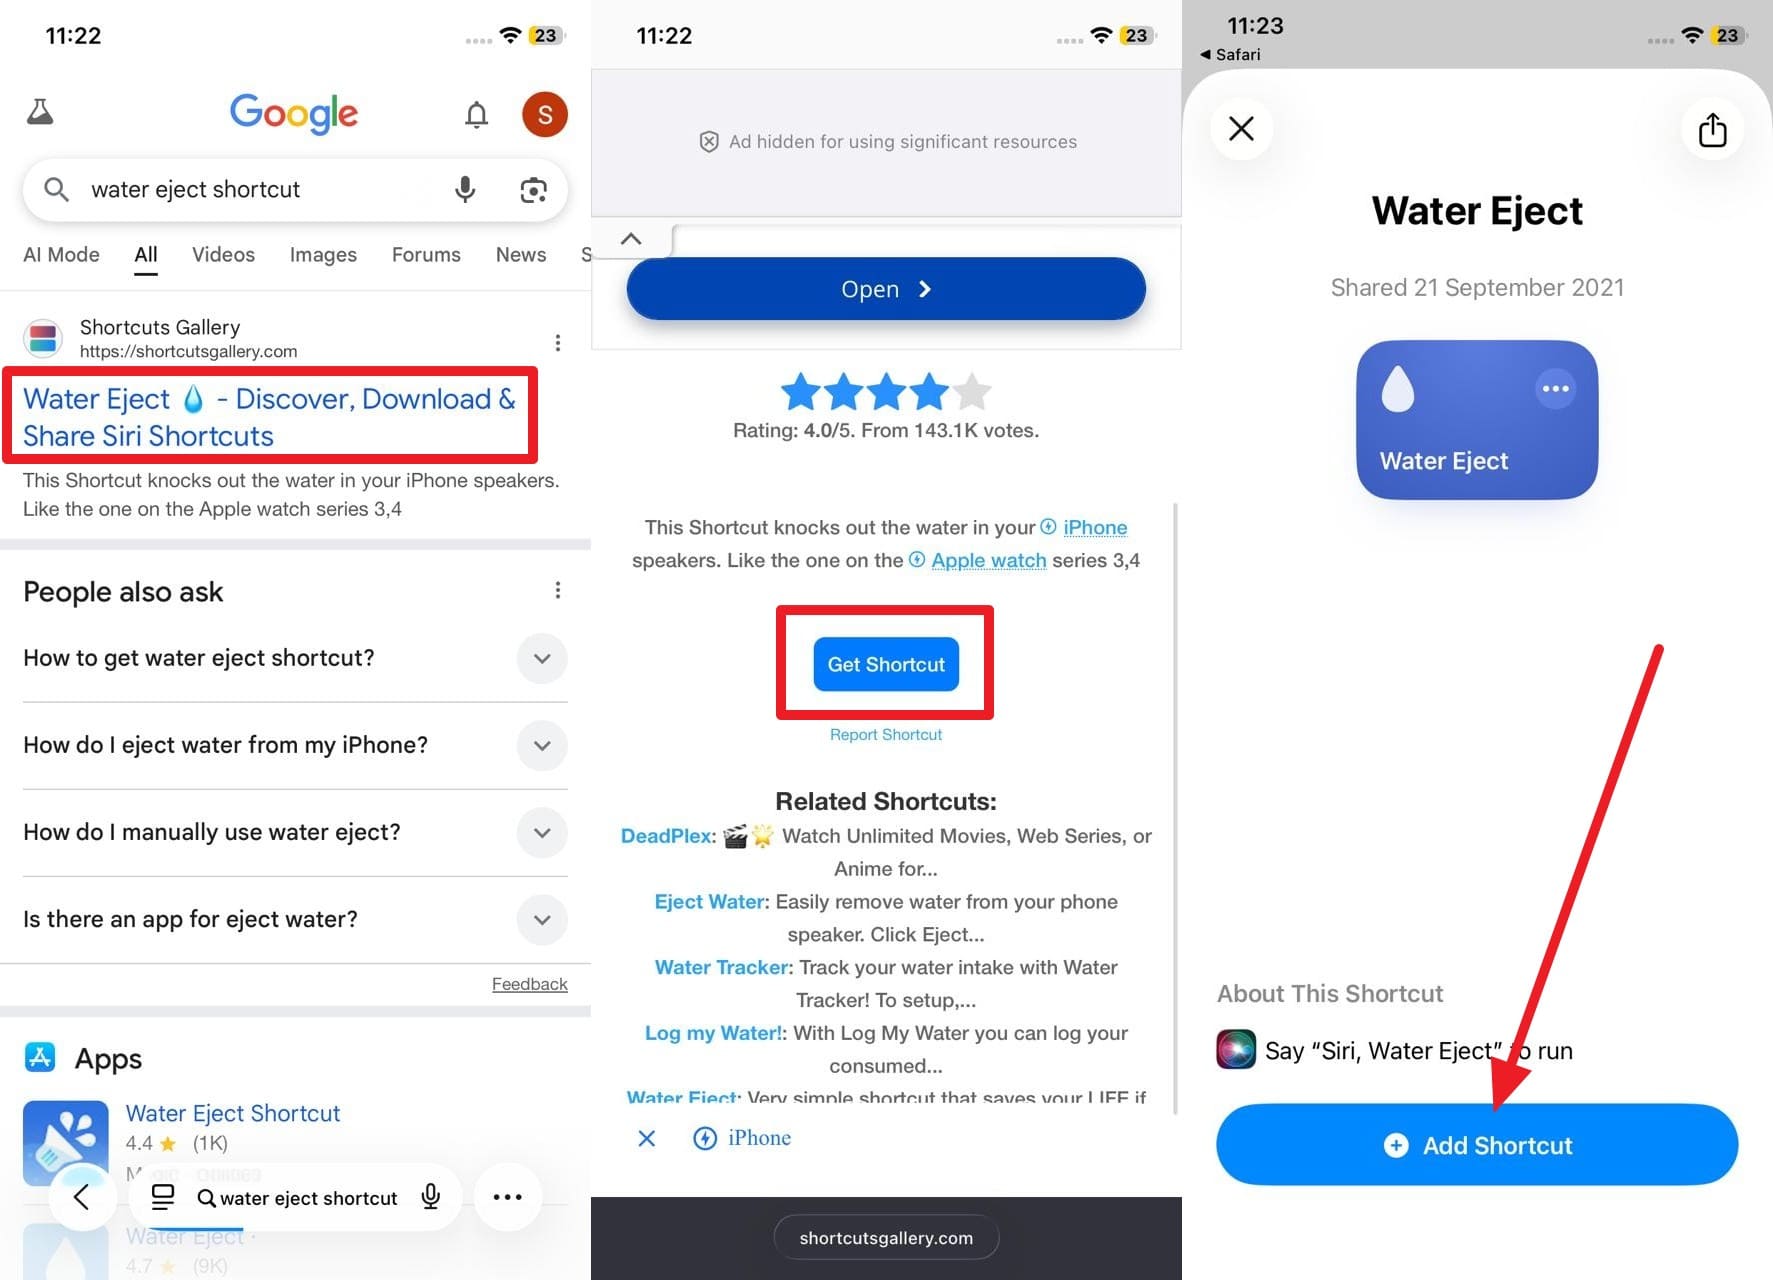
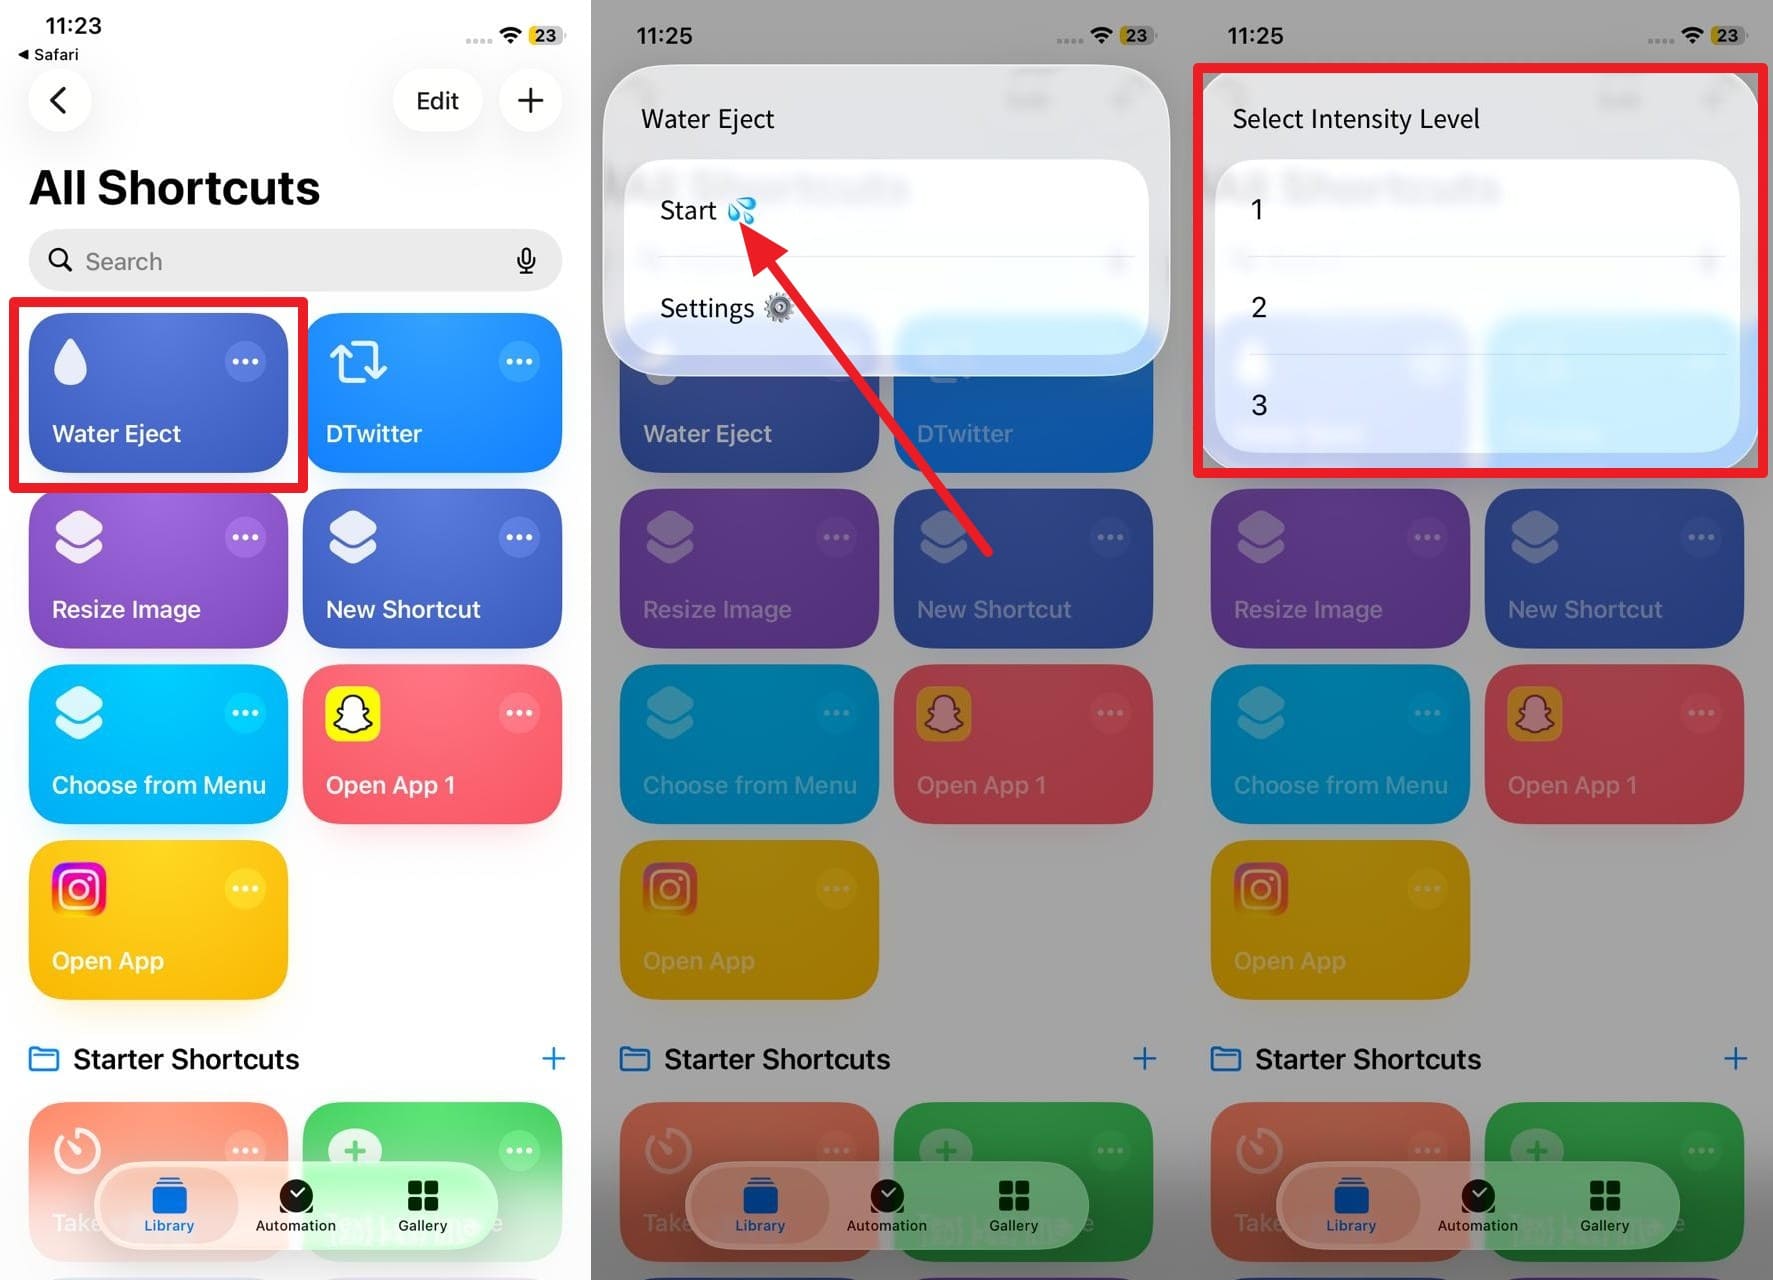
Note: If you have already enabled this shortcut, you can start it via Siri when touch is not working.
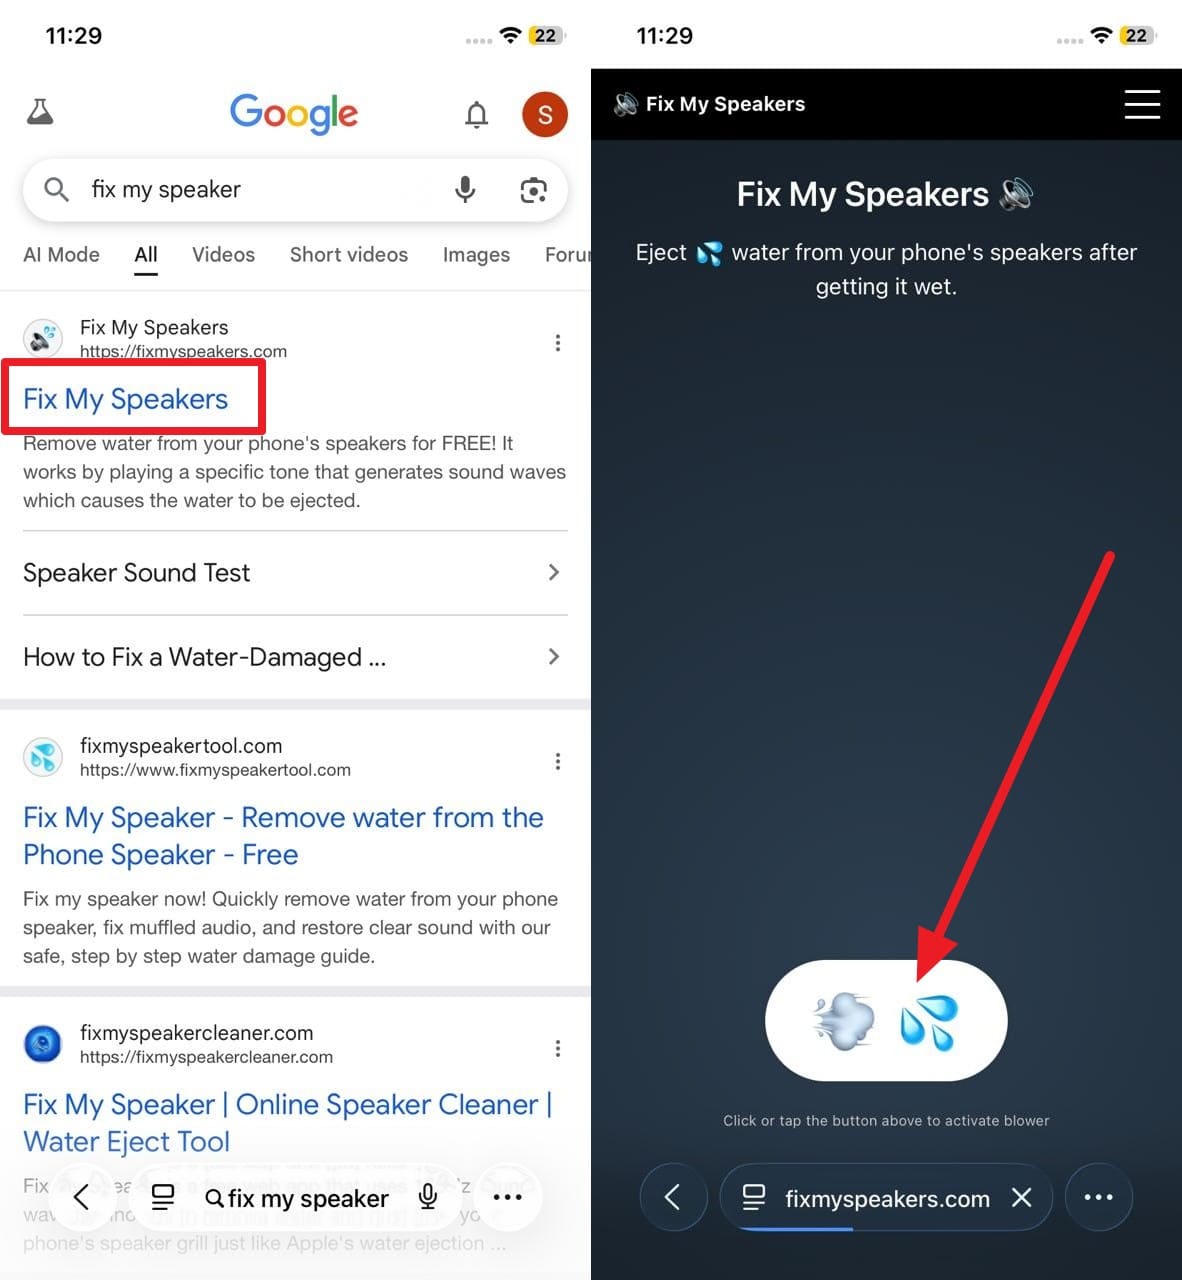
2. Fixmyspeakers.com
After learning how to get water out of the charging port of an iPhone, if droplets remain in the speaker, use the Fixmyspeakers.com site. This website plays a low-frequency tone that makes the speaker vibrate, and pushes the water out of the holes. In addition, this works like a water eject feature and helps restore clear sound, as guided:
Instructions: As you search for the site on your phone when touch is working, tap on the "Droplet" icon. Hold the phone with the speakers facing down to let gravity drain the water as the deep sound begins to play. Let the sound play for 10-15 seconds; repeat as needed until no more water comes out.
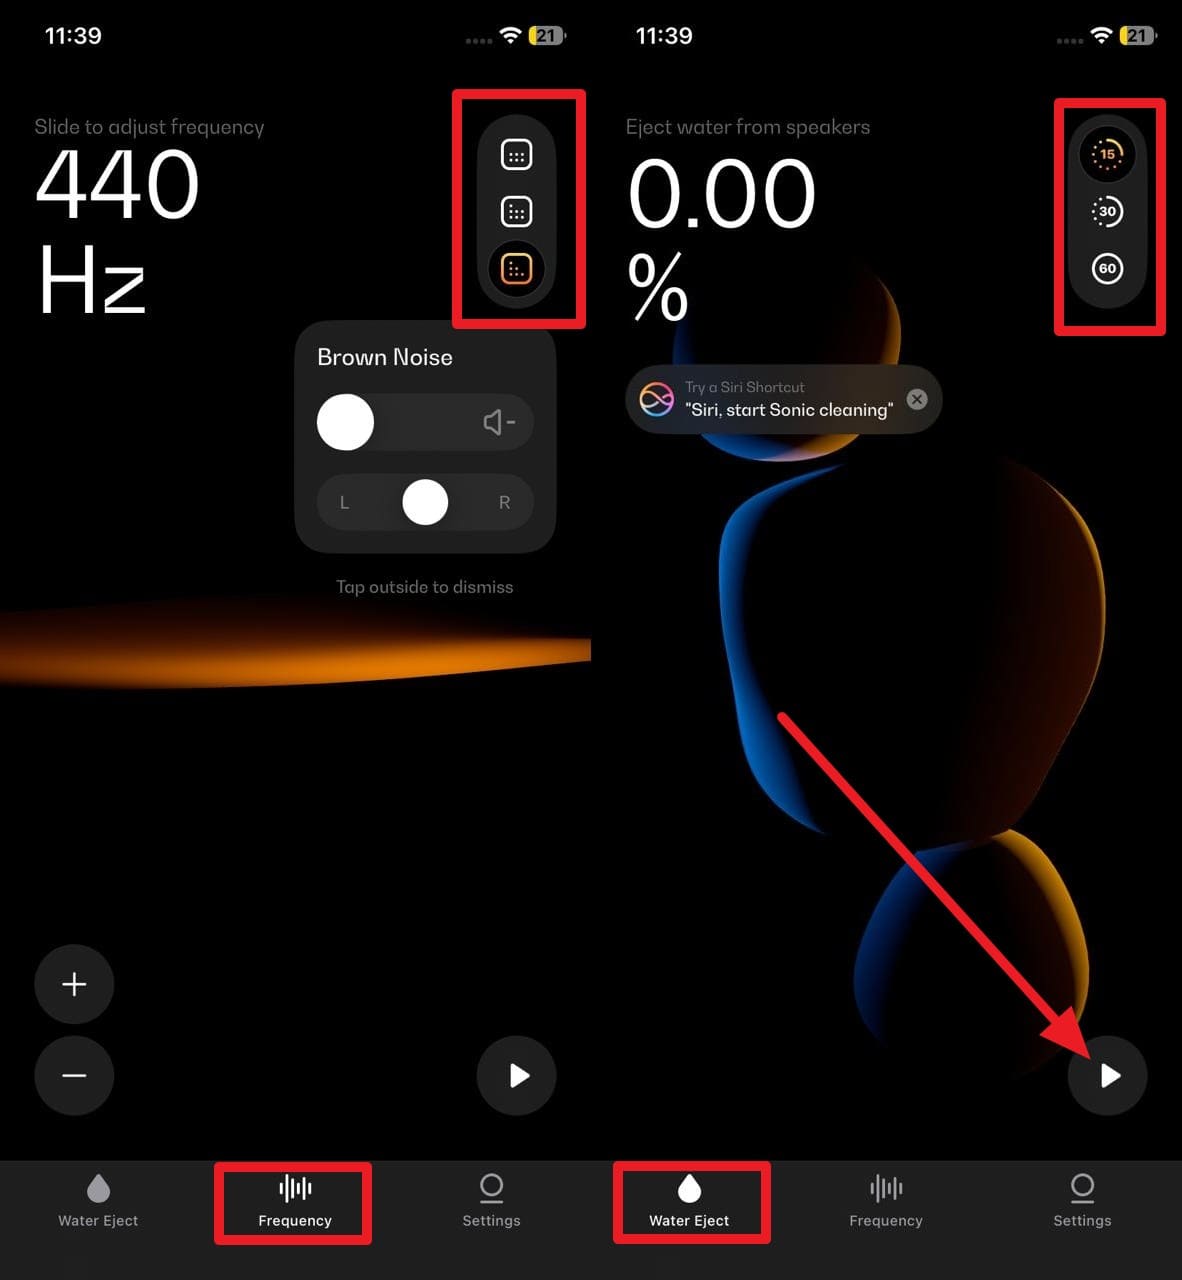
3. Sonic App
You can also use the Sonic Tone Generator app to push water through the speakers, as it also plays precise low-frequency tones that make the speakers vibrate. Users can adjust the frequency to target the optimal water-eject range and duration for the sound. Thus, while having complete control over water ejection, here is how you can use it in a few taps:
Instructions: Place the iPhone with the speakers facing down on an absorbent, lint-free cloth. Head to the "Frequency" tab and choose the frequency settings if your phone's touch is functional. Next, go to the "Water Eject" tab, choose the time from the top-right corner, and press the "Play" icon. If needed, repeat the process until the sound returns to normal.
4. Let It Fully Air‑dry Afterward
After knowing all the ways on how to get water out of the iPhone speaker, let it air-dry fully. This is important, as the tricks mentioned remove visible water, but tiny amounts of moisture can remain on the speaker mesh, coils, and nearby circuits. So, as you give the phone time to dry fully, it ensures that all the hidden moisture leaves and internal parts are secure.
Part 3. When Can You Charge a Wet iPhone Without Damaging It?
Apple warns against charging a wet Lightning or USB‑C port to prevent corrosion or permanent damage. Therefore, they suggest ideally waiting for at least 5 hours if the water damage was serious. In case of slight splashes, wait for 24 hours with the phone powered off in a cool, dry place. After this time, briefly test by plugging in; if "Liquid Detected" appears, unplug and keep drying.
Part 4. What If Your iPhone Won't Turn On After Water Damage?
Even though you know how to get liquid out of the charging port of your iPhone, in most cases, your phone fails to turn on despite trying all the tricks. Here, try the few basic solutions given below and determine how they can help:
1. Try One Careful Restart After Drying
This single test shows if the phone only needs drying or if there is deeper hardware damage. So, while knowing how to get liquid out of the charger port, try a restart after the recommended time. If it powers on, back up your data immediately to avoid damage from delayed corrosion.
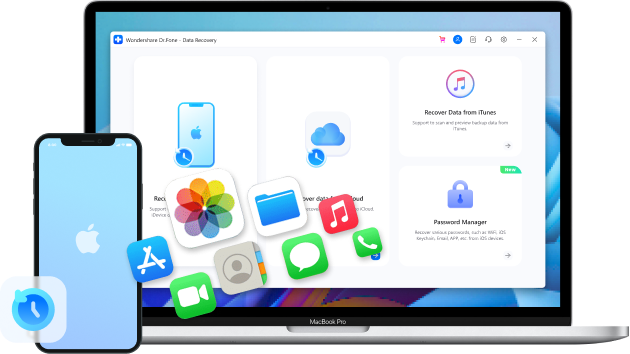
2. Use Dr.Fone – Data Recovery If the Phone is Detected
To backup, if your phone is somehow detectable after learning how to dry the iPhone charger port, use the Dr.Fone - Data Recovery toolbox. This tool will help you recover data from iCloud and iTunes while supporting newest iOS & iPhone series. Dr.Fone claims to offer 100% local recovery and lets users retrieve data selectively or in bulk. While it is secure, it comes with an intuitive interface and no learning curve.
Furthermore, users can retrieve multiple data types, like images, videos, messages, and WhatsApp data. Thus, users can later preview and filter them with the option to choose the export location manually. Overall, this innovative iPhone data recovery tool is ideal for beginners and professionals alike, and data can be recovered in 3 simple, guided steps.
Dr.Fone - Data Recovery (Android)
Recover whatsapp/contacts/messages/call history saved in Google Drive to your computer.
- Recover Android data by scanning your Android phone & tablet directly.
- Preview and selectively recover what you want from your Android phone & tablet.
- Supports various file types, including WhatsApp, Messages & Contacts & Photos & Videos & Audio & Document.
- Supports 5000+ Android Device Models & Various Android OS.


Simplified Guide to Recover iPhone Data via Dr.Fone Data Recovery for iOS
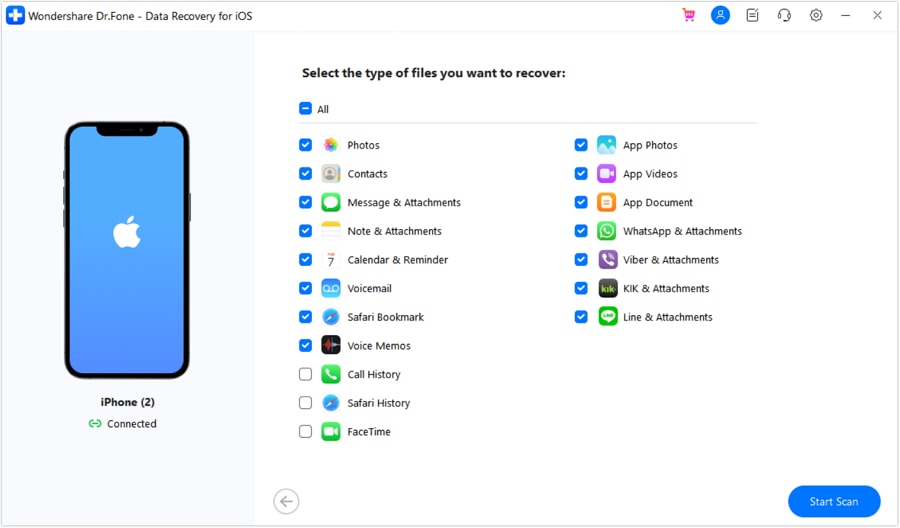
To know how you can use this iPhone data recovery toolbox for data retrieval, review the listed guide:
Instructions: As you choose the "Recover Data from iOS Device" option, connect your iPhone. Then, select the data you seek to recover and tap on the "Start Scan" button. Once data is recovered from your iPhone, restore the desired one to your iPhone or computer.
3. Check for Signs of Life
If you want to give your device one last retrieval chance, look for signs such as vibrations, notification sounds, or a backlight glow. This will help you understand what is happening inside your iPhone before deciding on your next step.
4. Try Charging with a Known‑Good Cable/Brick
After performing the steps on how to get liquid out of the charger port, use a known-good, certified cable and power brick to test charging. This helps you see if the problem is the iPhone or just faulty accessories.
5. Go to a Professional Repair Shop or Apple
Last but not least, seek support if water damage affects internal hardware. Technicians can open the iPhone, inspect the logic board and connectors, and use professional tools to fix it.
Conclusion
To sum up, many users want to know how to get water out of an iPhone after accidental spills or drops in water. Therefore, this guide has explained a basic trick workflow to safely eject the water from ports to prevent further damage to the image.
Even though you try the mentioned methods for the battery and speaker, and the phone is not functional, it is suggested to recover your data with Dr.Fone - Data Recovery. This tool will help you retrieve all the important data from iTunes and iCloud, and later send the device for professional repair or replacement.
FAQs


iPhone Recovery
- Deleted Data Recover
- 1. Recover HEIC Photos on iPhone
- 2. Recover Deleted Calendar Event
- 3. Retrieve iPhone Deleted Reminders
- 4. Retrieve iPhone Deleted Voicemail
- 5. Recover iPhone Deleted Photos
- 6. Recover iPhone Deleted Note
- 7. Recover Call History from iPhone
- 8. Recover iPhone Deleted Contacts
- 9. Play GamePigeon 8 Ball on iMessage
- 10. Recover Deleted iOS Files
- iPhone Passwords Recover
- 1. Retrieve iPhone Email Password
- 2. See iPhone Saved Password
- 3. Access iPhone Password
- 4. Get iPhone Password Back
- 5. iPhone Passcode Requriement Pops
- 6. Find iPhone Wi-Fi Password
- iPhone WhatsApp Recover
- 1. Recover WhatsApp Messages Apps
- 2. Recover Deleted WhatsApp Messages
- 3. Recover WhatsApp Messages Online
- 4. Retrieve Deleted WhatsApp
- Recover from Stolen iPhone
- Recover from Broken iPhone
- 1. Recover Data from Broken iPhone
- 2. Fix iPhone Fell in Water
- 3. Water Damaged iPhone Data Recovery
- 4. Recover Data from Dead iPhone
- 5. Recover Photos From Broken iPhone
- iPhone Recovery Tips
- 1. GT Recovery Undelete Restore
- 2. Recover Data from Memory Card
- 3. Recover iPhone Lost Data
- 4. SD Card Recovery for Mac
- 5. Clear Safari History
- 6. Recover from iPhone in DFU Mode
- 7. iTunes Data Recovery
- 8. Recover iPhone Data Without iTunes
- iPhone Recovery Tools
- ● Manage/transfer/recover data
- ● Unlock screen/activate/FRP lock
- ● Fix most iOS and Android issues
- Free Download Free Download Free Download

Daisy Raines
staff Editor