Recover photos, messages, WhatsApp, and more — no backup
needed.
Recover photos, messages, WhatsApp, and more — no backup
needed.

 100% Security Verified | No Subscription Required | No Malware

 :
: 
 ChatGPT
 Perplexity
 Gemini
 Claude
 Grok
Grok
Missing Viber media is not always caused by accidental deletion. Undownloaded files can expire from Viber’s servers after 14 days, while Viber’s Keep Media setting controls how long downloaded media remains available within the app.
Checking this setting can help explain why your photos disappeared. If no usable copy or backup remains, Dr.Fone - Data Recovery (iOS) can help recover deleted Viber photos by scanning the iPhone for recoverable data.
In this article
- Part 1. Ways to Recover Viber Photos, Videos, and Attachments on iPhone
- Part 2. Restore Viber Photos and Videos from an Available Backup
- Part 3. Why Viber Photos, Videos, and Attachments Become Unavailable
- Part 4. Recover Deleted Viber Photos, Videos, and Attachments with Dr.Fone Social Media Recovery
- Part 5. Protect Viber Photos, Videos, and Attachments from Future Loss
Part 1. Ways to Recover Viber Photos, Videos, and Attachments on iPhone
Before you try to recover deleted Viber videos or other missing media, check whether the files are still available within the conversation. If Viber still retains them, you may be able to download the original photos, videos, or attachments again.
1-1. Check Media, Links, and Files Inside the Viber Chat
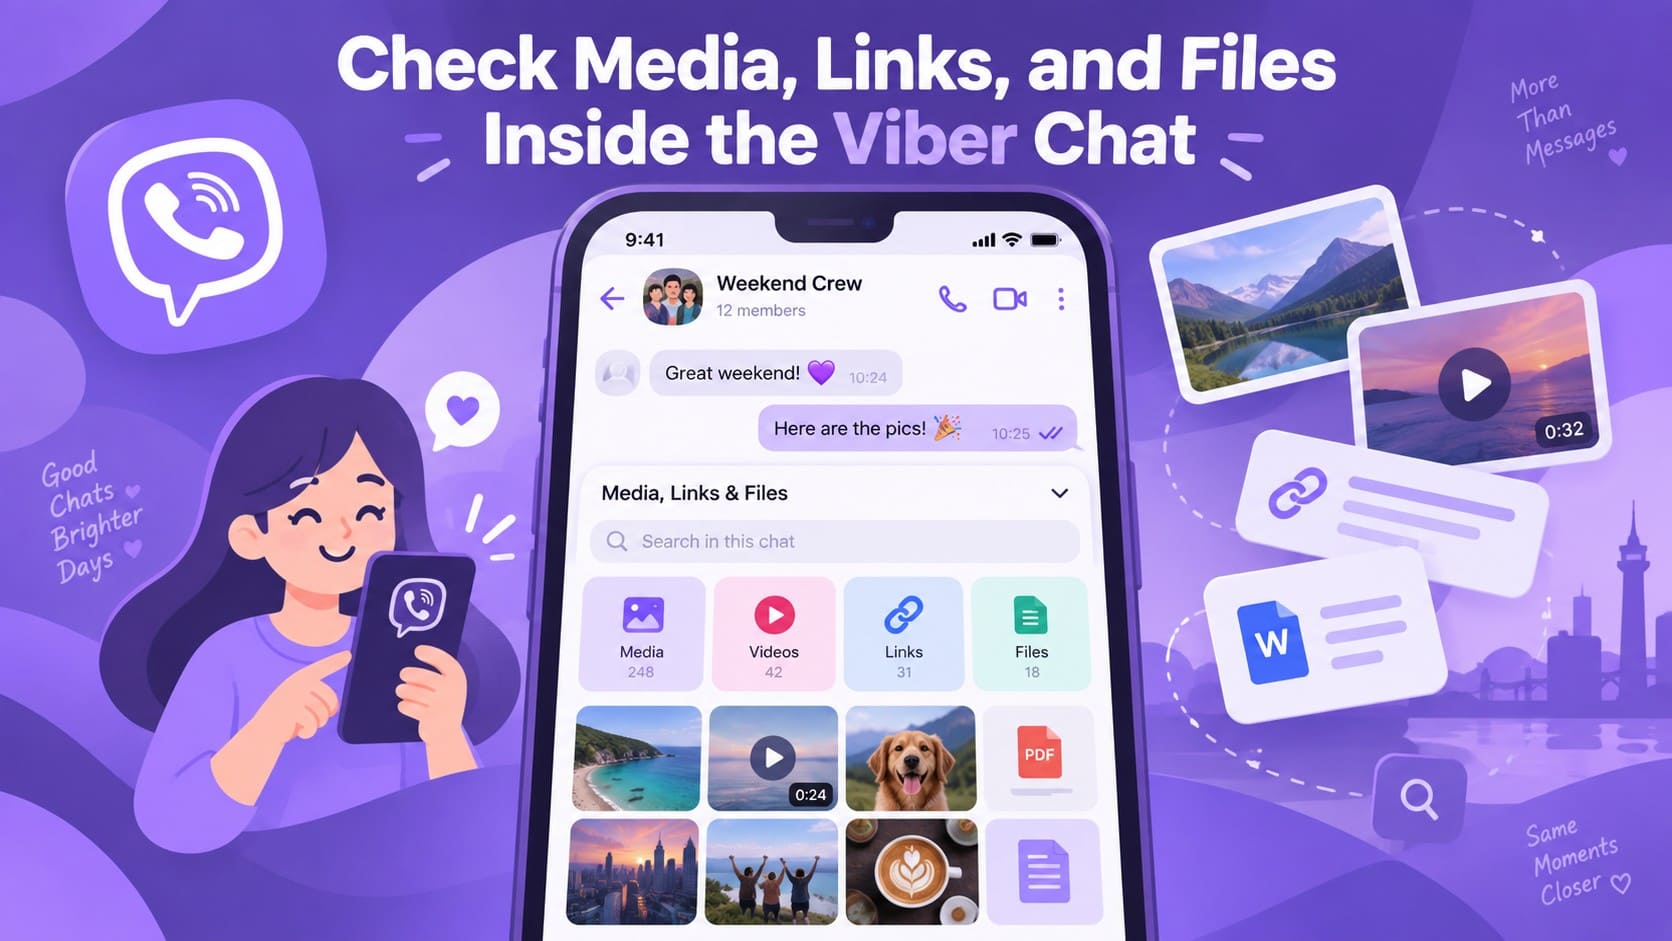
The first place to check when you want to recover Viber photos is the conversation’s media section. Viber organizes shared photos, videos, links, and files separately, making older content easier to find without scrolling through messages. Tap the contact or group name at the top of the chat, then open “Media, Links and Files” to check the available content.
1-2. Check Viber Photos and Videos Saved in the Photos App
Check whether the media was already saved outside Viber to recover deleted Viber videos and photos. If Viber’s Save to Gallery option was enabled, received photos may already exist in the iPhone Photos app. Videos you manually saved may also remain there. Open Photos and check Recents for Viber media. Search around the date you received the photo or video, rather than when you noticed it was missing.
1-3. Recover Saved Viber Photos and Videos from Recently Deleted
Viber photos and videos previously saved to the iPhone Photos app may still be recoverable after accidental deletion. Apple keeps deleted media in Recently Deleted for 30 days before removing it permanently. If your missing Viber media was saved to Photos, follow these steps to recover deleted Viber attachments:
-
Step 1
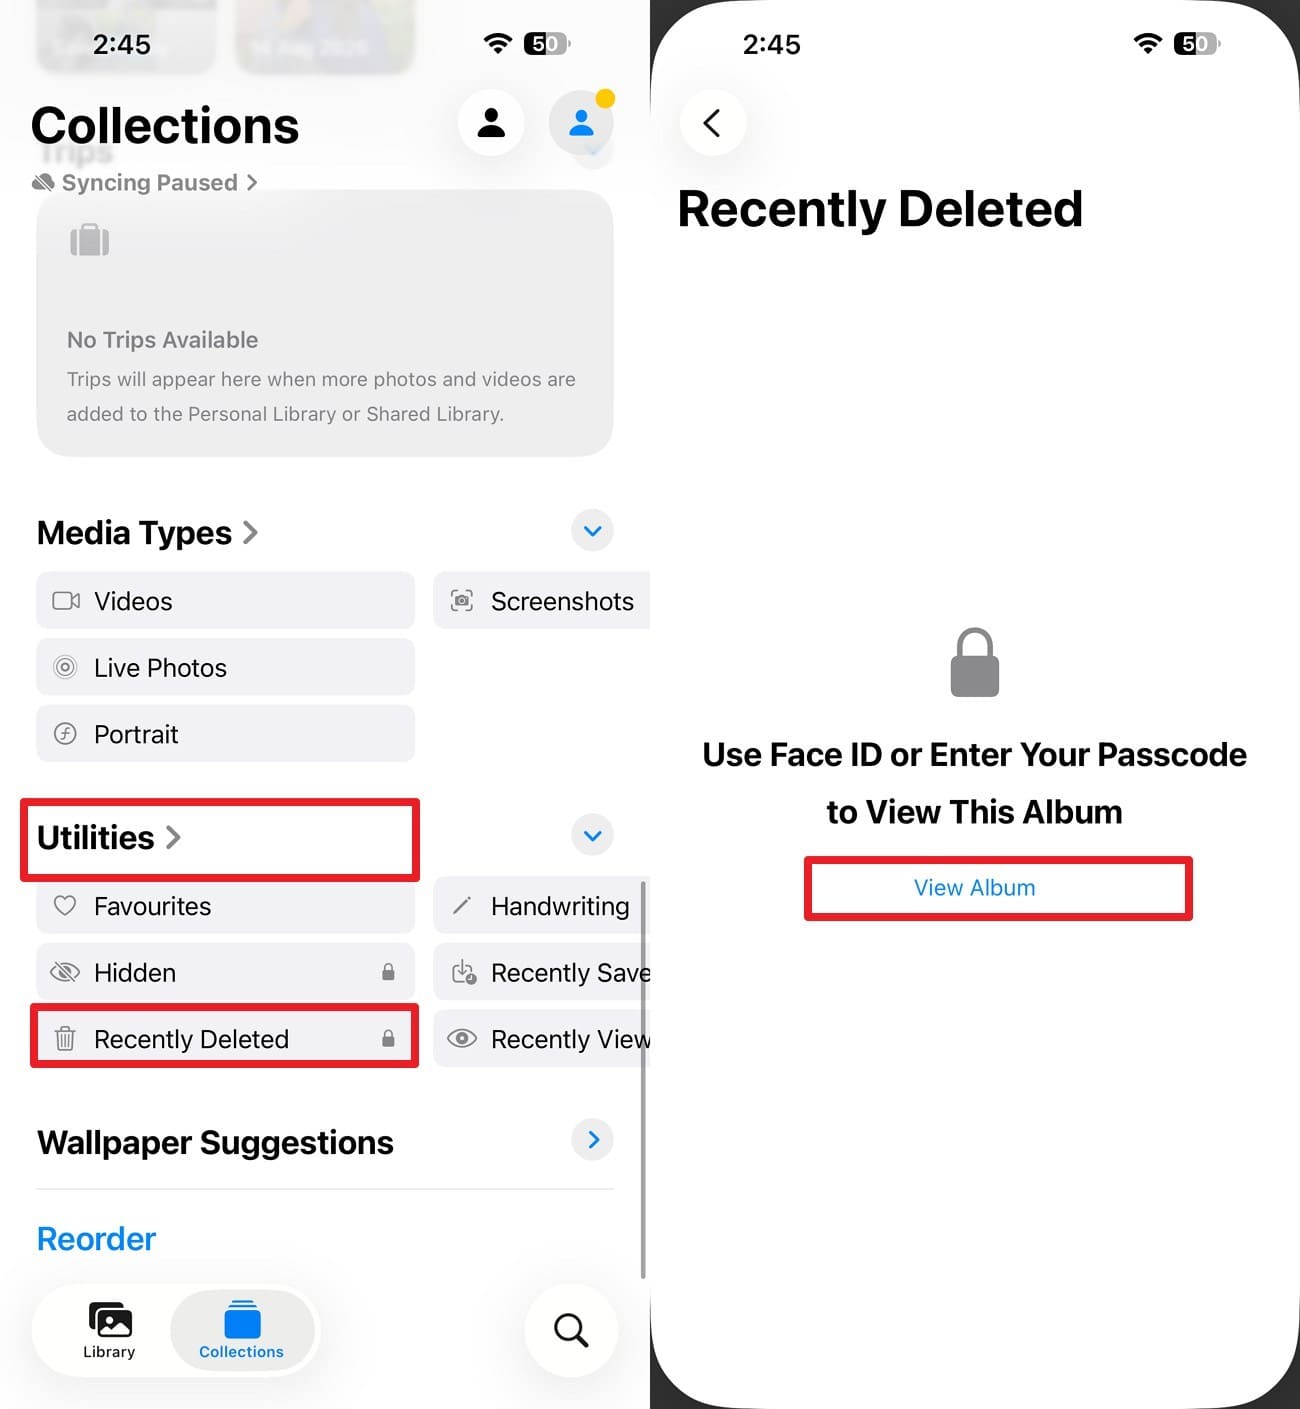
In the Photos app, go to “Collections > Utilities > Recently Deleted > View Album,” then use Face ID or your passcode to access the deleted Viber photos and videos.
-
Step 2
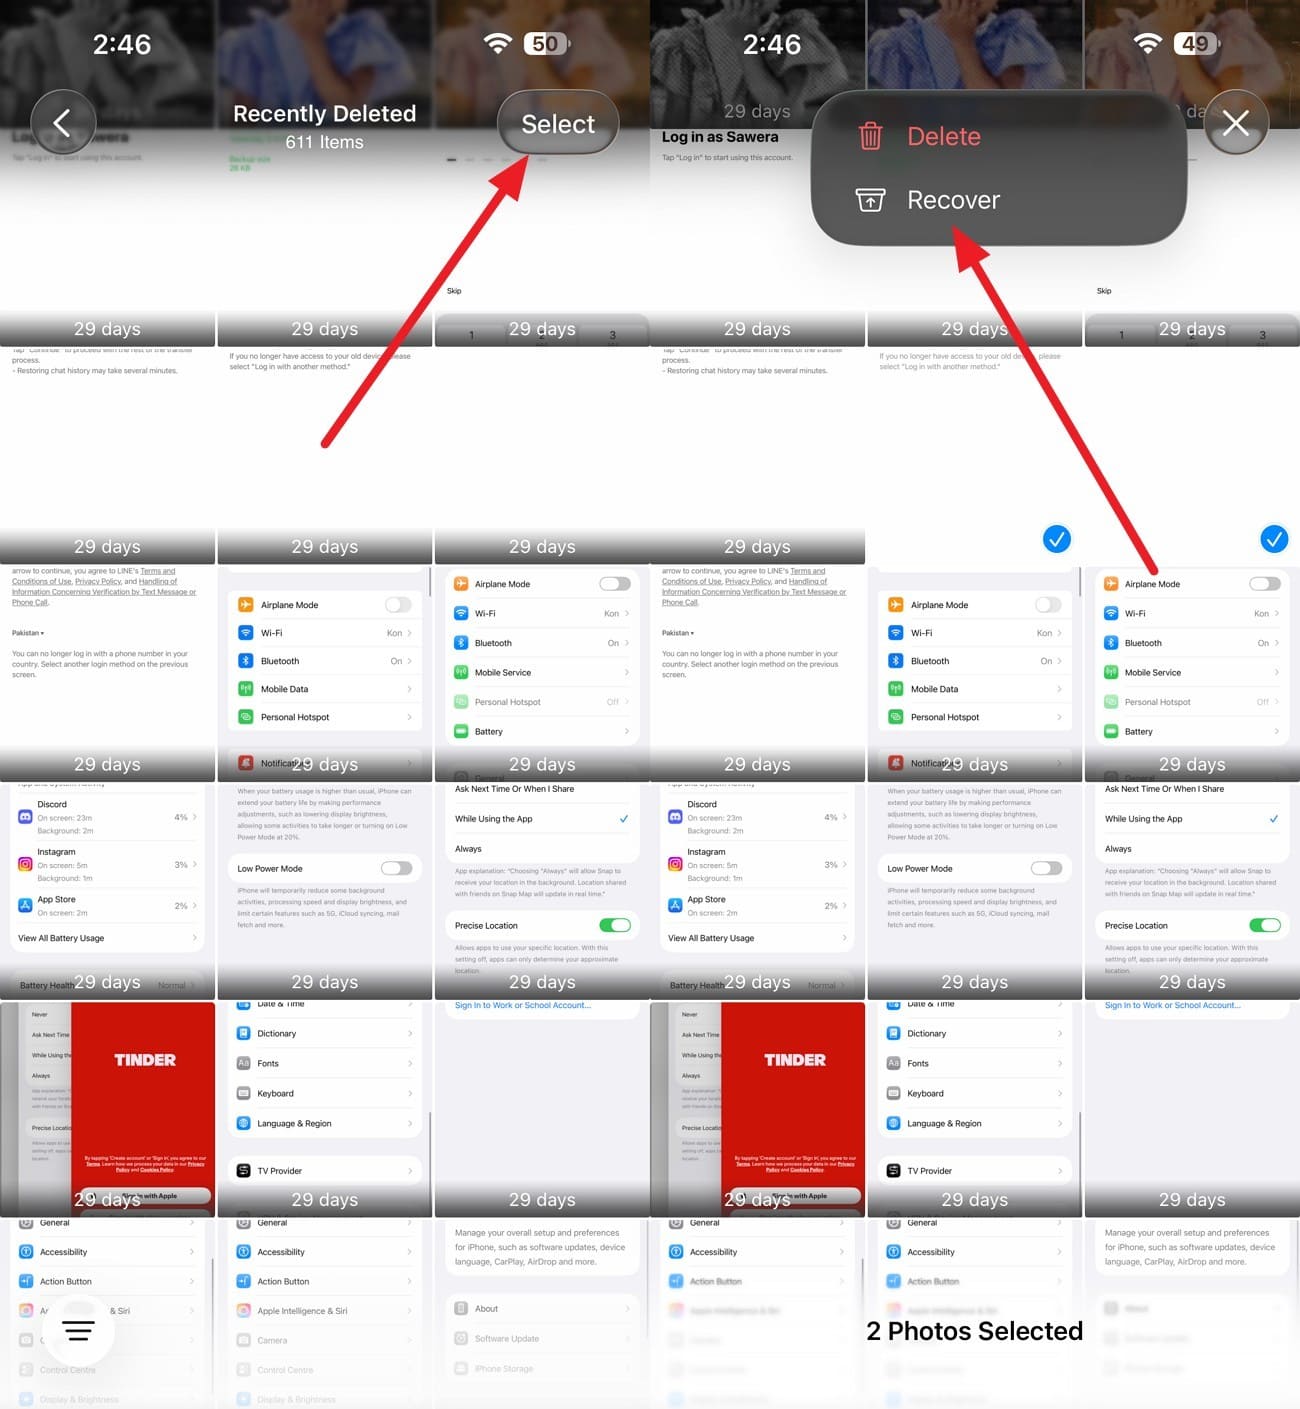
Tap “Select” and choose the Viber photos or videos you want to restore. Then, select “Three Dots > Recover” to return them to your Photos library.
1-4. Check Copies Previously Saved Outside Viber
A Viber photo, video, or file may still exist elsewhere if you previously saved, forwarded, or uploaded a separate copy. Check the Files app, iCloud Drive, and local folders using the filename, file type, or approximate date. You can also review emails and sent messages to recover the Viber attachments from copies shared outside Viber.
1-5. Ask the Sender or Recipient to Resend the Required Media or File
When you cannot recover deleted Viber videos, photos, or files from your own device, asking the other person to resend the missing media is often the simplest option. A newly sent file gives you a fresh copy without relying on the expired or unavailable attachment in the original Viber chat. Save the media as soon as it arrives instead of keeping it only within the Viber conversation.
Part 2. Restore Viber Photos and Videos from an Available Backup
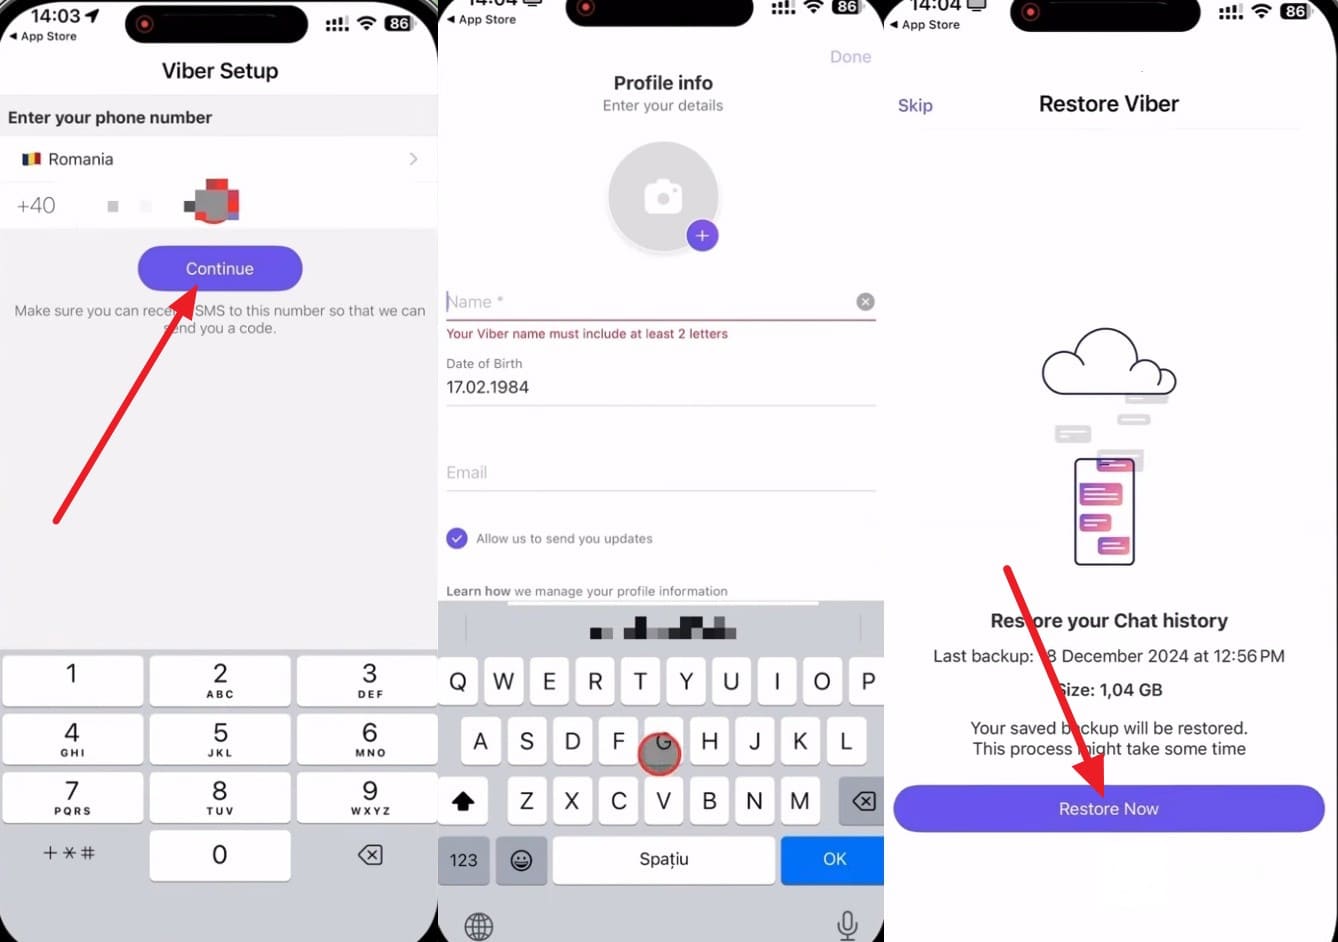
After checking local copies, the next place to look is a Viber backup. A backup can help you recover Viber photos and videos if it was created before the media disappeared and included them. Check what the available backup contains before restoring it, as the process may affect your current Viber data. Here are the steps to restore a Viber backup:
Instructions. Reinstall Viber and sign in using the same phone number and iCloud account used to create the backup. After that, tap "Continue" > Add "Profile Info" > Select "Allow" > "Restore Now."
Part 3. Why Viber Photos, Videos, and Attachments Become Unavailable
Viber photos, videos, and attachments can become unavailable for several reasons. Understanding what caused the media to disappear can help determine whether you can recover deleted Viber attachments or find another available copy.
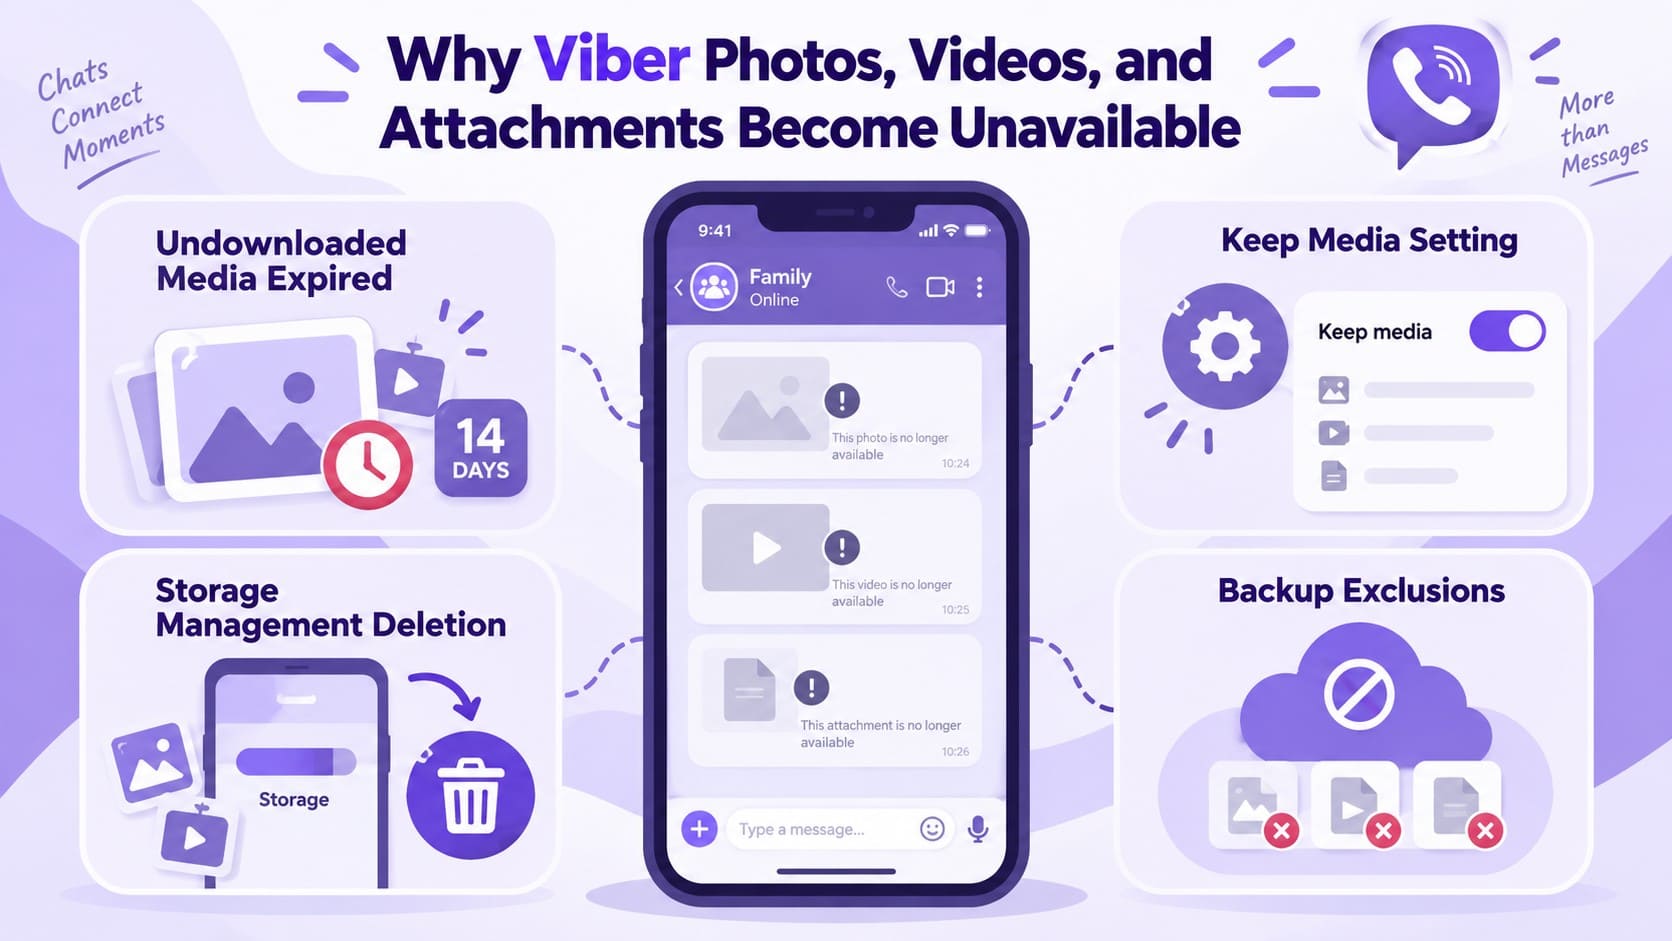
- Expiration of Undownloaded Media: Viber keeps undownloaded photos, videos, and attachments available for 14 days. Once this period expires, the media may become unavailable even though the related messages remain visible in the conversation.
- Impact of Keep Media Settings: Viber’s Keep Media setting determines how long downloaded media remains within Viber. After the selected retention period ends, older Viber-managed photos and videos can be automatically removed from the app.
- Deletion Through Storage Management: Viber provides storage management options for removing photos, videos, and other files to free up device space. Media deleted through these controls may no longer be available from its original Viber conversation.
- Media Missing from the Backup: A Viber backup can only restore photos and videos that were included when that backup was created. Media excluded from the backup or already unavailable at that time cannot be recovered by restoring it.
Part 4. Recover Deleted Viber Photos, Videos, and Attachments with Dr.Fone Social Media Recovery
When Viber photos, videos, or attachments become unavailable, a backup is not always the only recovery option. Dr.Fone - Data Recovery (iOS) provides Social Media Recovery, which scans supported social media data on the iPhone. This gives users another way to recover Viber photos and other media when local copies or usable Viber backups are unavailable.
Social Media Recovery can retrieve supported chat history and media attachments from apps such as Viber, LINE, Kik, Gmail, and Snapchat. After scanning, Dr.Fone displays the recoverable data for preview and selection. Recovery results depend on what remains accessible on the device, so data that has already been overwritten may no longer be recoverable.
 Recovers data after deletion, crashes, or device damage.
- Supports photos, messages, contacts, WhatsApp, and more.
- Supports all major iPhone, iPad, and iPod models.
- Preview and recover only what you need.

4-1. Guide to Recover Deleted Viber Photos, Videos, and Attachments
To recover Viber videos, photos, and other supported media using Dr.Fone’s Advanced Recovery, follow these 3 steps:
-
Step 1 Connect the iPhone and Choose Advanced Recovery
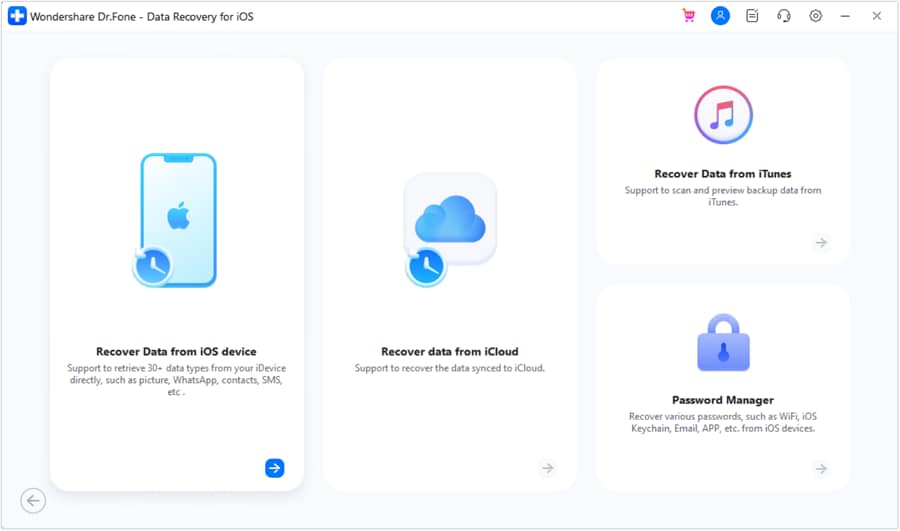
Open Dr.Fone on your computer and go to “Data Recovery > iOS > Recover Data from iOS Device.” Connect your iPhone using a cable, then select “Advanced Recovery” to proceed with the Viber recovery process.
-
Step 2 Select Viber and Initiate the Scan
Select “Viber” from the Social Media category and choose “Start Scan.” If prompted, verify your Apple ID by following the on-screen instructions to continue the Viber data scan.

-
Step 3 Preview and Recover the Required Viber Data
Follow the on-screen instructions to trust the Dr.Fone DataLink app on your iPhone, then wait for the scan to complete. Preview the recovered Viber photos, videos, and attachments, and select the required media for recovery.




Part 5. Protect Viber Photos, Videos, and Attachments from Future Loss
Once you recover Viber attachments, keeping separate copies can help prevent the same media from becoming unavailable again. Follow these practical steps to protect important Viber photos, videos, and files from future loss:
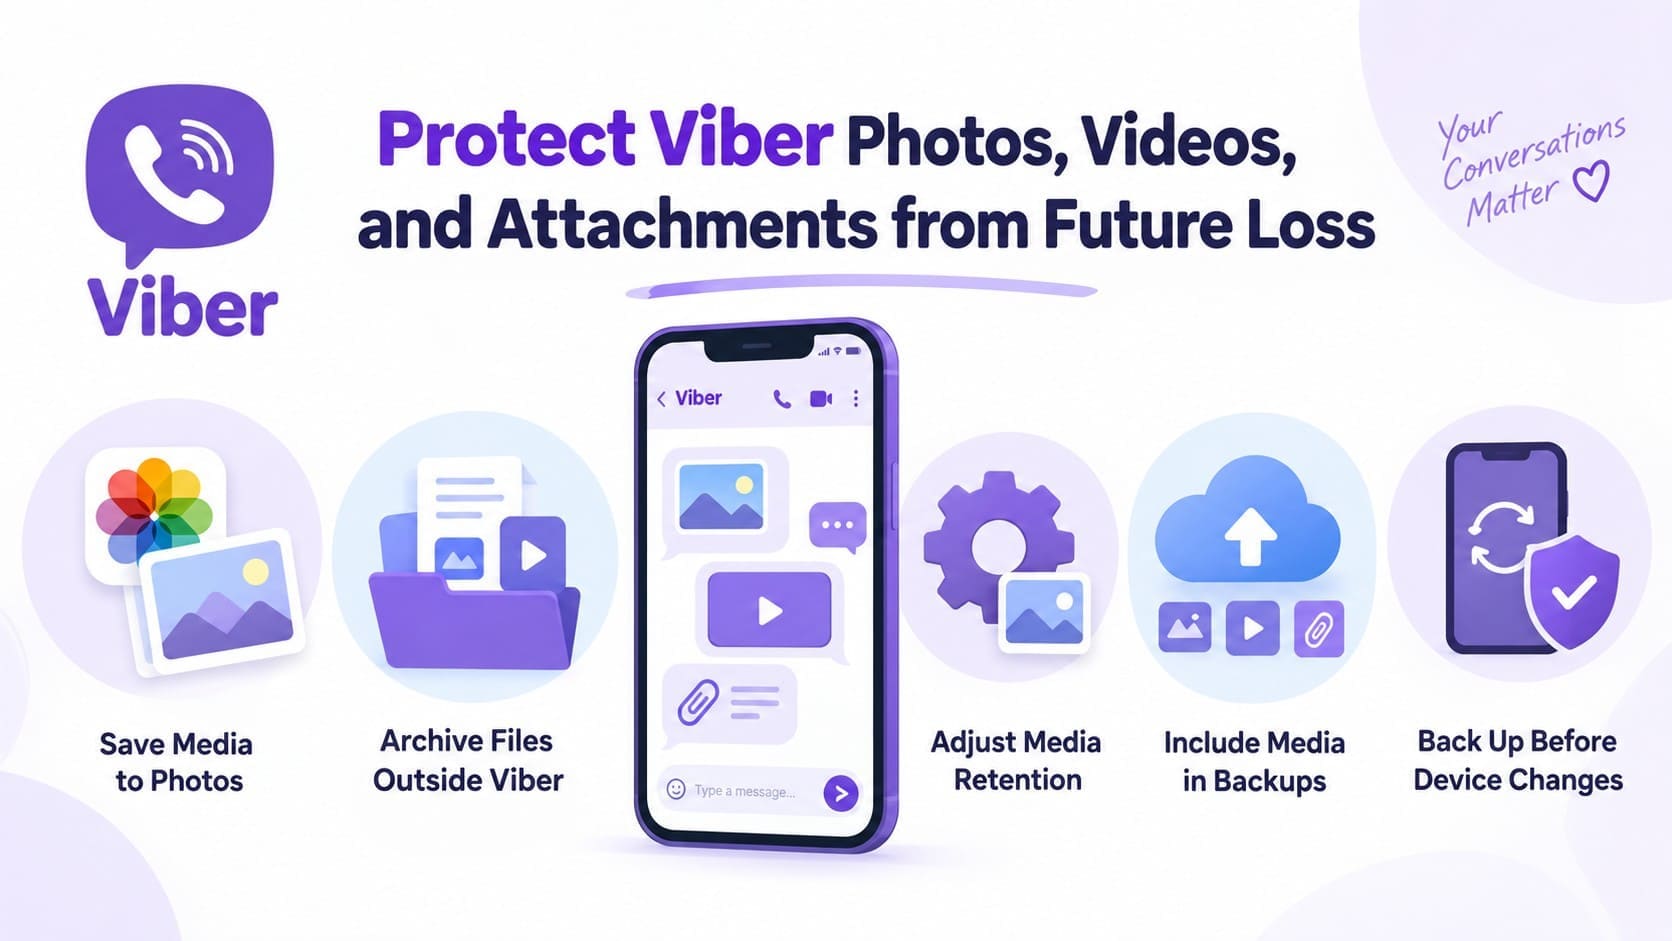
- Save Important Media to Photos: Save important Viber photos and videos to the iPhone Photos app. Keeping a separate copy prevents you from relying entirely on media that remains available only within Viber.
- Store Attachments Outside Viber: Move important documents and other attachments to the Files app, iCloud Drive, or another secure location. These separate copies remain accessible even if the original Viber attachments later become unavailable.
- Review the Keep Media Setting: Check Viber’s Keep Media setting and select a retention period that matches your needs. A longer period keeps downloaded Viber media available within the app for more time.
- Include Photos and Videos in Backups: Enable the option to include photos and videos when creating a Viber backup. This gives supported media a better chance of being available when you restore the backup later.
- Back Up Viber Before Major Changes: Create a fresh Viber backup before reinstalling the app, switching iPhones, or resetting your device. An updated backup helps preserve supported chat history and included media during the transition.
Conclusion
Recovering missing Viber media starts with checking where another copy may still exist. Review the chat, Photos app, Recently Deleted, and any files saved outside Viber. An available backup can also restore photos and videos if they were included before the content became unavailable.
If these methods cannot retrieve the missing media, Dr.Fone - Data Recovery (iOS) offers another option to recover deleted Viber photos and videos by scanning the iPhone for recoverable Viber data.
FAQ
-
1. Can I recover Viber media that was not downloaded within 14 days?
No. Undownloaded Viber media becomes unavailable after the 14-day retention period expires. If no other copy exists, ask the sender or recipient to resend the missing photo, video, or attachment. -
2. Does Viber Backup include photos, videos, and file attachments?
Viber Backup can include photos and videos when you select the “Photos & Videos” option. Viber does not list general file attachments among supported backup content, so these files should be saved separately before they become unavailable. -
3. What happens when the Viber Keep Media period expires on iPhone?
Viber automatically removes media that exceeds the selected Keep Media period from the app. Photos or videos separately saved to the iPhone Photos app remain available because those copies are stored outside Viber. -
4. Will restoring an older Viber backup affect newer chat history?
Yes. Restoring an older Viber backup returns your chat history to the state saved in that backup. Messages received after the backup was created will not be restored, so preserve important recent conversations beforehand.
 Add Wondershare Dr.Fone as a preferred source on Google