Teleport your device anywhere instantly with one click.


 100% Security Verified | No Subscription Required | No Malware

 :

 ChatGPT
 Perplexity
 Gemini
 Claude
 Grok
To turn off Location Services on iPhone, go to Settings > Privacy & Security > Location Services and disable the main switch. If you only want to restrict one app or stop sharing with another person, use the narrower controls instead. These settings do different jobs and should not be treated as interchangeable ways to make an iPhone untraceable.
The same distinction matters on an iPhone 17 or an older supported model: app permissions, system-service access, and Find My sharing are separate decisions. The string prefs:root=privacy&path=location is sometimes suggested as a shortcut to Settings, but opening a settings screen is not the same as turning its switch off. The manual path above is the reliable starting point.

Choose the smallest change that meets your goal. Disabling all location access can affect maps, weather, and other features, while changing one app's access leaves other permitted uses intact. None of these actions removes location information already collected or guarantees a particular battery improvement.
In this article
Optional location simulation is not a privacy switch
 Set your map route to simulate GPS movement.
- Set your wanted movement speed.
- HD and large map view to check location.
- Fake GPS location to anywhere.
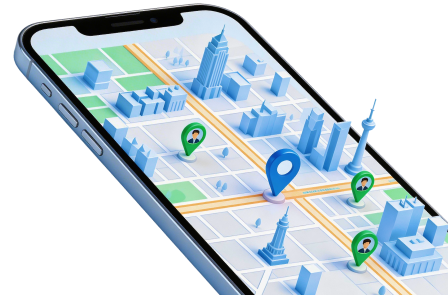
Dr.Fone - Virtual Location provides a separate workflow for simulating a reported GPS position or map route on supported devices. That can be relevant to permitted location testing, but it does not revoke an app's permission or stop an Apple location-sharing relationship.
Use Apple's controls below when your aim is to limit access or stop sharing. A simulated map point cannot guarantee that Find My will show a chosen position, freeze an old position, or hide movement from everyone. Location-based apps and Apple services can behave differently, so verify your own setup rather than assuming a universal result.
Step 1Connect your own supported phone
Open Virtual Location on your computer and follow the connection and trust prompts for the device. Check the current software requirements before proceeding.
Step 2Choose an appropriate test destination
Use Teleport Mode, search for the position or coordinates, and confirm the map marker with Move Here. The result is a simulated GPS position, not a change to the phone's privacy permissions.
Step 3Inspect the result and restore
Check a map app on the phone to see what it reports. Follow the tool's restart prompt to restore the actual position after the test, then check it again before navigation or real-location sharing.
Keep GPS testing separate from decisions about who may access your whereabouts. Use the supported permission and sharing controls whenever privacy is the actual objective.




Five ways to manage location on iPhone
The five approaches below preserve the original guide's scope, but not every approach disables the same feature. The Settings switch controls Location Services broadly; app and system settings are more selective; Find My controls person-to-person sharing. The Shortcuts approach is only a possible navigation aid, not an automatic off switch.
Before changing anything, identify the concern: a specific app, ongoing sharing with a contact, or general device access. This prevents unnecessary changes to useful services and makes it easier to confirm that the relevant setting has actually changed.
1. Turn off Location Services in Settings
Use this route if you want to stop normal apps from using Location Services in the foreground or background. It affects more than a single conversation or app, so read the confirmation before you accept it.
Step 1Open the privacy controls
Launch Settings and select Privacy & Security. On an older iOS version, the menu may simply be called Privacy.
Step 2Locate the main switch
Tap Location Services. Check the current state at the top of the screen rather than confusing an individual app switch with the device-wide control.
Step 3Disable access and review the effect
Turn Location Services off and accept the confirmation. Return to this screen to enable it again when you need location-dependent features.

Turning this off does not make the phone impossible to locate. Apple states that location information may still be used during an emergency call, and Find My device-finding capabilities have their own settings. Services can also infer an approximate area from information such as an IP address.
2. Use Shortcuts only as a possible Settings navigation aid
The source article incorrectly described an Open URLs shortcut as directly disabling Location Services. That action opens a URL; it does not itself change the Location Services switch. Private Settings routes are also version-dependent and are not a dependable replacement for Apple's documented manual path.
Step 1Open Shortcuts
Use Apple's Shortcuts app, installing it from the App Store if necessary. Create a shortcut with the plus control.
Step 2Inspect the proposed URL action
The original recipe uses Open URLs and the value
prefs:root=Privacy&path=LOCATION. Treat this as an unverified, iOS-dependent navigation attempt, not a supported automation that switches GPS off.Step 3Change the setting yourself
If a relevant settings page opens, manually inspect and change the switch. If it does not, open Settings and follow Privacy & Security > Location Services. Running the shortcut alone is not evidence that access is disabled.
Strings such as prefs:root=privacy&security&path=location found in search results should receive the same caution. Do not rely on a shortcut's name or a successful launch animation as confirmation that a privacy setting has changed.
3. Restrict a particular app instead of the whole phone
Per-app permission is usually the better choice when one service is the concern but you still want navigation or other apps to work. Apps appear in the location list after requesting access; the list is not necessarily every app installed on your phone.
Step 1Open the app's location entry
Go to Settings > Privacy & Security > Location Services, then select the relevant app.
Step 2Choose the appropriate permission
Select Never to prevent that app from accessing Location Services information. Where offered, While Using the App or Ask Next Time Or When I Share provides a more limited alternative to ongoing access.
Step 3Review precision separately
If the app needs an approximate area but not an exact position, consider turning Precise Location off. This reduces precision; it does not stop access altogether. Repeat the review for other apps as needed.

Changing an app's permission does not automatically erase previously stored data or cancel every account-level sharing arrangement. Check the app's own sharing controls as well as iOS permissions.
4. Review the System Services list
iOS system features can use location independently of third-party apps. Review these entries individually rather than assuming that switching everything off is necessary or harmless. Some entries support useful functions such as time-zone behavior or location-related alerts.
Step 1Start inside Location Services
Open Settings > Privacy & Security > Location Services. The original guide omitted this intermediate screen when describing the System Services path.
Step 2Open System Services
Scroll to System Services near the bottom and inspect the entries available on your device and iOS version.
Step 3Change only the relevant feature
Disable the selected service if you understand the trade-off, then check that the feature you still need works as expected. Keep a note of your change so you can reverse it.
Selective service changes are not a substitute for stopping a Find My share. If another person is receiving your live location, use the controls in the next section rather than guessing which background service supplies it.
5. Stop sharing through Find My without confusing device protection
Share My Location governs sharing your whereabouts with people. Find My iPhone helps recover and protect the device. You usually do not need to disable device finding merely to stop sharing with a friend.
Step 1Choose one person or everyone
For one person, open Find My > People and select their name. For everyone, open Find My > Me, or go to Settings > your name > Find My.
Step 2Use the matching sharing control
For one recipient, choose Stop Sharing My Location and confirm. To stop sharing with everyone, turn Share My Location off.
Step 3Check whether a pause will resume
If your version offers Hide Location for an individual, Apple describes it as a temporary pause that resumes the next day. Use the stop-sharing option when you do not want that automatic resumption.

Recipients may notice that you stopped sharing, and older operating systems may notify them in Messages. A supported iPhone can also remain findable through the Find My network after it is offline or powered down. Turning off Find My iPhone has significant recovery consequences and is a separate decision.
Conclusion
Use the main Location Services switch for broad app access, app or system settings for selective restrictions, and Find My's sharing controls for people. A Shortcuts URL is not an automatic privacy toggle, and a GPS simulation tool is not a guarantee of hidden movement. Review the actual setting and its consequences rather than assuming that less location access will always prevent tracking, overheating, or battery drain.
FAQ
1. Where are Location Services on iPhone?
Open Settings > Privacy & Security > Location Services. Use the top switch for broad access or select an app for a narrower change.2. Does a prefs URL automatically turn location off?
No. The source's Open URLs action is a navigation attempt, not a switch-changing action. Private Settings paths may fail on your iOS version; use the documented manual route.3. Is Share My Location the same as Find My iPhone?
No. Sharing controls govern other people's access to your whereabouts, while Find My iPhone supports device recovery and protection. Stop sharing without unnecessarily disabling device finding.4. Does disabling Location Services prevent every form of location use?
No. Normal app access is restricted, but emergency-call location, device-finding settings, and other sources such as IP-based estimates require separate consideration.
 Add Wondershare Dr.Fone as a preferred source on Google