100% Security Verified | No Subscription Required | No Malware

 :
: 
 ChatGPT
 Perplexity
 Gemini
 Claude
 Grok
Grok

I keep hearing “use these best settings,” but real life is kids moving, bad indoor light, and no time to tweak—so I just want a setup that actually works every day.
Reddit user, r/iPhone
“Best” camera settings usually fail because everyday shooting is a mix of motion, messy light, and time pressure—not controlled test scenes.
AI can help by turning your vague preferences (“I want nicer photos”) into clear priorities (speed vs quality, storage vs editability, consistency vs flexibility) and mapping those priorities to specific setting choices.
In this article
- How to Compare Better Everyday Camera Settings Based on Real Priorities
- Choose a shooting style (not a single setting)
- Spot trade-offs you only notice later
- Start from what you shoot most
- Define what “regret” looks like for you
- What the AI Needs to Compare
- Using AI Prompts to Evaluate Settings More Clearly
- AI Recommendation vs Real-World Fit
- When to Stop Researching and Make the Call
Part 1. How to Compare Better Everyday Camera Settings Based on Real Priorities
Most people aren’t choosing one setting—they’re choosing a shooting style: “point-and-shoot fast,” “highest quality for editing,” or “consistent results in tricky light.” The same phone can feel great or frustrating depending on which style your settings push you toward.
The uncertainty usually comes from trade-offs you only notice later: HDR that fixes bright skies but blurs moving kids, high-resolution that looks sharper but fills storage fast, or “pro” formats that edit well but complicate sharing.
A practical comparison starts with what you shoot most (people, pets, food, streets, documents) and what causes regret most (missed moments, weird skin tones, noisy night shots, running out of storage).
1-1. Choose a shooting style (not a single setting)
Instead of chasing “best,” decide what you’re optimizing for most of the time: speed, quality for editing, or consistency in tough light.
1-2. Spot trade-offs you only notice later
Many “improvements” have hidden costs (slower capture, more blur/ghosting, larger files, extra steps, or harder sharing).
1-3. Start from what you shoot most
Base the profile on your real subjects and scenarios—people indoors, moving kids/pets, travel streets, food, or documents—because each one punishes different settings.
1-4. Define what “regret” looks like for you
Be specific about what ruins shots for you (missed moments, harsh faces, noise, odd HDR frames, or storage pain). Your “best settings” should directly address that.
Part 2. What the AI Needs to Compare
Share the details below so AI can compare settings like a real-life decision, not a generic list.
- Your phone model + camera app you use most (default app or third-party)
- Your top 3 subjects (e.g., kids/pets, friends indoors, travel, food, screenshots/documents)
- Typical lighting (bright outdoor, mixed indoor, low light/night)
- Your priority order (speed, consistency, editability, maximum detail, smallest file size)
- Where photos go (social stories, messaging, prints, cloud albums, work)
- Your tolerance for “extra steps” (0–10) after taking a photo
- Storage situation (often full vs plenty of space) and backup habits
Part 3. Using AI Prompts to Evaluate Settings More Clearly
Use these prompts to compare setting bundles (speed-first vs quality-first vs consistency-first) and see the trade-offs before you commit.
3-1. Level 1: Basic Prompt
I want the best phone camera settings for better everyday shots.
Compare a “speed-first” setup vs a “quality-first” setup for my typical shooting (people, indoors, outdoor).
Tell me what to change in settings and what I gain/lose with each.
3-2. Level 2: Advanced Prompt
Act as a camera-settings decision assistant.
Propose two or three everyday camera setting profiles I can choose from (example: Speed/Share, Balanced, Edit/Quality), and for each profile include:
- recommended choices for HDR/processing behavior, resolution/aspect ratio, motion photo/live photo, flash behavior, grid/level, exposure adjustment habit, file format (space-saving vs editing-friendly), and lens switching habit (1x vs ultra-wide vs zoom)
- what each profile optimizes for (miss fewer moments, better low light, cleaner skin tones, sharper detail, easier sharing, smaller storage)
- what each profile risks (motion artifacts, noise, oversharpening, inconsistent color, storage growth, slower capture)
Then recommend which profile fits best based on my priorities and who the other profiles fit better.
3-3. Level 3: Evidence Prompt
Here’s my context: [phone model], I mostly shoot [subjects] in [lighting].
My biggest annoyances are [e.g., blurry kids indoors / harsh faces / noisy night shots / storage filling up].
I share to [apps] and I [rarely / often] edit photos.
Recommend one “best phone camera settings for better everyday shots” profile for me, and include:
- the exact setting directions in plain language (what to turn on/off or keep on auto)
- what I gain / what I give up with this profile versus the runner-up
- one key assumption you’re making that, if wrong, would flip your recommendation (and what you’d choose instead)
3-4. Prompt Refinement (Follow-up Prompts)
If I care most about not missing moments, which settings create the least friction while still improving results, and what quality am I sacrificing?
Which single setting is most likely to cause regret for me (motion blur/ghosting, weird skin tones, noisy low light, storage explosion), and what’s the safer default?
If my top subject is moving people/pets indoors, how should that change HDR behavior, motion photo/live photo, flash, and any “night/low light” behavior?
If I share mostly to stories/messaging, which settings are “invisible wins” and which are wasted effort (or make sharing harder)?
Give me a 2-week trial plan: what to change first, what to keep constant, and what to evaluate so I can decide without endlessly tweaking.
Part 4. AI Recommendation vs Real-World Fit
| Likely AI recommendation or conclusion | What real-life use may change or reveal |
|---|---|
| “Use HDR/processing on Auto for balanced results.” | Fast motion (kids/pets) can produce blur/ghosting or odd frames that make you prefer less aggressive processing. |
| “Use the default aspect ratio/resolution for consistency.” | You may realize your main output is stories/short video, making a different framing habit more satisfying even if you lose some cropping flexibility. |
| “Turn on grid/level and use slight exposure adjustments for better reliability.” | The extra step might slow you down, and you’ll stop using it—making a simpler setup more effective. |
| “Choose space-saving formats to avoid storage issues.” | Compatibility/sharing/editing workflows may push you back to a more universal format despite larger files. |
AI can clarify likely fit, but hands-on use, workflow friction, and daily habits still decide satisfaction.
Part 5. When to Stop Researching and Make the Call
- You can name your top priority (speed, low-light reliability, editability, or storage) and accept the main downside that comes with it.
- You’ve chosen one “default profile” you’ll use 90% of the time, plus one exception rule (e.g., “switch only for night indoor” or “switch only for portraits”).
- You know your most common failure mode (blur, noise, harsh faces, dull skies) and your settings explicitly address it.
- You have a simple way to judge success after a week (fewer misses, less editing, more consistent skin tones, fewer storage alerts).
Once you can describe your choice in one sentence and predict its downside, you’re ready to stop comparing and start shooting.
After Choosing Better Everyday Camera Settings: Switch or Prepare Smoothly with Dr.Fone
After you lock in a shooting profile, the next practical step is keeping your library and device workflow manageable—especially if you’re switching phones, reorganizing storage, or preparing a device for resale. If being locked out of an Android phone is part of your situation, Dr.Fone - Screen Unlock (Android) can help you regain access so you can proceed with backup/transfer/cleanup.
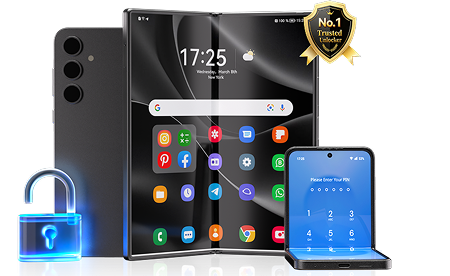
 Unlock Android phone in seconds.
- Remove PIN, pattern, password, fingerprint.
- Bypass Google FRP lock easily.
- Works on all Android brands & models.
- No tech skills required – user-friendly.
Optional: Unlock access first (so backup/transfer/cleanup is possible)
-
Step 1 Launch Dr.Fone and open Screen Unlock
Start Dr.Fone on your computer and enter the Screen Unlock feature so you can proceed with access recovery when needed.

-
Step 2 Select the Android unlock option
Choose the Android screen unlock path based on the device you’re trying to access.

-
Step 3 Enter the remove screen lock workflow
Follow the on-screen guidance to access the remove screen lock function for your device type.

-
Step 4 Select your brand and continue the guided steps
Select the brand in use and continue with the guided instructions shown by the tool.

Then keep your photo library manageable after you choose a profile
-
Step 1 Back up what you’ve already shot
Action: Use Dr.Fone to back up your photos/videos so changing settings (and shooting more) doesn’t raise the risk of losing your camera roll.
Limitation: A backup won’t improve photo quality retroactively—it only protects what you already captured.
-
Step 2 Transfer your library if you’re switching phones
Action: Use Dr.Fone to move photos/videos to a new device so your new “everyday settings” start fresh without leaving memories behind.
Limitation: Transfers can still take time on very large libraries, and you may need to confirm what counts as “completed” in your destination gallery.
-
Step 3 Clean up or prep for resale/reset
Action: Use Dr.Fone to remove unwanted data when you’re decluttering or getting a phone ready to hand off or sell.
Limitation: Data removal can be irreversible, so you should verify your backup first.


Conclusion
AI is best used to turn “better everyday shots” into a clear settings profile with understood trade-offs; real-life use is the proof; and if switching, transferring, cleaning up, or resale prep is part of your plan, Dr.Fone can handle the execution after the decision is made.
FAQ
-
Can I trust AI to tell me the best camera settings?
Trust it for structured trade-offs and a clear starting profile, not for guaranteeing your phone’s real processing look or the “feel” of using those settings under pressure. -
What’s the most important everyday trade-off?
Speed and consistency vs maximum quality and editability. The more you optimize for “highest quality,” the more you usually accept extra steps, bigger files, or slower capture. -
How do I avoid a generic spec-based decision?
Describe your subjects + lighting + sharing destination + tolerance for extra steps. Those four inputs usually matter more than theoretical capability. -
What should I test after I choose settings?
Shoot your most common scenario for a week (especially indoors people/motion), then review failures: blur, weird faces, noise, or storage pain—and adjust only the setting tied to that failure. -
If I’m switching phones soon, should I pick different settings now?
Yes—choose the simplest profile you’ll keep long-term, and focus on backup/transfer so you don’t postpone the decision due to library or storage stress.
 Add Wondershare Dr.Fone as a preferred source on Google