Effortlessly manage data through preview, delete, export, etc.

 100% Security Verified | No Subscription Required | No Malware

 :
: 
 ChatGPT
 Perplexity
 Gemini
 Claude
 Grok
Grok

System Data on my iPhone keeps growing even after I delete apps and photos. I’m scared to “just reset it” because I don’t want to lose anything—what should I actually do first?
Apple Support Community user
System Data can balloon on iPhone because multiple “invisible” buckets (caches, logs, update files, message attachments, indexing) overlap—so skipping one verification step can lead to wasted effort or accidental data loss. This guide shows how to use AI prompts to build a safer, ordered workflow with clear verification and stop points, then execute it carefully on your device.
In this article
- How to plan without missing critical steps
- What’s happening (and why order matters)
- Where people get stuck
- Risk gate: erase & restore
- What “verification” means
- What the AI needs to know
- AI prompts to build a safer workflow
- AI plan vs. real device constraints
- When to stop planning and start execution
Part 1. How to Plan Why System Data Keeps Growing on iPhone Without Missing Critical Steps

You’re low on storage, but “System Data” keeps growing even after deleting photos, apps, or chats. The Storage screen doesn’t explain what’s inside System Data, and the number can jump after updates, restarts, or syncing.
You ask AI what to do, get a list of tips, and still feel stuck because the order matters: some steps take time to reflect, some require power/Wi‑Fi, and some can silently fail if you don’t confirm backups and passwords first.
There’s also a point of no return: erasing and restoring the iPhone can reduce System Data, but you should not approach that step until backups are confirmed, encryption passwords are known, and you’ve captured evidence that earlier steps didn’t work.
Part 2. What the AI Needs to Know
Share a few specifics so the plan can be sequenced correctly and verified reliably.
- iPhone model and iOS version (e.g., iPhone 13, iOS 17.5)
- Total storage and free space (e.g., 128 GB total, 2.1 GB free)
- Current “System Data” size and how fast it grows (e.g., 28 GB, +2 GB/day)
- What changed recently (iOS update, new apps, travel/no Wi‑Fi, streaming, new SIM, MDM/work profile)
- Your top storage categories (Photos, Messages, iCloud Drive, WhatsApp, Safari, Music/streaming)
- Whether you use iCloud Backup and/or computer backups (Finder/iTunes), and when last successful backup happened
- Whether you can sign in to Apple ID and have stable Wi‑Fi + power for 1–2 hours
- Any constraints (can’t reset device, work phone, no computer access, limited data plan)
Part 3. Using AI Prompts to Build a Safer Why System Data Keeps Growing on iPhone Workflow
Use the prompts below to make AI produce a checklist you can follow, with clear stop points and verification checks.
3-1. Level 1: Basic Prompt
I need a step-by-step plan to stop “System Data” on my iPhone from growing and to reduce it safely.
Put the steps in the best order and include what to verify after each step so I don’t accidentally lose data.
3-2. Level 2: Advanced Prompt
Build a structured workflow to address “System Data keeps growing on iPhone,” split into Preparation, Execution, and Verification.
Mark each step as critical vs optional, and include “do-not-do-yet” warnings for any step that becomes risky if backups or passwords aren’t confirmed.
3-3. Level 3: Evidence Prompt
Create a plan based on my context and include checks before/during/after each action, plus what evidence I should capture so I can tell if iOS is just recalculating storage.
Context: iPhone (e.g., iPhone 12), iOS (e.g., 17.5), storage (e.g., 64 GB total / 1.5 GB free), System Data (e.g., 19 GB and rising), recent changes (e.g., iOS update + lots of streaming), backups (e.g., iCloud backup ON but last successful unknown; no computer backup).
Constraints: (e.g., I can’t erase the phone today; I can use Wi‑Fi overnight).
Output format:
- Preconditions (backup, passwords, battery, Wi‑Fi)
- Ordered steps (critical/optional)
- Verification after each step (what number/screen/log I should check, and how long to wait)
- Stop conditions (when to escalate to restore)
3-4. Prompt Refinement
Convert your workflow into a decision tree with “If/Then” branches based on my inputs (System Data size, free space, last backup success, iOS version).
List the top 8 root causes of System Data growth for my situation and map each cause to one diagnostic check and one safe fix.
Add a verification timeline: which steps show changes immediately vs after reboot vs after several hours (indexing/storage recalculation).
Identify the irreversible steps and write a “must-verify-first” checklist (backup status, encryption password, Apple ID access, 2FA, enough free space on computer/cloud).
Produce a minimum-risk sequence that avoids deleting apps/data until we’ve tried network/power/indexing and cache-limiting actions.
Part 4. AI Plan vs. Real Device Constraints
| Planning need | What AI can do | What AI can’t do | What you must verify on-device |
|---|---|---|---|
| Identify likely causes of System Data growth | Prioritize causes by your context and symptoms | Read your iPhone’s real storage breakdown | Actual Storage screen numbers, last backup timestamps |
| Build a safe sequence with stop points | Provide ordered steps and decision criteria | Enforce the sequence or prevent mistakes | Your backups, passwords, Apple ID access before risky steps |
| Define verification checks | Tell you what to screenshot/log and when to re-check | Confirm whether a change worked | System Data size after waiting/reboot/indexing |
| Escalation planning (restore/repair) | Explain prerequisites and risk gates | Perform restore/repair/cleanup | Confirm backup success and restore method before “erase” |
AI improves planning, but cannot execute. Treat the plan as a checklist you validate on the device before any irreversible action.
Part 5. When to Stop Planning Why System Data Keeps Growing on iPhone and Start Execution
- You can explain your current state in one line (iOS version, free space, System Data size, growth pattern).
- You’ve chosen a verification method (screenshots + timestamps, and when you’ll re-check Storage).
- You’ve confirmed backup readiness (at least one recent successful backup you can restore from, plus required passwords).
- You know your no-go boundary (e.g., “no erase/restore until backup confirmed and Apple ID access tested”).
If those are true, you’re ready to move from “ideas” to controlled, verifiable execution.
Execute the Workflow Safely with Dr.Fone
Execution matters now because System Data troubleshooting often requires backup, repair, or restore flows that must be done in the correct order—especially before any irreversible reset. If you want a device-side tool to help with backup and data handling, start with Dr.Fone Basic - Data Manager.
 Easily manage data through preview, delete, export, etc.
- Transfer all data between devices.
- Robust backup solutions for reliable data protection.
- Mirror screens to PC for meetings, teaching, and control.

Step: Lock in a restore-safe backup
- Action: Use Dr.Fone to create and confirm a backup you can rely on before you attempt deeper cleanup or any reset.
- Limitation: AI cannot confirm whether your backup is complete or restorable—you must verify it in the tool and keep needed passwords/Apple ID access.
Step: Run the least-risk remediation you selected in planning
- Action: Use Dr.Fone to carry out the specific device-level action your plan approved (only after the backup gate is passed).
- Limitation: AI can’t see which on-device options you selected or whether a step actually ran; you must follow the chosen sequence and avoid jumping ahead.
Step: Escalate only if verification says it’s necessary
- Action: If your plan’s stop conditions are met, use Dr.Fone to proceed with the escalation path you pre-approved (this may include a restore/reset that can be irreversible).
- Limitation: Once you erase or restore, you may not be able to recover unbacked data—do not proceed unless all verification gates are satisfied.

-
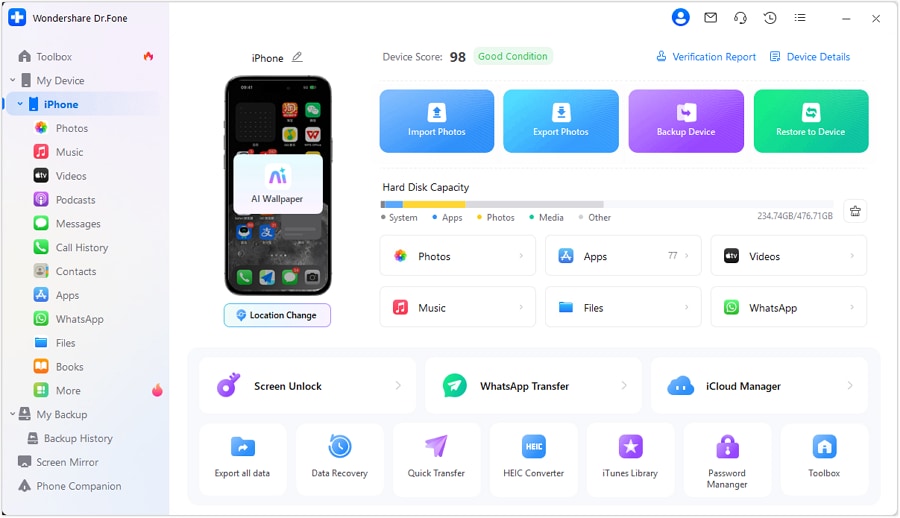
Step 1 Connect your iPhone to your computer
Open the tool and connect your iPhone so you can manage and back up data as part of your execution plan.
-
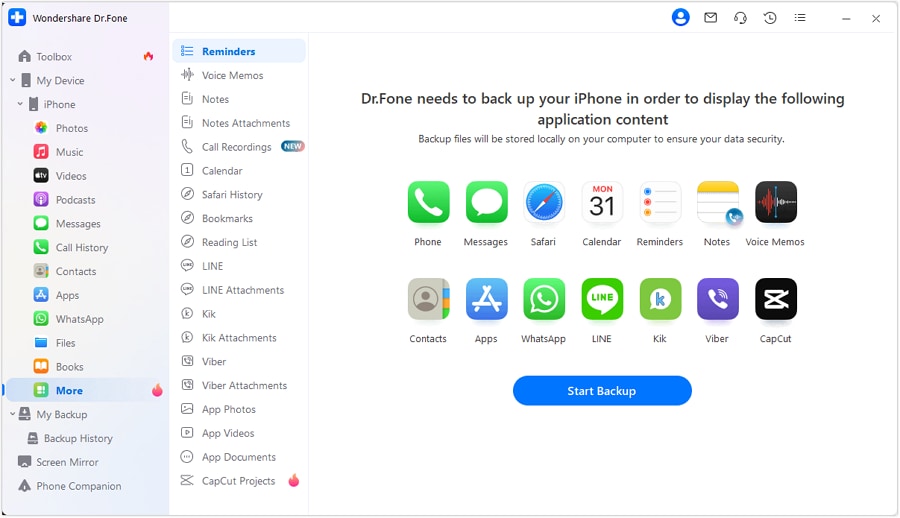
Step 2 Go to the data management view
Use the management interface to review what’s on the device and follow the ordered sequence you planned (backup first, then the least-risk actions).
-
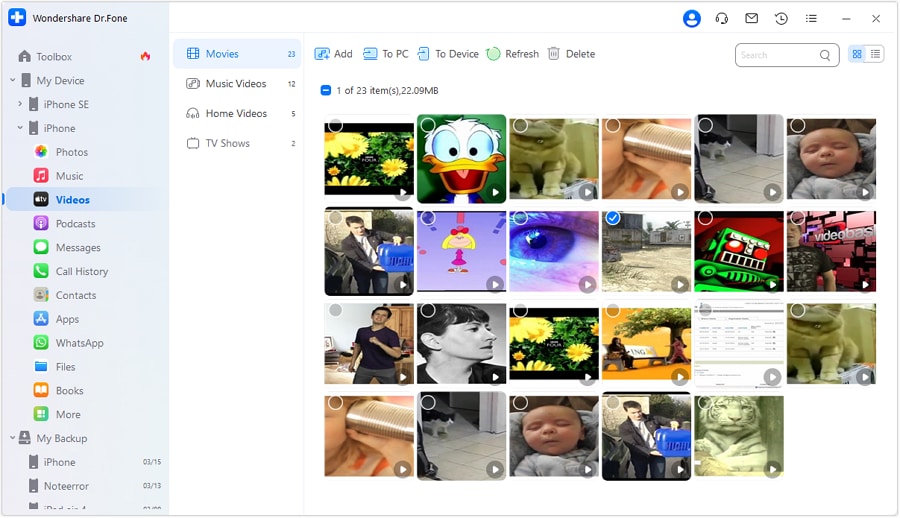
Step 3 Review large items (example: videos)
Identify space-heavy items you can safely export or remove (after verifying your backup and your plan’s stop points).

-
Step 4 Export or delete only what your plan approved
Select the required option (export/delete) and re-check iPhone Storage on the device using your verification timeline (wait time, reboot, and screenshots with timestamps).




Conclusion
Use AI to design a careful, verifiable workflow with clear stop points and risk gates; then use a real execution tool like Dr.Fone only after you’ve confirmed backups and verification checks—especially before any irreversible restore.
FAQ
-
Why does System Data keep growing even when I delete photos and apps?
Because System Data can include caches, logs, temporary update files, databases, and indexing artifacts that don’t shrink immediately—or at all—until certain conditions are met (time, reboot, re-indexing, completed sync). -
How do I know whether iOS is “recalculating” storage?
Re-check Storage after a consistent wait period (often hours), ideally after a restart and stable Wi‑Fi/power, and compare screenshots with timestamps. A sudden jump without any usage can be recalculation. -
What’s the highest-risk moment in this workflow?
Erasing and restoring the iPhone. It can reduce System Data, but it’s effectively irreversible if you don’t have a verified backup and the credentials needed to restore. -
Should I keep deleting apps to shrink System Data?
Not first. Deleting apps can remove data you care about while System Data remains unchanged. Use a verification-led sequence and escalate only after safer checks fail. -
When should I stop troubleshooting and escalate to restore?
When System Data growth is persistent, storage is critically low, verification shows low-risk steps didn’t help, and you’ve confirmed a restorable backup plus Apple ID access.
 Add Wondershare Dr.Fone as a preferred source on Google