Recover photos, messages, WhatsApp, and more — no backup
needed.


 100% Security Verified | No Subscription Required | No Malware

 :

 ChatGPT
 Perplexity
 Gemini
 Claude
 Grok
Several emails about a public-records request have nearly identical subjects, but the original acknowledgement with your reference number is missing from Gmail on your Pixel 11 series phone. A later progress update mentions the request without repeating its scope, and the attached response schedule is nowhere to be found. Finding another message with the same subject is not enough.
Dr.Fone - Data Recovery (Android) can help you inspect available local Gmail correspondence and attachments on a supported Pixel 11 series configuration, then save useful selections to a Windows PC. Before scanning, use a precise retained-mail check when possible: an original Message-ID can distinguish one email from the many updates discussing the same request.
In this article
Before you start
Keep each Pixel 11 support condition intact
This article covers only Google Pixel 11, Pixel 11 Pro, Pixel 11 Pro XL and Pixel 11 Pro Fold, each shown individually in the support table. Their supplied recovery records specify Android 16 and Kernels 6.12 / 6.12.69. These conditions are not a statement about shipping software, a blanket Pixel guarantee or a reason to change firmware.
Prepare Windows while protecting local records
Advanced Recovery is Windows-only and saves selected discoverable results to a PC. Prepare a Windows computer, a USB data cable and a private output folder. Do not remove the Gmail account, clear app storage, uninstall Gmail or reset the Pixel while trying to preserve local findings. Use displayed product instructions instead of inventing Root, unlocking or flashing steps.
Identify the specific acknowledgement, not just its subject
Note the authority's sender address, the approximate receipt date and any known request reference. If you have legitimate access to another original retained copy, its Message-ID may help with a precise mailbox search. The displayed subject, an administrative case number and a Message-ID are different identifiers. A local scan can be useful without having that ID in advance.
Use an original Message-ID to locate one retained Gmail email
Repeated or similar subjects when an original retained copy is available to you or another authorized recipient.
Step 1 Read headers from the original retained copy on a computer
In Gmail in a computer browser, open the relevant original email. Next to Reply, click More > Show original to view its full header. This is a computer-browser action, not an Android Gmail menu. If an authorized recipient helps, ask only for the necessary original Message-ID rather than sharing a whole header containing unrelated personal information.
Step 2 Search the exact ID in the account that received the missing mail
Google documents rfc822msgid: for searching a specific Message-ID header. Its example rfc822msgid:200503292@example.com illustrates the syntax; replace that sample with the actual original ID. Add in:anywhere to include Spam and Trash. Run this in Gmail's mailbox search, not in Dr.Fone's result search.
Step 3 Do not substitute a forward or a new update's identifier
Use the ID belonging to the missing original, not simply the identifier of a later forwarding email or status update. If you have no trustworthy original ID, skip the exact-ID search and use the sender address, request reference and a broader date range instead. A failed narrow search is not proof of permanent deletion.
Step 4 Open the match and inspect the actual acknowledgement
Read the message for the request reference and the scope actually acknowledged, then open any real attachment. If it is available online, use that retained source first. A matching identifier helps locate a message; it does not by itself establish authenticity, a complete response or the contents of an absent attachment.
- Search the correct online account. Offline searches cover only emails already synced to the Pixel.
- Do not assume Dr.Fone exports complete raw headers or a particular mail-file format. Its documented Gmail view presents available entries by name, title and date for content inspection.
Retrieve the acknowledgement from Gmail Trash if it remains there
An ordinary received email whose deletion is still reversible through Gmail.
Step 1 Inspect Trash independently of the exact-ID search
Open Gmail's Menu > Trash and inspect candidate messages by sender and content. Deleted mail can remain there for up to 30 days from deletion, unless permanently deleted or removed by emptying Trash earlier. Do not use the request submission date as the deletion date.
Step 2 Move the existing email and review its real attachment
Touch and hold the relevant email, choose More > Move to and select a destination such as Inbox. Open the moved item and its attachment to verify the information you need. This is restoration of retained account mail, distinct from saving phone-local scan results.
- Discarded drafts are not recoverable through Gmail Trash.
- When neither the acknowledgement nor its file is available in retained sources, continue to the supported local scan rather than repeatedly guessing identifiers.
Pixel 11 series: keep the listed recovery conditions model-specific
| Approved device | Listed Android condition | Listed Kernel entries |
|---|---|---|
| Google Pixel 11 | Android 16 | 6.12 / 6.12.69 |
| Google Pixel 11 Pro | Android 16 | 6.12 / 6.12.69 |
| Google Pixel 11 Pro XL | Android 16 | 6.12 / 6.12.69 |
| Google Pixel 11 Pro Fold | Android 16 | 6.12 / 6.12.69 |
Common problems and fixes
The Message-ID search finds nothing
Check that the value comes from the original retained message rather than a later forward, and that you are searching the intended account online. Remove the exact-ID condition and search more broadly with in:anywhere plus the sender or request reference. If no original ID is available, a normal content search remains useful; do not fabricate one.
Several local records share the same subject
Use the visible name, title and date to narrow candidates, then open each actual preview. Keep the acknowledgement containing the reference and stated request scope separately from a later progress update. If only an update is found, save the useful reference or contact details it contains and ask the authority for the missing acknowledgement.
You recover the reference but not the response schedule
Inspect Gmail Attachments separately if the scan finds that category. Open any selected output on the PC to check the actual document, not just its name. A useful reference lets you follow up about the missing file, but the scan does not infer a response deadline, supply missing pages or certify compliance with public-records rules.
How to use Dr.Fone - Data Recovery (Android)
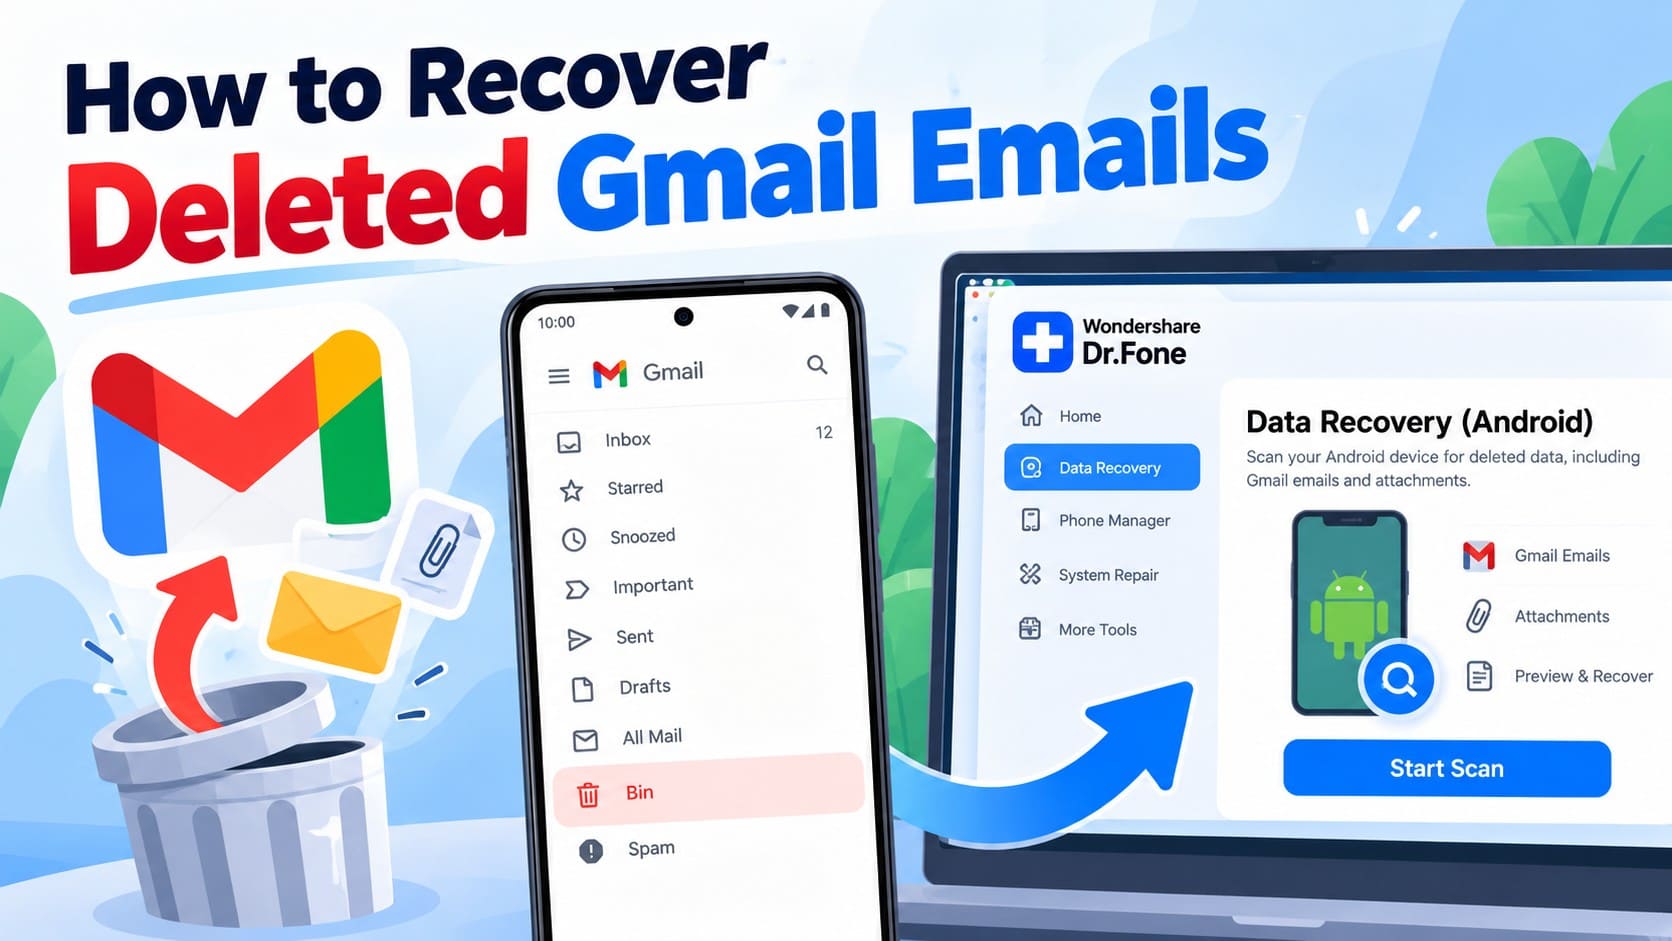
Dr.Fone - Data Recovery (Android) helps you move beyond similar Gmail subject lines to inspect the local records actually found on a supported Pixel 11 series phone. Its Windows-only Advanced Recovery workflow lets you preview candidate correspondence, check any separate Gmail Attachments and save selected data to a PC. For a missing acknowledgement, the useful outcome may be the actual request reference, readable scope details or an available response document.
- Name, title and date help locate candidate Gmail entries before you verify the actual contents.
- Separate found-attachment inspection helps distinguish a response schedule from an email that only refers to one.
- Selective PC saving keeps the useful acknowledgement or follow-up material without exporting unrelated correspondence.
 Scan Android phones and tablets directly.
- Preview and recover only what you want.
- Supports WhatsApp, photos, videos, contacts, and more.
- Works with 6000+ Android devices.
Follow the official Advanced Recovery workflow
Step 1 Open Advanced Recovery for the supported Pixel
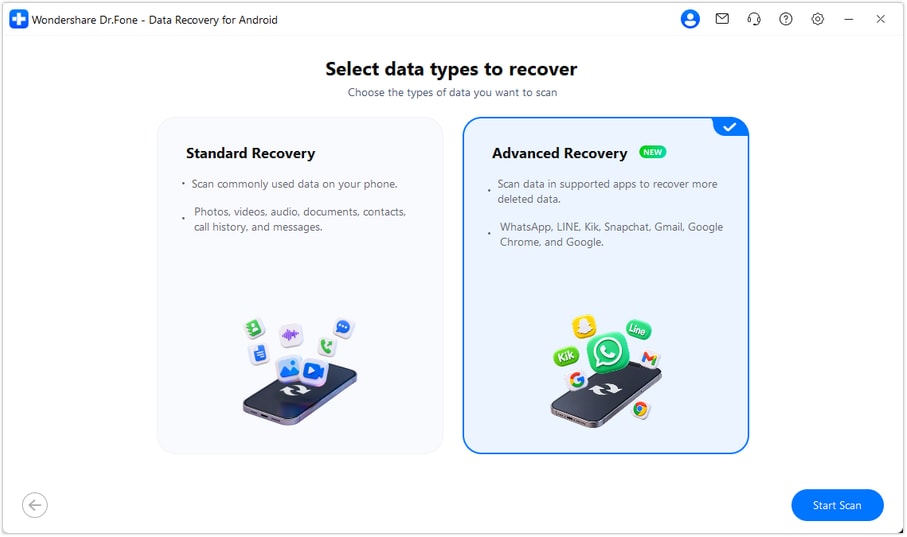
On Windows, start Dr.Fone and open Toolbox > Data Recovery. Choose Android > Recover Android Data, select Advanced Recovery and click Start Scan. Connect the Pixel by USB when prompted and follow the on-screen detection instructions.
Step 2 Choose the Gmail data category
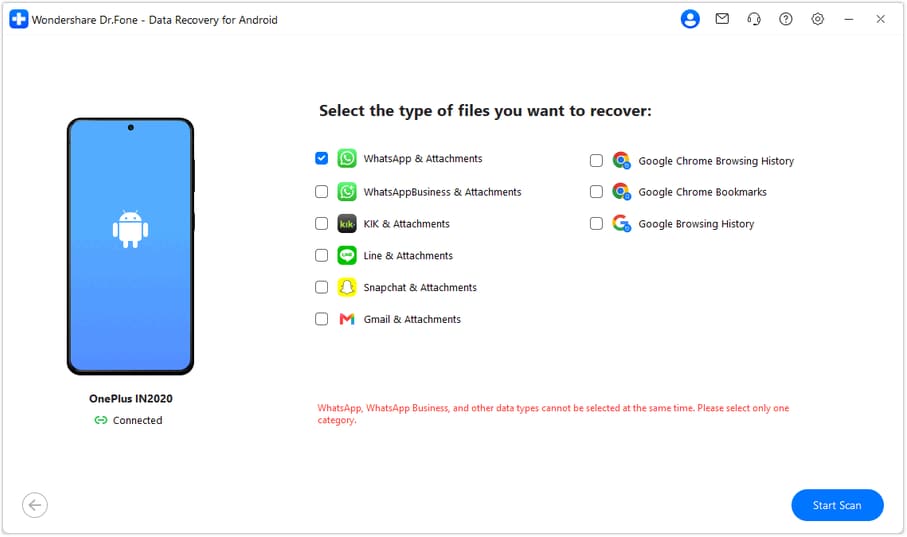
Select Gmail from the available categories and click Start Scan. The guide's separate-selection rule applies to WhatsApp and WhatsApp Business versus other categories; neither is needed for this Gmail record search.
Step 3 Allow the scan to run with a stable connection
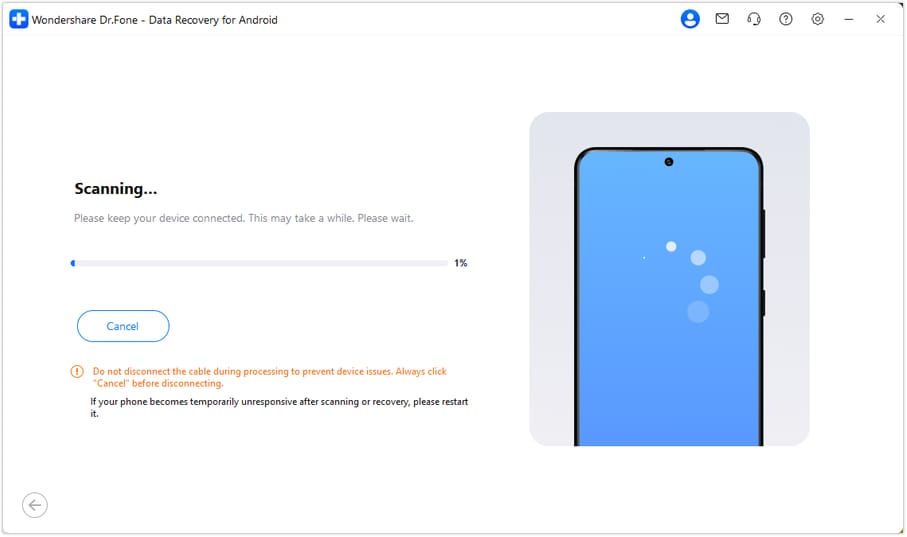
Keep the Pixel connected throughout scanning. If you need to stop, click Cancel before disconnecting. Follow any displayed restart instructions if the phone becomes temporarily unresponsive after scanning or recovery.
Step 4 Read candidate acknowledgements and any response files
Choose Gmail in the results sidebar and locate likely items by name, title and date. Use search or filters where available, then open the actual preview to check the request reference and acknowledged scope. If Gmail Attachments are found, preview them separately and select useful response files alongside the relevant email records.
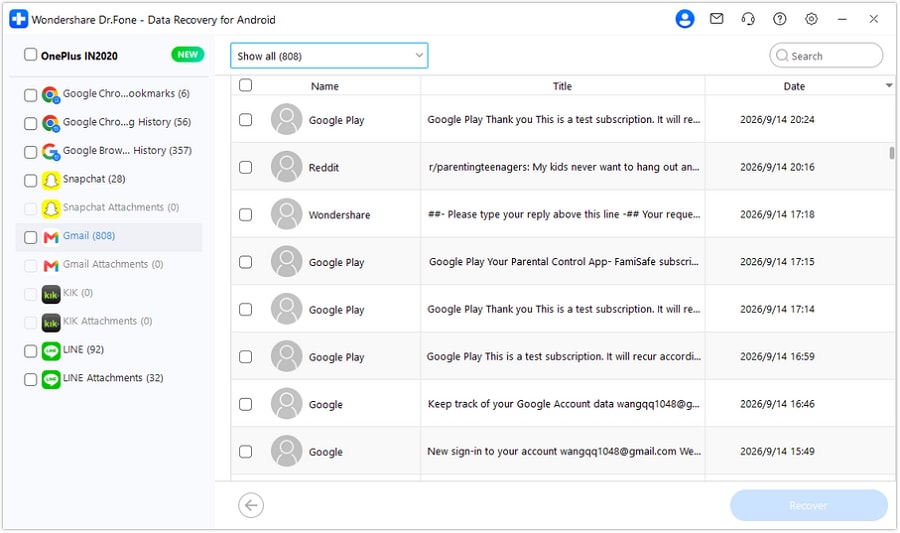
Step 5 Recover the selected correspondence to the PC
Click Recover and choose a computer folder through the displayed prompts. Open the saved output and check the available contents and files. These are selected PC copies, not a reconstruction of Google's mailbox, complete raw headers or automatic restoration into Inbox.




Conclusion
For a missing Gmail acknowledgement, success means keeping the reference, readable correspondence and available documents that help you follow up accurately. Dr.Fone - Data Recovery (Android) combines local Gmail preview, separate attachment inspection and selective PC saving on supported Pixel 11 series configurations. Download Dr.Fone - Data Recovery (Android) for Windows and start the guided scan to preserve the useful results you find.
FAQ
1. Which Pixel 11 series models are covered by these supplied recovery records?
Google Pixel 11, Pixel 11 Pro, Pixel 11 Pro XL and Pixel 11 Pro Fold are individually listed, each with Android 16 and Kernels 6.12 / 6.12.69. Keep those conditions attached to their named models. They are recovery-support entries, not a universal Pixel or firmware guarantee.2. Is a case number the same as a Gmail Message-ID?
No. A case number is normally part of the authority's correspondence, while Message-ID is a message header identifier. Gmail's rfc822msgid: operator searches the latter. If you only know a case number, use a normal Gmail content search rather than putting it into an invented Message-ID.3. Can I use Show original directly in Gmail for Android?
The instructions here are explicitly for Gmail in a computer browser: open the original email, then use More next to Reply > Show original. Do not look for that desktop command as a promised Android app menu. If there is no accessible original copy, search by sender or reference and continue to local recovery if needed.4. Does Dr.Fone recover full headers or return permanently deleted mail to Gmail?
This guide does not promise complete headers, a specific export format or restoration into Inbox. Dr.Fone scans discoverable local Gmail data on the supported phone, previews the available records and saves selections to a PC. It does not reverse Google's permanent server deletion or extend Trash retention.
 Add Wondershare Dr.Fone as a preferred source on Google