Recover photos, messages, WhatsApp, and more — no backup
needed.


 100% Security Verified | No Subscription Required | No Malware

 :

 ChatGPT
 Perplexity
 Gemini
 Claude
 Grok
After switching phones, an empty-looking Gmail view can make a missing order email or delivery document feel permanently lost. But a new phone showing a different account, an archived message and a truly deleted email are three different problems. The right recovery route starts by finding out which one you have.
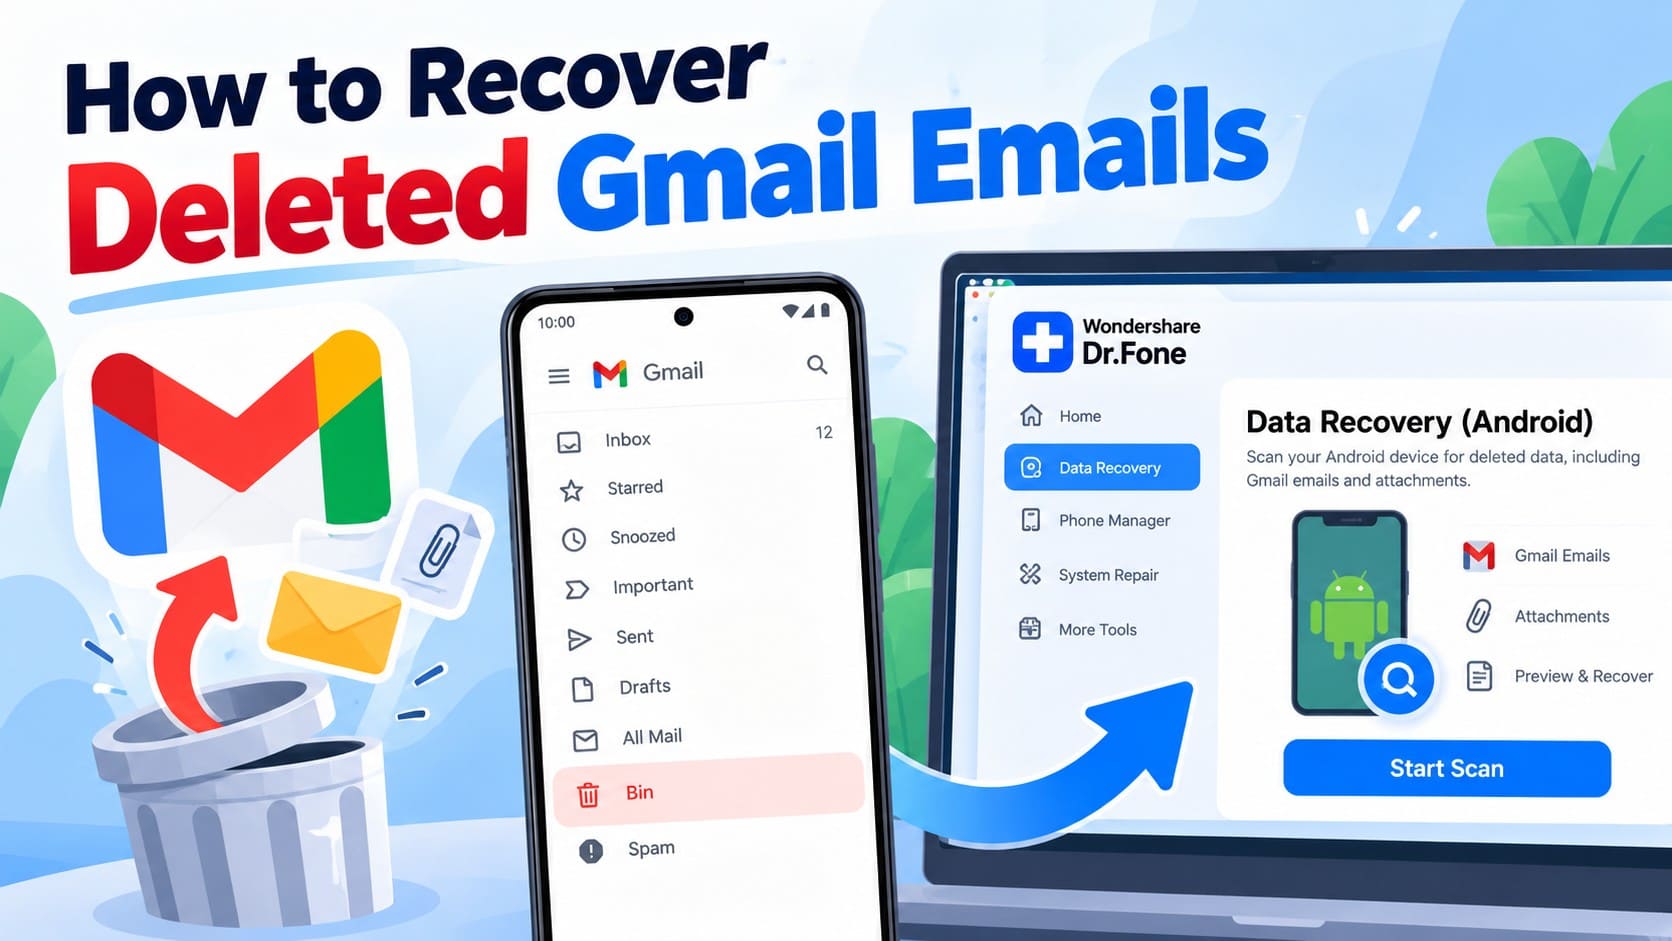
For local data on a supported Google Pixel 9 or 9a, Dr.Fone - Data Recovery (Android) gives you a focused way to scan Gmail records, inspect available attachments and save selected results to a PC. Use the phone that actually held the relevant data, rather than assuming a replacement phone contains every older email and file. The steps below help you check the mailbox first and then make a purposeful local recovery attempt.
In this article
Before you start
Check the separate Pixel 9 and Pixel 9a conditions
Google Pixel 9: the listed recovery configuration specifies Android 14 and Kernel versions 6.1.75 / 6.1.157. Google Pixel 9a: the listed recovery configuration specifies Android 14 and Kernel 6.1.157. The two entries do not share the full Kernel list. Check the exact model and installed software before using this route; if they differ, confirm the current configuration with Dr.Fone support. These are recovery support conditions, not shipping-software claims or instructions to install Android 14. Do not downgrade, flash or reset a phone to match them.
Preserve the device that held the missing Gmail data
If that device is a supported Pixel 9 or Pixel 9a, keep its existing Gmail installation and local data intact for the scan. Do not clear Gmail storage, uninstall, remove its Google account or erase the original phone before evaluating local recovery. Prepare a Windows PC, USB data cable and output folder. Advanced Recovery is Windows-only; follow its displayed connection and access prompts without adding an unverified Root or bootloader procedure.
Set the right destination and retention expectations
The local scan finds data on the connected phone, not a complete history from Google's servers or a different device. Selected Gmail records and attachments are saved to PC, not imported into Gmail. Trash can retain a deleted email for up to 30 days, unless it is permanently deleted sooner; deleted drafts are not recoverable from Trash. Neither moving to a new phone nor scanning it extends Google's deletion window.
Check which Gmail account and phone still show the email
Start here if mail disappeared during a phone change or if the new Pixel's Inbox looks different from the one you remember.
Step 1 Identify the receiving account
In Gmail, tap the profile picture at the top right and check the full email address. Make sure the account you search is the one that received the order, delivery notice or document, rather than another Google account on the phone. Do not remove and re-add accounts as a recovery experiment.
Step 2 Compare the retained mailbox on a computer
Open Gmail on a computer in that same account. Search the sender or a recognizable subject word. If the email appears there, it still exists in the mailbox; use the retained message while checking the Pixel's view. With the phone online, swipe down from the top of the Gmail Inbox to refresh.
Step 3 Check outside the Inbox
On the Pixel, open Menu > All mail for an archived message, or tap Search in mail and enter in:anywhere followed by a word such as delivery. This includes Spam and Trash. If an archived email is the missing item, touch and hold it and choose More > Move to Inbox when you want it visible there.
- A phone change does not turn a retained cloud email into deleted data. A local scan is a different task from displaying an existing mailbox message.
- If the original phone still holds useful local information, preserve it. Do not assume that finding nothing on a replacement phone proves nothing remains elsewhere.
Move an email out of Trash while it is retained
Use this route if the message is truly deleted but still present in Gmail Trash, and you want to use it in the mailbox again.
Step 1 Open Trash in the receiving account
Tap Menu > Trash in Gmail and locate the order or delivery email. Check the message title and date so you do not move an unrelated notification with a similar subject.
Step 2 Choose a mailbox destination
Touch and hold the retained message, tap More > Move to and choose Inbox or another suitable folder. Open it afterward and inspect any accessible attachment.
- When Trash no longer holds the message, a supported phone's local scan can investigate discoverable records and attachments; it does not rebuild the server message.
Which device or location should you check for missing Pixel mail?
| Where the information is available | Next step | What that step can deliver |
|---|---|---|
| The same Gmail account on a computer | Use the retained email and check the Pixel's account or sync view | Access to an existing mailbox message |
| Gmail Trash, before permanent deletion | Use More > Move to | The retained email moved into a usable mailbox folder |
| Local data on a supported Pixel 9 or 9a that held the email | Run Dr.Fone Advanced Recovery on that phone | Selected discoverable Gmail records and attachments saved to PC |
| No result on a replacement phone that never held the old data | Preserve and evaluate the original device separately | A more relevant place to investigate, not proof that the original data is gone |
Common problems and fixes
The replacement phone's scan has no trace of the older email
Confirm whether the relevant Gmail data ever existed locally on the phone you scanned. A scan examines that device, not another phone's storage. If the original device is a supported Pixel 9 or 9a, preserve it and check its own configuration before scanning; do not erase it merely because the replacement scan was empty.
The message exists on a computer but not on the new Pixel
Check the receiving account, internet connection and All mail first. In Gmail, open Menu > Settings, select the account and verify that Sync Gmail under Data usage is enabled. Swipe down in Inbox to refresh and allow time for sync; Google says it can take up to 15 minutes. Do not clear local storage as part of this recovery guide.
A Pixel 9a has been treated as if it shared every Pixel 9 Kernel
Use the Pixel 9a entry, which lists Android 14 and Kernel 6.1.157, rather than borrowing Pixel 9's additional 6.1.75 entry. If the installed software differs, ask Dr.Fone support about that exact configuration without attempting a downgrade.
How to use Dr.Fone - Data Recovery (Android)
Dr.Fone - Data Recovery (Android) helps you examine local Gmail data on a supported Pixel 9 or Pixel 9a when mailbox checks do not provide the records you need. Windows-only Advanced Recovery scans the connected phone, lets you review available Gmail entries and Gmail Attachments, and saves your chosen results to a PC. For a phone-change problem, this is especially useful as a structured way to inspect the device that actually held the email and preserve useful output before retiring it.
- A device-based Gmail scan focuses on the connected phone's discoverable app data instead of treating account sign-in as deleted-email recovery.
- Preview available names, titles and dates to identify the relevant order or delivery correspondence.
- Check attachments separately and save selected results to PC so useful records are kept independently of the phone.
 Scan Android phones and tablets directly.
- Preview and recover only what you want.
- Supports WhatsApp, photos, videos, contacts, and more.
- Works with 6000+ Android devices.
Follow the official Advanced Recovery workflow
Step 1 Connect the supported Pixel that held the data
Launch Dr.Fone on Windows and open Toolbox > Data Recovery. Choose Android > Recover Android Data, select Advanced Recovery and click Start Scan. When prompted, connect the supported Pixel 9 or Pixel 9a by USB and follow the on-screen instructions until the phone is detected.
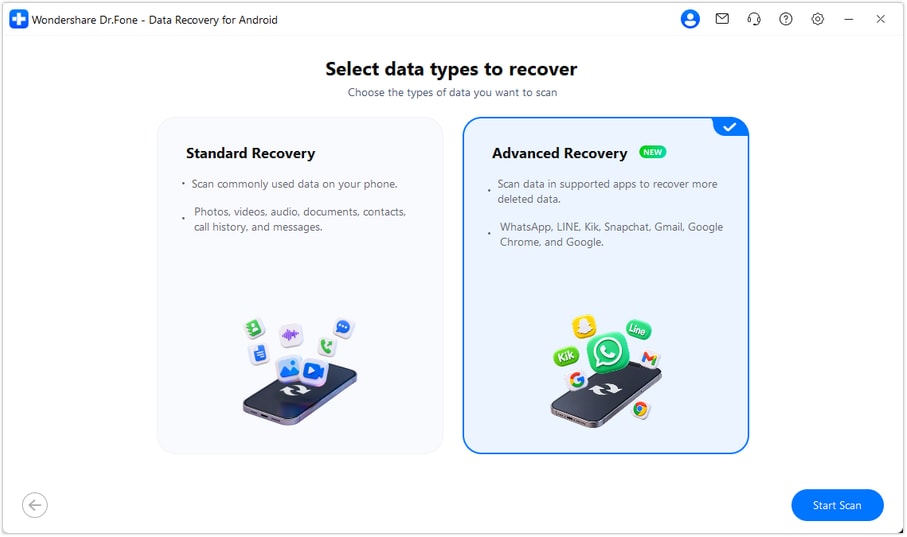
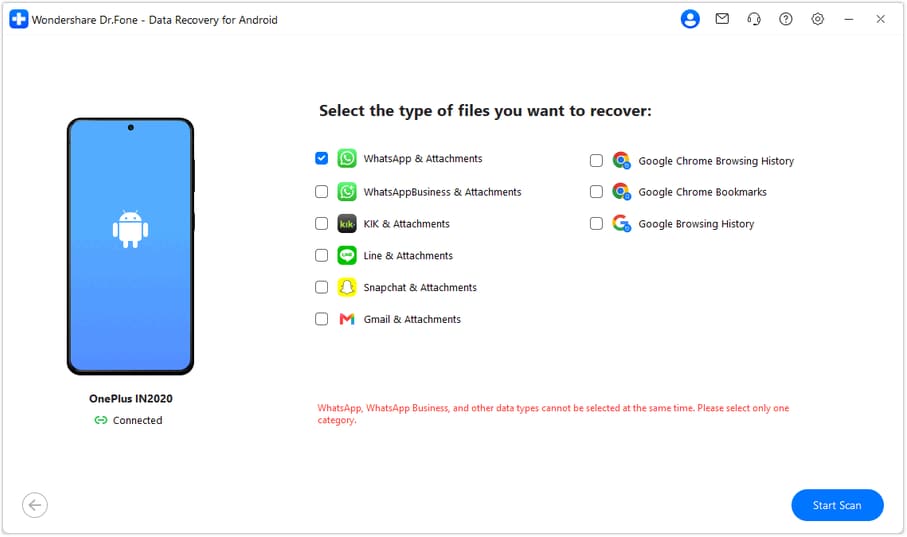
Step 2 Select Gmail for the local data scan
Choose Gmail from the available app-data categories and click Start Scan. Use this selection for the missing-email task. WhatsApp and WhatsApp Business, if needed in another recovery task, must each be scanned separately from the other categories.
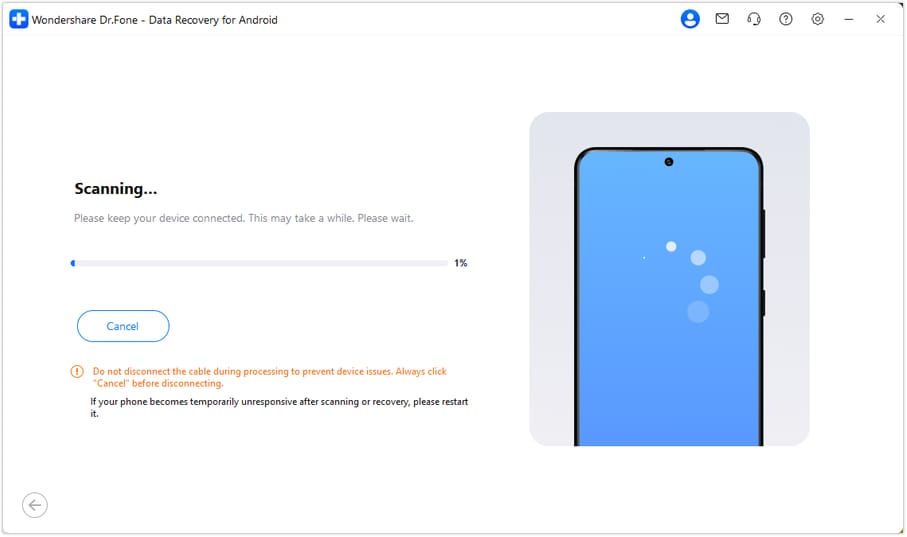
Step 3 Wait with the original USB connection intact
Keep the Pixel connected while the scan runs. If you need to stop, click Cancel before removing the cable. If the device is temporarily unresponsive after scanning or recovery, restart it as instructed by the product.
Step 4 Preview the Gmail entries and available attachments
Choose Gmail from the results sidebar and review available names, titles and dates. Narrow the results with search or filters where available, then check Gmail Attachments separately if the scan found file data. Select the records and attachments relevant to the missing correspondence.
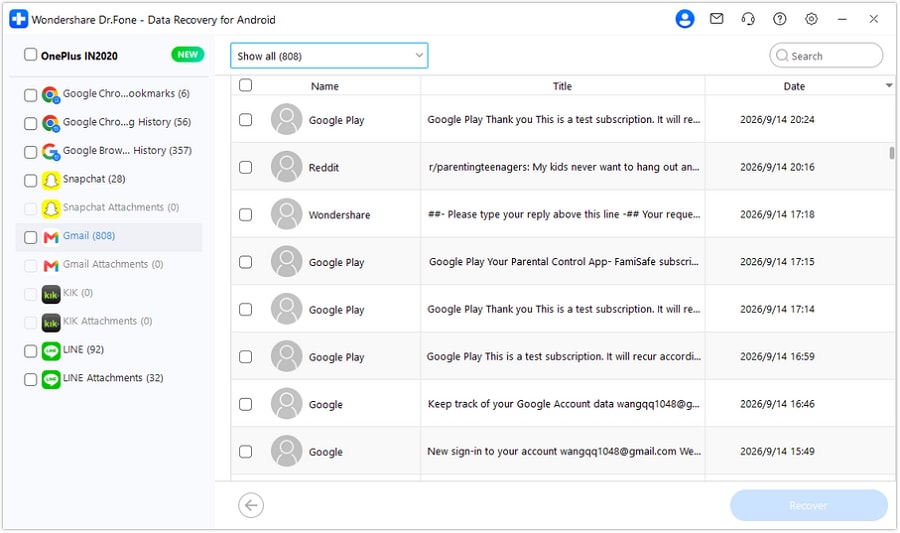
Step 5 Recover the selected Pixel Gmail data to PC
Click Recover, choose a folder on your computer as prompted and finish saving the selected results. Inspect the saved output for the information you need. This is a separate PC copy, not a transfer of those results into Gmail on a new or original phone.




Conclusion
For Gmail records missing during a phone change, Dr.Fone - Data Recovery (Android) provides a focused way to scan a supported Pixel 9 or 9a, preview useful email and attachment results, and preserve your selections on PC. Download Dr.Fone for Windows, connect the supported phone that held the relevant data and start your local Gmail recovery workflow before retiring the device.
FAQ
1. Can I recover deleted Gmail emails by scanning only my new Pixel 9 or 9a?
The scan can inspect only discoverable local data on that phone. If the email data never existed there, scanning it does not recover another device's local history. Check the Google mailbox first, preserve the original phone and evaluate that device's own support conditions if a local scan is needed.2. What recovery configurations are listed for Pixel 9 and Pixel 9a?
The Pixel 9 entry specifies Android 14 with Kernel 6.1.75 or 6.1.157. The Pixel 9a entry specifies Android 14 with Kernel 6.1.157. These supplied recovery conditions are model-specific, not statements about shipping software or permission to downgrade; confirm any different installed configuration with Dr.Fone support.3. Will the recovered email appear in Gmail on my replacement phone?
No. Advanced Recovery saves selected results to a PC. To move a retained deleted email back into the Google mailbox, use Gmail's Trash > More > Move to route while the message is still available there. A PC export does not import it into either phone's Inbox.4. Does switching phones restart Gmail's 30-day Trash period?
No. Gmail's up-to-30-day period is measured after deletion, unless the message is permanently deleted sooner. Changing phones does not restart that window, and a phone scan cannot reverse permanent server deletion.5. Can I use Trash to recover a discarded draft after changing phones?
Google states that a deleted draft cannot be recovered from Trash. Do not apply the received-email Trash steps to a discarded draft or treat a sync refresh as draft recovery. This guide's local Gmail scan also does not promise that a discarded draft will appear.
 Add Wondershare Dr.Fone as a preferred source on Google