Recover photos, messages, WhatsApp, and more — no backup
needed.


 100% Security Verified | No Subscription Required | No Malware

 :

 ChatGPT
 Perplexity
 Gemini
 Claude
 Grok
You need a clinic's referral letter or test-report email for a follow-up visit, but it has vanished from Gmail on your OPPO Find X8 Pro. Searching the clinic name may bring up reminders while missing the separate laboratory message that carried the document. To recover deleted Gmail emails on OPPO Find X8 Pro, identify the particular information you need before assuming every related message is gone.
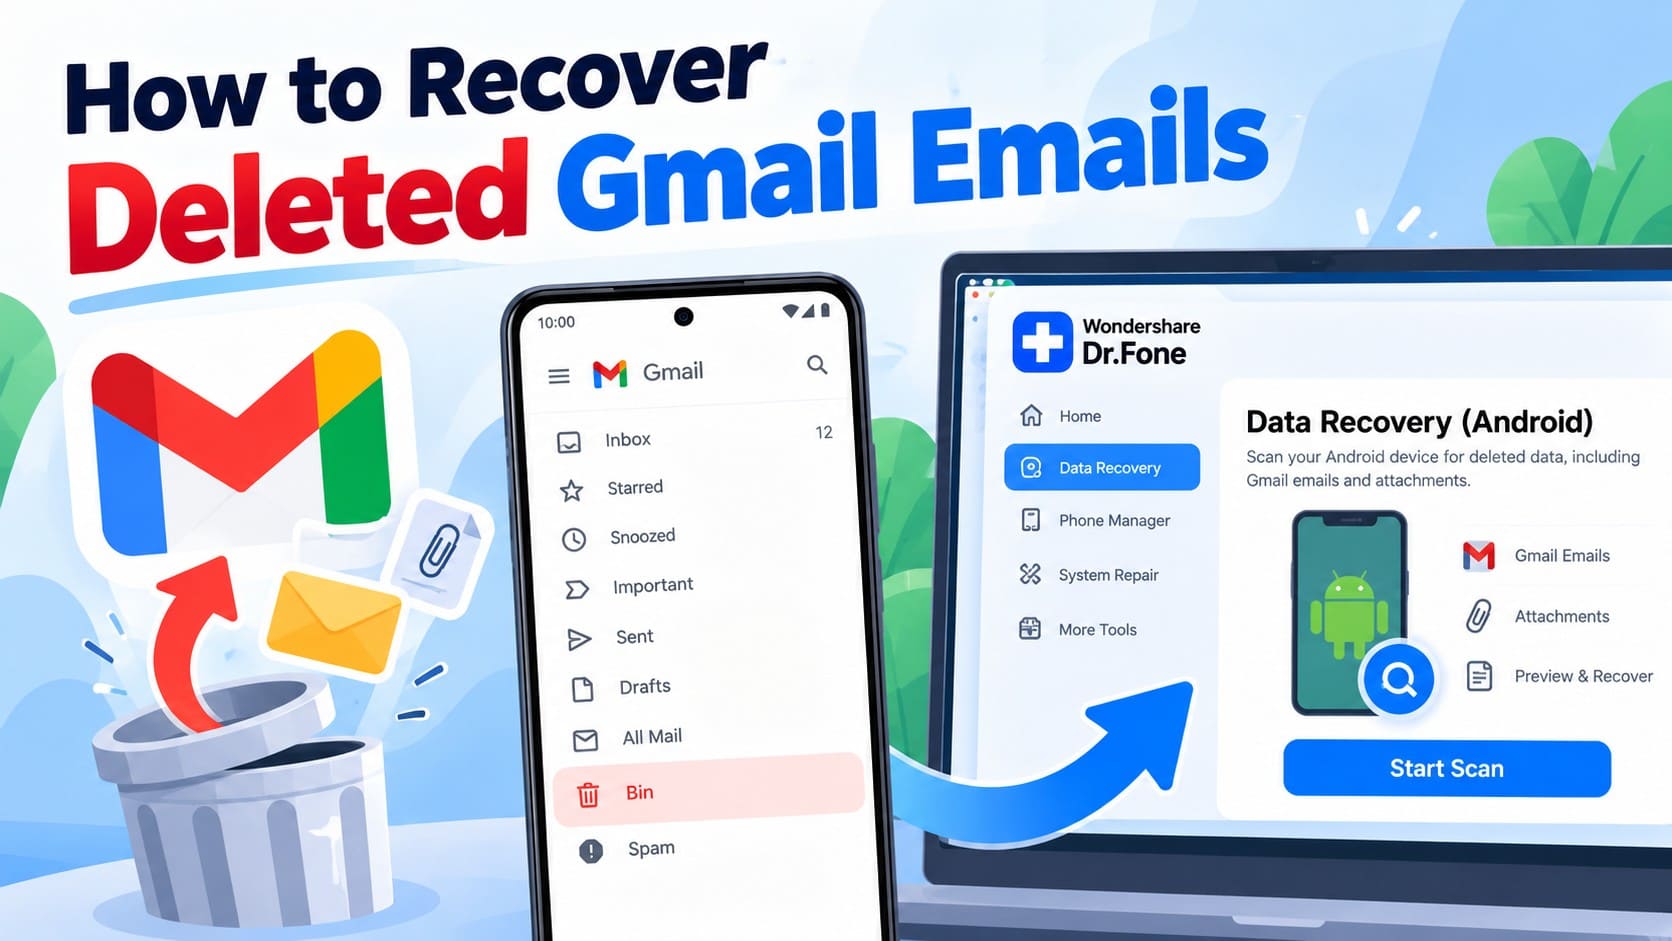
Dr.Fone - Data Recovery (Android) offers a way to inspect available phone-local Gmail records and attachments on a supported device, preview the useful items and save selected results to a PC. You can look for the correspondence and any actual document the scan finds, rather than relying on an email title as proof that the report is available. The retained-mail checks below can also uncover a message that was archived or overlooked.
In this article
Before you start
Confirm the Find X8 Pro support entry
The supplied recovery entry is OPPO Find X8 Pro with Android 15 and Kernel 6.6.118. Check the exact phone and its software information before connecting. This is a model-specific entry, not a blanket claim for the Find X8 family or every OPPO phone running Android 15.
Prepare a private Windows destination
Advanced Recovery is Windows-only and saves selected results to a PC. Use a computer and destination folder you control, with a reliable USB data cable. Medical correspondence can contain sensitive personal information, so choose only the records you need and check the destination before saving.
Preserve the Gmail installation and local data
Do not clear Gmail storage, remove the account, reinstall the app or reset the phone while trying to recover local data. Follow the product's on-screen access instructions for the supported device; unverified Root, bootloader-unlock and flashing procedures are not part of this guide. Access to the Google account does not establish that the phone retained a recoverable report.
Separate the email date from the clinical document date
Write down the provider, receiving account and approximate message date, as well as which referral or test document you need. A report's examination date can differ from the date it was emailed. Use the actual document to verify the patient and relevant examination; a Gmail title or date alone is not the report.
Find the provider's retained Gmail correspondence
Use a wider sender-and-subject search when the expected clinic name does not locate the email.
Step 1 Check the account and broaden the identifying terms
Confirm the Gmail account to which the provider sent the document. Search for a provider name, known sender address or a distinctive phrase from the correspondence. Try the laboratory or referral service as well as the clinic if you remember more than one organization being involved.
Step 2 Search archived mail and attachments
Open Menu > All mail for archived messages. In Gmail search, use the From, Attachment or Date chips when they help narrow results, but widen the date range if you initially used the examination date. Remove the attachment filter when checking whether the email contained a portal link instead.
Step 3 Include Trash and check the online account view
Search in:anywhere followed by a provider term to include Spam and Trash; a standard search excludes those locations. Connect to the internet and swipe down in the Inbox to refresh before relying on an empty offline search. Offline searches cover only messages already synced with the phone.
- An appointment reminder, a message announcing a report and the report file itself serve different purposes. Open the particular retained message rather than judging by a familiar sender.
- If Gmail shows a sync error, check Menu > Settings > the relevant account > Sync Gmail under Data usage. Do not clear the app's local data as a recovery measure.
Recover a clinic message still in Gmail Trash
Use Gmail's own move action when the required email remains in Trash and has not been permanently deleted.
Step 1 Locate the specific retained message
Open Gmail's Menu > Trash and inspect the relevant provider message. Gmail allows recovery from Trash for up to 30 days after deletion unless the item is permanently deleted earlier. An older report can still be eligible if it was only recently deleted; its original email date is not the start of the Trash period.
Step 2 Move it back and inspect its contents
Touch and hold the message, tap More > Move to and choose the destination. Open the message and check whether it provides an actual attachment or directs you to a portal. If Trash does not contain the message, continue with the local scan to inspect discoverable phone data.
- Do not empty Trash while searching. A permanently deleted message cannot be moved back through this Trash procedure.
- A phone-local scan is a separate route; it does not extend Google's retention period or bypass a provider portal's access controls.
What did you actually recover from the clinic exchange?
| Available result | Check before using it | Meaning |
|---|---|---|
| A provider email record | Read the content available, not only the sender and title. | It may provide correspondence context without supplying the report itself. |
| An actual referral or report attachment | Open the saved file and check its patient details, document date and readable content. | The found file can be assessed on its own; its presence does not establish that every page or related document was recovered. |
| A portal URL or notification | Use your authorized provider access or ask the clinic for a replacement copy. | The reference is not the report data and does not restore an expired or inaccessible portal document. |
| An unrelated appointment reminder | Compare the purpose of the message with the document you need. | A related sender does not make the message a substitute for the missing referral or report. |
Common problems and fixes
The search date does not match the report you remember
Widen the email date search and use the provider or document subject as another clue. Search chips filter message dates, while the examination date may appear inside the report. In scan results, treat the available date as a locating aid and verify the actual document before relying on it.
You found the notification, but there is no report attachment
Review Gmail Attachments if the scan finds attachment data. If the message only points to a provider portal, use the legitimate portal route or request the report from the provider. A notification email is not evidence that the full report was downloaded to the phone.
How to use Dr.Fone - Data Recovery (Android)
Dr.Fone - Data Recovery (Android) gives you a structured next step when a clinic message is no longer available through Gmail's retained-mail checks. Its Windows-only Advanced Recovery mode scans the supported OPPO Find X8 Pro for discoverable local Gmail data, lets you review entries and found attachments separately, and saves your chosen results to a PC. That makes it easier to identify useful correspondence and assess any available document without saving unrelated personal mail.
- Gmail entry review by available name, title and date helps you locate provider correspondence among other phone-local results.
- Separate attachment review helps distinguish a report file from an email that merely announces its availability.
- Selective PC recovery lets you choose the found items relevant to the follow-up and keep the output in your selected folder.
 Scan Android phones and tablets directly.
- Preview and recover only what you want.
- Supports WhatsApp, photos, videos, contacts, and more.
- Works with 6000+ Android devices.
Follow the official Advanced Recovery workflow
Step 1 Start Advanced Recovery and connect Find X8 Pro
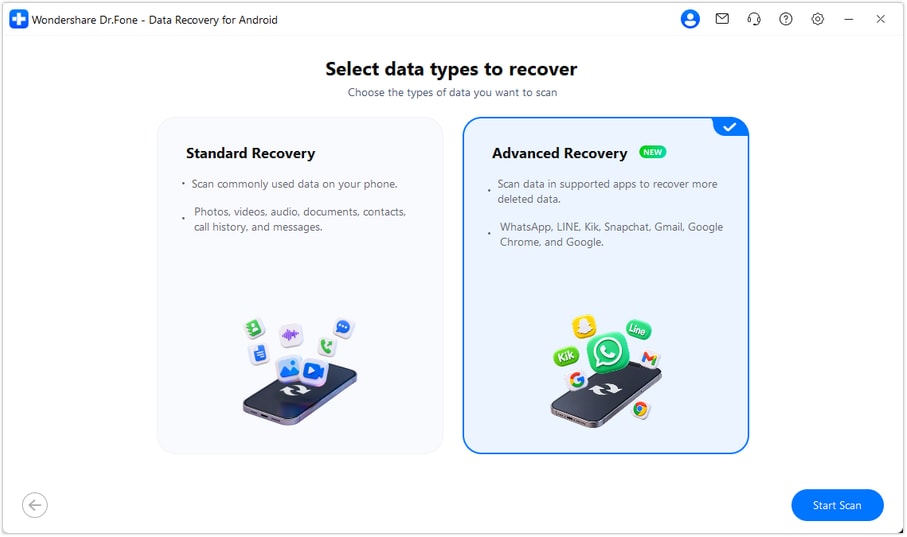
Launch Dr.Fone on Windows and open Toolbox > Data Recovery. Select Android > Recover Android Data, choose Advanced Recovery and click Start Scan. Connect the supported OPPO Find X8 Pro with a USB cable when prompted and follow the on-screen instructions until the phone is detected.
Step 2 Select Gmail as the target app data
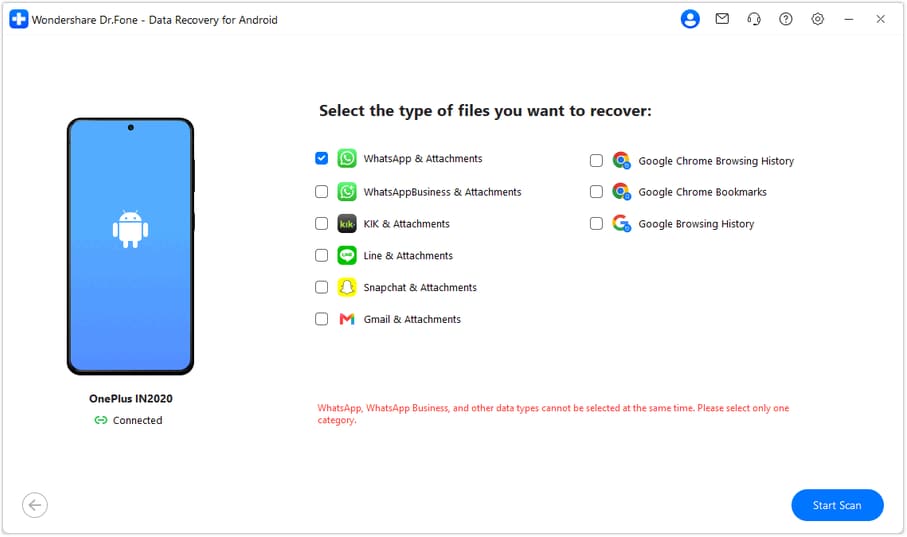
Choose Gmail from the available app-data categories and click Start Scan. This task concerns Gmail data. If you also need WhatsApp or WhatsApp Business, follow the guide's requirement to scan those separately from the other categories.
Step 3 Maintain the connection while scanning
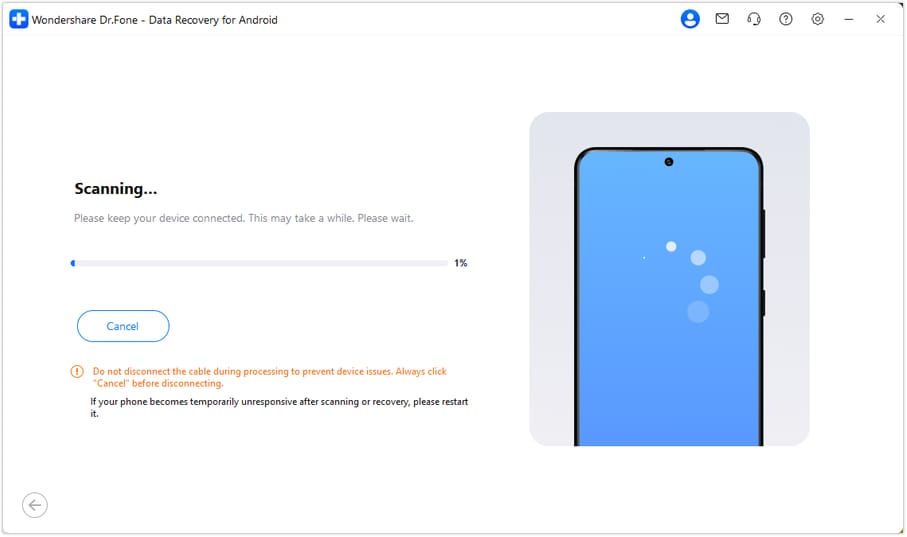
Keep the phone connected throughout the scan. To stop, click Cancel before disconnecting the USB cable. If the phone is temporarily unresponsive after scanning or recovery, use the restart instructions displayed by the product.
Step 4 Preview provider entries and available documents
Choose Gmail in the results sidebar and review available names, titles and dates. Use search or filters where available to locate the provider correspondence. Check Gmail Attachments separately when attachment data is found, inspect the available items and select the relevant records or documents.
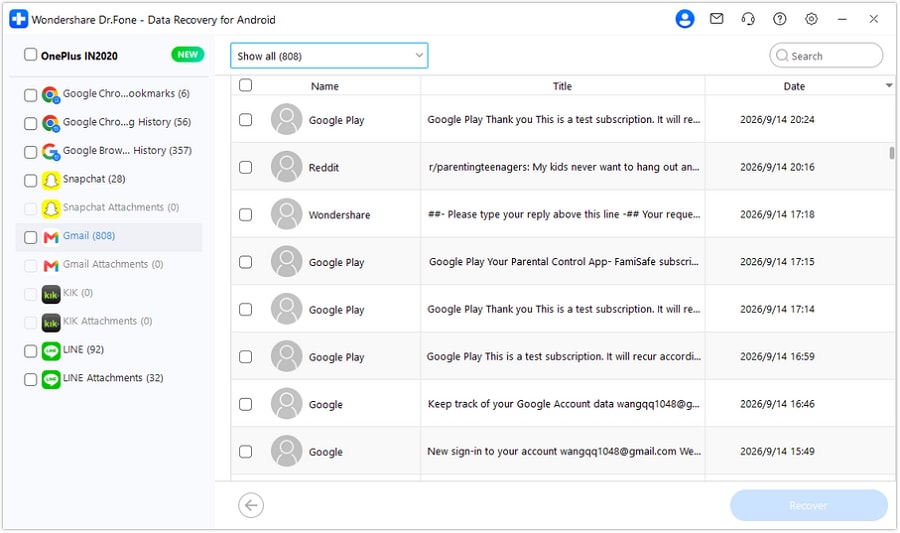
Step 5 Recover selected results to a private PC folder
Click Recover and follow the prompts to select a computer folder and save your chosen data. Inspect the saved output on the PC to confirm what you can access. This workflow saves the selected local results to the PC rather than placing the messages back in Gmail.




Conclusion
A useful clinic-email recovery starts with identifying the right correspondence and checking whether the document itself is available. Dr.Fone - Data Recovery (Android) helps supported OPPO Find X8 Pro users inspect local Gmail records, review found attachments and selectively save important results to a PC. Download Dr.Fone for Windows and begin the guided Gmail recovery workflow to look for the information you need for your follow-up.
FAQ
1. Can I recover deleted Gmail emails on OPPO Find X8 Pro?
Start with the correct account, All mail and eligible Trash messages. For the listed OPPO Find X8 Pro configuration, Dr.Fone - Data Recovery (Android) can scan discoverable local Gmail data using Advanced Recovery on Windows. Preview the actual results and save useful selections to a PC.2. Which Android and Kernel conditions apply to Find X8 Pro?
The supplied entry lists OPPO Find X8 Pro with Android 15 and Kernel 6.6.118. Check those model-specific conditions rather than assuming that a general Android 9-13 baseline excludes this listed newer device or that every Find X8 variant has the same support.3. Can a recovered email reopen an expired medical-report link?
No. A recovered URL or notification does not provide the linked report's contents or bypass portal permissions. Use your authorized provider access or ask the clinic to supply the report again. Check available Gmail Attachments separately for any actual file found on the phone.4. Why can an old report email still be in Trash?
Gmail's Trash period is measured from deletion, not the age of the message or the report's examination date. A message deleted recently may remain eligible for up to 30 days unless it was permanently deleted earlier.5. Does the PC copy replace the original report in Gmail?
No. Advanced Recovery saves selected discoverable results to a PC and does not rebuild the mailbox or recover server-permanently-deleted mail. Open the actual saved file to assess its contents and completeness; a title or email entry is not a substitute for the report.
 Add Wondershare Dr.Fone as a preferred source on Google