Recover photos, messages, WhatsApp, and more — no backup
needed.
Recover photos, messages, WhatsApp, and more — no backup
needed.

 100% Security Verified | No Subscription Required | No Malware

 :
: 
 ChatGPT
 Perplexity
 Gemini
 Claude
 Grok
Grok
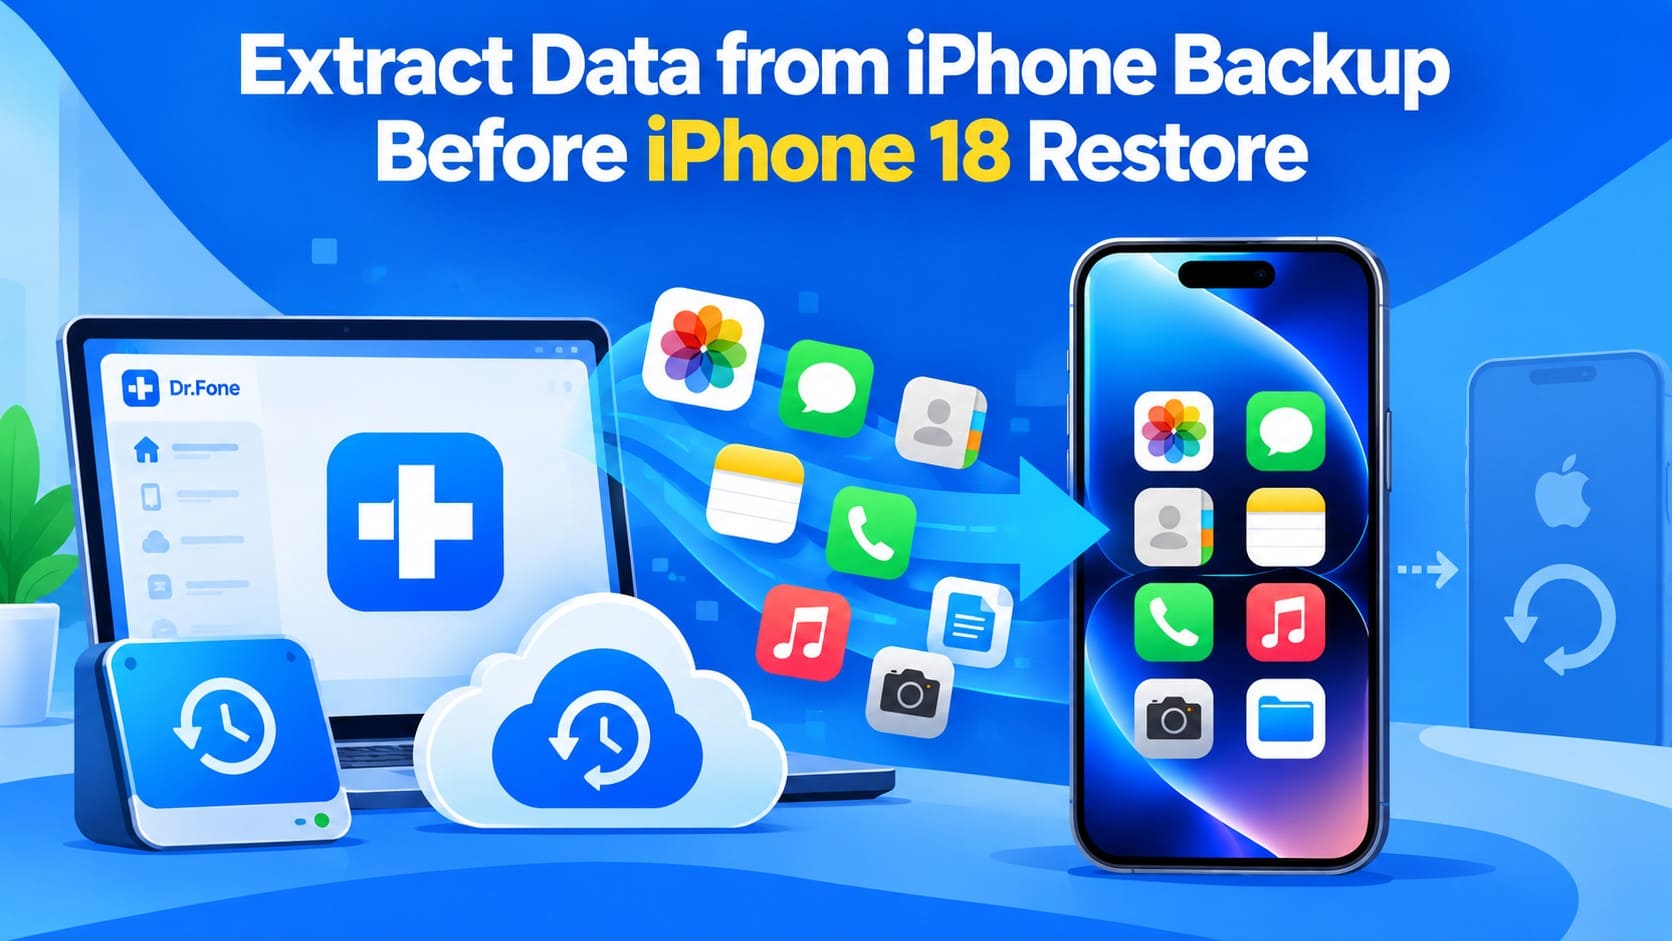
How to Extract Data from iPhone Backup Before Restoring to iPhone 18
Older iPhone backups may contain important photos, messages, contacts, and other data you want to access without restoring everything. Apple’s backup tools restore backups as a whole rather than letting you browse and extract individual files. Checking the backup first can help you identify and save important data separately.
Local backups are stored through Finder, Apple Devices, or iTunes, while iCloud backups remain in your Apple Account. Since Apple’s tools do not offer selective extraction, third-party software can help extract data from an iPhone backup before you restore it to iPhone 18. This guide shows how Dr.Fone - Data Recovery (iOS) can preview supported data from local and iCloud backups and export selected items before or without a full restore.
In this article
- Part 1. Identify the iPhone Backup You Want to Extract Before Restoring
- Part 2. Check What Data the iPhone Backup Actually Contains
- Part 3. How to Extract Data from a Finder, Apple Devices, or iTunes Backup
- Part 4. Extract Selected Data from an iCloud Backup Before iPhone 18 Restore
- Part 5. What to Check Before Restoring a Backup to iPhone 18
Part 1. Identify the iPhone Backup You Want to Extract Before Restoring
Before you extract data from iPhone 18 backup files, first confirm where the backup is stored. Finder, Apple Devices, iTunes, and iCloud backups follow different restore paths. The location also determines which extraction method you can use. The table below compares these backup types, where they are stored, and the available options for selective extraction:
| Backup Source | Where It Is Stored | Apple Restore Behavior | Selective Extraction Option |
|---|---|---|---|
| Finder Backup | Locally on a Mac running macOS Catalina or later | Finder restores the selected backup and its saved data to the iPhone | Dr.Fone can preview and extract supported data from the recognized local backup |
| Apple Devices Backup | Locally on a Windows PC using the Apple Devices app | Apple Devices uses the chosen backup to return saved content and settings | Dr.Fone can access supported files from the detected local backup |
| iTunes Backup | Locally on a Mac running macOS Mojave or earlier, or a Windows PC using iTunes | iTunes transfers the backed-up information from the selected archive to the iPhone | Dr.Fone can browse supported content through “Recover Data from iTunes” |
| iCloud Backup | In iCloud under the Apple Account linked to the backed-up device | iCloud restores the backup while setting up a new or erased iPhone | Dr.Fone can retrieve supported content through “Recover Data from iCloud Backup” |
Part 2. Check What Data the iPhone Backup Actually Contains
Finding the right backup is only half the job. Before you extract data from an iPhone backup, first check what the older backup was designed to contain when it was created. iCloud syncing and local backup encryption can leave some data out even when the backup is complete. The following checks can help you understand what the selected backup is likely to contain:
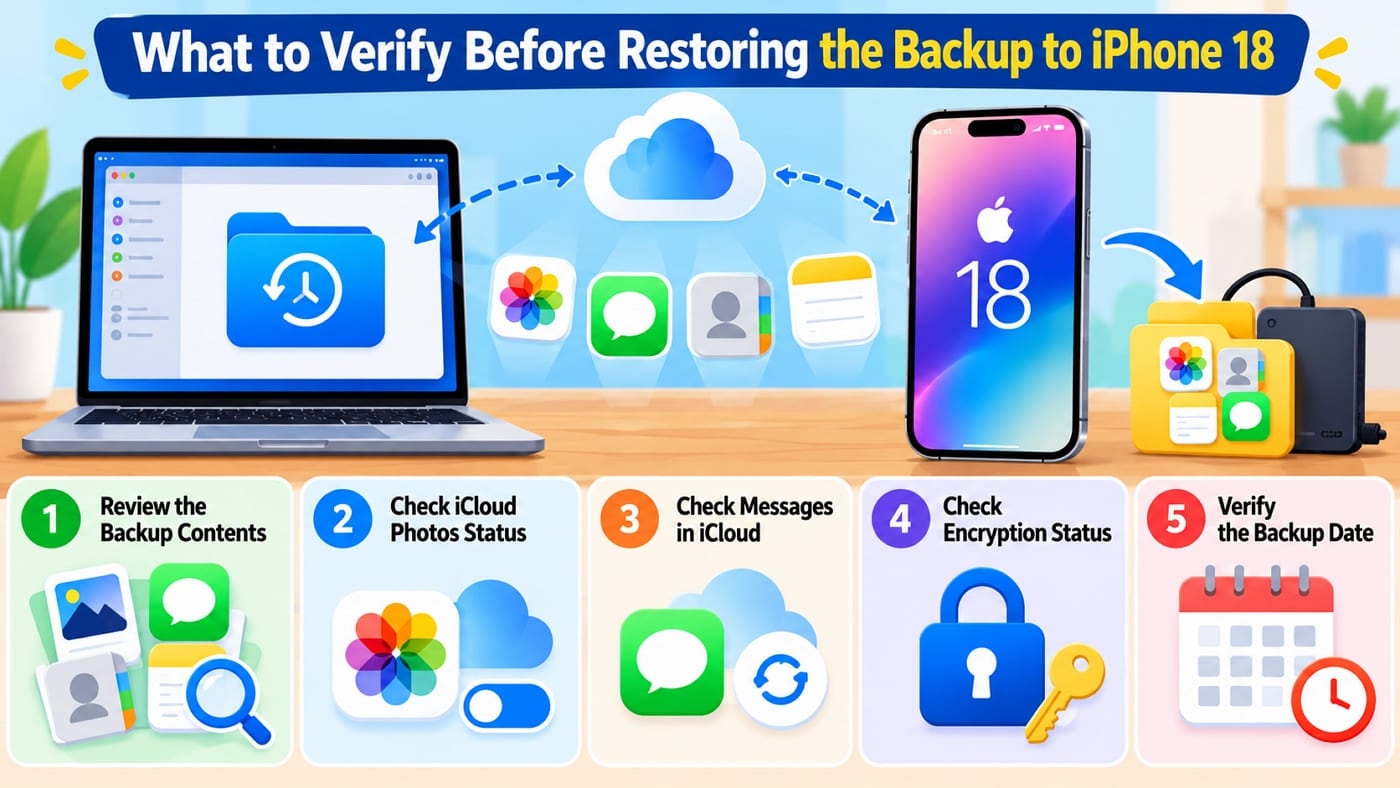
- Review the Backup Contents: Check the backup date, size, device, and which apps are included. Apple shows these backup-level details but does not let you preview individual photos, messages, contacts, or files inside the backup.
 Note: Use Dr.Fone’s supported backup scan when you need to preview individual recoverable items before restoring the backup.
 - Check iCloud Photos Status: With iCloud Photos enabled, photos and videos sync to iCloud separately instead of being included in daily backups. If it was disabled, iCloud Backup may include photos and videos stored on the device.
- Check Messages in iCloud: Conversations synced through Messages in iCloud are not included in iCloud or computer backups. Instead, message history syncs directly through iCloud across supported devices.
- Check Encryption Status: Unencrypted computer backups leave out certain protected information. Encrypted backups can also contain saved passwords, Wi-Fi settings, website history, Health data, and call history.
- Verify the Backup Date: Confirm when the backup was created and choose one that predates the data loss or device change. A newer backup may no longer contain the specific version of the files you want to extract.
Part 3. How to Extract Data from a Finder, Apple Devices, or iTunes Backup
Let’s say the backup you need is already stored on your Mac or Windows PC. You can extract data from an iPhone backup without restoring the older backup to iPhone 18 first. Finder, Apple Devices, and iTunes can manage and restore local backups, but they do not provide a built-in option for selectively browsing and extracting individual files.
Dr.Fone - Data Recovery (iOS) provides a “Recover Data from iTunes or Other Backups” mode for accessing supported local backups. It can detect compatible backups stored on the computer, including supported backups created through Apple’s desktop tools. This gives you more control over the data you want to preview and recover before deciding whether to perform a full backup restore.
 Recovers data after deletion, crashes, or device damage.
- Supports photos, messages, contacts, WhatsApp, and more.
- Supports all major iPhone, iPad, and iPod models.
- Preview and recover only what you need.

Instructions to Extract Selected Files from a Local iPhone Backup
Before you extract data from an iPhone backup, use the computer where the older local backup is already stored. Since the backup is accessed directly from the computer, your iPhone 18 remains unchanged unless you choose to restore supported data to it. Once you are ready, follow the guide below to preview and recover the required data from the local backup:
-
Step 1 Access the iTunes Backup Mode
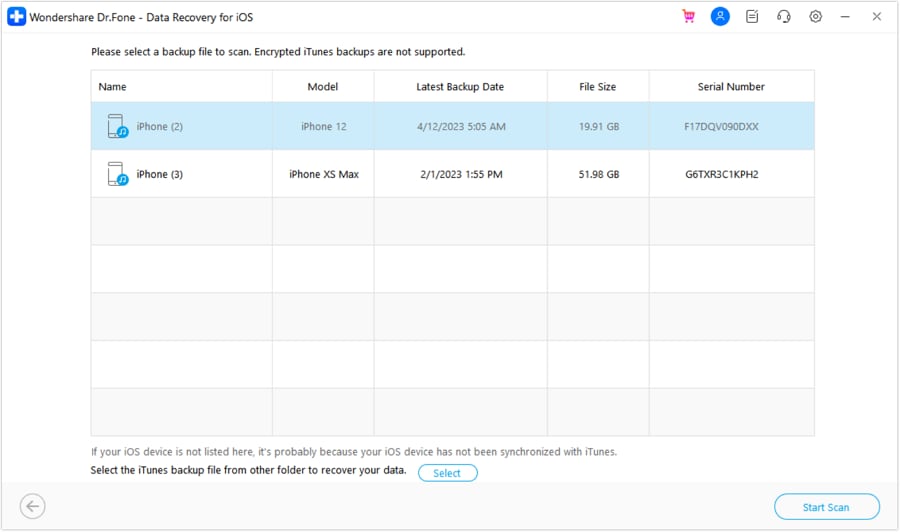
Open the “Data Recovery” tool and choose “iOS,” then select “Recover Data from iTunes & Other Backups.” Choose the backup that matches the correct device and date, click “Start Scan,” and enter the backup password if prompted.
-
Step 2 Scan the Backup and Browse Its Categories
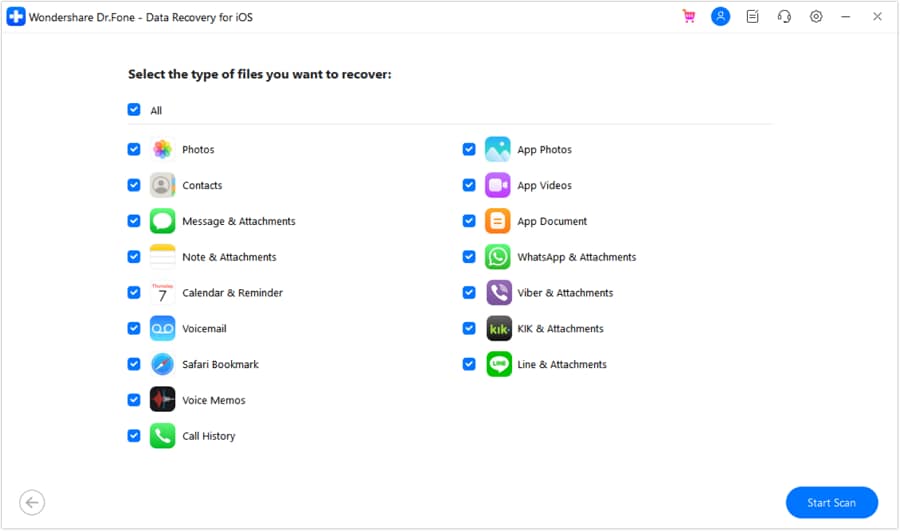
Select the data types you want to scan, such as photos, messages, or contacts, then click “Start Scan.” As the scan progresses, detected items appear under their respective categories for review.
-
Step 3 Inspect the Results and Export
Open each category to preview the detected items, then select the files you want to keep. Choose “Recover to Computer” to save the selected files locally. If “Restore to Device” is available for that data type, connect iPhone 18 and follow the on-screen prompts.
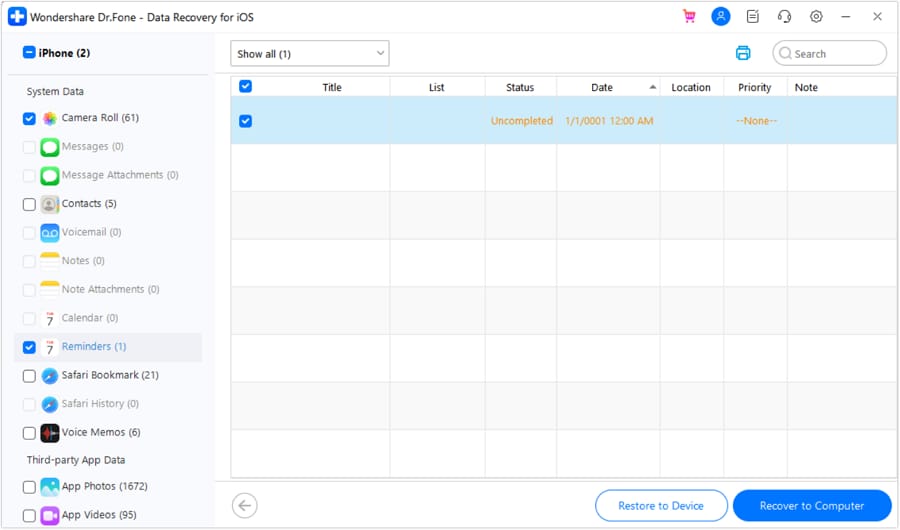 Note: Data synced to iCloud may not appear in the local backup because it is stored separately. If you use “Restore to Device,” Dr.Fone may ask you to disable Find My. A later full backup restore can also replace the data you restored earlier.




Part 4. Extract Selected Data from an iCloud Backup Before iPhone 18 Restore
If the older iPhone backup you plan to inspect is stored in iCloud rather than on a computer, the extraction workflow differs from Apple’s full restore. Apple restores an iCloud Backup as a complete backup during device setup rather than letting you browse and extract individual items. An already configured iPhone 18 must also be erased before using Apple’s full iCloud backup restore process.
For more selective control, Dr.Fone - Data Recovery (iOS) provides a “Recover Data from iCloud Backup” mode. It can access supported backup data for preview and selective recovery without requiring a full Apple restore. Depending on the supported data type, you can save selected items to a computer or restore compatible data directly to iPhone 18.
Guide to Preview and Extract an iCloud Backup with Dr.Fone
Before you extract data from an iPhone backup stored in iCloud, confirm that the backup belongs to the older device and was created while the required files still existed. Check the backup date to identify the correct copy and keep a trusted device nearby to receive the two-factor authentication code. Once everything is ready, follow the guide below to access and recover the required data:
-
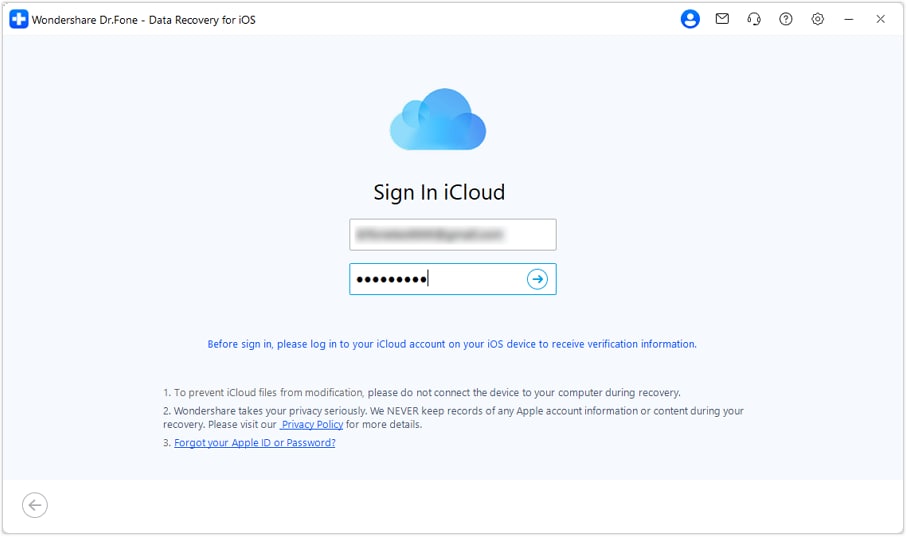
Step 1 Verify Your Apple Account Inside Dr.Fone
From the “Data Recovery” tool, select “iOS,” then choose “Recover Data from iCloud Backup.” Sign in with the Apple Account linked to the backup and enter the verification code sent to a trusted device or trusted phone number.
-
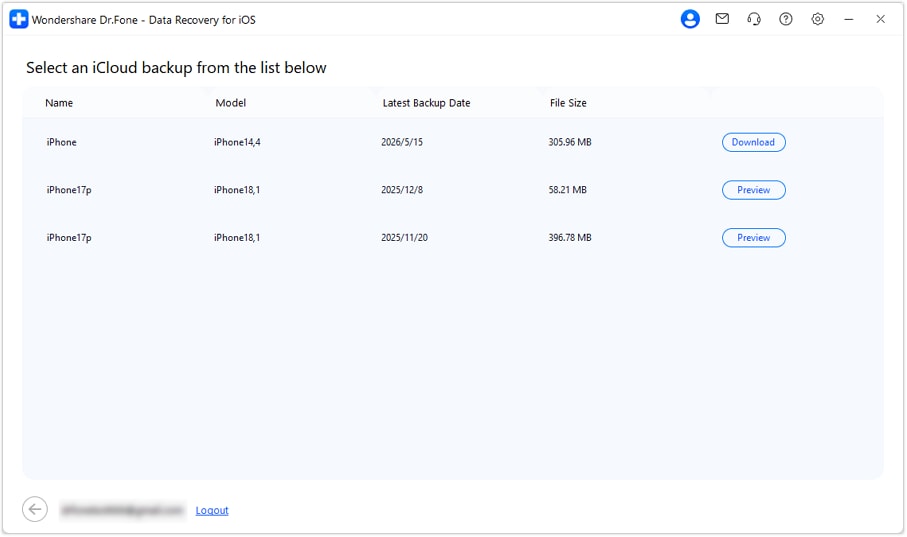
Step 2 Pick the Matching Backup and Start the Download
Once the backup list appears, use the device name and backup date to find the copy you identified earlier. Select the correct backup, click “Download,” and keep the computer connected to the internet until the download finishes.
-
Step 3 Keep What Matters from the Downloaded Backup
Open categories such as photos, messages, and contacts to preview the available data. Select the items you need, then choose “Recover to Computer” to save them locally before deciding whether to restore the older backup to iPhone 18.
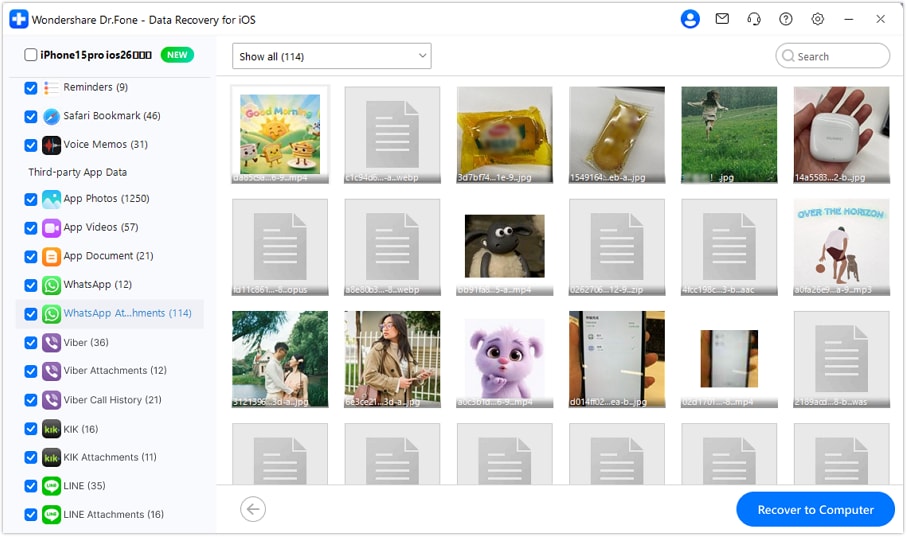 Note: If a category appears empty, check whether that data was syncing with iCloud when the backup was created. Synced content is stored separately in iCloud and is not included in the backup. Otherwise, the selected backup may not contain those items.
Part 5. What to Check Before Restoring a Backup to iPhone 18
Once you extract data from an iPhone backup, review the exported files and the older backup before restoring anything to iPhone 18. Apple’s restore process returns backed-up information to the device, while some iCloud-synced content may download separately afterward. The following checks can help confirm that your important data is ready before you continue:
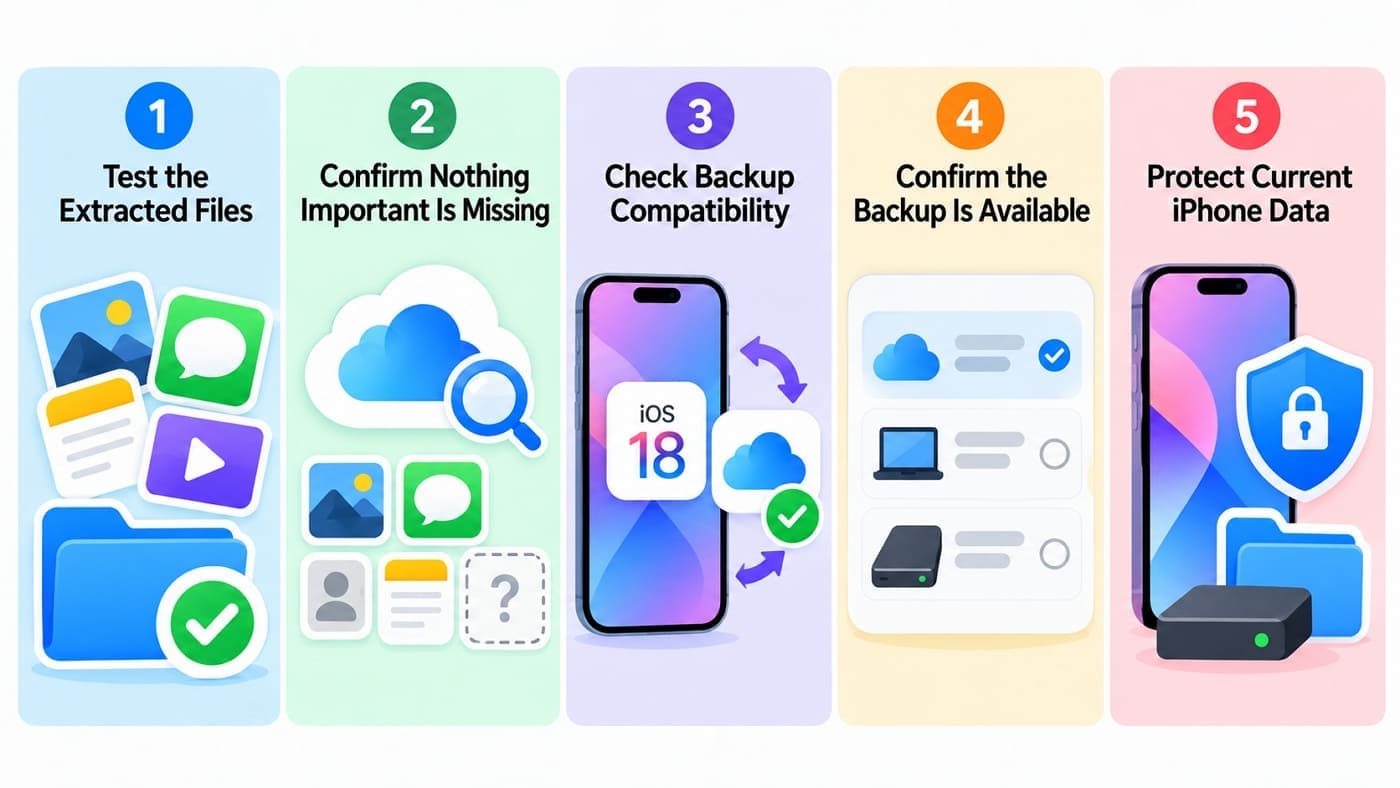
- Test the Extracted Files: Open exported photos, play videos, and review messages, contacts, or notes. Confirm the files you need are accessible and complete before starting the restore.
- Confirm Nothing Important Is Missing: Compare the extracted files with the data you intended to save. If something is absent, check whether it is stored separately in iCloud before restoring the device.
- Check Backup Compatibility: Make sure iPhone 18 is running an iOS version that can restore the selected backup. Apple may require an iOS update when the backup was created on a newer software version.
- Confirm the Backup Is Available: Verify that the intended backup still appears in Finder, Apple Devices, iTunes, or iCloud and can be selected before beginning the restoration process.
- Protect Current iPhone Data: If iPhone 18 already contains newer files you want to keep, create a separate current backup first. This prevents the restore process from leaving those newer files without another copy.
Conclusion
Extracting selected files from an iPhone backup gives you more control over your data without immediately restoring the entire backup. You can extract data from an iPhone backup, preview supported content, and save important items separately before restoring the backup to iPhone 18.
Dr.Fone - Data Recovery (iOS) supports selective extraction from compatible local and iCloud backups. After exporting the files you need, verify the backup, check separately synced iCloud content, and protect any newer iPhone 18 data before proceeding with a full restore.
Frequently Asked Questions
-
1. Can I extract individual files from an iPhone backup without restoring it?
Yes. Apple’s tools restore backups as a whole rather than offering selective file extraction. Dr.Fone - Data Recovery (iOS) can preview supported data from compatible local or iCloud backups and export selected photos, messages, contacts, and other supported items to a computer or iPhone. -
2. Can I view an encrypted iPhone backup before restoring it to iPhone 18?
Yes, if you know the backup password. Dr.Fone - Data Recovery (iOS) can access a supported encrypted local backup after you enter the password, allowing you to preview supported data before restoring. Without the password, the existing encrypted backup cannot be accessed or restored. -
3. Can I extract photos and messages from an iCloud backup without resetting iPhone 18?
Yes, provided those items are included in the backup. Dr.Fone - Data Recovery (iOS) can scan a supported iCloud backup and preview available data on a computer. You can then export selected photos, messages, and other supported items without erasing iPhone 18 or performing a full iCloud restore.
 Add Wondershare Dr.Fone as a preferred source on Google