Recover photos, messages, WhatsApp, and more — no backup
needed.


 100% Security Verified | No Subscription Required | No Malware

 :

 ChatGPT
 Perplexity
 Gemini
 Claude
 Grok
The orchid-care instructions you printed last month do not include the sender's later correction, and the original Gmail conversation and seasonal chart are now missing from your OPPO Find X9 Ultra. A paper copy helps only if it contains the message you need. Printing one email and printing all the accessible replies produce different reference material.
Dr.Fone - Data Recovery (Android) offers supported Find X9 Ultra users another place to look: the phone's available local Gmail records and attachment data. Preview the actual care instructions, inspect any real chart file found and save useful selections to a PC. You can preserve the readable material that answers your question instead of treating an old printout or familiar attachment name as the complete record.
In this article
Before you start
Use the Find X9 Ultra's own support row
The supplied OPPO Find X9 Ultra record lists Kernel 6.12.58; no Android-version restriction is listed for this model. This exact-model rule does not remove its Kernel condition or extend to the Find X9 Pro and other OPPO phones. Advanced Recovery is Windows-only. Have a stable USB data cable ready and follow the product's connection prompts without flashing, unlocking or resetting the phone.
Keep the remaining sources intact
Leave Gmail installed and retain its local storage. Do not remove the account or clear app data while looking for missing local content. Keep the existing printout and any separately saved chart, and note the sender, plant variety and correction you need. These are comparison references, not proof that the original email or attachment is still on the phone.
Keep printing, Trash and recovery distinct
Printing requires accessible mail; it cannot recreate a deleted reply. Gmail Trash retains normally deleted messages for up to 30 days from deletion unless permanently deleted earlier, and discarded drafts are excluded. The scan below saves selected discoverable local results to PC rather than restoring the mailbox. Sender-controlled confidential-mode restrictions are not bypassed by printing or this recovery workflow.
Check whether your reference contains one email or the available conversation
A printout survives but you still need a later instruction, correction or attached chart.
Step 1 Read the surviving copy for its actual scope
Check which sender, date and instruction are actually visible on the printout. Look for the correction you need rather than assuming that a conversation subject means every reply was printed. If the copy stops before the revised watering interval, it remains a partial reference.
Step 2 Print an accessible individual message when that is all you need
If the needed email remains available in Gmail on Android, open it and use More at the top right of that email > Print. Google distinguishes this single-email action from printing all messages in the conversation. Phone printing requires a printer that can receive data through Wi-Fi or a mobile network.
Step 3 Use Print all for the accessible replies you need together
To preserve the available conversation instead, open that conversation and use the top-right More > Print all. Check the resulting reference for the individual instructions you intended to include. This prints accessible content; it is not a way to include replies already deleted or to certify an entire historical exchange.
Step 4 Find missing source mail before trying to print it
Search the relevant Gmail account with in:anywhere and the grower's name or a distinctive care term. If the needed message remains in Trash, open Menu > Trash, touch and hold it and use More > Move to to choose a destination. Inspect any actual chart separately from the email text. If the missing source is not retained, continue with the local scan.
- A printout can preserve useful visible wording, but it does not demonstrate that a separate attachment file was saved or that a missing later correction was included.
- If confidential mode prevents printing, respect that restriction and contact the sender for an authorized alternative.
Choose the reference that answers the care question
| Available material | Useful information to inspect | Best use |
|---|---|---|
| A printout of one message | The actual instruction and date visible on the page | Keep a readable excerpt; check whether it predates the correction. |
| Print all from an accessible conversation | The available replies actually included in the output | Compare original advice with the later clarification without assuming deleted members are present. |
| A local Gmail result with readable correction text | The condition or interval explicitly written in that entry | Save the useful record to PC and retain the context needed to interpret it. |
| An actual seasonal-chart attachment | Readable headings, season and plant variety in the file | Keep the chart as a separate reference; do not invent missing instructions from its filename. |
Common problems and fixes
Print all still does not contain the missing correction
Confirm that the correction is actually accessible in the opened conversation. Print all is a retained-content action, not recovery of deleted members. Search for the grower's message separately, and use the local scan if the needed phone record is still missing.
Gmail has no working print destination
Check that an appropriate network-capable printer is configured, as required by Google's Android printing help. A printer problem does not mean the email has been deleted. You can still read retained email and proceed with the separate local recovery task if other material is missing.
A chart title appears but the preview does not show usable chart content
Inspect the actual file under Gmail Attachments if one is found. Check readable season and plant details rather than trusting a thumbnail or quoted filename. Keep useful email wording independently and request the chart from the sender if the real content remains unavailable.
How to use Dr.Fone - Data Recovery (Android)
Dr.Fone - Data Recovery (Android) provides a focused local recovery route for a supported Find X9 Ultra when a printed excerpt is not enough. Windows-only Advanced Recovery lets you inspect available Gmail content and any found attachment files separately, then save selected results to a PC. This helps you preserve the actual correction and useful chart material instead of a collection of unverified subject lines.
- Identify candidate emails by visible name, title and date, then read the available instruction text.
- Inspect discovered Gmail Attachments independently for readable chart content rather than an attachment reference.
- Save selected useful email and file results to PC to build a more usable reference alongside an existing printout.
 Scan Android phones and tablets directly.
- Preview and recover only what you want.
- Supports WhatsApp, photos, videos, contacts, and more.
- Works with 6000+ Android devices.
Follow the official Advanced Recovery workflow
Step 1 Open Advanced Recovery for the Find X9 Ultra
Launch Dr.Fone on Windows and choose Toolbox > Data Recovery. Go to Android > Recover Android Data, select Advanced Recovery and click Start Scan. When prompted, connect the supported Find X9 Ultra with a USB data cable and complete the on-screen detection instructions.
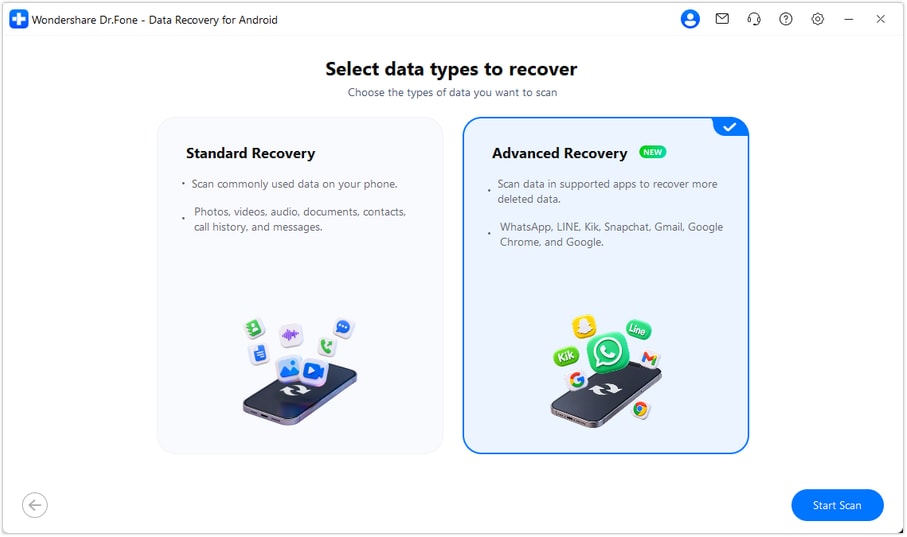
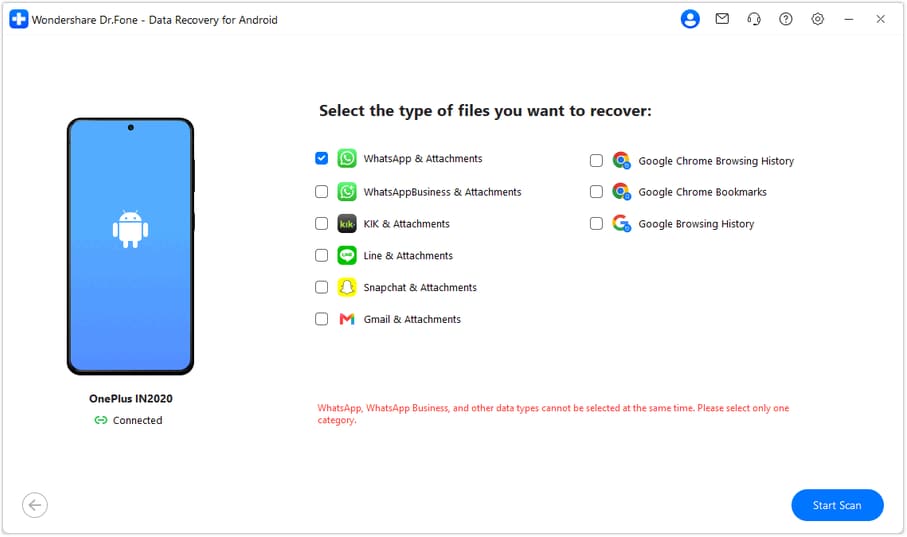
Step 2 Choose Gmail data to scan
Select Gmail in the displayed app-data options and click Start Scan. The official guide requires WhatsApp and WhatsApp Business to be scanned separately from the other categories if you need them for another task; the Gmail workflow here uses its own results category.
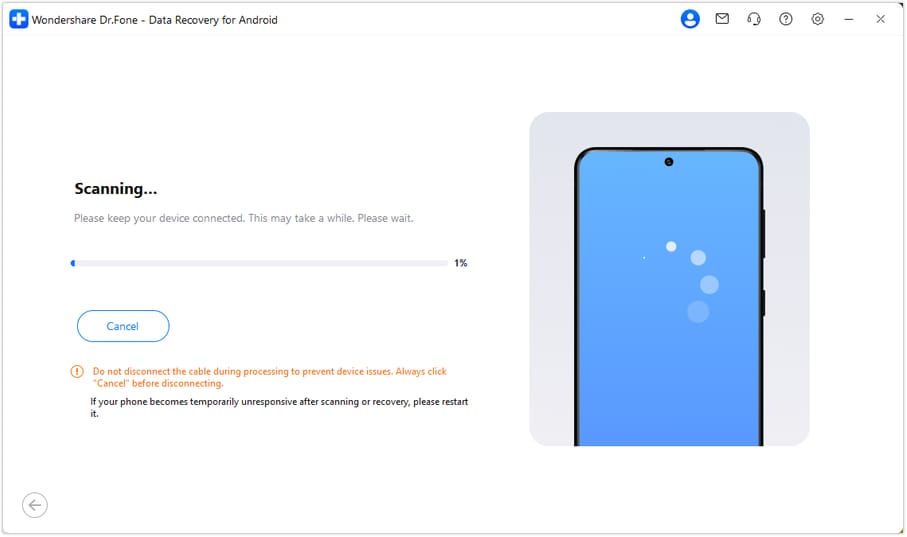
Step 3 Keep the phone connected until the scan finishes
Allow Advanced Recovery to scan while the USB connection remains stable. If you need to stop, click Cancel before removing the cable. Follow the product's displayed restart directions if the phone becomes temporarily unresponsive afterward.
Step 4 Preview the correction and actual chart data
Choose Gmail in the sidebar. Locate candidate entries by name, title and date using available search or filters, then open the actual preview for the care correction. If Gmail Attachments data is found, inspect its real files separately for readable chart content. Select the records that supply useful wording or a usable file, rather than relying on a title alone.
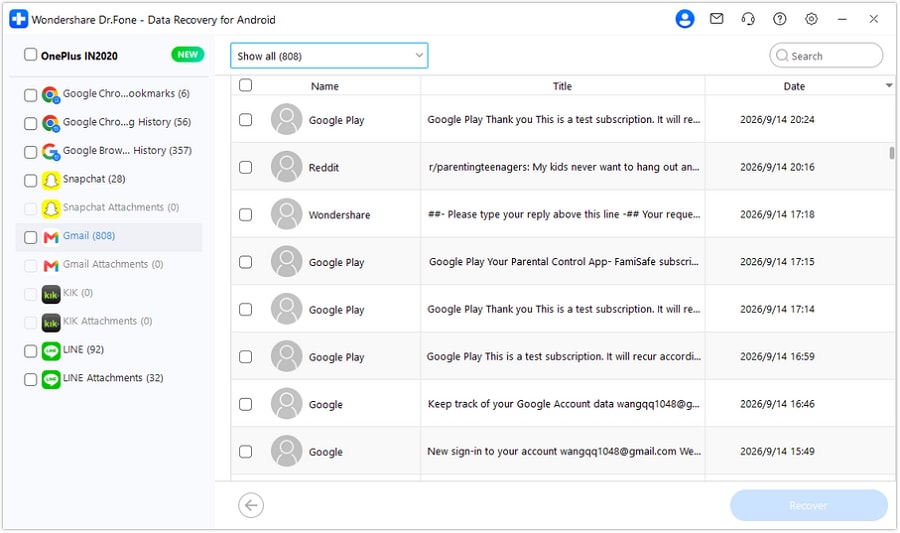
Step 5 Preserve your selected references on PC
Click Recover and follow the prompts to choose a computer folder and save the selected data. Open the saved output and check the instruction text or chart you selected against the older printout. This saves PC copies; it does not place the conversation back into Gmail.




Conclusion
Dr.Fone - Data Recovery (Android) helps supported OPPO Find X9 Ultra users find readable Gmail content, inspect actual attachment files and keep selected useful references on PC. Download Dr.Fone - Data Recovery (Android) for Windows and start the guided scan to look for the missing correction and chart beyond your existing printout.
FAQ
1. Can I recover deleted Gmail emails on OPPO Find X9 Ultra without an old printout?
An old printout is not required for the local device scan. Dr.Fone - Data Recovery (Android) uses Advanced Recovery on Windows to look for available Gmail records and attachment data on the supported phone. Preview what is found and save useful selections to PC.2. What Android version is required for this Find X9 Ultra article?
No Android-version restriction is listed for this exact model in the supplied support record; its listed Kernel is 6.12.58. That does not establish support for every OPPO model or remove the need for the product to detect the phone and display the applicable recovery route.3. Does Print all recover deleted replies or the original chart attachment?
No. It prints the conversation content available to Gmail. Inspect whether the needed reply is actually present and check the attachment as its own file. Neither a paper excerpt nor a chart mention proves that the missing source was preserved.4. Can I use recovery to bypass a sender's printing restriction?
No such bypass is offered here. Google says confidential mode can prevent printing of message text and attachments. Ask the sender for authorized access or an alternative reference, and keep ordinary accessible material separate from restricted content.
 Add Wondershare Dr.Fone as a preferred source on Google