Recover photos, messages, WhatsApp, and more — no backup
needed.


 100% Security Verified | No Subscription Required | No Malware

 :

 ChatGPT
 Perplexity
 Gemini
 Claude
 Grok
Your rail reseller's payment receipt is still visible, but the operator's cancellation notice and replacement-ticket email have disappeared from your OPPO Find N5. When several addresses appear in Gmail's All inboxes, a familiar booking subject can conceal a basic problem: the receipt and the travel update may belong to different mailboxes.
To recover deleted Gmail emails on OPPO Find N5, combine that account check with a focused local recovery route. Dr.Fone - Data Recovery (Android) lets you preview available Gmail records, inspect actual attachment files found and save selected results to a PC. That gives you a practical way to look for the travel instructions and usable ticket document you need, rather than collecting every email with the same destination.
In this article
Before you start
Match the Find N5 recovery conditions
The supplied support record lists OPPO Find N5 with Android 15 and Kernel 6.6.118. These conditions apply to this named model, not every OPPO foldable. Prepare a Windows PC and a reliable USB data cable; Advanced Recovery is Windows-only. Follow the product's device-detection and access prompts, without unlocking the bootloader, flashing firmware or resetting the phone as a recovery experiment.
Keep the original phone data and identify the mailbox
Leave Gmail installed and do not clear its local storage or remove accounts while looking for phone-local records. Note which address received the operator's message, the journey date and a booking reference you already know. Gmail can display non-Gmail services too; their presence in the app is not evidence that every provider or account configuration has the same recovery support.
Separate the server window from the local scan
A deleted Gmail message can remain in Trash for up to 30 days from deletion, unless permanently deleted earlier. Discarded drafts cannot be recovered from Trash. The scan below looks for available local Gmail records and files and saves selected results to PC; it neither reverses permanent server deletion nor inserts mail into the cloud Inbox. A ticket link or barcode reference is not automatically an available attachment file.
Check All inboxes without mixing up the source accounts
A receipt survives, but a related update seems missing when you use more than one email address in Gmail.
Step 1 Open the combined view deliberately
In Gmail on the Find N5, tap Menu > All inboxes. Google provides this view for multiple accounts, including supported non-Gmail addresses added to the app. Use it to notice related correspondence, not to assume that matching booking subjects all came to one Google mailbox.
Step 2 Identify the actual destination address
Read the surviving receipt and any visible update for the recipient address and booking details. Check the addresses already present in the profile menu, then compare the relevant Google account at mail.google.com. If the missing item went to a non-Gmail provider, check that provider's retained mailbox through its own authorized access instead of treating a Gmail-account search as a cross-provider search.
Step 3 Search the relevant Gmail account beyond the Inbox
In that account, search for in:anywhere followed by a known operator name or booking reference. Inspect the actual message for the affected journey and replacement instructions. This Gmail mailbox search includes locations such as Spam and Trash; it is not a Dr.Fone scan command. An archived update can still be useful even though it is absent from the Inbox.
Step 4 Keep retained mail or move it out of Trash
If the needed Gmail message remains in Trash, use Menu > Trash, touch and hold the message, then More > Move to and choose the appropriate destination. If the accessible message points to a ticket portal, use your normal authorized account access there. If neither source supplies the missing local record or file, continue with the device scan.
- All inboxes is a combined view, not a separate backup or an instruction to merge accounts.
- The reseller's receipt, operator's revised journey and current ticket validity answer different questions. Verify the actual travel details before relying on an old document.
Which booking result actually helps you travel?
| What you find | What it establishes | Useful next action |
|---|---|---|
| A reseller receipt in another mailbox | A payment or purchase reference in that source | Use the reference to locate the operator's correspondence; do not infer the replacement route. |
| An accessible operator update in Gmail | The revised instructions actually written in that message | Read the affected journey, date and next action before saving a reference copy. |
| A local Gmail result with readable travel instructions | The content available in that scan result | Save the useful record to PC and separately check whether a real ticket file is available. |
| An actual ticket document without the update | The details readable in that particular file | Keep the file, but confirm current travel validity with the operator rather than guessing from the filename. |
Common problems and fixes
All inboxes shows the receipt, but searching one account finds no update
Recheck the destination address for each message. The two items may have gone to different accounts or services. Compare the correct retained mailbox; do not add and remove accounts or clear Gmail storage to force the views to match.
The scan finds a booking title but no readable change notice
Use the name, title and date only to choose candidates, then open the actual preview. A familiar title does not supply missing route text. Keep any useful readable result and ask the operator for the current instruction if the needed wording is not available.
A recovered message mentions a ticket, but there is no ticket file
Inspect Gmail Attachments separately if that category contains results. A portal link, embedded reference or quoted filename does not establish that the real ticket was stored locally. Use the operator's authorized ticket source for a new copy where available.
How to use Dr.Fone - Data Recovery (Android)
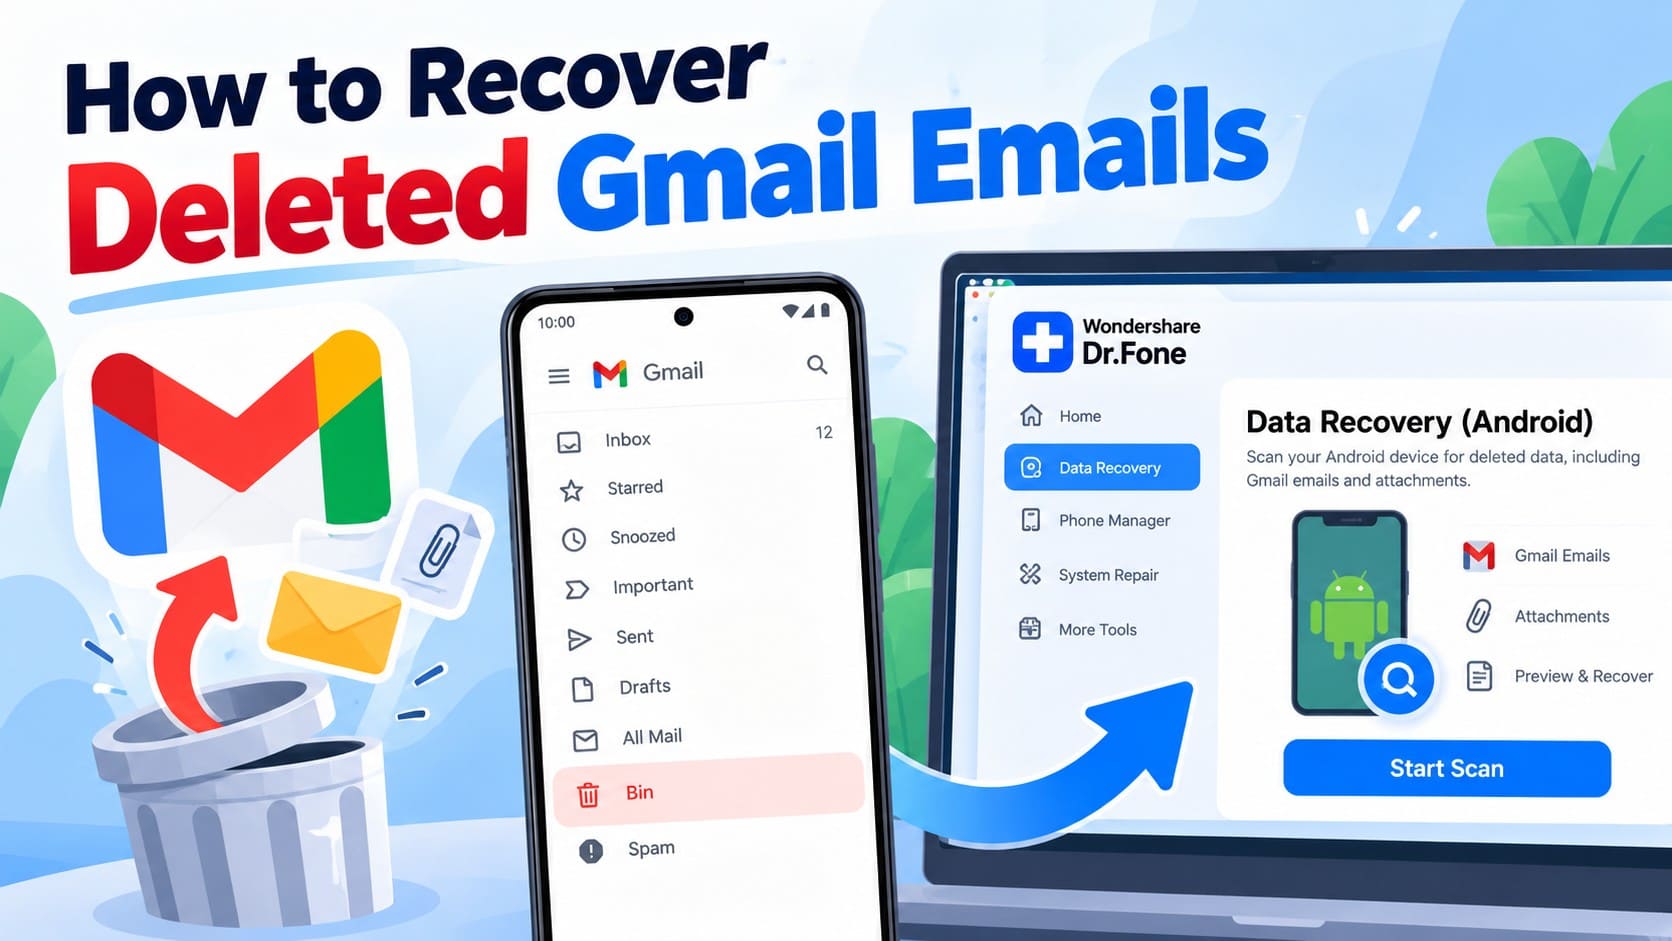
Dr.Fone - Data Recovery (Android) helps you turn a missing Find N5 travel email into a focused search for useful local information. Its Windows-only Advanced Recovery workflow organizes Gmail results for preview, lets you inspect attachment data found separately and saves selected records to a PC. You can concentrate on the actual journey instructions and usable ticket material instead of a mixed list of receipts from unrelated accounts.
- Find promising Gmail entries by visible name, title and date, then read the available content before selecting.
- Review actual files in Gmail Attachments when found, so a ticket reference is not mistaken for a usable document.
- Keep selected readable travel records on a PC for convenient reference alongside your current booking information.
 Scan Android phones and tablets directly.
- Preview and recover only what you want.
- Supports WhatsApp, photos, videos, contacts, and more.
- Works with 6000+ Android devices.
Follow the official Advanced Recovery workflow
Step 1 Connect the Find N5 through Advanced Recovery
Launch Dr.Fone on Windows and open Toolbox > Data Recovery. Choose Android > Recover Android Data, select Advanced Recovery and click Start Scan. Connect the supported Find N5 by USB when prompted and follow the on-screen instructions until it is detected.
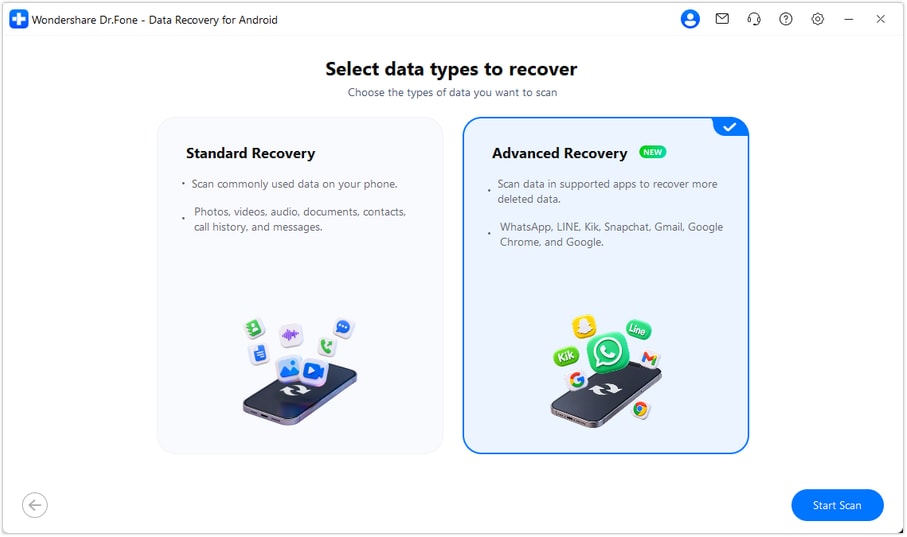
Step 2 Select Gmail data for scanning
Choose Gmail in the displayed app-data categories and click Start Scan. This article uses the Gmail result view. If you also need WhatsApp or WhatsApp Business, the official guide requires those categories to be scanned separately from the other data.
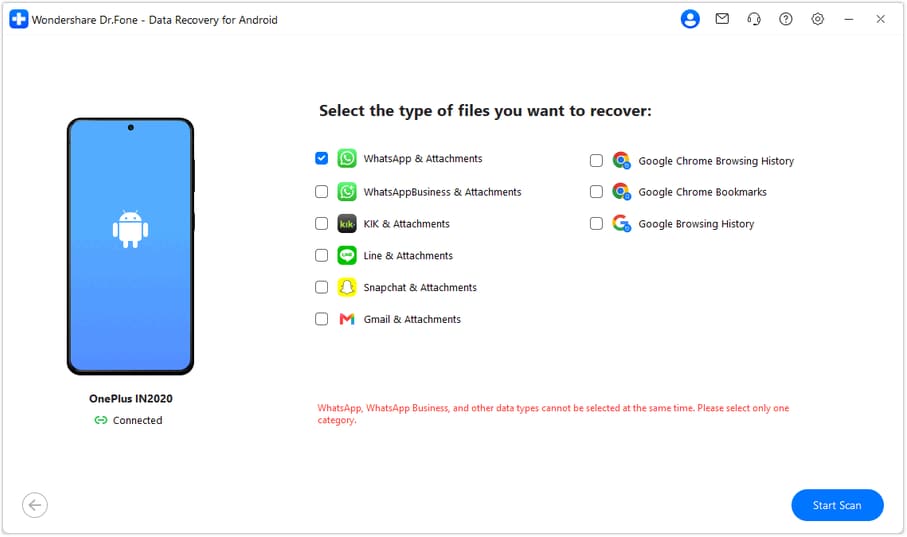
Step 3 Maintain the connection during the scan
Keep the Find N5 connected while Advanced Recovery scans. To stop, click Cancel before removing the USB cable. If the phone is temporarily unresponsive afterward, follow the restart instructions displayed by the product.
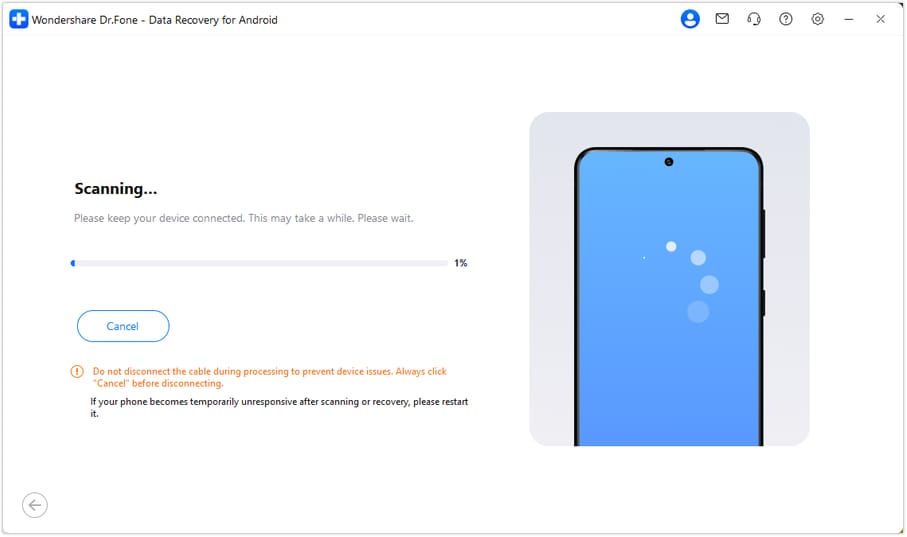
Step 4 Read travel-email previews and inspect found ticket files
Choose Gmail in the results sidebar. Use visible name, title and date, plus available search or filters, to identify candidates, then open the actual preview and check the journey and instruction text. If Gmail Attachments contains data, preview the actual files separately and select useful ticket documents rather than assuming an email reference includes them.
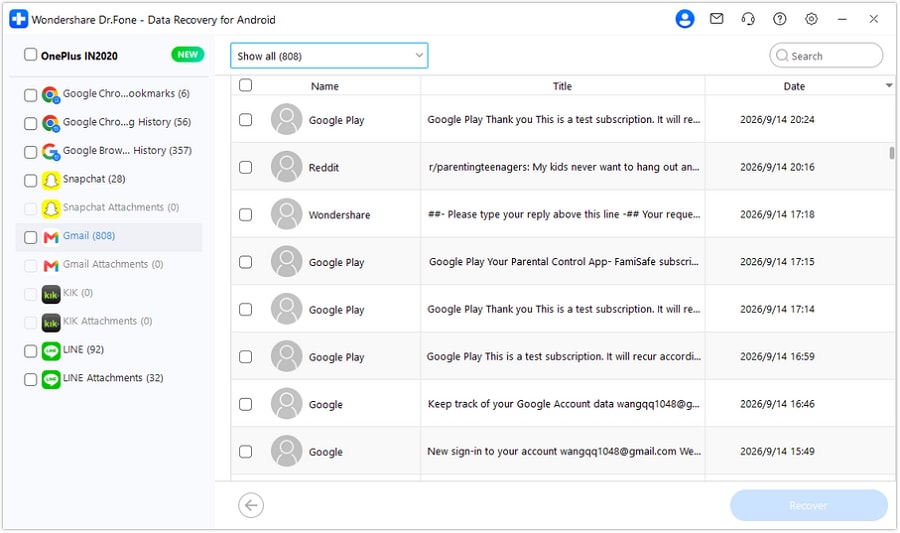
Step 5 Save selected useful records to your PC
Click Recover, choose a computer folder and complete the save prompts. Open the selected output and check the readable travel instruction or document you intended to preserve. These are PC copies, not messages restored to the Find N5 Inbox.




Conclusion
For missing travel correspondence on a supported OPPO Find N5, Dr.Fone - Data Recovery (Android) gives you focused Gmail previews, separate inspection of available ticket files and selective PC saving. Download Dr.Fone - Data Recovery (Android) for Windows and start the guided scan to preserve the useful journey records and documents it finds.
FAQ
1. Can I recover deleted Gmail emails on OPPO Find N5?
Dr.Fone - Data Recovery (Android) provides a local device-scan route for supported Find N5 configurations. Check the supplied Android 15 and Kernel 6.6.118 conditions, then scan Gmail on Windows, read available previews and save selected results to PC. Recovery depends on the records found.2. Does All inboxes mean all my email addresses share one Gmail mailbox?
No. Gmail offers a combined view for multiple accounts, including non-Gmail providers. Establish which account received the missing email and check that actual source. A surviving receipt in one account does not prove that the operator update was delivered to the same account.3. Can the scan download a replacement ticket from the operator's portal?
This workflow previews and saves discoverable phone-local Gmail data. It does not retrieve remote portal content. If an actual attachment is found, inspect it separately; otherwise use the operator's authorized service for the ticket.4. Will recovered email appear in my Gmail Inbox again?
The Advanced Recovery output is saved to a Windows PC, not written into the cloud mailbox. Retained Gmail Trash messages can instead be moved using Gmail within its deletion-based retention window; permanent deletion and discarded drafts are different cases.
 Add Wondershare Dr.Fone as a preferred source on Google