Recover photos, messages, WhatsApp, and more — no backup
needed.


 100% Security Verified | No Subscription Required | No Malware

 :

 ChatGPT
 Perplexity
 Gemini
 Claude
 Grok
Your first day is close, but the welcome email, onboarding checklist or attached form is missing from Gmail on your Redmi Turbo 5 Max. Another message still appears but will no longer open. Those two problems need different answers: an ordinary email may be archived or deleted, while a confidential message can remain visible after its access expires.
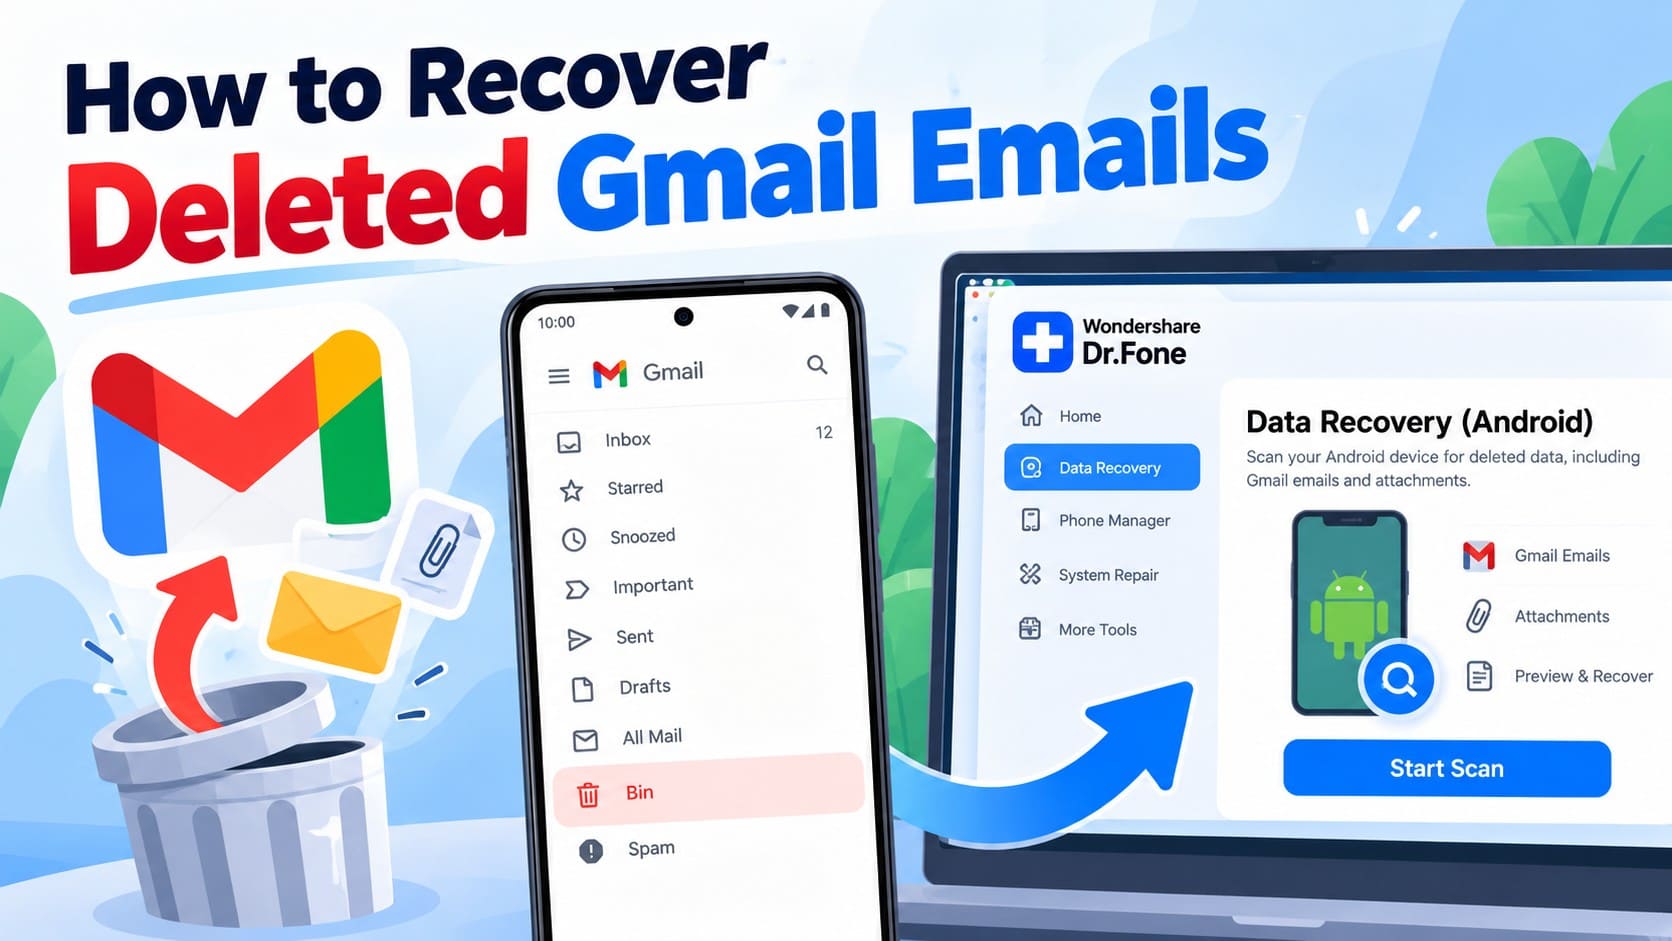
Dr.Fone - Data Recovery (Android) offers a practical way to look for available local Gmail records and attachment data on a supported connected phone, preview what was actually found and save selected results to a PC. This guide helps you recover deleted Gmail emails on Redmi Turbo 5 Max while keeping a useful checklist or ordinary form separate from content that still requires the sender's permission.
In this article
Before you start
Match the Redmi Turbo 5 Max listing
The confirmed recovery entry names Redmi Turbo 5 Max, Android 15 and Kernel 6.6.118. Check the actual model and software details before the Windows workflow. This specific entry does not establish support for other Turbo variants, and there is no need to change or downgrade firmware to match it.
Keep local Gmail data intact
Prepare a Windows PC, USB data cable and a private output folder. Advanced Recovery is Windows-only and saves selected results to a PC rather than restoring them to Gmail. Do not clear Gmail storage, remove the account, reinstall the app or reset the phone while preserving recovery possibilities. Follow the product's access prompts; no Root mechanism, bootloader change or lossless-access guarantee is supplied here.
Respect the difference between recovery and authorized access
For Gmail confidential mode, Google says the sender can set expiry and revoke access; recipient options to copy, print, forward and download the message and attachments are disabled. Recovering a local entry is not a way to remove those controls or obtain passcodes. For this scan, focus on content and ordinary attachments actually made available. A Google account does not ensure recoverable local records, full bodies or a complete set of files.
Separate a confidential-access problem from a deleted email
An onboarding packet can arrive as several different messages. Identify which source contains the missing checklist or form before choosing the next action.
Step 1 Check the account and list the missing items
Verify the receiving email address in Gmail. Note the HR sender, your start date and what you need: the ordinary welcome instructions, a downloadable form or access to a confidential message. These are separate targets even if they refer to the same onboarding process.
Step 2 Read an existing access notice
If a message remains visible but cannot be opened, inspect its actual notice instead of assuming it was deleted. Google says confidential text and attachments are accessible only until expiry or removal of access. Contact the sender for more time or a resend through their approved process when access is the problem.
Step 3 Find the ordinary correspondence independently
In Search in mail, search for the HR sender or a distinctive welcome phrase. Use From or Date chips if useful, allowing for the email arriving before the start date. Open Menu > All mail for archived messages, and search in:anywhere with relevant words to include Spam and Trash. Do not require an attachment in every search: the checklist may be ordinary message text.
Step 4 Check whether the issue is only the phone view
If the ordinary message is present in the same account's online mailbox, check the phone's connection, swipe down in the Inbox to refresh and inspect Menu > Settings > your account > Sync Gmail. Search while online because offline Gmail searches cover only synced messages. Keep existing local data in place throughout.
- A confidential-access expiry date is not a deletion date and does not start Gmail's Trash retention period.
- If you already saved an ordinary form outside Gmail, inspect that retained file. Its continued availability is a separate source, not evidence that the full onboarding email remains.
Recover ordinary onboarding mail still held in Trash
Use this route if the missing welcome message or ordinary form email was deleted but remains in the account's Trash.
Step 1 Inspect the retained welcome email
Tap Gmail Menu > Trash and open the relevant candidate to check its actual contents. Messages can remain for up to 30 days after deletion, even when their original sent dates are much earlier. Do not confuse an old welcome date with an expired Trash window.
Step 2 Move the wanted message to a mailbox destination
Touch and hold it, tap More > Move to and choose the desired destination. Then check which ordinary instructions and attachments are accessible. Moving an entry does not renew confidential access. Permanently deleted messages and deleted drafts cannot be restored by this Trash method.
- If ordinary material is still absent, a local phone scan provides a different source to inspect; it is not an extension of Google's server retention.
Choose the right route for each onboarding item
| What you need | Useful next action | What the result means |
|---|---|---|
| Existing confidential content that will not open | Read the notice and contact the sender about authorized access. | Access renewal is a sender-controlled action, not deleted-email recovery. |
| An archived ordinary welcome email | Open All mail or search the account. | You have found an existing source of instructions. |
| An ordinary email in Trash | Move it out through Gmail within the retained window. | Gmail restores that retained mailbox message. |
| A local Gmail entry found by Advanced Recovery | Preview the content actually available and select useful records. | A saved PC reference is not renewed confidential access or an Inbox restore. |
| An ordinary form found in attachment results | Inspect and save the actual file if it meets your need. | File availability is independent of whether the entire welcome correspondence was found. |
Common problems and fixes
The welcome subject is present, but the confidential content has expired
Use the existing message to identify the sender and request renewed access or a resend. Continue looking for the ordinary checklist separately. Do not repeatedly scan in the expectation that the same visible title will become an unrestricted confidential document.
A Gmail result mentions a form, but no usable form is visible
Check Gmail Attachments if the scan found attachment data, and inspect any actual file offered. A message reference or title is not the form itself. If no accessible file is present, ask HR for an approved copy of that specific item rather than assuming it is embedded in the saved email record.
The scan finds instructions but not your whole onboarding packet
Save useful records selectively and compare them against the missing-item list. Note which instructions you can read and which specific form still needs to come from the sender. A partial set can reduce the work of requesting replacements without being presented as a complete packet.
How to use Dr.Fone - Data Recovery (Android)
Dr.Fone - Data Recovery (Android) helps you preserve the ordinary onboarding information that remains discoverable on a supported Redmi Turbo 5 Max. The Windows-only Advanced Recovery workflow shows available Gmail entries for preview and found attachment data in its own Gmail Attachments view. That lets you save a useful welcome instruction, checklist or ordinary form to a PC while keeping the recovery task focused on actual content rather than matching subjects alone.
- Narrow candidate Gmail entries using the names, titles and dates actually displayed.
- Preview available content to distinguish practical instructions from a reference to material you still need.
- Check found attachments and selectively save useful ordinary files with the relevant local records to a PC.
 Scan Android phones and tablets directly.
- Preview and recover only what you want.
- Supports WhatsApp, photos, videos, contacts, and more.
- Works with 6000+ Android devices.
Follow the official Advanced Recovery workflow
Step 1 Choose Advanced Recovery and connect the Redmi Turbo 5 Max
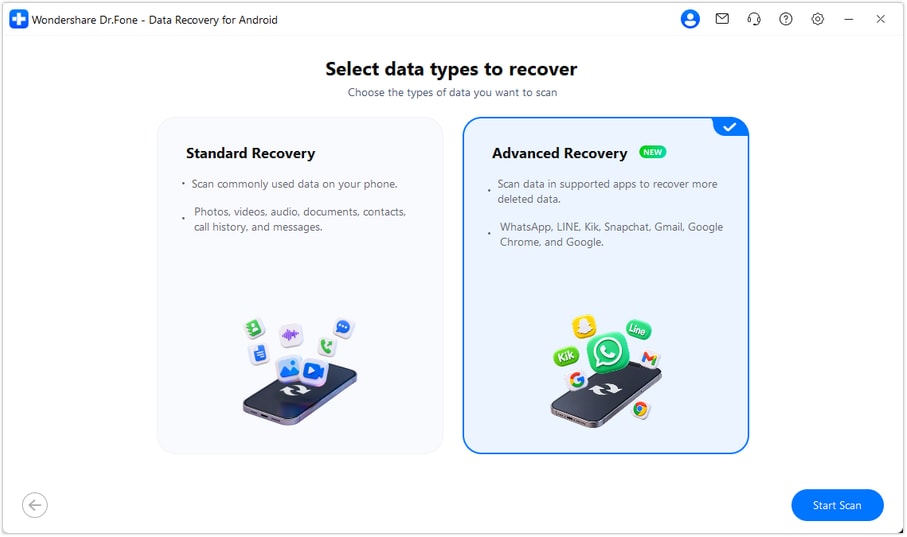
Open Dr.Fone on Windows and choose Toolbox > Data Recovery. Go to Android > Recover Android Data, select Advanced Recovery and click Start Scan. Connect the phone by USB when asked, then follow the on-screen instructions for device detection.
Step 2 Choose Gmail for the recovery search
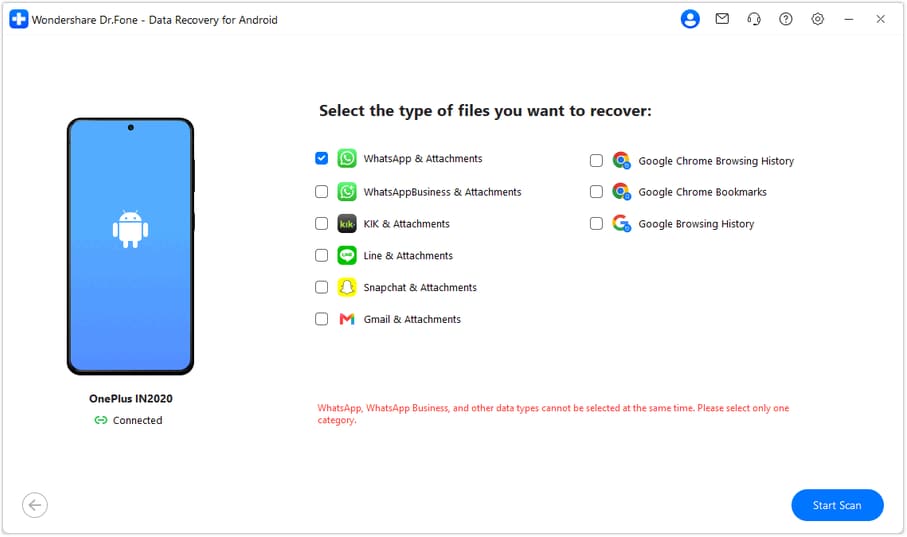
Select Gmail from the available app-data categories and click Start Scan. This chooses the local app-data source for the ordinary onboarding records you want to inspect.
Step 3 Keep the phone connected as scanning proceeds
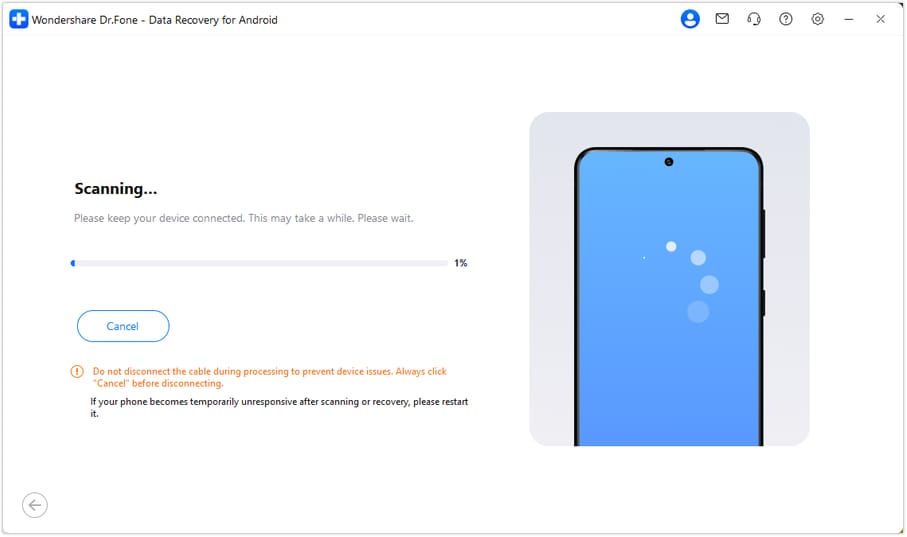
Wait with the USB connection in place while Advanced Recovery scans. If stopping is necessary, click Cancel before disconnecting. Follow the product's restart instructions if the phone becomes temporarily unresponsive after scanning or recovery.
Step 4 Inspect the Gmail entries and available ordinary attachments
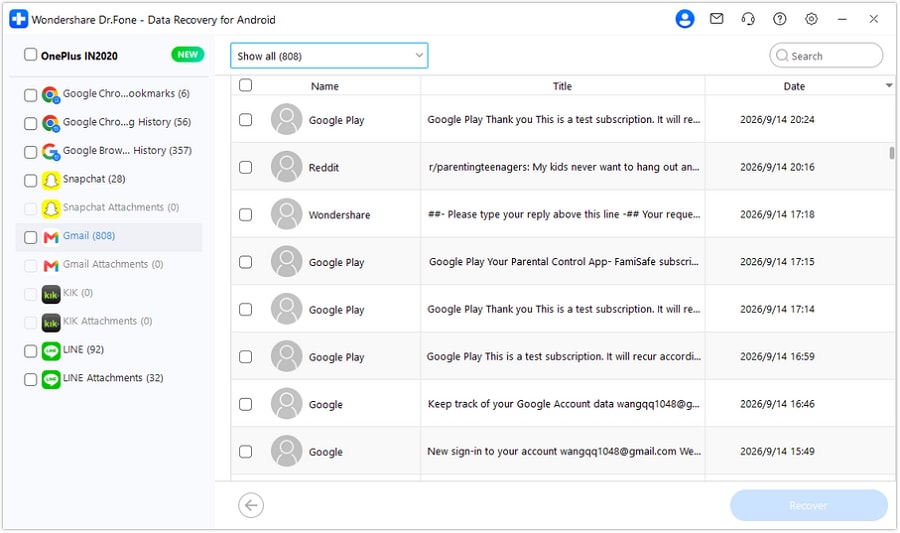
Choose Gmail from the results sidebar and review visible names, titles and dates. Use search or filters where available and preview the actual content of likely welcome records. Check Gmail Attachments separately when attachment data is found, selecting useful records and files based on the content offered rather than a form's name alone.
Step 5 Save useful onboarding results to a PC folder
Click Recover, follow the prompts to choose a computer folder and save the selected items. Check the saved results against the instructions and ordinary forms on your list. The workflow creates selected PC output, not a restored Gmail Inbox or a complete onboarding mailbox.




Conclusion
Recovering useful onboarding material starts with knowing whether you need an existing message, renewed access or a local copy of missing ordinary correspondence. For the phone-local recovery task, Dr.Fone - Data Recovery (Android) combines focused Gmail scanning, content preview and selective PC saving on a supported Redmi Turbo 5 Max. Download Dr.Fone for Windows and start checking for the available instructions and attachments that help you prepare.
FAQ
1. How do I recover deleted Gmail emails on Redmi Turbo 5 Max?
Check the correct Gmail account, All mail and Trash. If a local scan is needed, use Dr.Fone - Data Recovery (Android) on Windows with the listed Android 15 and Kernel 6.6.118 conditions. Preview available Gmail entries and attachment data, then save the wanted results to a PC.2. Does an expired confidential message mean Gmail deleted it?
Not necessarily. Confidential mode has a sender-controlled expiry and allows access to be revoked. A message can remain visible while its contents are inaccessible. Ask the sender about the access issue instead of treating the expiry date as the start of Trash retention.3. Can Dr.Fone unlock a confidential email or supply its passcode?
No such capability is part of this workflow. A local scan does not bypass confidentiality restrictions or provide a passcode. Use the sender's authorized access process; the recovery route described here concerns discoverable local Gmail records and available ordinary attachment data.4. Can I recover deleted Gmail attachments on Redmi Turbo 5 Max without the full welcome email?
Inspect Gmail Attachments when the scan finds attachment data. An ordinary file may be useful independently of the surrounding message, but its presence, completeness and readability must be checked from the actual result. A title alone does not establish a recovered form.5. Does saving a local email result restore Google's permanently deleted copy?
No. Advanced Recovery saves selected discoverable phone-local results to a PC. It does not retrieve permanently deleted Google server mail, extend the Trash window or insert the recovered entries back into Gmail.
 Add Wondershare Dr.Fone as a preferred source on Google