Recover photos, messages, WhatsApp, and more — no backup
needed.


 100% Security Verified | No Subscription Required | No Malware

 :

 ChatGPT
 Perplexity
 Gemini
 Claude
 Grok
A receipt you ignored for months can become essential when a device needs a warranty repair. If that email and its attachment are missing from your Galaxy S23, the purchase date alone does not tell you whether recovery is possible: an old email might still be archived, might have been deleted yesterday or might no longer be retained in Gmail.
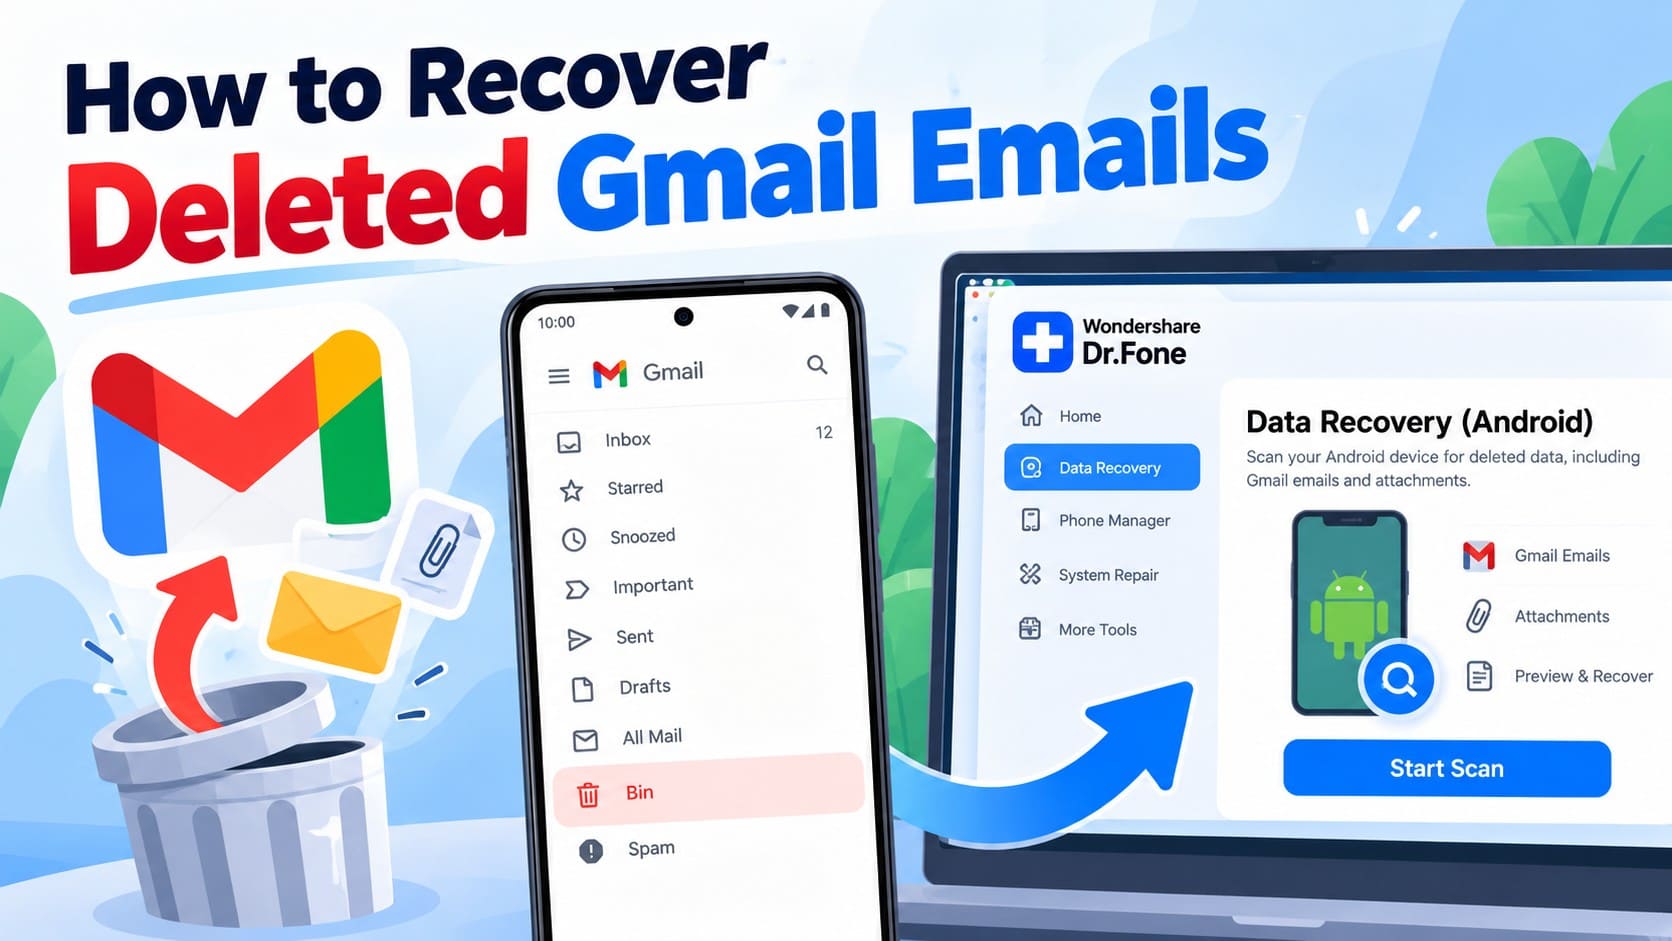
Dr.Fone - Data Recovery (Android) gives supported Galaxy S23 series users another place to look: the phone's discoverable local Gmail records and attachments. Preview what is available and save the useful proof-of-purchase information to a PC. Start with a targeted mailbox search, then use the five-step scan when you need to investigate local data.
In this article
Before you start
Use the correct S23 model conditions
Samsung Galaxy S23: no Android-version restriction is listed for this model; the listed Kernel is 5.15.153. Samsung Galaxy S23+: no Android-version restriction is listed for this model; the listed Kernel is 5.15.153. Samsung Galaxy S23 Ultra: no Android-version restriction is listed for this model; the listed Kernel is 5.15.189. Compare the exact model and Kernel in your phone's software information with its entry. This guide covers these three models only.
Preserve the phone and prepare the PC destination
Use a Windows computer and a USB data cable for the Windows-only Advanced Recovery workflow. Keep Gmail installed and do not clear its data, uninstall it, reset the S23 or flash firmware to search for deleted records. Follow Dr.Fone's on-screen access instructions and confirm an unlisted configuration with support. Prepare a PC folder where you can review any recovered receipt records and files.
Separate the purchase date from the deletion date
Write down the store name, the receiving Google account, an approximate purchase date and the document you need. Gmail's Trash period is up to 30 days after deletion; an older received date does not itself put an email outside that window. Once permanently deleted, the message cannot be recovered through Trash, and deleted drafts do not enter recoverable Trash. A local scan can save only data it discovers on the phone and does not undo Google's server deletion.
Search for the old receipt before treating it as deleted
Use a purchase-focused search when you remember the transaction but not where Gmail placed the message.
Step 1 Check the account and search a recognizable term
Open Gmail on the S23, tap the profile picture at the top right and check the receiving address. In Search in mail, enter in:anywhere followed by the store name or a word such as warranty. This broadens the search to Spam and Trash as well as ordinary mail.
Step 2 Narrow by date or attachment only when useful
Use Gmail's Date search chip to focus on the purchase period. If the receipt was attached, the Attachment chip can narrow the results further. If nothing appears, remove the attachment restriction and broaden the date range; some purchase confirmations contain the useful receipt details in the email itself.
Step 3 Check All mail for an archived confirmation
Tap Menu > All mail and look for the matching purchase confirmation. An archived email no longer appears in Inbox but still exists in the mailbox. Open it to inspect the available receipt information; if you want it back in Inbox, touch and hold it and choose More > Move to Inbox.
- Search with an internet connection when checking the mailbox: offline Gmail search only covers messages synced to the phone.
- A search that is too narrowly filtered can hide a retained receipt; changing search criteria is not deleted-data recovery.
Recover a recently deleted receipt from Trash
This works for a message that Gmail still retains in Trash, even if the purchase itself was long ago.
Step 1 Look for the retained receipt in Trash
Open Menu > Trash in Gmail and find the purchase message. Compare the title and transaction details rather than ruling it out because its original date is more than 30 days old.
Step 2 Move the receipt back to a mailbox folder
Touch and hold the message, tap More > Move to and choose Inbox or another appropriate folder. Review the moved message and any accessible attachment so you know which information is already available.
- If Trash no longer contains it, do not empty other folders or clear Gmail storage in an attempt to restore it. Continue to the local scan below if the phone meets the listed conditions.
Old receipt or old deletion: choose your S23 recovery route
| Receipt situation | What it means | Practical route |
|---|---|---|
| Received months ago, still in All mail | The email is retained rather than deleted | Read the existing confirmation or move it to Inbox |
| Received months ago, deleted recently, still in Trash | Trash eligibility depends on the deletion date | Use More > Move to while the message remains available |
| Permanently deleted from Gmail | Trash no longer offers the message | Look for discoverable local records with Dr.Fone; PC results do not reverse server deletion |
| Only a saved receipt document remains | A useful file may exist without its email | Preserve that copy, but do not describe it as restoration of the message body |
Common problems and fixes
A date-and-attachment search returns no receipt
Remove one search restriction at a time. Try the store name without an attachment filter, then widen the purchase-date range. Confirm the receiving account and compare the same account on a computer. If the email exists there but not on the S23, check internet access and refresh the phone's Gmail Inbox rather than assuming it is deleted.
A local result shows the right store but not a complete receipt
Inspect the available Gmail entry and check Gmail Attachments separately. Save useful results, then verify the actual contents of the PC output before treating them as proof of purchase. A store name or message title alone does not establish that the transaction details or full document were recovered.
The S23 Ultra's Kernel differs from the base S23
Use the Ultra's own listed Kernel, 5.15.189. The S23 and S23+ entries list 5.15.153 and cannot be substituted for the Ultra entry. Give Dr.Fone support the exact model and software information if the connected phone is not accepted; leave its firmware unchanged.
How to use Dr.Fone - Data Recovery (Android)
Dr.Fone - Data Recovery (Android) helps you search a supported Galaxy S23 series phone for local Gmail information that may be useful for a warranty claim or purchase query. Its Windows-only Advanced Recovery mode presents discoverable Gmail records and Gmail Attachments for preview, then saves selected results to your PC. This makes it easier to keep a relevant receipt record and an available document together while checking what information you actually recovered.
- Review available Gmail results by name, title and date to narrow a long purchase history to the relevant transaction.
- Inspect Gmail Attachments independently so an available document is not overlooked when the expected email entry is missing.
- Recover selectively to a PC folder and inspect the saved output before using it for your warranty or support request.
 Scan Android phones and tablets directly.
- Preview and recover only what you want.
- Supports WhatsApp, photos, videos, contacts, and more.
- Works with 6000+ Android devices.
Follow the official Advanced Recovery workflow
Step 1 Connect the supported S23 through Advanced Recovery
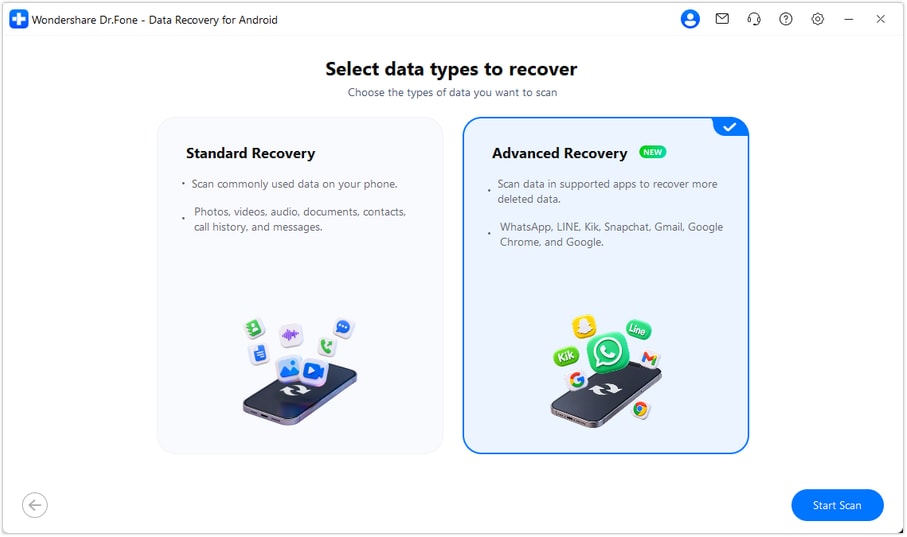
On Windows, launch Dr.Fone and open Toolbox > Data Recovery. Select Android > Recover Android Data, choose Advanced Recovery and click Start Scan. Connect the Galaxy S23, S23+ or S23 Ultra by USB when prompted and follow the displayed instructions until the phone is detected.
Step 2 Select Gmail data for the receipt search
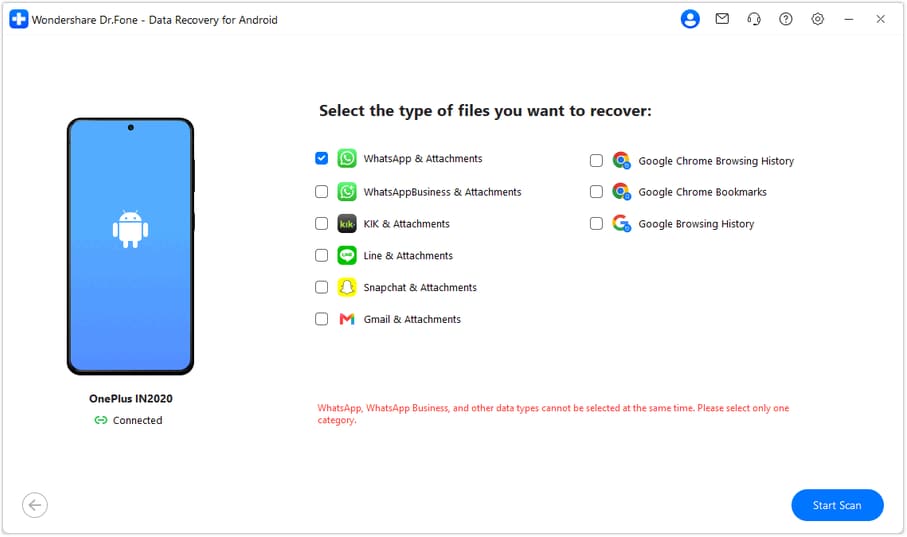
Choose Gmail from the available categories and click Start Scan. Gmail is the relevant app-data selection here. If you have a separate WhatsApp or WhatsApp Business recovery task, those categories must be scanned separately from the other data types.
Step 3 Let the scan finish with the cable connected
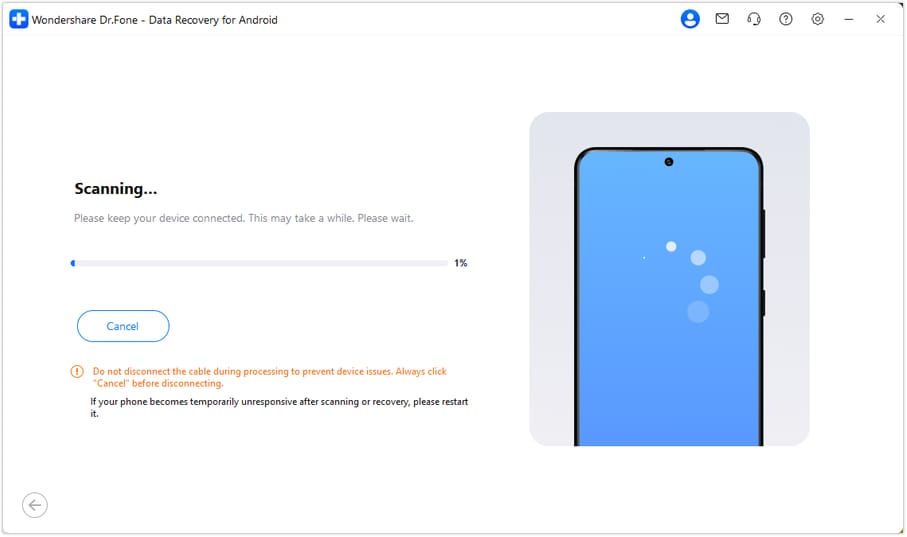
Keep the S23 connected while Advanced Recovery scans. If you need to stop, click Cancel before unplugging the cable. Follow the product's on-screen restart instructions if the phone is temporarily unresponsive after scanning or recovery.
Step 4 Preview purchase records and any attachment data
Choose Gmail in the results sidebar and inspect available entries by name, title and date. Use search or filters where available to locate the store or purchase period. Review Gmail Attachments separately if the scan found attachment data, then select the relevant records and documents.
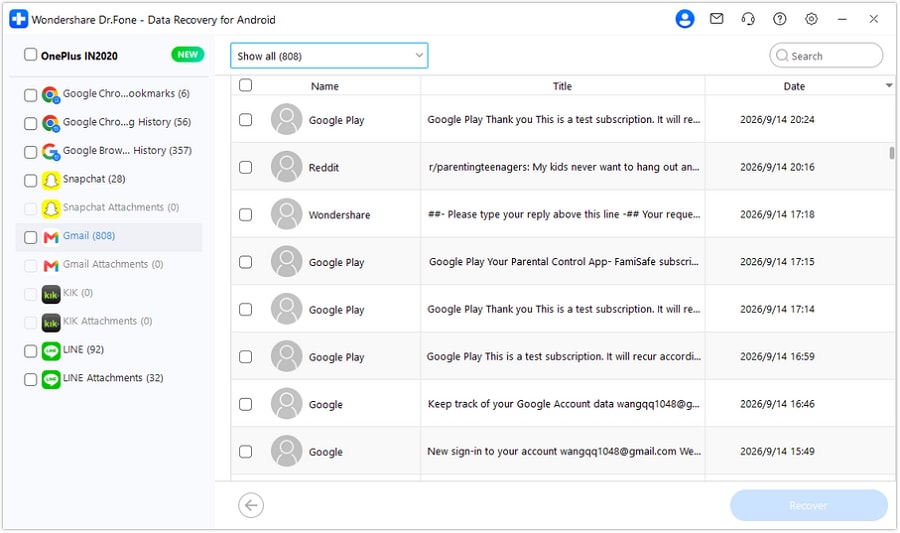
Step 5 Save the selected receipt information to PC
Click Recover and follow the prompts to choose a computer folder. Complete the save and open the output to inspect the available purchase information. The selected records are saved to your PC; they are not inserted into Gmail on the phone.




Conclusion
For an old receipt that matters today, Dr.Fone - Data Recovery (Android) offers a focused way to scan local Gmail data, preview available purchase records and attachments, and keep selected results on your PC. Download Dr.Fone for Windows, connect your supported Galaxy S23 series phone and start looking for the email information and documents needed for your next warranty or purchase-support step.
FAQ
1. Can I recover a Gmail email received more than 30 days ago on Galaxy S23?
The email's age is not the same as the time since deletion. A years-old message may still be in All mail, or it may still be recoverable from Trash if deleted recently and retained there. Trash lasts up to 30 days after deletion, unless the message is permanently deleted sooner.2. Can Dr.Fone find a receipt after the Gmail Trash period?
It can scan discoverable local Gmail data on a supported S23, but there is no promise that an old receipt or attachment remains available. Review the actual scan results and save useful selections to PC. This does not extend Google's retention period or restore a permanently deleted server message.3. Does the S23 Ultra use the same listed Kernel as S23 and S23+?
No. The listed S23 Ultra Kernel is 5.15.189, while the S23 and S23+ entries list 5.15.153. No Android-version restriction is listed for each of these specific models, but the individual Kernel conditions still apply.4. Can I recover deleted Gmail attachments without an email backup?
The Dr.Fone device-scan route does not require an existing email backup. On a supported phone, inspect Gmail Attachments after the Gmail scan and select available file data to save to your PC. A missing backup does not establish that a specific attachment can be found.5. What if I find the receipt file but not the original email?
Keep the useful file and verify its contents. Whether it came from Gmail Attachments in the scan or from a copy you had already saved, it does not by itself restore the original sender context or the complete message. If those details matter, review any Gmail record results as well or ask the store for a replacement receipt.
 Add Wondershare Dr.Fone as a preferred source on Google