100% Security Verified | No Subscription Required | No Malware

 :
: 
 ChatGPT
 Perplexity
 Gemini
 Claude
 Grok
Grok
If you are getting ready to unlock the bootloader, root a phone, or flash firmware, learning how to enable oem unlocking on android is the first setting to check. On many devices, the switch is easy to find, but OEM unlock restrictions on Samsung/Android can make the option missing, delayed, or permanently unavailable depending on the model, carrier, region, and security state.
In this article
Before you start
Before changing any bootloader-related setting, make sure the phone is stable, updated, and eligible for unlocking. This saves time if the toggle is hidden for policy reasons rather than because of a menu issue.
The preparation below applies to Samsung and most other Android brands.
Back up and charge the phone
Save important photos, messages, documents, and app data before you continue. Turning on the OEM unlocking toggle usually does not wipe the phone, but the later bootloader unlock process on most devices typically triggers a factory reset.
- Back up important data before changing bootloader settings
- Charge the phone to at least 50 percent
- Keep a stable USB cable nearby if you plan to continue with firmware work later
Enable Developer options first
The OEM unlocking switch lives inside Developer options. If you do not see that menu yet, go to Settings and tap Build number seven times. On Samsung, this is usually under About phone > Software information > Build number.
Check model and carrier compatibility
Not every Android phone supports bootloader unlocking. Factory-unlocked models are more likely to show the toggle, while some carrier-locked phones and region-specific Samsung devices may never allow it.
- Confirm your exact model is bootloader-unlockable
- Stay connected to Wi-Fi or mobile data
- Sign in to your Google or Samsung account if required by the device setup
Understand what OEM unlocking actually does
Enabling the switch does not unlock the bootloader by itself. It only permits the next stage of unlocking through the device's official bootloader process or command workflow.

Method 1: Enable OEM unlocking on most Android phones
This is the standard path for Pixel, Motorola, OnePlus, Xiaomi, and other Android devices where the toggle is visible.
If the menu names differ slightly, check System, Additional settings, or the main Settings page for Developer options.
-
Step 1 Turn on Developer options
Open Settings, go to About phone, and tap Build number seven times. Enter your PIN, pattern, or password if prompted.
-
Step 2 Open the Developer options menu
Return to Settings and open System, Additional settings, or wherever Developer options appears on your brand.
-
Step 3 Enable the OEM unlocking switch
Find OEM unlocking, turn it on, read the warning message carefully, and confirm the change.
- The Android OEM unlocking option may be absent on devices whose bootloaders cannot be unlocked
- The toggle itself usually does not erase data, but the actual unlock process usually does
Method 2: Enable OEM unlocking on Samsung phones
This method is for Galaxy devices where you want to enable OEM unlocking before flashing, rooting, or advanced repair steps.
Samsung menus are similar across many models, but restrictions vary more than on some other Android brands.
-
Step 1 Enable Developer options on Samsung
Go to Settings > About phone > Software information, then tap Build number seven times. Enter your lock screen credentials when asked.
-
Step 2 Check for the OEM unlocking setting
Open Settings > Developer options and look for OEM unlocking. If it appears, switch it on and confirm the warning prompt.
-
Step 3 Restart and verify the device state
Restart the phone and check again if needed. Some models require internet access, completed setup, and time after activation before the setting remains available.
- Some US carrier Samsung models have hard bootloader restrictions
- KG or RMM state, carrier lock, region, and firmware policy can all affect the toggle
- If you cannot enable OEM unlocking on Samsung after setup, the limitation may be model-based rather than temporary
Method 3: Fix missing or greyed out OEM unlocking
If OEM unlocking is missing or unavailable, the cause is often a policy, activation, or security-state issue instead of a simple software glitch.
Work through these checks before assuming the phone supports unlocking.
-
Step 1 Verify basic requirements
Make sure the phone has internet access, automatic date and time are correct, and your required account sign-in is complete.
-
Step 2 Update and wait if needed
Install pending software updates, reboot the device, and wait several days if the phone was recently activated or factory reset. Some Samsung devices show the option only after a waiting period.
-
Step 3 Check for carrier or region restrictions
If the switch is still missing, verify whether your exact model supports bootloader unlocking. Carrier-locked or region-restricted phones may never offer the toggle.
Method comparison
The table below shows what usually happens in the most common OEM unlocking situations.
| Situation | What you will see | What to do |
|---|---|---|
| Standard unlocked Android phone | OEM unlocking toggle is visible in Developer options | Turn it on and confirm the warning |
| Samsung phone with supported bootloader | Toggle may appear after setup, internet connection, or a waiting period | Sign in, stay connected, reboot, and check again |
| Carrier-locked or restricted model | Toggle is missing or cannot be turned on | Verify model policy because some phones cannot be unlocked at all |
Common problems and fixes
Most failures come from missing prerequisites, unsupported models, or brand-specific security rules rather than from a broken Settings app.
- Developer options does not appear: Go back to About phone and tap Build number seven times again. On Samsung, use About phone > Software information > Build number.
- OEM unlock missing on Samsung: Connect to the internet, finish account sign-in, restart the device, and wait if the phone was recently activated or reset. If it still does not appear, the model may be restricted.
- OEM unlocking greyed out Android: Check for device admin policies, carrier limits, or manufacturer bootloader rules. A greyed out switch often means the device is not eligible in its current state.
- Phone becomes unstable during preparation: Stop before any bootloader changes. Fix boot loops, black screens, or failed startup problems first so the device remains accessible.
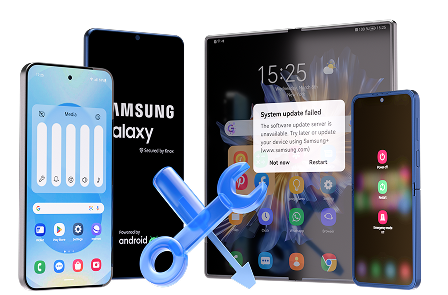
Why this Wondershare tool may help
If your phone develops startup errors, black screens, or boot loops while working through how to enable oem unlocking on android, Dr.Fone - System Repair (Android) is the most relevant Wondershare option to stabilize the device first. It is especially useful when OEM unlock restrictions on Samsung/Android are mixed with system issues that prevent reliable access to Settings.
- Repair Samsung phone issues related to boot loops, black screens, and startup failures
- Use a guided workflow without requiring advanced repair knowledge
- Address system instability before attempting deeper firmware or bootloader tasks
 Fix Android instantly – no skills needed.
- Solve boot loop, black screen, won’t turn on, etc.
- High success rate for all system issues.
- User-friendly interface with easy-to-follow steps.
How to Use Dr.Fone - System Repair (Android) for how to enable oem unlocking on android?
To know whether this tool fits your case, review the matched guide steps extracted for the feature: Repair Samsung Phone Issues.
-
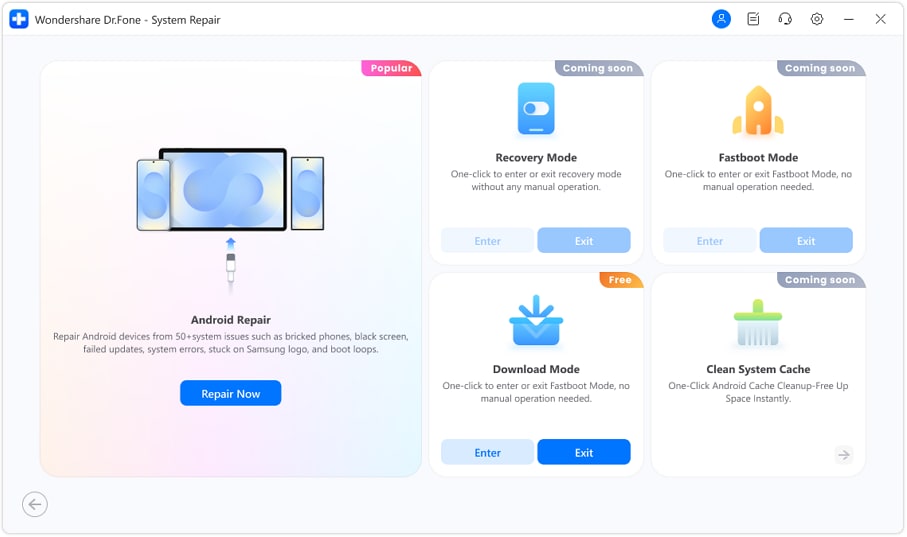
Step 1 Open System Repair Tool for Android
Open Wondershare Dr.Fone on your computer and enter the Toolbox section from the left panel. Connect the Samsung phone or tablet that requires repair, and proceed by choosing System Repair from the available options.

-
Step 2 Select Android System Repair
Choose the Android Repair option and click Repair Now to begin the repair process for your Samsung phone or tablet.
-
Step 3 Download Firmware Successfully
Once the Samsung device enters Download Mode, the firmware automatically starts to download on the platform. You can click Stop at any instance to abort the process.

If your Samsung phone is not just restricted but also malfunctioning, this tool can help repair the system first so you can return to normal settings access and confirm whether the OEM unlock option is truly available.


Conclusion
For most phones, how to enable oem unlocking on android starts with enabling Developer options and turning on the OEM unlocking switch. If the option is missing, the real issue is often OEM unlock restrictions on Samsung/Android, including carrier policy, regional limits, firmware rules, or Samsung KG and RMM checks.
If your phone is supported and stable, the toggle should appear after setup and verification. If it never shows up, confirm the exact model's bootloader policy before spending more time on troubleshooting.
FAQ
-
1. How do I enable OEM unlocking on Android?
Open Settings, go to About phone, and tap Build number seven times to unlock Developer options. Then go to Settings > System or Developer options and switch on OEM unlocking. -
2. Why is OEM unlock missing on my Samsung phone?
The toggle may be hidden because of carrier limits, regional policy, Samsung security state, lack of internet connection, incomplete account setup, or a waiting period after activation or factory reset. -
3. How do I fix OEM unlocking greyed out on Android?
Check whether the device is under admin policy, carrier restriction, or manufacturer bootloader rules. Also verify date and time, internet access, software updates, and completed device setup. -
4. Can I enable OEM unlock on a carrier-locked Samsung device?
Sometimes no. Many carrier-locked Samsung models, especially certain US variants, have hard bootloader restrictions, so the toggle may never appear even after all setup steps are completed. -
5. How long does it take for OEM unlock to appear on Samsung?
It varies by model and firmware. On some Samsung phones, the option appears only after internet connection, account sign-in, rebooting, and a waiting period of several days after activation or reset. -
6. Does enabling OEM unlocking erase Android phone data?
Usually, turning on the toggle alone does not erase data. However, the later bootloader unlock process on most Android phones normally performs a factory reset, so backing up first is strongly recommended.
 Add Wondershare Dr.Fone as a preferred source on Google