 Effortlessly manage data through preview, delete, export, etc.

 100% Security Verified | No Subscription Required | No Malware

 :
: 
 ChatGPT
 Perplexity
 Gemini
 Claude
 Grok
Grok
what is recovery mode ipad? It’s a built-in troubleshooting state that lets a Mac or Windows PC reinstall iPadOS or restore the device when normal startup, updating, or syncing fails. iPad Recovery Mode is commonly used to fix serious software issues, remove a stuck update, or recover an iPad that won’t boot.
In plain English: Recovery Mode is the "rescue screen" you use when your iPad is frozen, won’t turn on properly, or can’t update the usual way. One key takeaway: Recovery Mode is an official Apple method for repairing iPadOS, but "Restore" can erase data and may still require the original Apple ID afterward.
In this article
- Part 1. What iPad Recovery Mode is used for: core uses & scenarios (Why it matters)
- Part 2. How iPad Recovery Mode works: official working logic (How it works, non-technical + technical-lite)
- Part 3. Where to find iPad Recovery Mode: settings paths and entry points (Where to find it)
- Part 4. How to use, enable, disable, or check iPad Recovery Mode
- Part 5. Requirements and compatibility
- Part 6. iPad Recovery Mode vs related concepts
- Part 7. Common issues and misconceptions
- Part 8. Security, privacy, and compliance notes
Part 1. What iPad Recovery Mode is used for: core uses & scenarios (Why it matters)
Core uses and real-world scenarios
Recovery Mode matters because it provides an official path to repair or reinstall iPadOS when the iPad can’t complete normal startup or update processes, especially when the device becomes unresponsive or stuck on a system screen.
- Your iPad is stuck on the Apple logo and won’t finish booting.
- An iPadOS update fails repeatedly or freezes mid-install.
- The iPad shows a "connect to computer" recovery screen after a crash.
- Finder/iTunes can’t update the iPad during normal operation.
- You need to reinstall iPadOS to resolve persistent system instability (random reboots, endless loading).
Who needs it most
Everyday users benefit when an update goes wrong or the iPad won’t start. Second-hand buyers and sellers may encounter Recovery Mode during setup or after a reset and should be prepared for Activation Lock (Apple ID verification). Parents managing family iPads may use it to recover a child’s device after a failed update. Enterprise or school IT teams may use it as part of standard repair workflows, while staying compliant with MDM and asset ownership policies.
Part 2. How iPad Recovery Mode works: official working logic (How it works, non-technical + technical-lite)
Plain explanation
Recovery Mode boots the iPad into a limited "repair" state so a computer can communicate with it even when iPadOS can’t start normally. From the computer, you typically choose to Update (reinstall iPadOS without erasing data when possible) or Restore (erase and reinstall, used when Update doesn’t work).
Key components
- Button sequence at startup: A specific button press pattern forces the iPad into Recovery Mode instead of normal boot.
- Computer connection (Finder or iTunes): A Mac (Finder on newer macOS) or Windows PC (iTunes or Apple Devices app, depending on Windows setup) handles the reinstall/restore process.
- iPadOS firmware package: The computer downloads the required iPadOS files (size and time vary).
- USB cable and stable power: A reliable cable/port and sufficient battery help prevent interruptions mid-repair.
- Security checks after restore: If Find My was enabled, Activation Lock may require the Apple ID and password previously used on the device.
Part 3. Where to find iPad Recovery Mode: settings paths and entry points (Where to find it)
Settings or menu paths
Recovery Mode itself is not a toggle inside Settings—it’s entered during startup with buttons while connected to a computer. However, you can check related settings that affect recovery and restore outcomes:
- Settings > General > Software Update
- Settings > General > Transfer or Reset iPad > Reset
- Settings > [your name] > Find My > Find My iPad
Search keywords and entry tips
Helpful Settings search keywords:
- "Software Update"
- "Transfer or Reset"
- "Find My"
If labels vary by iPadOS version, look for "Transfer or Reset" under General, and "Find My iPad" under your Apple ID section (or "Apple Account" wording on some versions).
Part 4. How to use, enable, disable, or check iPad Recovery Mode
Safe how-to steps
-
Step 1 Connect iPad to a computer and open Finder/iTunes
On a Mac or Windows PC, open Finder (macOS) or iTunes/Apple device management app (Windows setup varies), then connect the iPad with a USB cable.
-
Step 2 Enter Recovery Mode using the force-restart buttons
Force-restart the iPad and keep holding the required button until the Recovery Mode screen appears (the exact button depends on whether your iPad has a Home button).
-
Step 3 Try Update first
When prompted on the computer, choose Update first to reinstall iPadOS without erasing data when possible.
-
Step 4 Use Restore if Update fails
If Update fails or the iPad can’t be repaired, choose Restore (this can erase the iPad and may require Apple ID verification afterward).
-
Step 5 Exit Recovery Mode (when possible)
To exit Recovery Mode without restoring (when possible), disconnect the iPad and force-restart it again.
Official help resources
If you’re unsure which buttons apply to your iPad model or you see repeated restore errors, use the Apple Support app or contact Apple Support for model-specific guidance and service options.
Part 5. Requirements and compatibility
Quick compatibility table
| Requirement | What it means in practice | Notes / limitations |
|---|---|---|
| Supported devices | iPad models that can connect to a Mac/PC via USB | Button steps vary by model (Home button vs no Home button) |
| Computer platform | macOS (Finder) or Windows (iTunes/Apple device management) | Windows tools vary by Windows version and installed apps |
| Account sign-in | Apple ID may be required after restore (Activation Lock) | If Find My was on, you must sign in with the prior Apple ID |
| Required toggles | Find My affects post-restore activation | Turning off Find My requires Apple ID password beforehand |
| Connectivity | USB connection; internet usually needed for firmware download | Slow/unstable internet can cause download or verification failures |
| Offline behavior | Limited | Without internet, firmware download/verification may not complete |
| Notable limitations | Update may fail; Restore can erase data | Recovery Mode doesn’t guarantee data preservation |
Notes and caveats
Exact prompts and tools depend on your iPad model, iPadOS version, and whether you’re using macOS or Windows. "Update" is the safer first attempt, but it’s not always available or successful. "Restore" is more drastic and can trigger Activation Lock, so it’s important to have the correct Apple ID credentials (or proof of ownership for official support).
iPad Recovery Mode vs related concepts
Key differences
| Concept | Purpose | Where it appears | Dependencies | Common confusion |
|---|---|---|---|---|
| Recovery Mode | Repair/reinstall iPadOS via a computer when iPad won’t boot or update | Recovery screen + Finder/iTunes prompt | USB + computer; firmware download | Mistaken for "reset" or DFU Mode |
| DFU Mode | Deeper restore state used for advanced recovery when Recovery Mode fails | Black screen while connected to computer | Very model-specific timing; computer required | Confused as "better Recovery Mode" (it’s riskier and less user-friendly) |
| Reset (in Settings) | Erase settings/content from within iPadOS | Settings app | iPad must boot normally | Confused with Recovery Mode; doesn’t help if iPad won’t start |
| Force restart | Restart iPad when frozen | Physical buttons | No computer required | Confused with Recovery Mode entry |
When readers confuse them
- Thinking Recovery Mode is a setting you "turn on" inside the Settings app.
- Assuming "Reset" and "Restore" mean the same thing (Restore is typically computer-driven and can be more complete).
- Using DFU Mode unnecessarily when Recovery Mode and Update would be safer.
- Expecting Recovery Mode to remove Apple ID/Activation Lock (it does not).
Part 7. Common issues and misconceptions
Symptom → likely reason → what to check
- iPad keeps returning to the recovery screen → Update didn’t complete or the cable/port is unstable → Try a different cable/USB port, ensure the computer stays on, and attempt Update again before Restore.
- Computer doesn’t detect the iPad in Recovery Mode → Driver/software issue or bad connection → Update Finder/iTunes/device app, reboot the computer, and try another USB port/cable.
- Restore/update fails with repeated errors → Download/verification problems or storage/firmware mismatch → Check internet stability, free disk space on the computer, and try again later.
- After restore, iPad asks for someone else’s Apple ID → Activation Lock is enabled → You need the original owner to remove the device from their account, or pursue official ownership support.
- "Recovery Mode will fix hardware problems" → Software tools can’t repair failed hardware → If issues persist after a clean restore, consider battery/logic board/service diagnosis.
When Dr.Fone can help
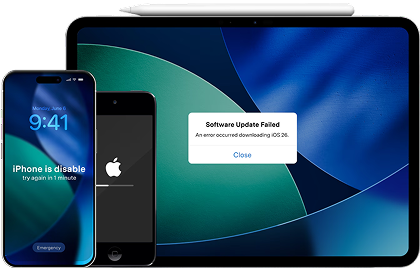
If your iPad is stuck in a boot loop, frozen on the Apple logo, or repeatedly failing updates, a dedicated repair workflow can sometimes resolve iPadOS system faults more smoothly than repeated restore attempts. Dr.Fone - System Repair (iOS) is designed for legitimate system-repair scenarios like startup issues, update failures, and iPadOS instability.
 Fix iOS issues, no data loss.
- One-click repair for all iOS problems.
- Solve recovery mode, Apple logo, black screen, etc.
- Upgrade or downgrade iOS without iTunes
-
Step 1 Install Dr.Fone and open System Repair
Install Dr.Fone on a computer and open System Repair, then connect the iPad via USB.
-
Step 2 Choose the iPad repair option and download firmware
Select the iPad/iPadOS repair option and follow the guided prompts to download the appropriate firmware package.
-
Step 3 Run the repair and try setup/update again
Start the repair process and, once complete, restart the iPad and attempt setup/update again.
- If you can still access the phone (or iPad) settings, back up your data first and try a normal iPadOS update before deeper repair steps.
- If you forgot the passcode, use official Apple account recovery and device erase workflows—expect Activation Lock if Find My was enabled.
- If the device is stuck or unstable, try Recovery Mode Update first, then consider System Repair or official service if problems persist.


Part 8. Security, privacy, and compliance notes
Recovery Mode exists to protect users by offering a controlled, official way to repair iPadOS while preserving Apple’s anti-theft and data-protection systems. It does not remove security protections like Activation Lock, and you should not attempt to bypass Apple ID, MDM, or ownership controls. If an iPad is account-bound (Activation Lock) or managed by an organization (MDM), the correct next step is to contact the original owner or the organization’s IT admin, or work with Apple Support using proof of purchase and ownership documentation.
Conclusion
iPad Recovery Mode is an official Apple troubleshooting state that lets a computer reinstall or restore iPadOS when the iPad can’t boot or update normally. It matters because it can recover a device from serious software failures, though restores may erase data and still require Apple ID verification. If standard Recovery Mode steps don’t resolve persistent system issues, Dr.Fone System Repair can be a practical, legitimate next step for iPadOS repair workflows.
FAQ
-
Q1. Does Recovery Mode erase my iPad?
Not always. Choosing Update in Recovery Mode is intended to reinstall iPadOS without erasing data when possible, while Restore typically erases the iPad and reinstalls iPadOS. -
Q2. Why is my iPad stuck in Recovery Mode?
Common causes include an interrupted update, a failed firmware reinstall, connection problems, or deeper system corruption. Check your cable/USB port, update your computer’s Apple software, and try Update again before moving to Restore. -
Q3. Will Recovery Mode remove Activation Lock or an Apple ID?
No. Recovery Mode can reinstall iPadOS, but it does not remove Activation Lock. If Find My was enabled, you’ll need the Apple ID and password previously associated with the iPad or official proof-of-ownership support. -
Q4. What should I try before using Recovery Mode?
Start with a force restart, ensure the iPad has sufficient battery, free up storage if you can still boot, and try a normal update in Settings > General > Software Update. If the iPad can’t boot or update normally, Recovery Mode is the next official step.
 Add Wondershare Dr.Fone as a preferred source on Google


