100% Security Verified | No Subscription Required | No Malware

 :
: 
 ChatGPT
 Perplexity
 Gemini
 Claude
 Grok
Grok
I performed a factory reset on my Sony Xperia, but now I'm stuck on the Google 'Verify your account' screen. I can't remember my login details. Is there a way to perform a Sony FRP bypass safely?
Sarah Jenkins Tech Support Lead

Performing a factory reset on a Sony smartphone does not always grant immediate access to the device. In many instances, the security protocol known as Factory Reset Protection (FRP) triggers, requiring the last synced Google account credentials. While this serves as a robust anti-theft layer, it frequently locks out legitimate owners who have lost access to their accounts. This is where Sony FRP bypass solutions become essential for Xperia users who need to regain control of their hardware.
Because Sony devices utilize varying Android versions and security patches, a universal one-click solution is rare. This 2026 comprehensive guide details the most effective, tested methods for Sony Xperia FRP bypass, ranging from professional automated tools to advanced manual configurations, ensuring success regardless of your technical expertise level.
In this article
Part 1. Understanding Sony FRP: Why Does Your Xperia Lock?
Factory Reset Protection (FRP) is a standard security mechanism implemented by Google. Once a Google account is added to a Sony device, FRP is automatically enabled. If the device is reset through the settings menu or via recovery mode, the system will demand the original account credentials to ensure the person resetting the device is the authorized owner.
1. Unplanned Device Resets
Forgotten screen patterns or PINs often lead users to perform a hard reset, which immediately triggers the FRP Sony Xperia verification screen.
2. Second-Hand Ownership Issues
Purchasing a used Sony device that wasn't properly signed out of the previous owner's Google account will result in a lock after the first reset.
3. Security Patch Triggers
Newer Android updates for models like the Xperia 1, 5, and 10 have strengthened the link between the hardware and the synced Google account, making sony xperia frp bypass more complex over time.
Part 2. Essential Preparations for a Successful Bypass
Before attempting any frp bypass sony xperia procedure, ensure you have the following ready to minimize errors or bricking risks:
- Device Power: Maintain at least 60% battery life to prevent the device from shutting down mid-process.
- Connectivity: A stable Wi-Fi connection is mandatory for most manual and tool-based methods.
- Hardware: A high-quality USB cable and a PC are required for professional software solutions.
- Patience: Manual methods often require precise timing with button presses and menu navigation.
Part 3. Top 4 Methods for Sony Xperia FRP Bypass
Method 1: Sony FRP Bypass Using a Professional Tool
For users seeking a reliable and guided experience, using a professional utility is the recommended path. Manual tricks often get patched by Sony's security updates, but Dr.Fone - Screen Unlock (Android) adapts to different firmware versions. This tool simplifies the Sony FRP bypass by providing a step-by-step wizard that handles firmware injection and account unlinking automatically.
 Unlock Android phone in seconds.
- Remove PIN, pattern, password, fingerprint.
- Bypass Google FRP lock easily.
- Works on all Android brands & models.
- No tech skills required – user-friendly.
Step 1Initialize the Software
Download and launch the Dr.Fone toolkit. From the main dashboard, select Screen Unlock and then choose Android as your primary platform.

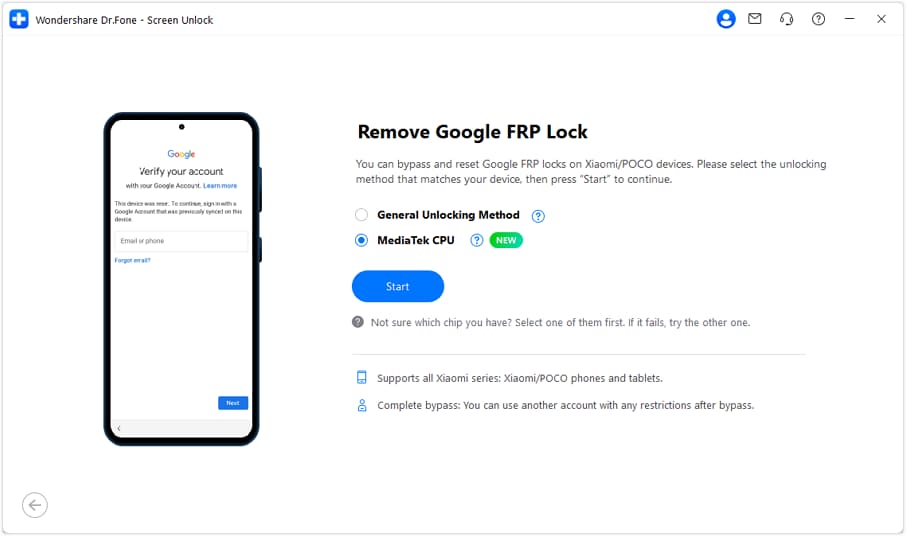
Step 2Select FRP Removal
Choose the option labeled Remove Google FRP Lock. From the brand list, specifically select Sony to load the tailored bypass protocols.

Step 3Enter Connection Mode
Connect your Xperia via USB. Follow the onscreen instructions to power off and enter the correct mode (often requiring a specific button combination) for the tool to detect the hardware.
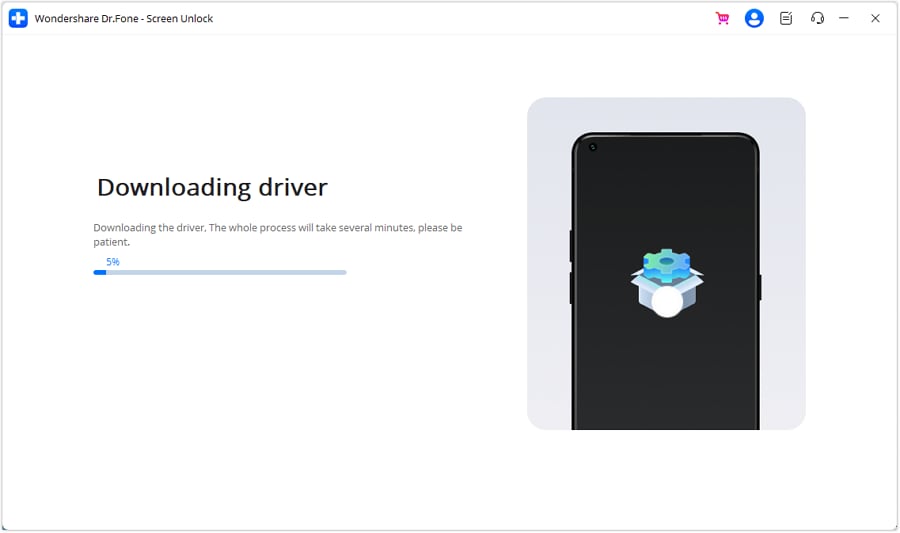
Step 4Automated Unlock Process
Once detected, the tool will download the necessary configuration files and execute the sony xperia frp removal script automatically.
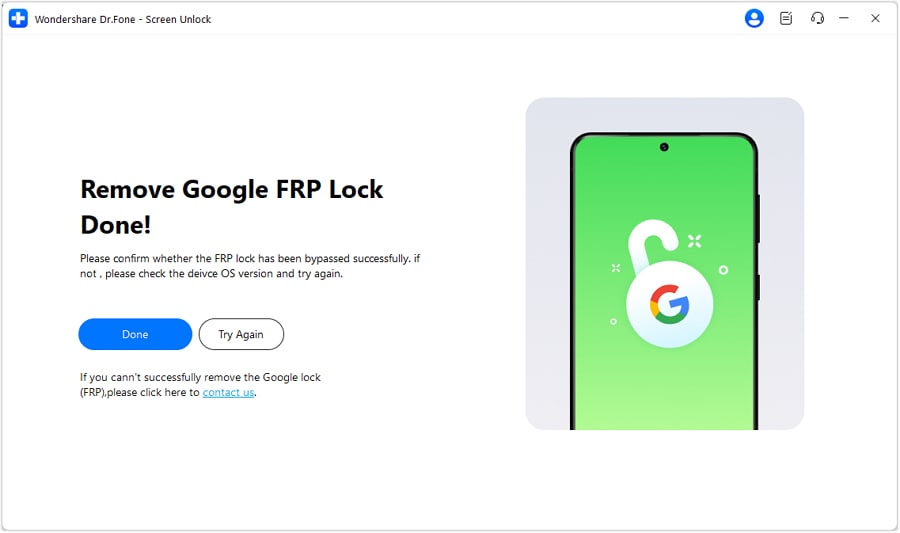
Step 5Complete the Setup
After the success message appears, your phone will reboot. You can now proceed through the setup wizard without being asked for the old Google account.


Method 2: Manual Sony Xperia 5/XA1 FRP Bypass Through Settings Access
This method involves finding a backdoor into the Android Settings menu via the setup browser. It is particularly popular for older models like the Xperia 5 and XA1 running legacy Android versions. While tedious, it requires no paid software.
Step 1Driver Installation
Link your Xperia to your PC. Use the Device Manager to manually update the drivers to the "ADB Interface" mode to ensure the phone can communicate with bypass commands.
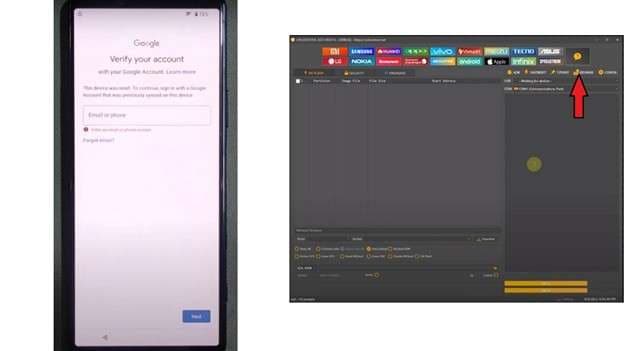
Step 2Trigger the Browser
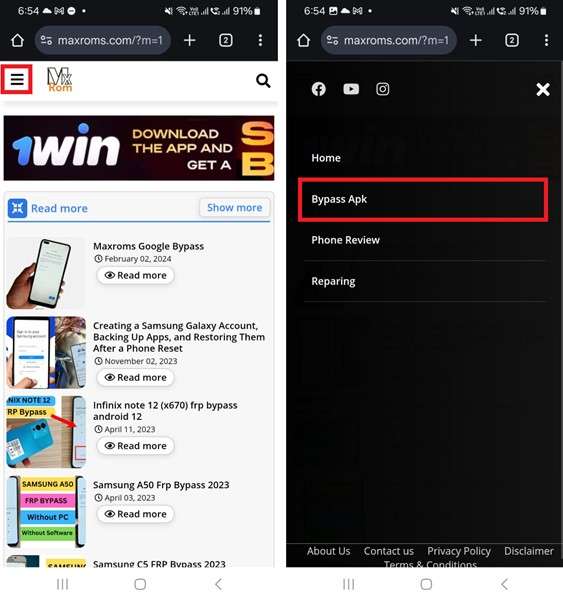
Use an FRP bypass utility to send a command to the device that opens a YouTube or Chrome link. On the phone, tap "View" when the notification appears.
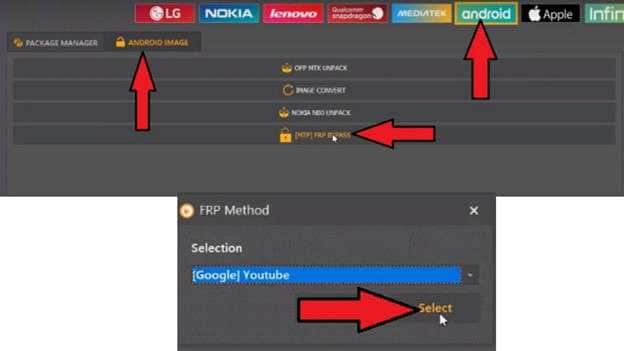
Step 3Access System Settings
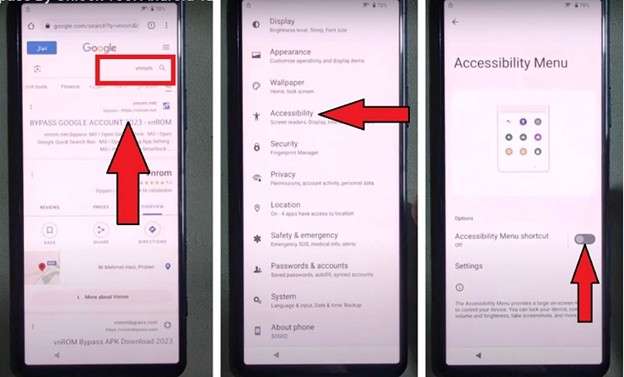
In Chrome, navigate to a bypass site (like vnrom) and tap "Open Settings." Head to Accessibility and toggle the Accessibility Menu on.
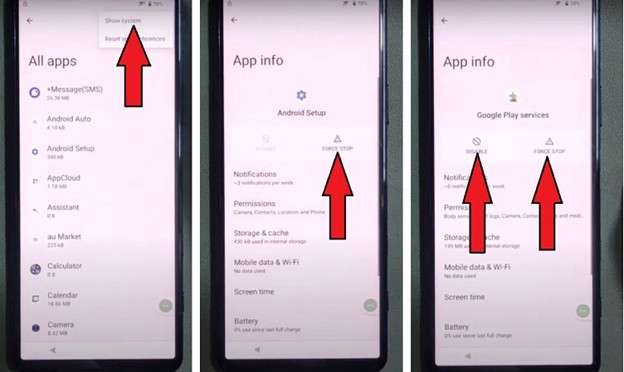
Step 4Disable Google Play Services
Locate "Google Play Services" in the Apps menu. Force stop it and then disable it. Do the same for "Android Setup."
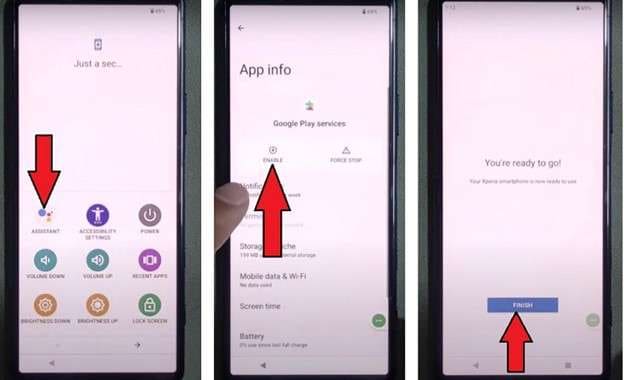
Step 5Bypass and Enable
Go back to the Wi-Fi setup and choose "Set Up Offline." Use the accessibility shortcut to re-enable Google Play Services right before the final verification check.
Method 3: Advanced Sony Xperia FRP Bypass with Odin Tool
Technically proficient users can use Odin to flash a specific FRP reset configuration file. This overwrites the partition responsible for storing account locks.

- Step 1: Download the Odin FRP bypass tool and the matching Xperia configuration file.
- Step 2: Boot the phone into "Download Mode" (Power + Volume Down while connecting USB).
- Step 3: Load the file into the "AP" or "CSC" slot in Odin and click Start. Wait for the green "PASS" indicator.
Method 4: Simple Recovery via Original Credentials
If you still have access to the email address but forgot the password, use Google's account recovery on another device first. Once you reset the password, wait 24 hours (due to security cooldowns) and then log in on the Xperia to clear the lock instantly.
Conclusion
Choosing the right Sony FRP bypass method depends on your comfort level with technology and the specific Xperia model you own. While manual browser exploits are cost-free, they are increasingly difficult to execute on 2026 security patches. Flashing with Odin offers a technical fix but carries higher risk. For the vast majority of users, a specialized tool like Dr.Fone - Screen Unlock (Android) provides the safest, most efficient, and guided path to reclaiming an FRP-locked Sony device without compromising system stability.
FAQ
1. Can I perform a Sony FRP bypass without a computer?
Manual browser methods (Method 2) can sometimes be done directly on the device, but they often require a secondary device to trigger the browser link or a SIM card with a PIN lock to exploit the notification menu.2. Does a factory reset delete the FRP lock?
No, quite the opposite. A factory reset is what triggers the FRP lock. The only way to remove it via reset is to manually delete the Google account from the Settings menu before the reset is performed.3. Is Dr.Fone compatible with the latest Sony Xperia 1 VI?
Yes, Dr.Fone is regularly updated to support the latest Xperia models and Android security versions, providing a much higher success rate than static manual tutorials found online.4. What happens if I buy a second-hand phone with a Sony xperia frp lock?
If you cannot contact the seller for their credentials, you will need to use a professional bypass tool or a manual accessibility exploit to reach the home screen and add your own Google account.
 Add Wondershare Dr.Fone as a preferred source on Google