Resolve common problems and system crashes on both iPhone and Android devices.

 100% Security Verified | No Subscription Required | No Malware

 :
: 
 ChatGPT
 Perplexity
 Gemini
 Claude
 Grok
Grok
Recovery Mode is a crucial failsafe for fixing major iOS issues, but what happens when your device gets trapped in it? The iPhone Recovery Mode loop is a frustrating problem where your device continuously reboots to the 'Connect to iTunes/Computer' screen, making it completely unusable.
This issue typically arises from a corrupted iOS, a failed software update, or an unsuccessful jailbreak attempt. While it might seem like a critical failure, there are effective ways to resolve it. This guide will walk you through two distinct methods to exit the iPhone Recovery Mode loop, one that protects your data and another that involves a full system restore.
In this article
Part 1: Exit iPhone Recovery Mode Loop Without Losing Your Data
When your priority is to save your photos, messages, and other important files, using a specialized third-party tool is the most reliable approach. We recommend Dr.Fone - System Repair (iOS) as an efficient solution designed to fix a wide range of iOS system problems, including being stuck in a recovery loop, without erasing your device's data.
Dr.Fone provides a user-friendly interface that guides you through the repair process, making it accessible even if you're not tech-savvy. It works by repairing the underlying system files that caused the issue, allowing your iPhone to boot up normally.
 Fix iOS issues, no data loss.
- One-click repair for all iOS problems.
- Solve recovery mode, white Apple logo, black screen, etc.
- Upgrade or downgrade iOS without iTunes
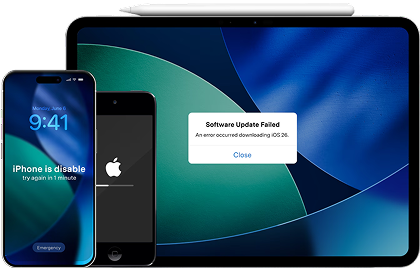
Follow these steps to safely exit the Recovery Mode loop:
-
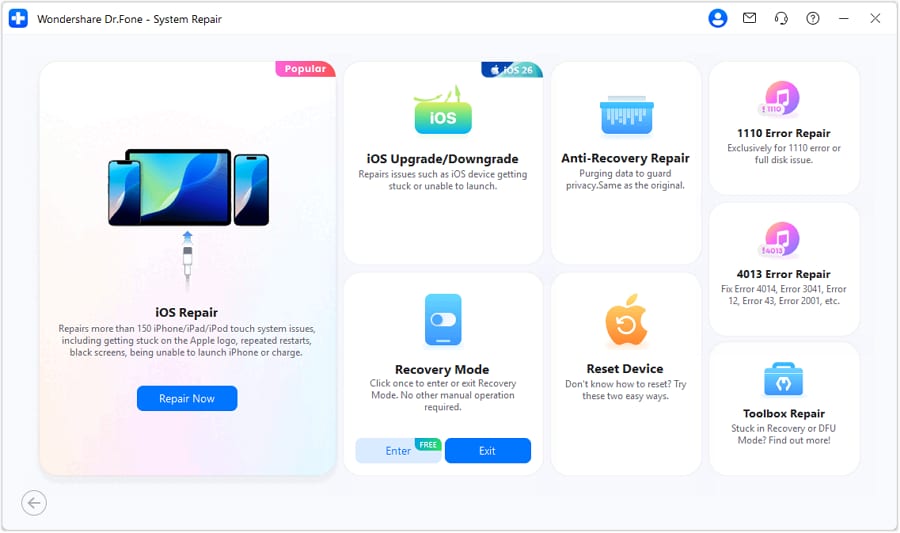
Step 1 Launch Dr.Fone and Select System Repair
Download and install Dr.Fone on your computer. Open the application and select "System Repair" from the main dashboard. Connect your iPhone, which is stuck in the recovery loop, to the computer using its original USB cable. Then choose "iPhone" to proceed.

-
Step 2 Choose the Standard Repair Mode
On the next screen, click on "iOS Repair" and then select "Standard Repair." This mode is specifically designed to fix most common iOS issues without causing any data loss.
-
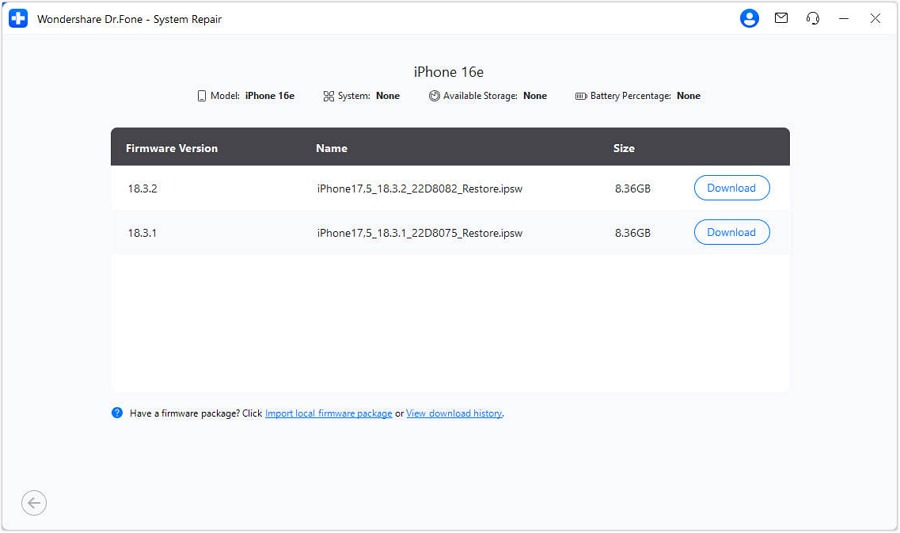
Step 3 Download the Correct Firmware
Dr.Fone will automatically detect your iPhone model and the required iOS firmware version. Verify that the detected information is correct and click the "Download" button to begin downloading the firmware package. This file is essential for repairing your device's operating system.
-
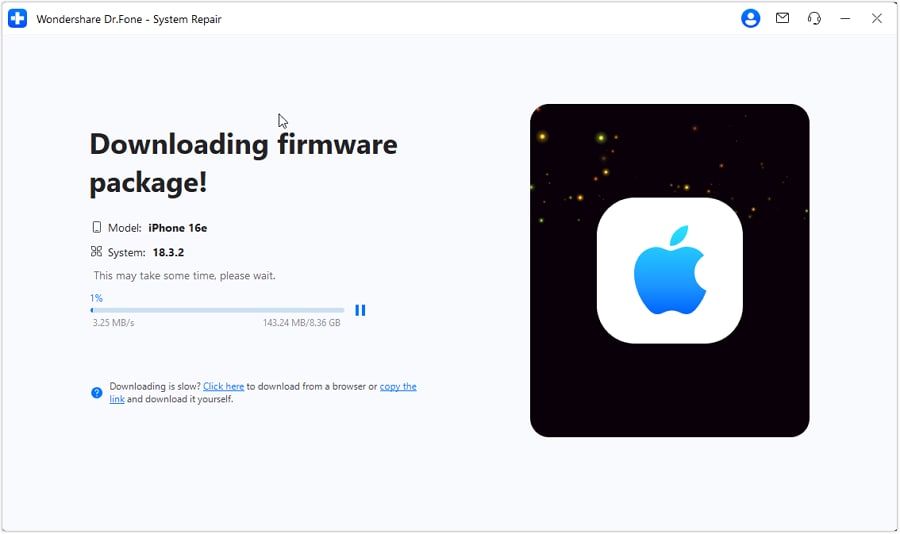
Step 4 Start the Repair Process
The download process may take a few minutes depending on your internet connection. Please wait patiently for it to complete.
-
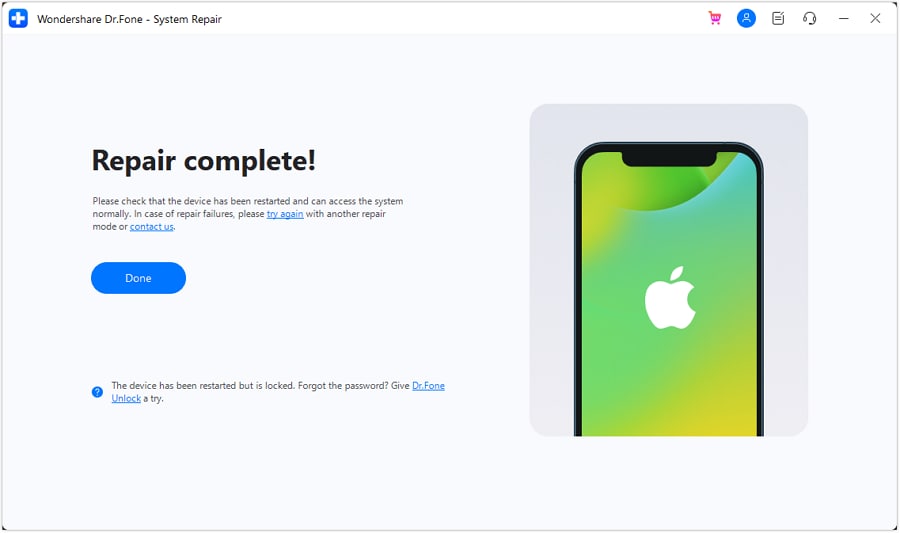
Step 5 Exit the Recovery Mode Loop Successfully
Once the firmware is downloaded and verified, Dr.Fone will automatically start repairing your iPhone's system. After the process is complete, your iPhone will restart in normal mode, free from the Recovery Mode loop, with all your data intact.
Part 2: Get Your iPhone Out of Recovery Mode Using iTunes/Finder
If you prefer using Apple's official method, you can use iTunes (on Windows or older macOS) or Finder (on macOS Catalina and newer) to restore your iPhone. However, it is critical to understand that this method will erase all data and settings on your device. It's only recommended if you have a recent backup or if you don't mind losing your data.
-
Step 1 Connect Your iPhone to the Computer
Use a genuine Apple USB cable to connect your iPhone (stuck in Recovery Mode) to your computer. Ensure you have the latest version of iTunes or your macOS is up-to-date.
-
Step 2 Locate Your Device in iTunes/Finder
Launch iTunes or Finder. A message should appear stating, "There is a problem with the iPhone that requires it to be updated or restored." If iTunes doesn't open automatically, launch it manually.
-
Step 3 Choose to Restore the iPhone
In the pop-up window, you will be given two options: "Update" or "Restore." While updating might seem like a good option, it often fails to fix the loop. To resolve the issue definitively, click the "Restore" button. This will erase your device completely.

-
Step 4 Confirm the Restore and Update
iTunes/Finder will then try to connect to the software update server to download the latest iOS for your device.

Click "Restore and Update" on the next confirmation box.

-
Step 5 Agree to Terms and Download iOS
Follow the on-screen prompts by clicking "Next" on the iPhone Software Update window.

Then, click "Agree" to accept the software license terms.

-
Step 6 Wait for the Process to Finish
iTunes/Finder will now download the latest iOS and install it on your iPhone. Once complete, your device will restart in its factory state, and you can set it up as a new device or restore it from a backup if you have one.

- Official Apple method
- Completely free to use
- Installs a fresh version of iOS
- Erases all data and settings
- Requires a backup to recover data
- The process can fail due to network or server issues
Part 3: Understanding the Difference: Recovery Mode vs. DFU Mode
While dealing with system issues, you may also hear about DFU Mode. It's important to know how it differs from Recovery Mode, as they serve different purposes. DFU mode is a deeper level of restore that bypasses the bootloader, which is sometimes necessary for more complex firmware issues.
| Feature | Recovery Mode | DFU (Device Firmware Upgrade) Mode |
|---|---|---|
| Purpose | Restore or update iOS when the OS is damaged. | Upgrade or downgrade firmware, bypassing the OS and bootloader. |
| Screen Display | Shows a 'Connect to Computer/iTunes' logo. | The screen remains completely black. |
| Detection | iTunes/Finder recognizes the device is in Recovery Mode. | iTunes/Finder detects a device but doesn't specify its state. |
| Bootloader (iBoot) | The iBoot bootloader is active and used for the restore. | The iBoot bootloader is bypassed entirely. |
Conclusion
Facing an iPhone stuck in a Recovery Mode loop can be alarming, but it's a solvable problem. The best method depends on your priority. If preserving your data is paramount, using a reliable tool like Dr.Fone - System Repair (iOS) offers a safe and effective way to exit the loop without any data loss. On the other hand, if you have a backup or don't mind starting fresh, restoring your device with iTunes or Finder is a viable, albeit destructive, free option. Choose the solution that best fits your needs to get your iPhone back in working order.




FAQ
-
1. What causes the iPhone Recovery Mode loop?
The Recovery Mode loop is usually triggered by software-related issues. The most common causes include:• A failed or interrupted iOS update.• Corrupted system files from a faulty software installation.• Issues arising from jailbreaking the device.• Hardware problems, although this is less common. -
2. Will I lose my data if I exit Recovery Mode?
It depends on the method you use. Restoring your iPhone with iTunes or Finder will erase all of your data. However, using a specialized third-party tool like Dr.Fone - System Repair (Standard Repair mode) is designed to fix the system issue and exit Recovery Mode without affecting your personal data. -
3. Can I exit Recovery Mode without a computer?
Unfortunately, no. Exiting Recovery Mode requires connecting your iPhone to a computer. Both the iTunes/Finder method and third-party repair tools need a computer to communicate with the device, download the necessary firmware, and perform the system restore or repair. -
4. Why would I use DFU mode instead of Recovery Mode?
DFU mode is a more advanced restore option used for more severe issues. You would use DFU mode if Recovery Mode fails, or if you need to downgrade your iOS version (not always possible). Since it bypasses the bootloader, it can solve deeper firmware problems that Recovery Mode cannot address. However, it's a more complex process and also erases all data.
 Add Wondershare Dr.Fone as a preferred source on Google