100% Security Verified | No Subscription Required | No Malware

 :
: 
 ChatGPT
 Perplexity
 Gemini
 Claude
 Grok
Grok
In the fast-paced world of mobile technology, a new firmware update often brings excitement with promises of new features and enhanced performance. However, not every update delivers a flawless experience. This can be the case with iOS 27, the latest software release for Apple devices, which has left some users encountering unexpected issues.
If you've updated to iOS 27 and are now dealing with frustrating bugs, rapid battery drain, or app instability, you might be looking for a way to go back. This guide is designed to help you safely delete iOS 27 and revert to a more stable version. We'll explore the safest methods to uninstall the iOS 27 update and restore your iPhone's smooth performance.
In this article
Part 1. 5 Common Reasons to Uninstall iOS 27
Before proceeding with a firmware downgrade, it's helpful to understand why you might need one. While updates are intended to enhance your device, sometimes they introduce new problems. If you've recently upgraded to iOS 27, you might be experiencing issues that make you want to undo the iOS 27 update. Here are five common reasons users decide to revert to a previous version.
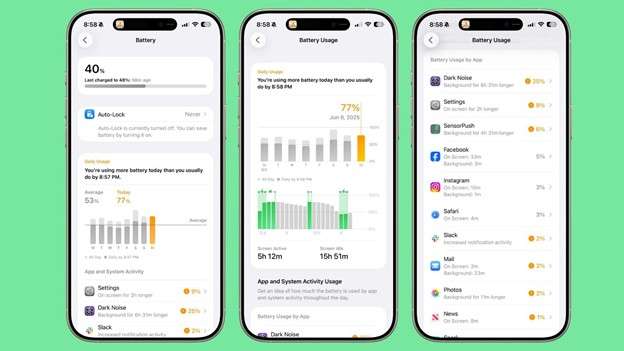
1. Significant Battery Drain
One of the most frequently reported issues after a major iOS update is a noticeable decline in battery life. If your iPhone is dying much faster than it used to, the new software could be the cause. This can disrupt your daily routine and make the update feel like a downgrade in itself.
2. Application Instability and Crashes
With iOS 27 currently in developer beta, many third-party apps haven't been fully optimized yet, leading to frequent crashes, freezing, or failure to launch. When essential daily apps become unreliable, staying on the latest iOS version simply isn't practical.
3. Sluggish Performance and Lag
Instead of the promised speed improvements, your device might feel slower or less responsive after the update. Basic actions like typing, scrolling, or switching between apps can become sluggish, creating a frustrating user experience.

4. Persistent Bugs and Glitches
New software releases often come with unexpected bugs. These can range from minor visual glitches and unresponsive widgets to more severe issues with Wi-Fi or Bluetooth connectivity. While small, these problems can accumulate and significantly detract from the overall usability of your device.
5. Unwanted Feature Changes
Sometimes, an update alters or removes features you've grown accustomed to. A redesigned interface or a change in functionality might not align with your preferences or workflow. If the new changes are more of a hindrance than a help, reverting to a familiar version is a sensible choice.
Part 2. Essential Checklist Before You Remove iOS 27
Before you attempt to downgrade your firmware, there are several crucial steps you must take. Neglecting these preparations can result in data loss, a failed downgrade, or even a bricked device. To ensure the process to remove iOS 27 goes smoothly, follow this checklist carefully to minimize risks and avoid preventable complications.
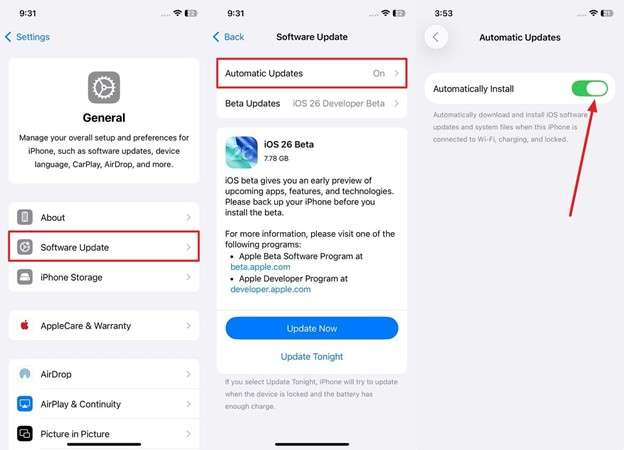
1. Disable Automatic iOS Updates
Your first task is to turn off the automatic updates feature. If enabled, your iPhone might try to reinstall iOS 27 overnight without your consent, undoing all your hard work. Disabling this ensures that once you downgrade, your device remains on the desired stable version.
Instructions: Open the Settings app, go to General > Software Update. Tap on Automatic Updates and toggle off both "Download iOS Updates" and "Install iOS Updates."
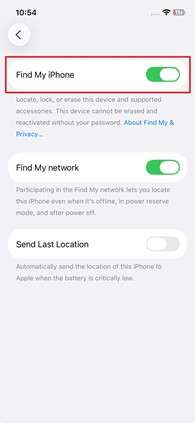
2. Turn Off the 'Find My' Feature
The 'Find My' feature is an essential security tool, but it can interfere with system-level changes like a firmware downgrade. You must disable it before proceeding, as its Activation Lock will block the process to uninstall iOS 27 during security verifications.
Instructions: In Settings, tap your Apple ID at the top, then select Find My. Tap Find My iPhone and toggle it off. You will need to enter your Apple ID password to confirm.
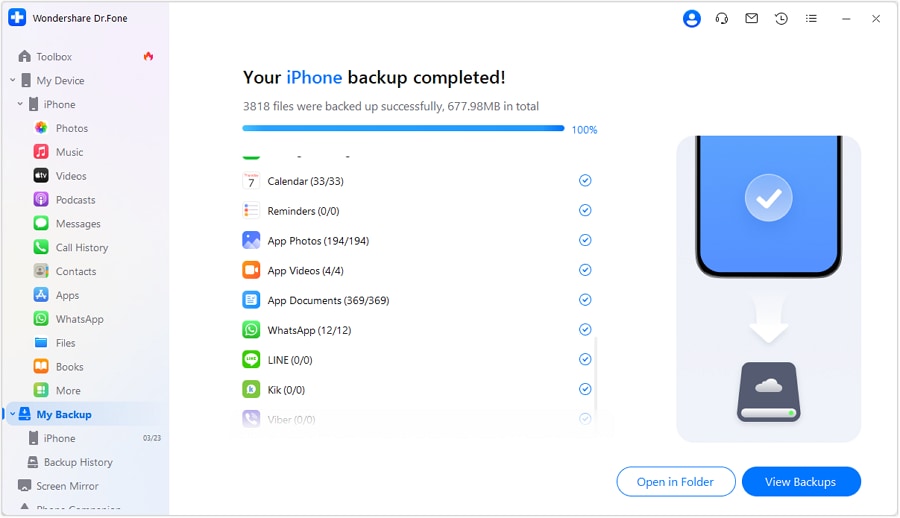
3. Create a Full Backup of Your Device
This is the most critical step. Downgrading iOS will erase all data on your device. While iCloud and iTunes backups are options, they offer limited flexibility. For a more comprehensive and controllable backup, using a tool like Wondershare Dr.Fone is highly recommended.
Dr.Fone allows you to selectively back up your data, whether it's your entire device or just specific files like contacts and photos. It creates backups on your computer, so you're not limited by iCloud storage, and it won't overwrite your previous backup files. It provides a reliable safety net, ensuring your important information is secure before you begin the downgrade.
-
Step 1 Select Data for Backup
After connecting your iPhone, Dr.Fone will detect it. Navigate to the "My Backup" tab. From here, choose the specific data types you wish to save, select a backup path on your computer, and click "Back Up Now."

-
Step 2 Monitor and Complete the Backup
Allow the backup process to complete without interruption. Once finished, you can click "View Backups" to verify that your data has been saved successfully. You can also configure automatic future backups from this screen.


Part 3. The Easiest Way to Delete iOS 27: Dr.Fone – System Repair (iOS)
Once your data is safely backed up, it's time to uninstall the iOS 27 beta. Instead of navigating complex manual procedures that carry a high risk of error, a specialized tool can make the process safe and simple. Dr.Fone - System Repair (iOS) is designed specifically for tasks like this.
This powerful software provides a guided workflow to help you delete iOS 27 and return your iPhone to a stable, signed iOS version. It handles all the technical details, so you don't need to manually find firmware files or worry about compatibility. Dr.Fone supports a wide range of iOS devices and can fix over 150 system issues, all without jailbreaking your phone or voiding its warranty. It's the most reliable way to undo an iOS update and restore your device's functionality.
 Fix iOS issues, no data loss.
- One-click repair for all iOS problems.
- Solve recovery mode, Apple logo, black screen, etc.
- Upgrade or downgrade iOS without iTunes

-
Step 1 Launch System Repair and Select iOS Downgrade
Open Dr.Fone on your computer, go to the "Toolbox," and select "System Repair." Choose "iOS" as your device type and then click on "iOS Upgrade/Downgrade."

-
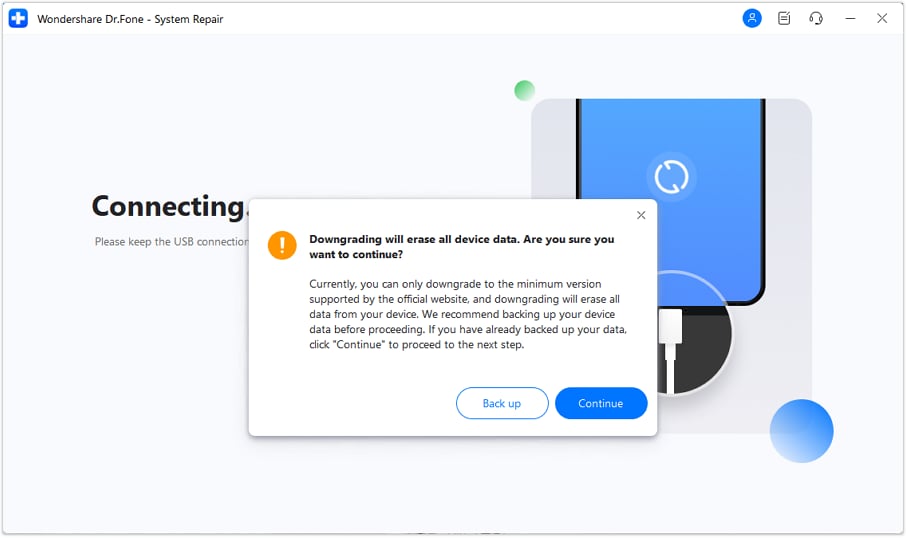
Step 2 Choose the Downgrade Option and Connect Your Device
On the next screen, select "Downgrade iOS." Connect your iPhone to the computer with a reliable cable. The software will prompt you to back up your device; click "Continue" if you have already done so.
-
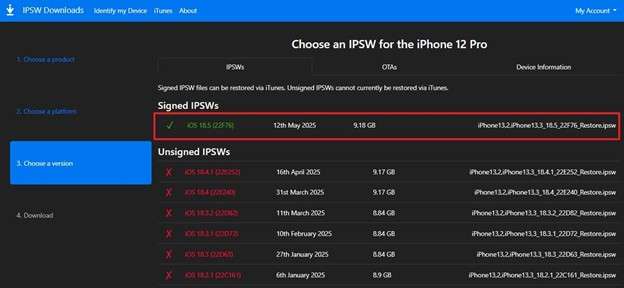
Step 3 Select and Download the Desired Firmware
Dr.Fone will detect your device and display a list of available (signed) iOS versions you can downgrade to. Choose the version you want and click "Download" next to it. Wait for the firmware to be downloaded and verified.

-
Step 4 Initiate the Downgrade Process
Once the firmware is ready, click "Repair Now" to begin the downgrade. The process will take some time, so ensure your device remains connected. When it's finished, a completion screen will appear. Click "Done," and your iPhone will restart with the older, stable iOS version installed.

Part 4. How to Manually Remove iOS 27 Beta Using an IPSW File
For those who prefer a manual approach, it is possible to revert to a stable firmware version using iTunes (on older macOS/Windows) or Finder (on newer macOS). This method requires you to download a signed IPSW file for your specific device model. While effective, this process is more technical and guarantees data loss. Follow these steps carefully to remove the iOS 27 beta manually.
-
Step 1 Download the Correct IPSW File
First, find and download the correct signed IPSW file for your iPhone model corresponding to the iOS version you want to downgrade to. Ensure it is from a reputable source. Launch the latest version of iTunes or Finder on your computer.
-
Step 2 Put Your iPhone into Recovery Mode
Connect your iPhone to your computer. Then, enter Recovery Mode: quickly press and release the Volume Up button, then the Volume Down button. Finally, press and hold the Side button until you see the Recovery Mode screen on your iPhone.

-
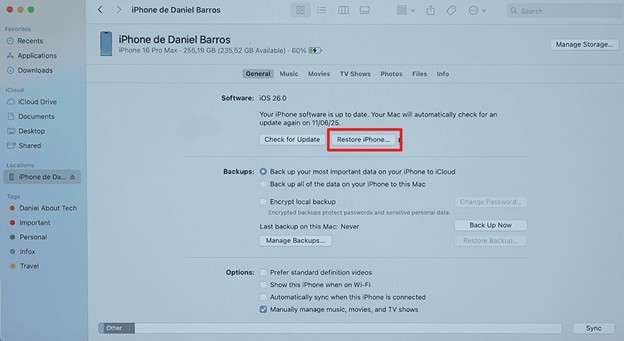
Step 3 Restore Your iPhone with the IPSW File
In iTunes or Finder, a dialog box will appear. Hold down the Shift key (on Windows) or the Option key (on Mac) and click the "Restore iPhone" button. A file browser will open. Select the IPSW file you downloaded earlier and allow the program to restore your device. This will erase your phone and install the selected iOS version.
Conclusion
Deciding to delete iOS 27 can seem daunting, especially if you're not accustomed to managing system software. However, when your device's performance is compromised, returning to a more stable version is often the best solution. With the right tools and preparation, the process is entirely manageable and safe.
Before you begin, remember that backing up your data with a reliable tool like Dr.Fone is essential to prevent loss. When you're ready to proceed, Dr.Fone - System Repair (iOS) offers a clean, straightforward, and secure way to remove iOS 27. By using these advanced solutions, you can confidently regain control over your iPhone's performance and enjoy a smoother, bug-free experience.
Frequently Asked Questions
-
1. How long do I have to delete iOS 27 before Apple stops signing the older version?
Apple typically allows users to downgrade for a limited time, usually one to two weeks after a new iOS release. During this period, the older firmware is "signed," making it installable. Once Apple stops signing the previous version, you will no longer be able to downgrade using official methods. -
2. Can I downgrade from iOS 27 without using a computer?
No, it is not possible to downgrade iOS without a computer. Apple's official process requires using iTunes or Finder to restore the device with an IPSW file. Third-party tools like Dr.Fone - System Repair also require a computer to manage the firmware installation on your iPhone. -
3. Will downgrading from iOS 27 erase my data?
Yes, downgrading your iOS version will erase all the data on your device. This is why creating a complete backup before you begin is the most critical step. After the downgrade, you can restore your data from the backup you created. -
4. What should I do if I see an error while trying to restore the IPSW file manually?
Errors during a manual restore (like error 4000) often indicate a problem with the IPSW file or its signature. Double-check that you have downloaded the correct file for your specific iPhone model and that the iOS version is still being signed by Apple. If the issue persists, the signing window may have closed.
 Add Wondershare Dr.Fone as a preferred source on Google