Resolve common problems and system crashes on both iPhone and Android devices.

 100% Security Verified | No Subscription Required | No Malware

 :
: 
 ChatGPT
 Perplexity
 Gemini
 Claude
 Grok
Grok
Installing the latest iOS software is usually an exciting process, unlocking new features and enhanced security. However, this excitement can quickly vanish if your iPhone does not turn on after an update is installed. Finding out that your iPhone will not turn on after the update is a highly frustrating scenario, but it is a surprisingly common issue among Apple device owners.
Whether you are testing the latest iOS 18 beta or performing a standard 2026 iOS update, many users report their iPhones are not starting after the update. In this comprehensive guide, we will explore the root causes behind a dead iPhone post-update and walk you through practical, step-by-step solutions to safely restore your device to normal working condition.
In this article
Part 1. Why is My iPhone Not Turning On After the Update?
It's entirely possible that your iPhone won't turn on after the update to a new beta or stable release. Understanding these underlying triggers can help you diagnose what exactly went wrong and fix it more efficiently. Below is a list of the most common reasons:
- Software Glitches: Unexpected software bugs are the primary reason an iPhone does not turn on after an update. These fatal glitches often happen during the installation process, forcing the device's operating system to crash. This is especially prevalent when dealing with beta versions like iOS 18, which lack the stability of public releases.
- Incompatible Applications: Older or unoptimized third-party apps may occasionally conflict with the newest iOS infrastructure. When these applications attempt to refresh in the background during a reboot, they can induce a catastrophic system freeze, leaving your iPhone not working after an update.
- Insufficient Storage Space: A severe lack of storage space during an update sequence is a common culprit. If your smartphone runs out of available memory while unpacking the update files, the installation will abort midway. This corrupted state prevents your iPhone from starting after the update.
- Underlying Hardware Issues: In certain rare situations, the root of the problem might actually involve physical hardware rather than software code. If your iPhone is dead after an update and remains unresponsive to all resets, a damaged battery, malfunctioning logic board, or disconnected display cables might be to blame.
Part 2. How to Fix iPhone Not Turning On After Update
Solution 1. Force Restart Your iPhone
Performing a hard reset is the best initial step if your iPhone won't turn on after the update. This technique is entirely free, forces the hardware to reboot bypassing software blocks, and carries no risk of data loss.
For iPhone 8, iPhone X, and Newer Models:
Step 1 Press Volume Up
Swiftly push and immediately release the "Volume Up" button on the side of your device.
Step 2 Press Volume Down
Swiftly push and immediately release the "Volume Down" button.
Step 3 Hold the Power Button
Press and continuously hold down the Power (Side) button until the Apple logo illuminates on the screen.

For iPhone 7 and iPhone 7 Plus:
Step 1 Hold Key Buttons
Simultaneously press and hold both the Volume Down button and the Power (Side) button.
Step 2 Wait for the Logo
Keep holding both keys until the Apple logo appears, then release them.

For iPhone 6 and Older Generations:
Step 1 Hold Home and Power
Press and hold both the physical Home button and the Power button at the same time for roughly 10 seconds.
Step 2 Release on Boot
Release both buttons the moment you see the Apple logo pop up.

Solution 2. Charge Your iPhone
Occasionally, an iPhone that won't turn on after an update is simply dealing with a completely depleted battery. Software updates consume significant power, which might drain an already low battery to zero.
- Charge your iOS device: Securely connect your iPhone to a reliable power source, such as a high-quality wall adapter or a powered USB port on your computer.
- Wait and observe: Allow the device to charge uninterrupted for at least one to two hours. If it was merely a power deficit, your iPhone should eventually power on or display the charging icon.

Solution 3. Restore the iPhone via iTunes
If hardware resets fail, utilizing iTunes is a potent method to recover your iPhone if it won't turn on after the update. Be strictly warned: this specific method will erase all local files and reset the device to factory settings.
Step 1 Connect Your iPhone
Use an MFi-certified USB cable to link your iOS device to your laptop or desktop, then launch the latest version of iTunes (or Finder on newer Macs).
Step 2 Force Recovery Mode
Follow the specific hardware button combinations for your model (similar to force restarting) but keep holding the final button until the Recovery Mode screen (a computer icon and a cable) appears.
Step 3 Execute the Restore
iTunes will immediately display a prompt stating it has detected an iPhone in recovery mode. Click on "Restore" to authorize the wiping and reinstallation of the iOS system.

By reinstalling a fresh iOS firmware, this process routinely eliminates deep-seated corruption causing my iPhone won’t turn on after an update.
Solution 4. Use Recovery Mode via Third-Party Tools
When the standard Apple methods fail and your iPhone won’t turn on after an update, utilizing dedicated recovery software like Dr.Fone – System Repair (iOS) offers a streamlined alternative to iTunes.
- Install the Software: Download and install Dr.Fone on your Windows or Mac computer.
- Link the Device: Connect your dead iOS device using a reliable USB cable.
- Trigger Recovery Mode: Use the built-in "Enter Recovery Mode" feature within the software dashboard to automatically push your phone into the correct state.
- Fix the Core System: Once recognized in recovery mode, allow the software to diagnose and seamlessly repair the operating system.
Solution 5. Contact Apple Support 
If exhaustive software troubleshooting yields no results and your iPhone is not turning on after an update, you are likely facing physical hardware failure. In this scenario, professional intervention is mandatory.
Step 1 Book an Appointment
Navigate to the official Apple Support website or use the Apple Support app to schedule a Genius Bar visit at your local Apple Store.
Step 2 Explain the Context
Bring your device and any relevant accessories. Clearly explain that your iPhone is not turning on after the update was downloaded and installed, detailing the troubleshooting steps you've already attempted.
Step 3 Professional Diagnostics
Apple technicians have specialized diagnostic tools to determine if a fried logic board, dead battery cell, or screen failure is why your iPhone won’t switch on after an update.
Solution 6. One Click to Fix iPhone Not Restarting Without Data Loss
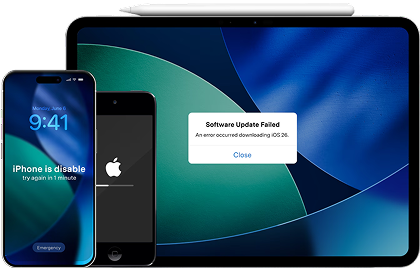
For users who want to avoid the data loss associated with an iTunes restore, utilizing Wondershare Dr.Fone represents the safest and most reliable technique. The advanced Dr.Fone - System Repair (iOS) utility is explicitly engineered to resolve complex update failures, boot loops, black screens, and devices stuck on the Apple logo. Crucially, it reinstalls the iOS framework while meticulously preserving all your personal photos, contacts, and app data.
 Fix iOS issues, no data loss.
- One-click repair for all iOS problems.
- Solve recovery mode, Apple logo, black screen, etc.
- Upgrade or downgrade iOS without iTunes
Follow these detailed instructions to safely revive your frozen device:
Step 1 Launch the System Repair Tool
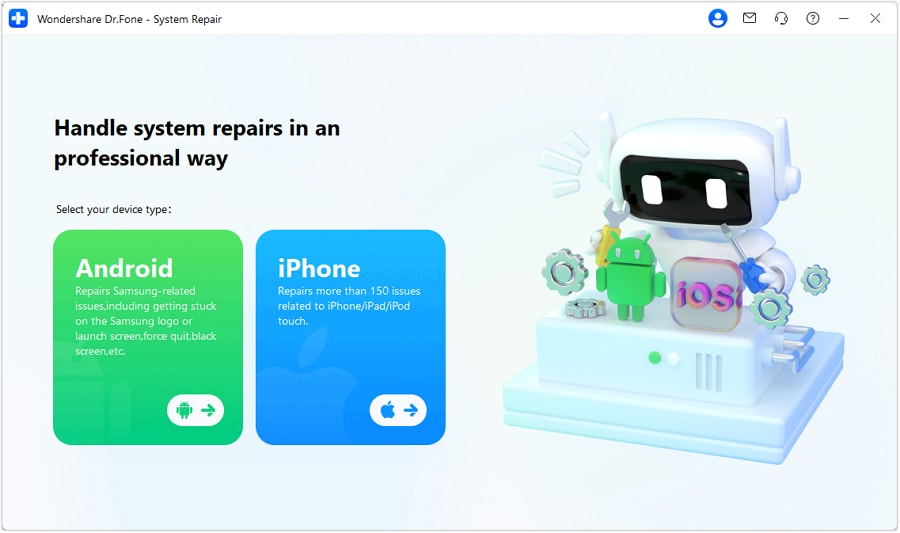
After successfully installing Wondershare Dr.Fone on your computer, launch the application. From the primary interface, click on the "Toolbox" section and select the "System Repair" module.

Step 2 Choose Your Device Type
Connect your unresponsive iOS smartphone to the PC using a USB cable. In the ensuing window, select "iOS" to indicate the correct operating environment for the repair.
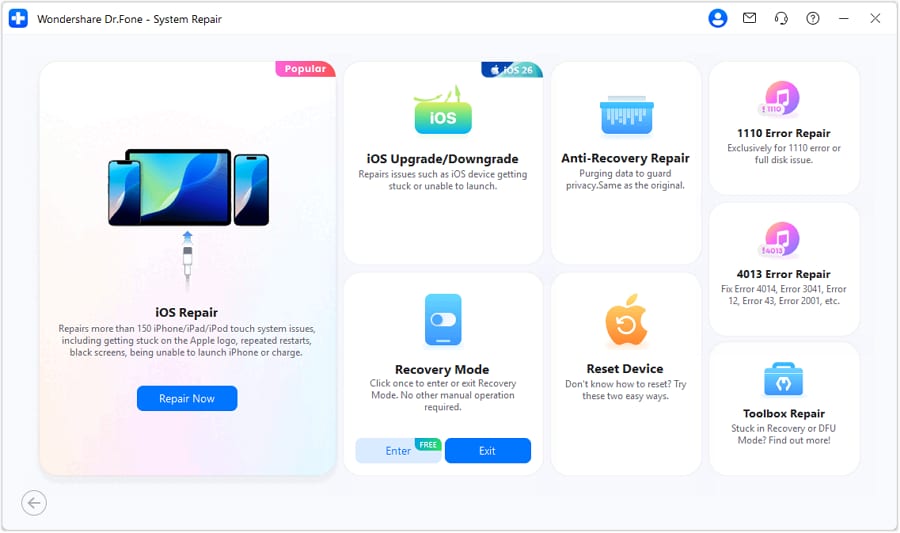
Step 3 Select the Repair Category
Click on "iOS Repair" to proceed specifically with fixing the foundational software glitches causing your update failure.
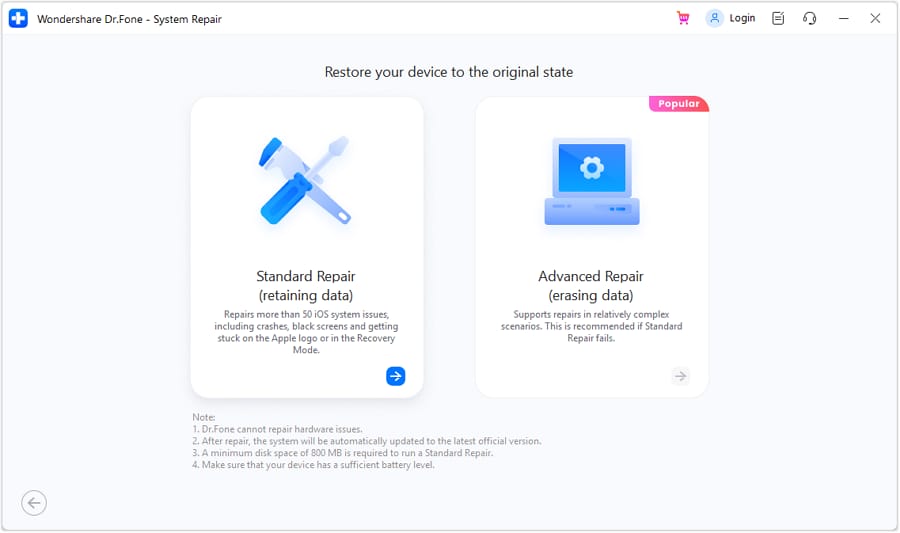
Step 4 Opt for Standard Repair
To guarantee that your device data remains completely intact, strictly choose the "Standard Repair" mode. This mode safely tackles the vast majority of boot loop and black screen issues.
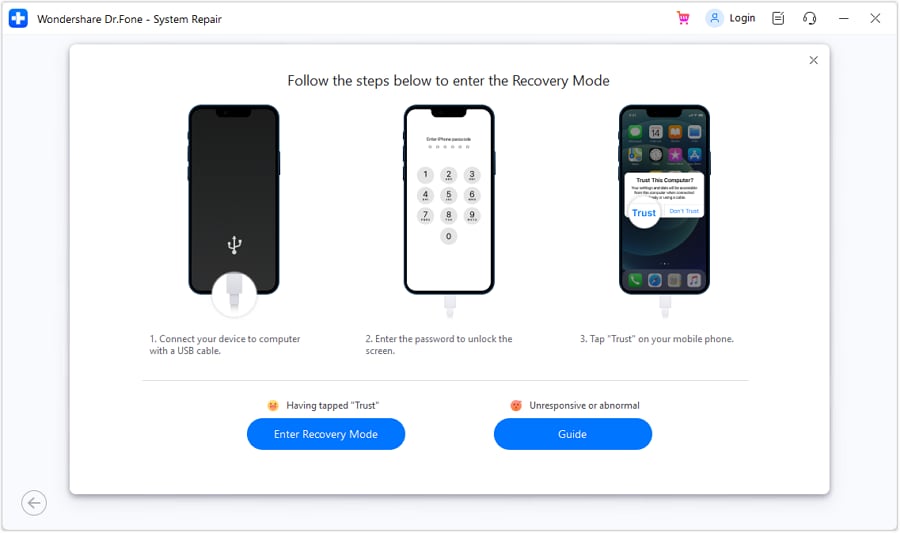
Step 5 Enter Recovery Mode Safely
The interface will prompt you to place your iPhone into Recovery Mode. Follow the customized on-screen graphics tailored to your specific model, then click "Enter Recovery Mode". Use the provided "Guide" button if you struggle with unresponsive keys.
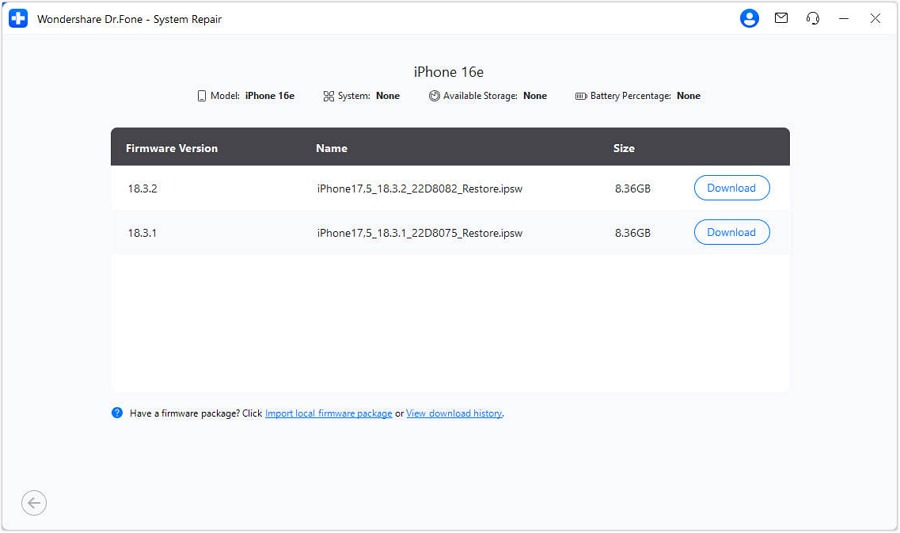
Step 6 Download Official iOS Firmware
Once Dr.Fone successfully detects your device in Recovery Mode, it will fetch the list of compatible, official Apple firmware. Pick the appropriate version and hit the "Download" button.
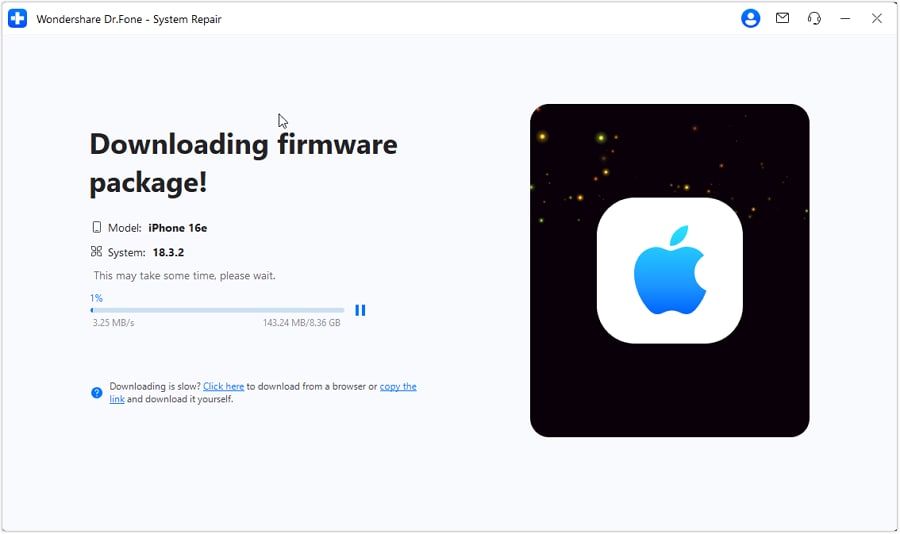
Step 7 Wait for Firmware Verification
The program will quickly download the large firmware package. Afterward, it automatically verifies the digital signature of the file to ensure maximum safety before installation.
Step 8 Execute the System Fix
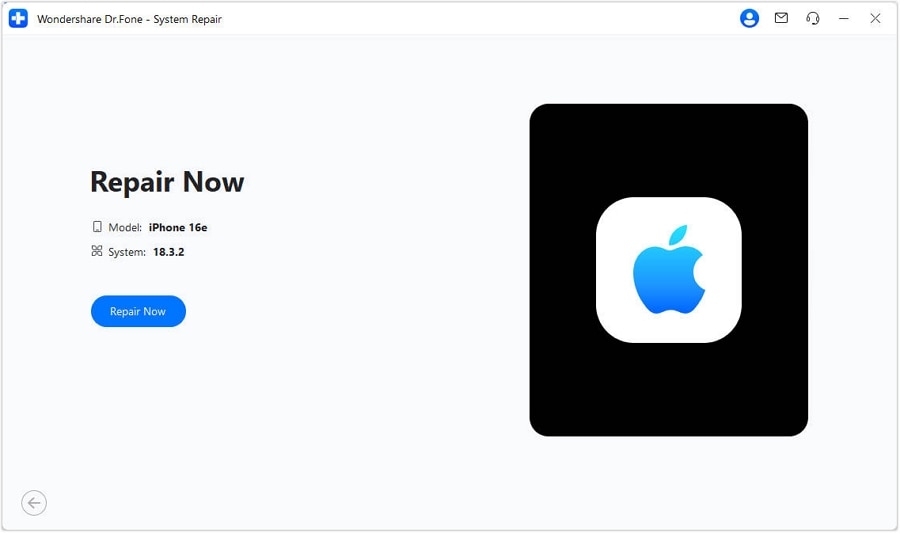
With the firmware verified, click "Repair Now". The software will meticulously overwrite the corrupted OS files with the clean ones.
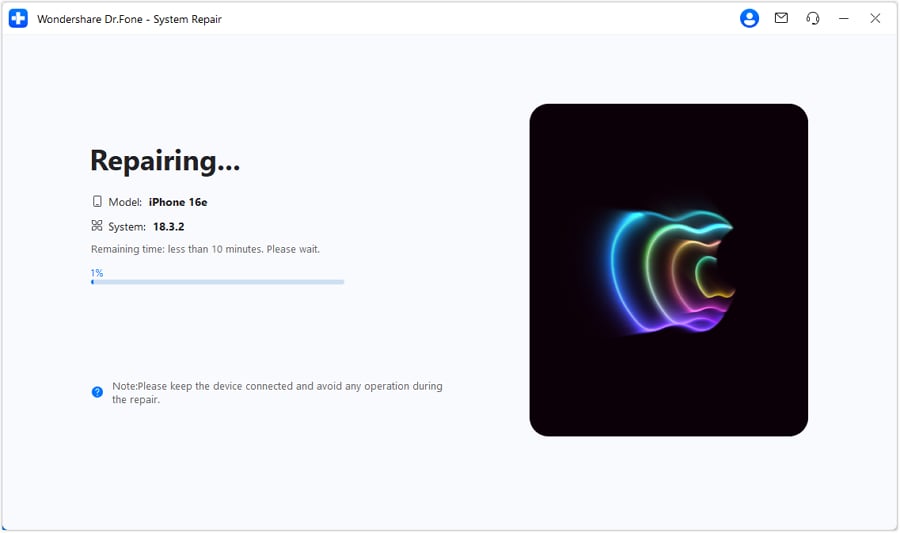
Step 9 Monitor the Installation
Observe the live progress bar and ensure the USB connection remains rock-solid throughout the entire duration.
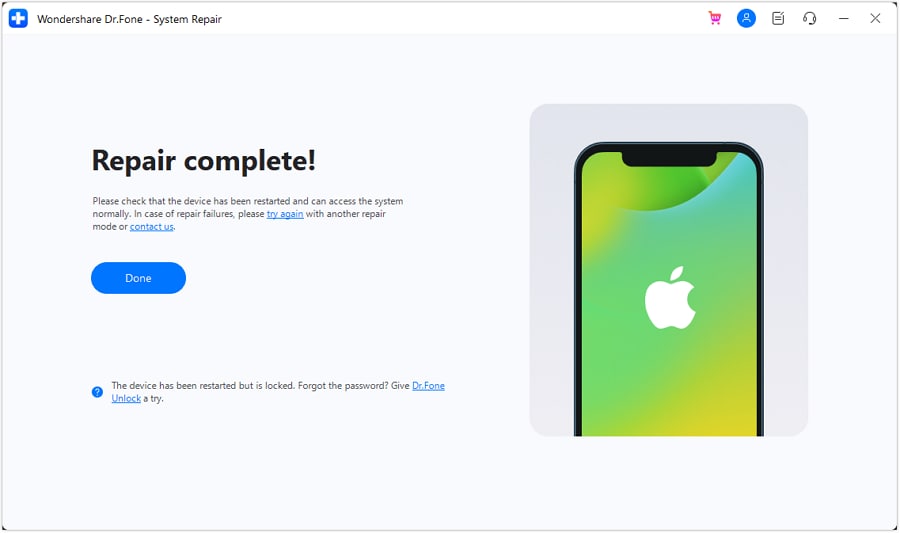
Step 10 Finalize and Reboot
A success prompt will appear upon completion. Click "Done". Your iPhone will automatically restart, ready for use with all data preserved.
Conclusion
Facing a dead screen where your iPhone does not turn on after updating to a beta or official iOS release can be incredibly stressful, but it's rarely a permanent death sentence for your device. As we've detailed, you have a solid arsenal of fixes at your disposal. Starting with a basic force restart or an extended charging session might immediately wake the device. If the corruption runs deeper, relying on a dedicated, data-safe utility like Dr.Fone - System Repair (iOS) serves as the ultimate remedy for resolving why your iPhone not working after the update. Should all software avenues fail, consulting Apple Support remains the definitive safety net. With these solutions, you can swiftly conquer these update hurdles and get back to enjoying the latest iOS capabilities.




FAQ
1. Will I lose my data if I restore my iPhone using iTunes?
If you choose the 'Update' option in iTunes, your data should remain intact. However, selecting 'Restore' will completely erase all data, apps, and settings on your device, returning it to factory conditions.2. Can I use Dr.Fone - System Repair if my iPhone is in a boot loop?
Yes, Dr.Fone - System Repair is specifically designed to fix various iOS issues, including endless boot loops, black screens of death, and devices permanently stuck in recovery mode.3. How long does the repair process take with Dr.Fone - System Repair?
The time required heavily depends on the severity of the system issue and your internet connection speed for downloading the iOS firmware. Generally, the actual repair phase takes about 10-30 minutes.4. What should I do if my iPhone still doesn’t turn on after using Dr.Fone?
If your iPhone remains unresponsive after running a comprehensive system repair, it almost certainly suffers from a physical hardware defect (such as a degraded battery or damaged logic board). In such cases, it is highly recommended to contact Apple Support or visit an authorized service center for professional hardware diagnostics.
 Add Wondershare Dr.Fone as a preferred source on Google