Bypass iCloud Activation Lock and Android FRP without password.

 100% Security Verified | No Subscription Required | No Malware

 :
: 
 ChatGPT
 Perplexity
 Gemini
 Claude
 Grok
Grok
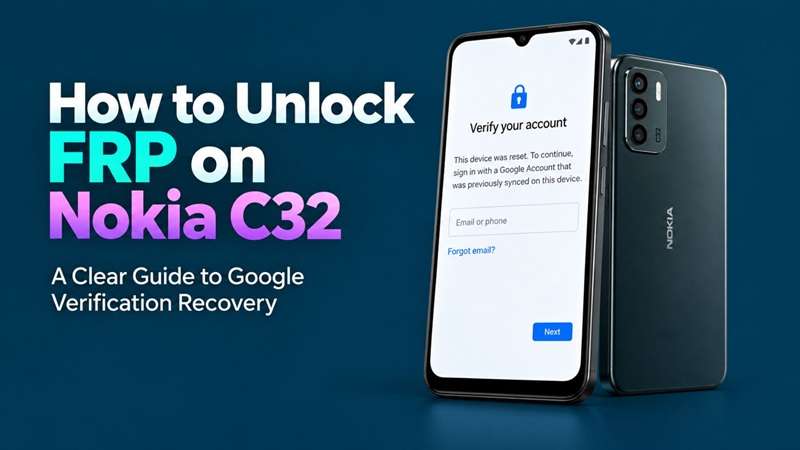
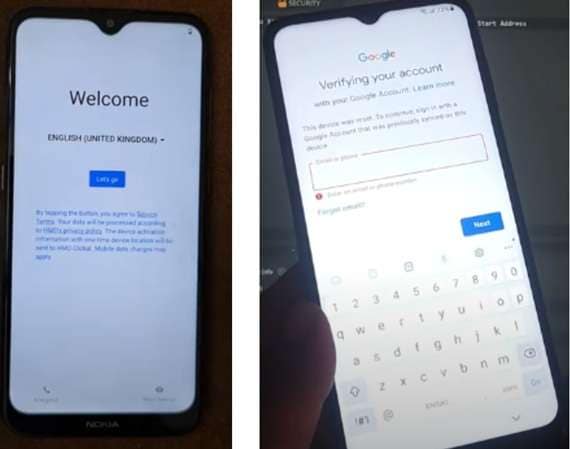
A factory reset can erase a Nokia C32 and still leave the phone unusable at setup. Instead of opening to a clean home screen, it may stop at Google’s “Verify your account” check and ask for an account previously synced with the device. That is Factory Reset Protection, not a failed reset. Similar post-reset verification problems are still reported by Android users, including cases where account recovery has already been attempted.
For a reliable Nokia C32 FRP unlock, the device itself matters. The C32 that released either with or just after Android 13, using a Unisoc-based platform this firmware build, region and security patch can affect which recovery paths remain possible for you.
This guide will help you choose the proper recovery route for the specific Nokia C32 in your hands while steering clear of outdated or chipset-mismatched instructions.
In this article
Part 1. Before You Touch Anything, Identify Your Exact Nokia C32
A Nokia C32 FRP unlock will go smoothly if you know exactly what phone and software you have.
A lot of people fail FRP because they either search for 'Nokia FRP Bypass' or check the first video. Haphazard decision! Nokia phones are powered by Qualcomm, MediaTek, and Unisoc platforms – a history.
For the Nokia C32, check these points first:
- Exact Nokia C32 model or TA number
- Country or regional variant
- Android version
- Firmware/build number, if available
- Security patch level
- Current tool version
- Exact processor family
The Nokia C32 shipped with Android 13 and an octa-core processor running up to 1.6 GHz. Independent hardware references identify that processor as the Unisoc SC9863A family, often listed as SC9863A1.
Why does this matter?
An FRP process written for an older Nokia model could use a completely different chipset. An update may also remove a shortcut that worked six months earlier. Even when a tool supports Unisoc hardware, that does not automatically mean it supports every Nokia C32 firmware.
Part 2. Try the Account Route Before Any FRP Tool
Before attempting a Nokia C32 FRP unlock with third-party software, check whether Google’s own verification can get the phone through setup.
Way 1: Try a Google Account Previously Used on the C32
At the Verify your account screen:
-
Step 1 Connect the Nokia C32 to Wi-Fi.
-
Step 2 Enter a Google Account that was previously added and synced to this phone.
-
Step 3 Enter its current password and continue setup.
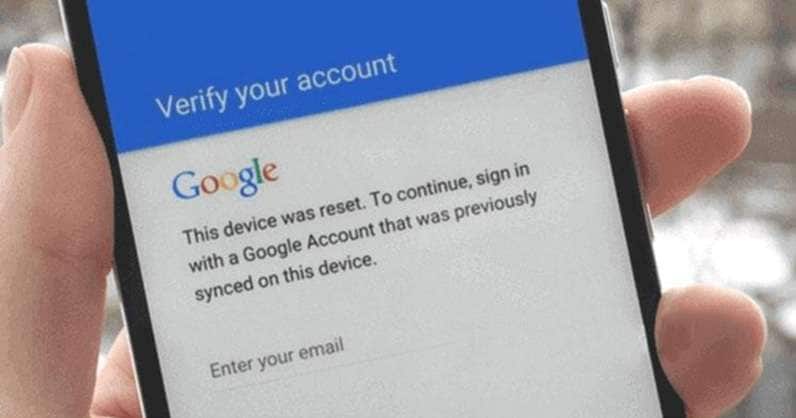
After a protected device is reset, any Google Account previously added and synced to that device can be used for verification. A newly created account will not satisfy FRP simply because it belongs to the current owner.
Way 2: Recover the Account if You Cannot Sign In
If you forgot the email address or password:
-
Step 1 Open Google Account Recovery on another device.
-
Step 2 Answer the verification questions as accurately as possible.
-
Step 3 When possible, use a device and location from which you normally sign in.
-
Step 4 Use the recovery phone number or email already linked to the account.
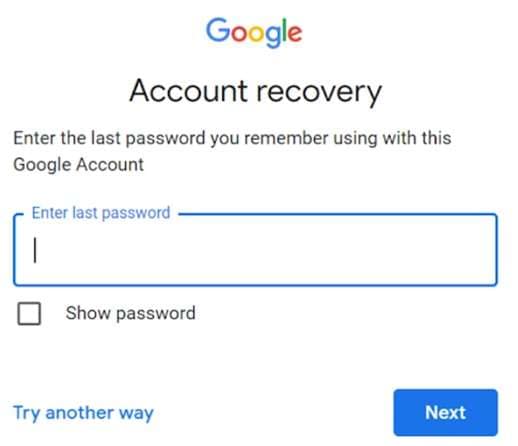
It is specifically recommended trying recovery from a familiar device and usual sign-in location when verification fails.

Way 3: Contact HMD if the Account Route Fails
If you own the phone but cannot complete Google verification, contact HMD support before moving to more technical options.
Keep these details available:
- Nokia C32 model or TA number
- IMEI or serial number
- Proof of purchase, if available
- A clear description of the verification problem
HMD support is an ownership and service route, not a guaranteed FRP-removal service. If official account recovery cannot resolve the lock, the next step is to verify whether a current FRP tool supports the exact Nokia C32 build.
Part 3. Dr.Fone - Screen Unlock (Android) — The Main Guided Option
For users who want a PC-based process instead of searching through random APKs and old YouTube shortcuts, Dr.Fone - Screen Unlock (Android) is the strongest guided consumer option covered in this guide.
Wondershare currently lists Nokia among the Android brands supported by its FRP removal feature. Its general FRP guide also includes Nokia in the supported-brand workflow.
 Unlock Android phone in seconds.
- Remove PIN, pattern, password, fingerprint.
- Bypass Google FRP lock easily.
- Works on all Android brands & models.
- No tech skills required – user-friendly.
Why Dr.Fone Fits a Nokia C32 Recovery Workflow
FRP recovery is often confusing because the correct path depends on the phone, Android build, and hardware.
Dr.Fone reduces that guesswork by providing a guided Screen Unlock interface rather than asking the user to piece together unrelated tricks.
Its current FRP features are built around:
- Dedicated Google FRP removal: Dr.Fone separates FRP recovery from normal PIN, pattern, password, fingerprint, and face-lock removal.
- Nokia is listed as a supported FRP brand: Wondershare’s current support list includes Nokia alongside Samsung, Xiaomi, OPPO, Vivo, Motorola, and other Android brands.
- Support for newer Android versions: Its Android FRP feature supports Android 16 and earlier versions.
- Designed for post-reset account lock cases: Wondershare positions the FRP function for situations such as a forgotten Google account, forgotten credentials, or a used Android phone that remains linked to a previous account.
- No need to confuse FRP with SIM unlocking: Dr.Fone’s Screen Unlock module handles local device locks and Google FRP, not carrier or SIM-network restrictions.
Step-by-step guide to use Dr.Fone Workflow for Nokia FRP
-
Step 1 Open the Screen Unlock Tool
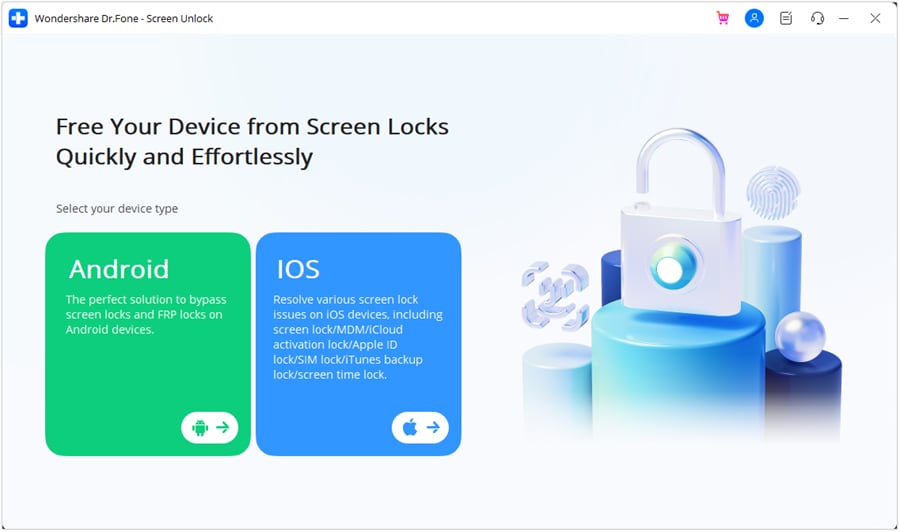
Launch Wondershare Dr.Fone on your computer. Go to Toolbox and select Screen Unlock. When the device type screen appears, choose Android.
-
Step 2 Choose Remove Google FRP Lock
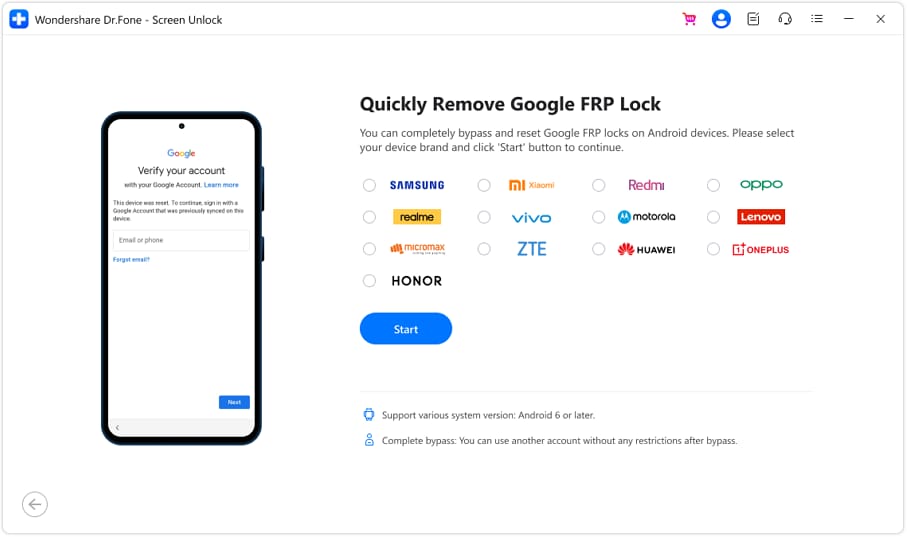
Select Remove Google FRP Lock from the available options. Choose Nokia if it is available for your device.
-
Step 3 Download the Driver and Connect the Phone
Dr.Fone will download the required driver if one is needed. Follow the on-screen connection instructions.
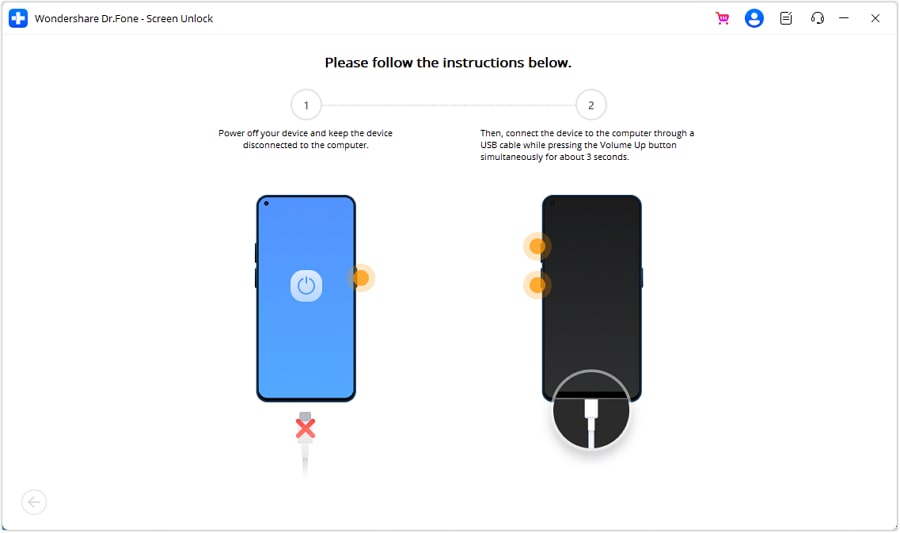
-
Step 4 Follow the On-Screen Nokia FRP Route
Once the phone is connected, follow each instruction in order. Keep the USB connection stable during the process.
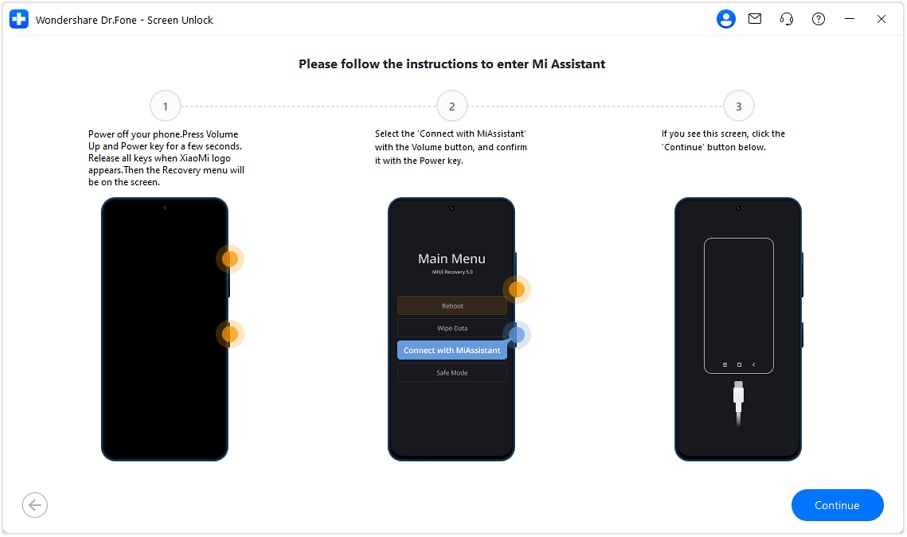
-
Step 5 Remove FRP and Finish Setup
When the FRP process is finished, select Done. Restart the Nokia phone and continue with the Android setup.
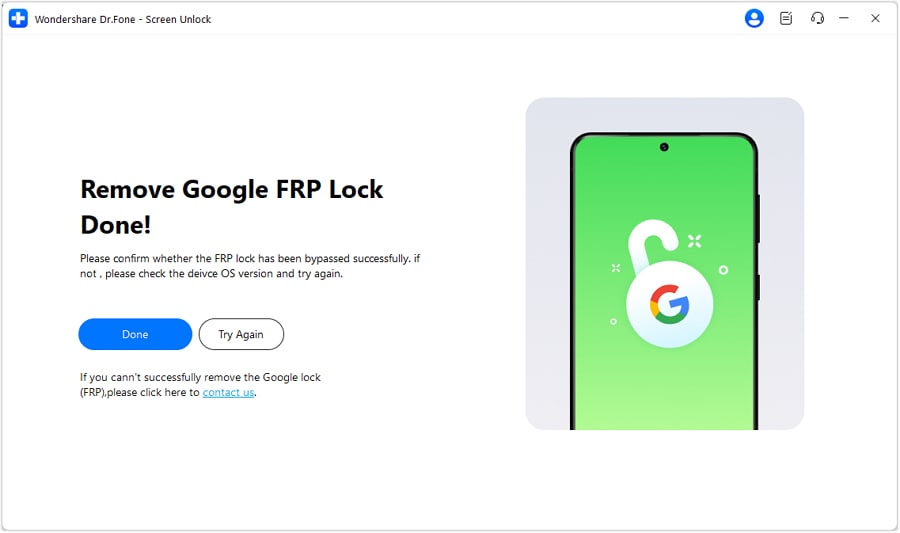




Part 4. When Official Recovery Fails — Professional Unisoc Service Options
If account recovery and guided consumer software do not work with the current C32 build, the next level is professional servicing. Tools such as UnlockTool are commonly used by repair technicians because they work more directly with supported device platforms and service modes.
For the Nokia C32, chipset accuracy is critical. The phone uses a Unisoc SC9863A/SC9863A1 platform, so any technician workflow should match that hardware.
METHOD 1
-
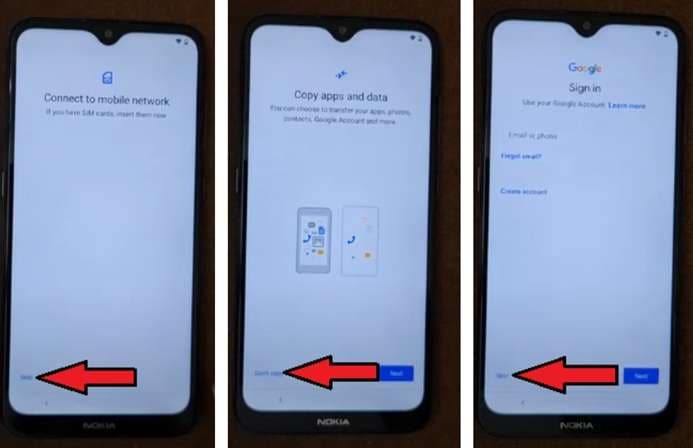
Step 1 You will first be directed to the “welcome” page. At some point on the following pages, you will be asked to verify your Google account, and that is where the Unlock Tool comes in handy.
-
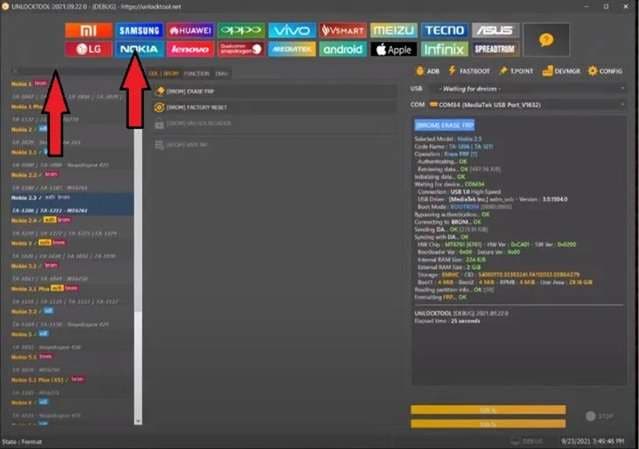
Step 2 Open Unlock Tool on your laptop or PC, select NOKIA as indicated in the image below, and select the model you would like to bypass FRP.
-
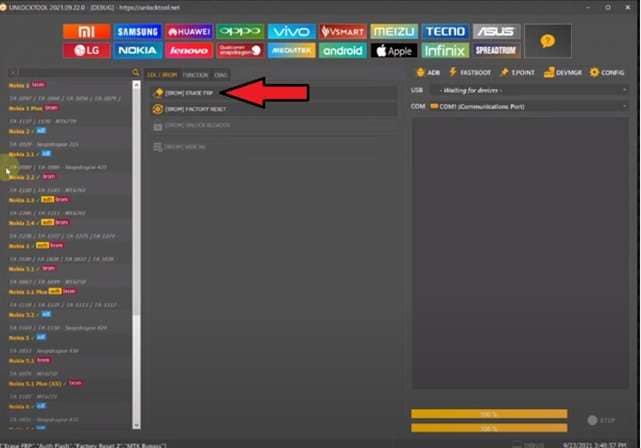
Step 3 Thereafter, connect your Nokia C32 mobile phone to your laptop or PC using a USB cable and click on “ERASE FRP” as shown below.
-
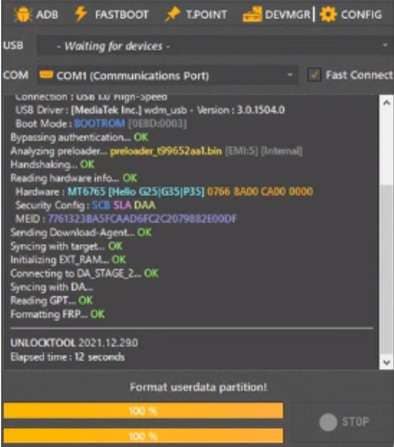
Step 4 Patiently wait for the process to complete and once the process is successful, you should be able to see a dialogue on the right side of your laptop or PC screen as the one indicated below.
-
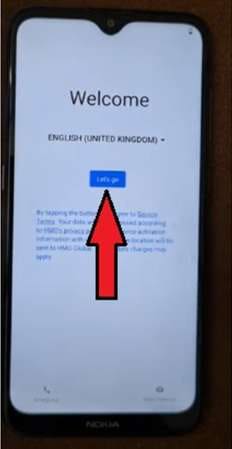
Step 5 You can now unplug your Nokia C32 mobile phone from the USB cable and power it on. Once your device is powered on, you will be directed to the welcome page.
-
Step 6 Just like before, you will skip all the unimportant options and you will be directed to a screen where you are asked to verify your Google account. Click on “Skip” on the bottom left of your screen.
-
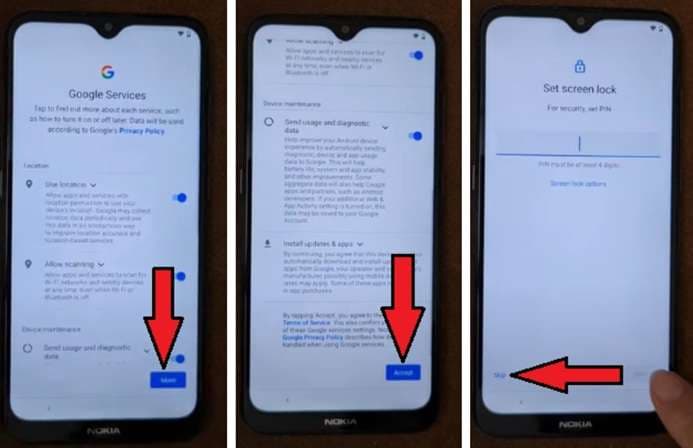
Step 7 Accept the Google Terms of Service, and on the next page, you can decide whether to set the screen lock or skip.
-
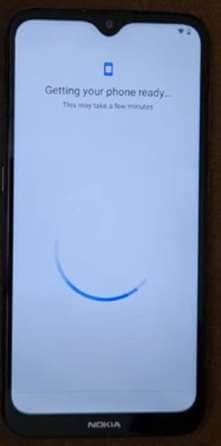
Step 8 Thereafter, you will get a message like the one displayed below, which will take a few minutes and after completion you will be directed to the home screen of your device.
-
Step 9 Congratulations!!! You have successfully bypassed FRP on your device, and you can now use your phone.
METHOD 2
-
Step 1 Open the unlock tool on your laptop or PC and select “MEDIATEK”.
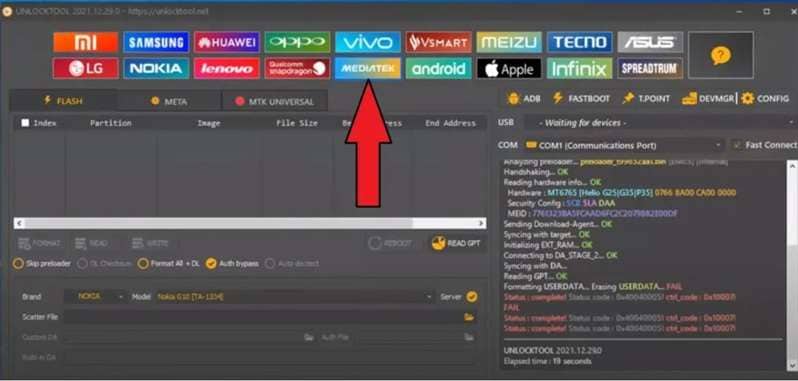
-
Step 2 Select the phone brand, which in this case is NOKIA, and the model according to your Nokia phone.
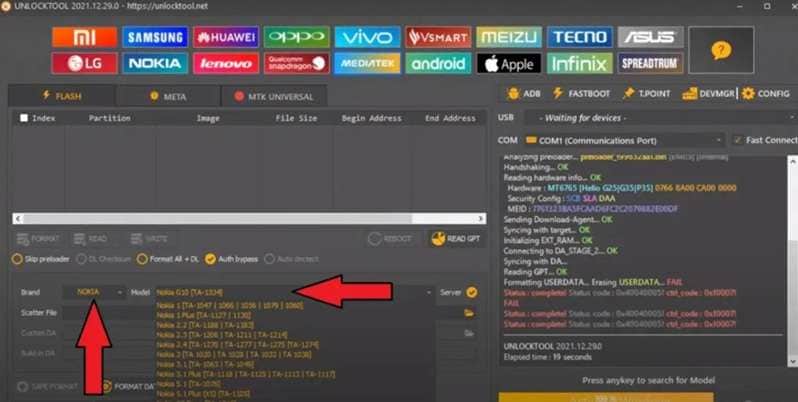
-
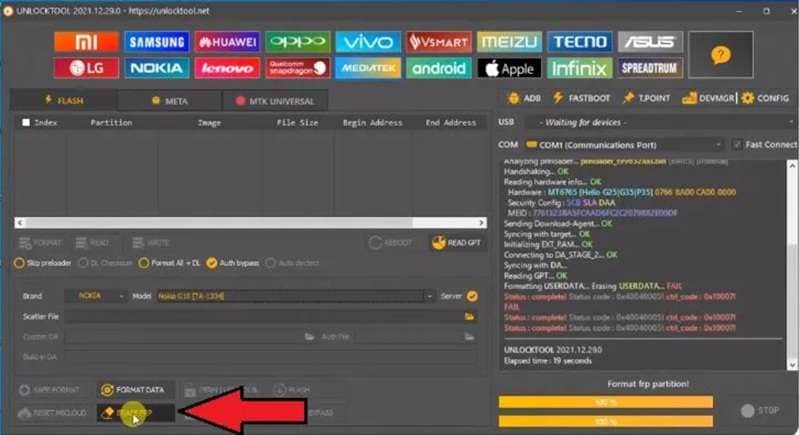
Step 3 Thereafter, connect your Nokia C32 phone via a USB cable to your laptop or PC, click on the “ERASE FRP” option, and wait for the process to complete.
-
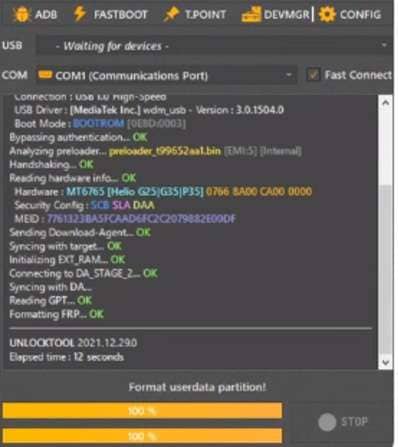
Step 4 After a successful completion, you should be able to see a text displayed on the right side of your laptop or PC screen just as shown in the image below.
-
Step 5 This shows that the mission was a success. You can now unplug your Nokia C32 device and power it on. Give it some time and eventually, you will be directed to the homescreen of your device.
Nokia C32 FRP FAQ
-
1. Does a Nokia C32 FRP unlock restore erased data?
No. FRP removal only clears the Google verification barrier. A factory reset erases local data, though previously backed-up Google data may be restored later. -
2. What if a second-hand Nokia C32 is still linked to the previous owner?
Get in touch with seller first. The previous owner must properly remove their Google Account. If they cannot, safe to return the phone instead of using random bypass methods.
Conclusion
A successful Nokia C32 FRP unlock depends on matching the recovery route to the phone’s exact software and hardware. The C32 launched with Android 13, and firmware or security updates can change which options remain compatible. Start with the previously synced Google account or official account recovery whenever possible.
If that fails, Dr.Fone – Screen Unlock (Android) offers a straightforward FRP workflow and currently lists Nokia as a supported brand, though you should verify C32 compatibility first. For unsupported builds, professional Unisoc servicing is the safer fallback. Avoid MediaTek-specific instructions and always verify the exact device environment before proceeding.
 Add Wondershare Dr.Fone as a preferred source on Google