Bypass iCloud Activation Lock and Android FRP without password.

 100% Security Verified | No Subscription Required | No Malware

 :
: 
 ChatGPT
 Perplexity
 Gemini
 Claude
 Grok
Grok
You may want friends or family to see your iPhone location during a trip, but not all day, every day. The problem starts when you decide to stop sharing and wonder whether Find My or iMessage will make the change obvious.
Apple gives you several ways to stop sharing location iPhone access, but they do not all work the same way. Some end sharing with one person, while others affect every contact or other location-based features.
This guide explains how to stop sharing location with someone on iPhone and whether they receive a notification. We compare six practical methods, show what the other person may see, and clarify how to stop sharing location without someone knowing as discreetly as Apple’s current settings allow.
In this article
Part 1. What Is iMessage Location Sharing and When Should You Stop It?
Before we get on how to stop sharing location without someone knowing, it helps to understand what iMessage location sharing does.
You can share your live location on iPhone through an iMessage conversation or via the Find My app. You can share for defined time, keep it on until you turn it off or share with certain people only. You can control who views your location and for how long with this.
Still, there are reasons you might sometimes wish to stop sharing it.
- Privacy: People do not want anyone following their movements the entire day.
- Personal boundaries: Constant location sharing can feel too intrusive.
- Surprises or plans: Turning off sharing can help keep a visit or event private.
- Battery concerns: Continuous location use may consume extra battery power.
- Avoiding uncomfortable moments: Sometimes, you simply prefer not to reveal where you are.
Part 2. Does iMessage Notify Someone When You Stop Sharing Location?
So, what happens when you stop sharing location access on your iPhone with someone? Will iMessage or Find My alert them?
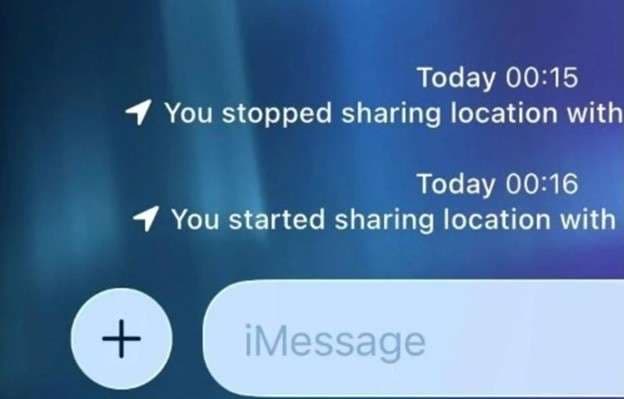
In short, no, it is not. When you stop sharing your location with someone, that person will not be notified, according to Apple. This applies when you stop sharing through Find My or Messages.
What Happens When You Stop Sharing?
If you use:
- Find My > People > select the person > Stop Sharing My Location
your location sharing with that person ends. They do not receive a notification.
You can alternatively open the relevant Messages conversation, tap the user's name, and select Stop Sharing My Location. Apple observes that the previous location bubble in the thread won’t show the map anymore.
However, no notification does not mean the change is completely hidden. The person may still notice later that your location is no longer available.
Thus, Apple's built-in controls already let you stop sharing your location without notifying others. We will review the available options and explain how each method affects location sharing.
Part 3. How to Stop Sharing Location without Notifying iMessage
Apple confirms that stopping location sharing with one person does not send them a notification, although they may notice the change when they check Find My or Messages.
Here is a quick look at the methods covered below.
| Method | Notification Sent? | What They May See | Suspicion Level* |
|---|---|---|---|
| 1. Use another iOS device | No documented alert | Location from second device | Low |
| 2. Stop sharing in Find My | No | Location disappears | Medium |
| 3. Turn off Share My Location | No direct alert | Location unavailable | Medium |
| 4. Turn on Airplane Mode | No sharing alert | Location may stop updating | High |
| 5. Use another Apple device as location | No documented alert | Selected device’s location | Low |
| 6. Sign out of iCloud | No direct alert | Location becomes unavailable | High |
Method 1: Use Another iPhone to Stop Sharing Location Without Someone Knowing
If you have two iOS devices using the same Apple ID, you can designate the second device as your shared location source. This works best when your iPhone’s anchor device stays put while you go mobile with your main iPhone.
Instead of ending location sharing completely, you change which Apple device provides your location.
- It can hide the movement of your main iPhone without sending an obvious alert.
- It avoids creating a sudden gap in the shared location.
- The setup is quick if you already own another iOS device.
- You need a second iPhone or another compatible iOS device.
- A location that stays fixed for too long may look unusual.
- Family Sharing members may still be able to see device-related location information.
Steps
-
Step 1 Open Settings on the second iOS device.
-
Step 2 Tap your name at the top.
-
Step 3 Select Find My.
-
Step 4 Tap Use This iPhone as My Location.
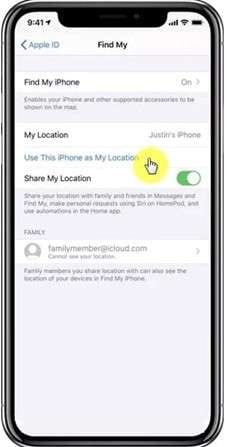
Your shared position will then come from the second device rather than the iPhone you are carrying.
Method 2: How to Stop Sharing Location on iPhone With Someone in Find My
The Find My iPhone App Lets Users Share Their Location With Certain Friends And Family You can disable location sharing for one person or all your contacts with this feature.
You can do this when you’d like to restrict who can see your location, while still keeping other people on your list.
- The process is simple and quick.
- You can stop sharing with one specific person.
- You can also switch off location sharing for everyone at once.
- The person may notice that your location is no longer available.
- Find My may still show location information differently depending on which sharing option you change.
- Disabling sharing for everyone impacts every individual on your location-sharing list.
Steps
-
Step 1 Open the Find My app on your iPhone.
-
Step 2 Tap Me at the bottom.
-
Step 3 Disable Share My Location to stop sharing your location with everyone.
-
Step 4 Open the People tab to stop sharing with a single person.
-
Step 5 Select that person's name.
-
Step 6 Tap Stop Sharing My Location.
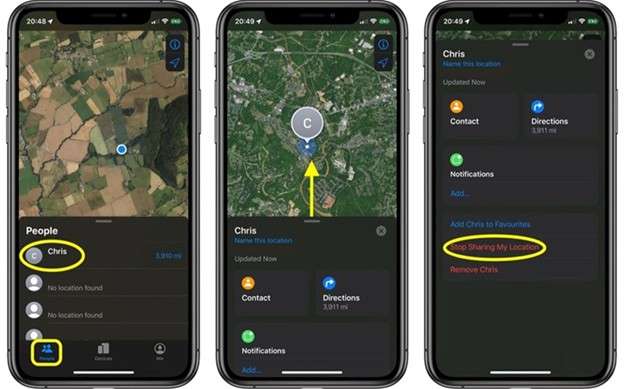
If you want to share again later, return to Find My and enable location sharing.
This is one of the simplest answers to how do I stop sharing my location with someone. However, the other person can still notice that your location has disappeared. If you want another way to control location access, then the next method makes use of the iPhone Settings app.
If you don't want apps to know your real location at all times, a location-changing tool like Dr.Fone - Virtual Location can set a different location instead.
Method 3: How Do I Stop Sharing My Location on My iPhone Through Settings?
You can also stop sharing your location from the Settings app on the iPhone. Simply turn off the Share My Location feature to stop sharing your location with everyone at once.
Disabling location sharing won't provide any alerts. However, people who check your location may still notice that it is no longer available.
- Gives you one place to turn off location sharing.
- The process is simple and quick.
- No direct notification is sent when you disable sharing.
- Apps such as Maps and Weather may not work as expected if you also restrict location access.
- Your location might be missing from your older messages even without anyone knowing.
- iPhone users can now avail this option after the update to iOS 8.
Steps
-
Step 1 Open Settings on your iPhone.
-
Step 2 Scroll down and tap Privacy.
-
Step 3 Select Location Services.
-
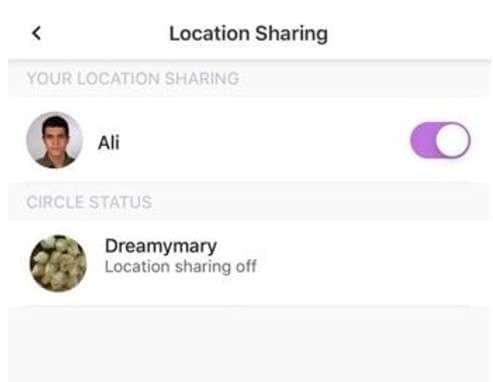
Step 4 Tap Share My Location.
-
Step 5 Turn off the Share My Location option.
Method 4: How to Temporarily Turn Off Find My Friends With Airplane Mode
Airplane Mode can pause the wireless connections your iPhone uses to send fresh location updates. It is a quick option when you only want a temporary break from location sharing.
What the other person may see: Your live position may stop updating. If they check your location, they may see “Location Not Available.”
Steps
-
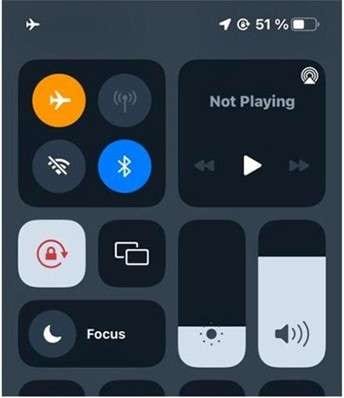
Step 1 Open Control Center. Swipe down from the top-right on iPhone X or later. On iPhone 8 or earlier, swipe up from the bottom.
-
Step 2 Tap the Airplane Mode icon.
-
Step 3 While Airplane Mode remains active, your location will not update normally in Find My.
Pros
- It is fast and requires no changes to your sharing list.
- No direct location-sharing notification is sent.
- It provides a temporary way to pause normal location updates.
Cons
- Calls, text messages, and internet access are also disabled.
- The effect lasts only while Airplane Mode is turned on.
- Someone checking your location may see “Location Not Available,” which can make the change noticeable.
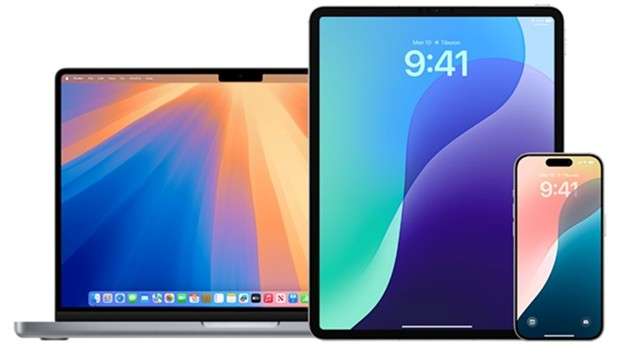
Method 5: Use Another Apple Device to Change Your Shared Location
If you have more than one Apple device, such as a second iPhone or an iPad, you can opt to use that device as your location.
Your profile may appear on the shared map in iMessage, but your second Apple device will send the location shown.
Steps
-
Step 1 Leave the second Apple device where you want to appear.
-
Step 2 Open the Find My app on that device.
-
Step 3 Tap the Me tab.
-
Step 4 Select Use This [Device] as My Location.
Pros
- Your shared location stays visible instead of disappearing.
- No direct notification is sent when you change the location source.
- It can be useful if you want to avoid fully turning off location sharing.
Cons
- You need another Apple device to use this method.
Method 6: Sign Out of iCloud to Stop Sharing Location on iPhone [Not Recommended]
Signing out of iCloud also prevents location sharing. Nevertheless, this method impacts much more than location sharing, so it is typically not the best option.
What the other person may see: Your profile may disappear from the shared iMessage map. If they check your location, they may see “Location Not Available.”
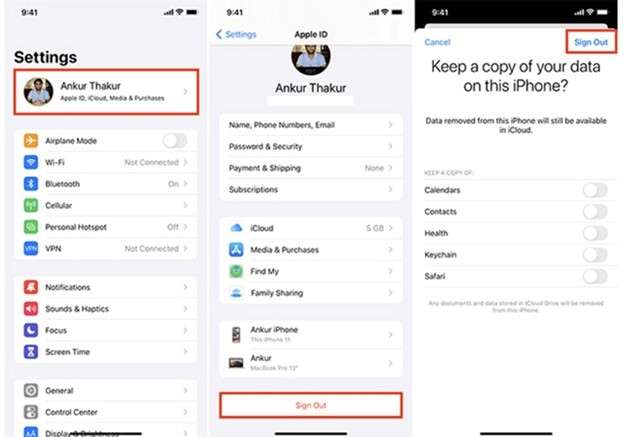
Steps
-
Step 1 Open Settings on your iPhone.
-
Step 2 Tap your Apple ID/name at the top.
-
Step 3 Scroll down and select Sign Out.
-
Step 4 If requested, input your Apple ID password.
-
Step 5 Decide to keep iCloud data on iPhone or remove it after verification.
-
Step 6 Make sure you want to sign out.
Pros
- No direct location-sharing notification is sent.
- It can stop location sharing at once.
- The change affects Apple devices connected to the same iCloud account.
Cons
- You may encounter issues with iCloud backup, iCloud Drive, or iMessage syncing.
- Your Find My iPhone feature may be disabled which will reduce the security of the device.
- Location sharing may start again after you sign back in.
- People checking your location may notice the “Location Not Available” message.
Bonus: Locked Out of Your iPhone? Regain Access With Dr.Fone - Screen Unlock (iOS)
The methods above work when you can open Find My or Settings. But what if you need to stop sharing your location, access your iPhone, and cannot get past the lock screen?
In that case, the first problem is restoring access to your own device. Dr.Fone - Screen Unlock (iOS) helps with screen lock issues on iPhone/iPad/iPod touch. According to Wondershare, the program can effectively remove common lock types. This includes 4-digit and 6-digit password locks, Touch IDs, and Face IDs. The existing guide lists support for iOS/iPadOS 7 and later.
Once again able to use the device, you can return to Find My or Settings to manage location sharing normally.
 Unlock iPhone/iPad passcode in minutes.
- Remove Face ID, Touch ID, MDM lock, and screen lock.
- Bypass iCloud Activation Lock easily.
- Support all iOS versions and devices.
- Simple steps, no technical skills needed.
Key Features of Dr.Fone - Screen Unlock (iOS)
According to Wondershare, the iOS unlock toolkit includes:
- Unlock iOS Screen: Bypass compatible screen passwords, Touch ID, and Face ID restrictions.
- Apple ID Removal: Allows in certain cases, removal of Apple ID is possible.
- MDM Removal: Includes tools to remove or bypass supported MDM restrictions.
- Screen Time Unlock: Can remove supported Screen Time restrictions without the Screen Time passcode.
- Wondershare claim to offer Activation Lock removal as one of their iOS unlocking functions.
Notably, the standard Unlock iOS Screen feature will wipe the data of the device, making it similar to a factory reset. Only use it on a device you own or have permission to manage.
How to Use Dr.Fone - Screen Unlock (iOS)
-
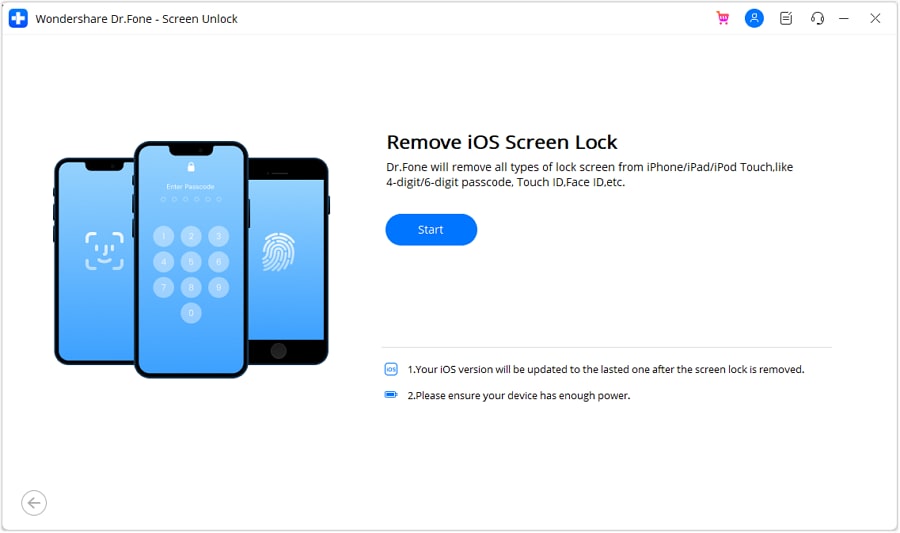
Step 1 Open the iOS Screen Unlock tool
Install and launch Dr.Fone on the computer. Open Toolbox, select Screen Unlock, and choose iOS. Click Unlock iOS Screen, connect the device, and select Start.
-
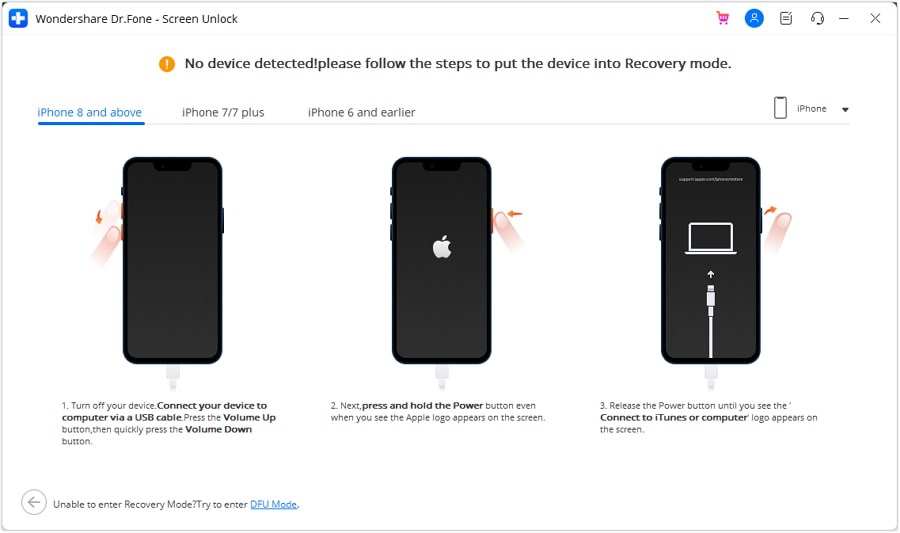
Step 2 Enter Recovery Mode
Follow the instructions that match your iPhone or iPad model to place it in Recovery Mode. Select Try DFU Mode if Recovery Mode does not work.
-
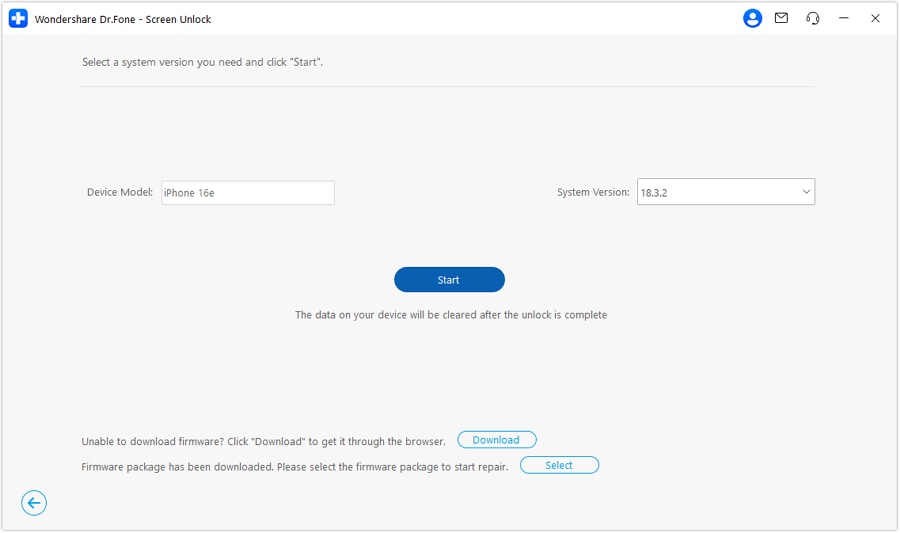
Step 3 Confirm and download the firmware
Dr.Fone detects the connected device model. Check the model and system version before continuing. Select Start to download the required iOS firmware package.
-
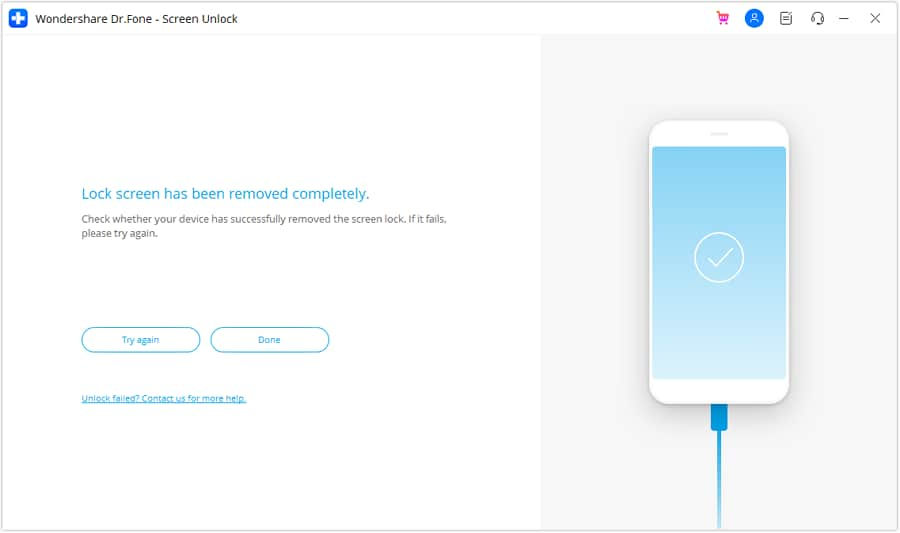
Step 4 Remove the screen lock
After verifying the firmware, press Unlock Now. Enter the confirmation code and select Unlock. Please keep the device connected as Dr.Fone installs the firmware and removes the lock. When the process finishes, select Done.
Conclusion
To stop sharing location on iPhone, the method depends on what you want others to see. Find My lets you end sharing with one person without sending them a notification, although they may notice your location is gone. Turning off Share My Location affects everyone, while Airplane Mode and signing out of iCloud are less practical because they interrupt other services. A second Apple device can keep a shared location active.
If a screen passcode prevents you from reaching these settings, Dr.Fone - Screen Unlock (iOS) offers a way to regain access, but its standard unlock process erases device data.




 Add Wondershare Dr.Fone as a preferred source on Google