Bypass iCloud Activation Lock and Android FRP without password.

 100% Security Verified | No Subscription Required | No Malware

 :
: 
 ChatGPT
 Perplexity
 Gemini
 Claude
 Grok
Grok
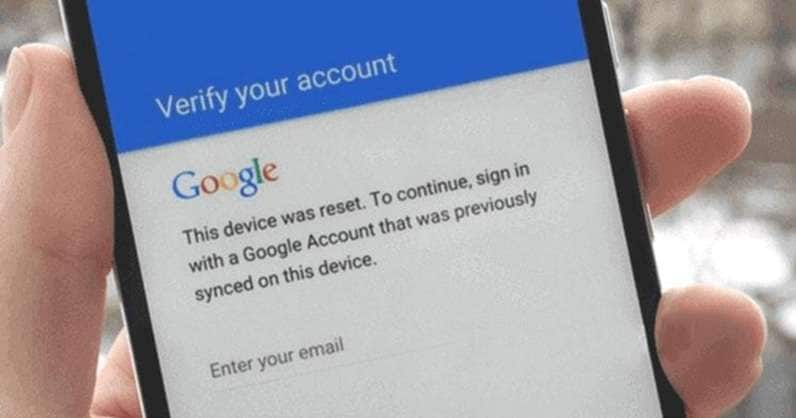
A Nokia G22 can be factory reset and stop at Google verification. When Factory Reset Protection is turned on, setup may prompt you for the Google account last synced on the device. This check prevents reuse without authorization after startup.
A proper Nokia G22 FRP unlock also depends on the device itself. The G22 runs on a Unisoc T606 chipset and shipped with Android 12, though the model’s compatibility with updates, patches, and variants may differ.
This guide shows the safest recovery paths for your genuinely owned Nokia G22. It also helps you choose the right path based on your phone's software and account situation.
In this article
Part 1. Why Did FRP Lock Your Nokia G22?
1-1. FRP Is Different From a Screen Lock
A PIN, pattern, or password protects normal access to your phone. FRP works after a protected factory reset.
Google states that a reset Android device may require ownership verification before setup can continue. After a reset through Recovery mode, for example, you may need the previous screen lock or a Google Account that was already added and synced to the device.
Here is the difference:
- Screen lock: Blocks normal access to the phone.
- Factory reset: Erases local apps, settings, and user data.
- FRP: Checks ownership during setup after the reset.
So, wiping the Nokia G22 does not necessarily remove Google’s device protection.
1-2. Why Nokia G22 FRP Requires the Right Device Workflow
HMD has verified that the Nokia G22 uses the Unisoc T606. It was originally introduced with Android 12 and was promised two years of OS upgrades and three years of security updates.
The compatibility of a Nokia G22 FRP unlock is determined by the exact device and software environment, including:
- Android version
- security patch
- firmware build
- TA variant
- current tool support
UnlockTool’s current device database lists Nokia G22 TA-1528 and TA-1516 under a T606-specific profile with FRP-related service functions.
Part 2. Start With Google’s Official FRP Recovery
Before trying any FRP tool, first check whether you can verify the Google Account already linked to the Nokia G22.
2.1 Sign In With a Previously Synced Google Account
At the verification screen, use a Google Account that was added and synced to the phone before the reset.
Google confirms that any previously synced account on the device can be used for verification. A newly created account will not replace this ownership check.
If you still know the account and password, this is the simplest Nokia G22 FRP unlock route.
2.2 Recover Forgotten Google Account Details
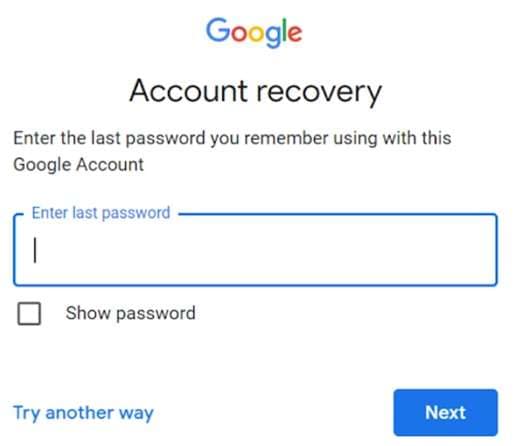
If you forgot the email address or password, use Google Account Recovery first.
Google provides recovery options for:
- a forgotten username or email
- a forgotten password
- missing verification access
To verify you own the account, you might need to enter information associated with the account - like a recovery email or phone.
If you recently changed the Google Account password, wait 24 hours for the factory reset.
2.3 Contact HMD Support if Account Recovery Fails
If you’re in possession of the Nokia G22 but unable to retrieve the associated Google Account, then HMD support or an authorized service center should be your destination.
Have these details ready:
- proof of purchase
- IMEI or serial number
- exact Nokia G22 model
- details of the problem
HMD identifies its support channel as the authorized support route for HMD-manufactured Nokia devices. Under the terms of service, they may need proof of purchase and the device IMEI or serial number to provide service.
If official account recovery doesn't unlock the lock, check whether your exact Nokia G22 software build is supported by a compatible FRP recovery tool.
Part 3. Unlock Nokia G22 FRP With Dr.Fone - Screen Unlock (Android)
Dr.Fone - Screen Unlock (Android) is a handy tool that can remove Android screen lock and bypass FRP lock on supported devices. Wondershare presently includes Nokia in its Android FRP brand list. As such, checking for a Nokia G22 FRP unlock is worth a try. Verify your exact G22 configuration in the latest version before starting, since compatibility varies by model and software build.
 Unlock Android phone in seconds.
- Remove PIN, pattern, password, fingerprint.
- Bypass Google FRP lock easily.
- Works on all Android brands & models.
- No tech skills required – user-friendly.
Key Features
- Supports Google FRP removal on selected Android brands
- Includes Nokia in the current supported FRP brand list
- Provides automatic device-driver setup
- Works through a desktop interface on Windows and macOS
- Also supports common screen locks such as PINs, patterns, passwords, fingerprints, and face locks
How to Use Dr.Fone for Nokia G22 FRP Removal
-
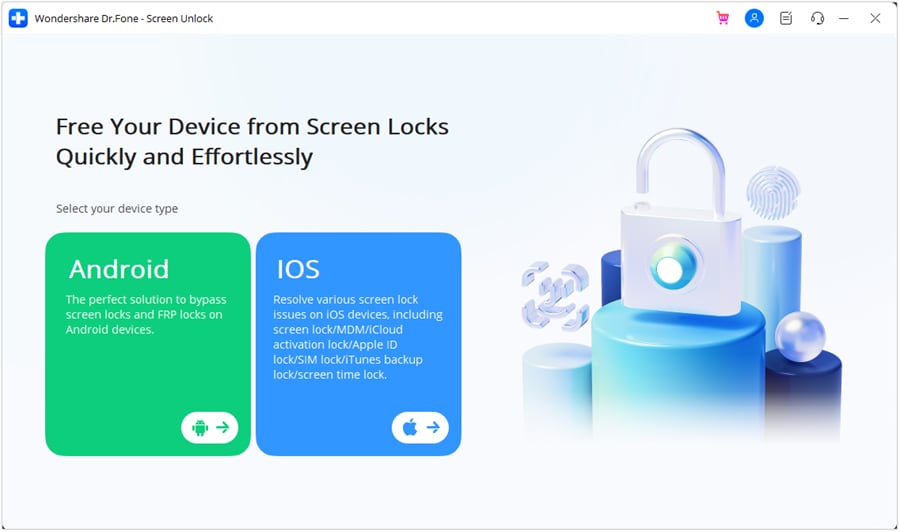
Step 1 Open the Screen Unlock Tool
Launch Wondershare Dr.Fone on your computer.
Open Toolbox, select Screen Unlock, and then choose Android.
-
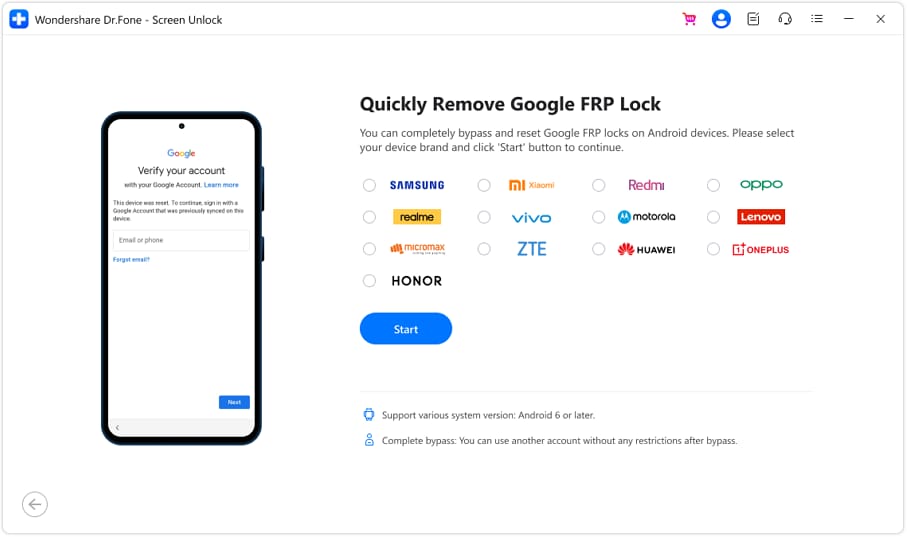
Step 2 Select FRP Removal
Choose Remove Google FRP Lock.
Select Nokia from the available brands. Check that your device is supported before moving forward.
-
Step 3 Download the Driver and Connect the Phone
Dr.Fone will download the required driver after you select the device brand.
Turn off the phone and connect it to the computer. While connecting, hold Volume Up and Volume Down together for about three seconds.
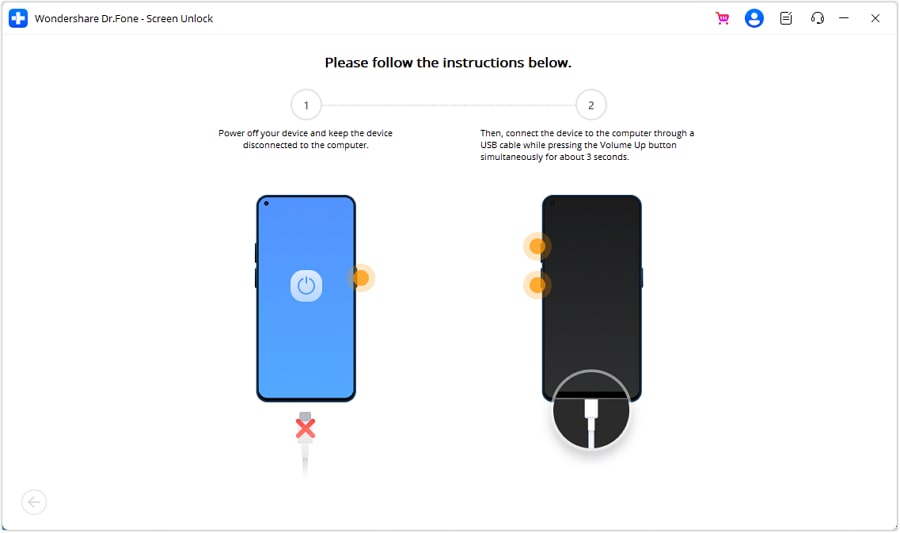
Follow the on-screen instructions to complete the connection.
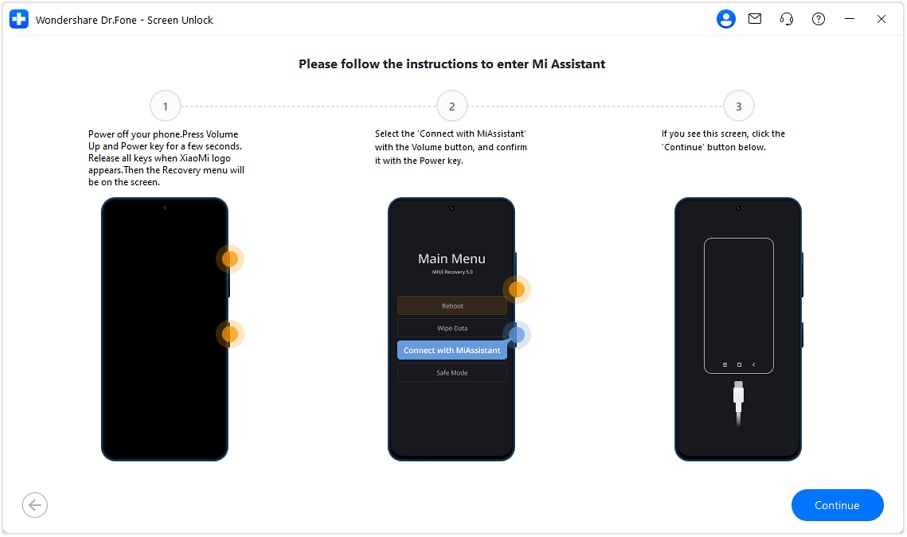
-
Step 4 Remove the FRP Lock
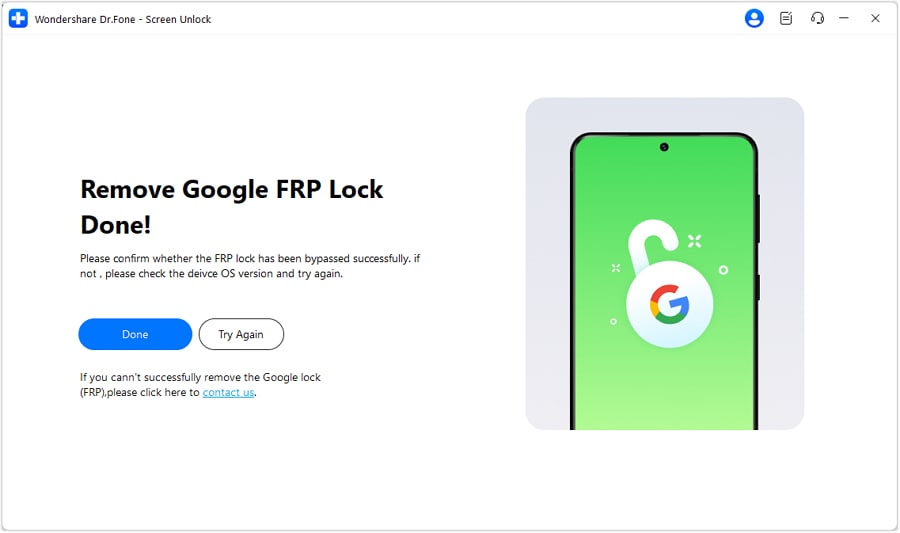
Once the device is detected, Dr.Fone will start FRP removal.
Keep the phone connected until the process finishes. Then click Done.




Part 4. Other Nokia G22 FRP Unlock Routes You May See Online
Several older FRP workarounds still appear in online guides. They usually rely on third-party APK files, setup-screen loopholes, or Android menus that may no longer be available on updated phones. Their success can vary by device, Android version, firmware, and security patch.
1. Pangu Free FRP Unlock Tool [Insecure]
Pangu is often described as a free Android FRP utility. Its general process uses a computer and an FRP-related APK file to reach account setup options.
General Process
-
Step 1 Install the Pangu FRP utility on a computer.
-
Step 2 Select the phone model and Android version shown by the software.
-
Step 3 Connect the device to the computer using USB.
-
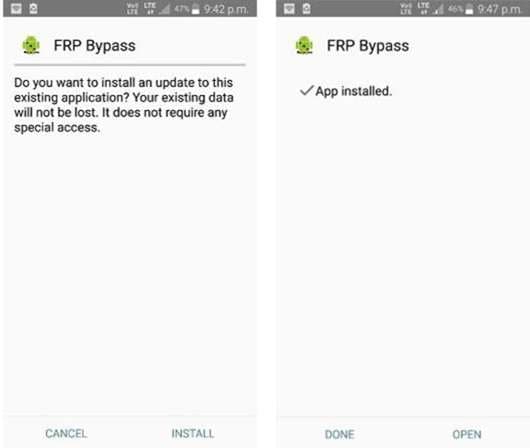
Step 4 Transfer the required FRP-related file to the phone using supported storage or transfer options.
-
Step 5 Open the file on the device and follow the tool’s prompts.
-
Step 6 Complete the account setup shown by the software.
-
Step 7 Disconnect any external storage or transfer device.
-
Step 8 Restart the phone and check whether setup can continue.
This method should be treated carefully. It depends on third-party files and is not confirmed by the supplied material as a Nokia G22-specific solution.
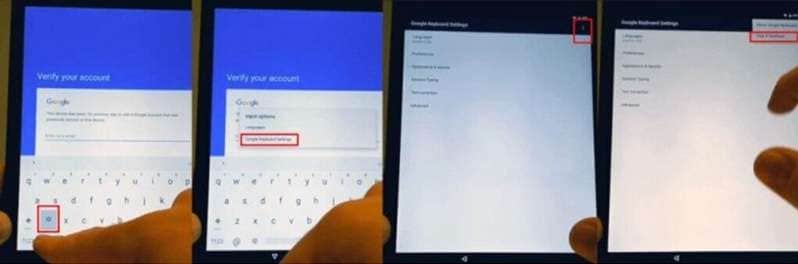
2. Google Keyboard FRP Workaround [Complex]
Another older method uses the keyboard and setup interface to reach parts of Android that are normally unavailable during verification.
General Process
-
Step 1 Start from the Google verification screen.
-
Step 2 Open the available keyboard settings.
-
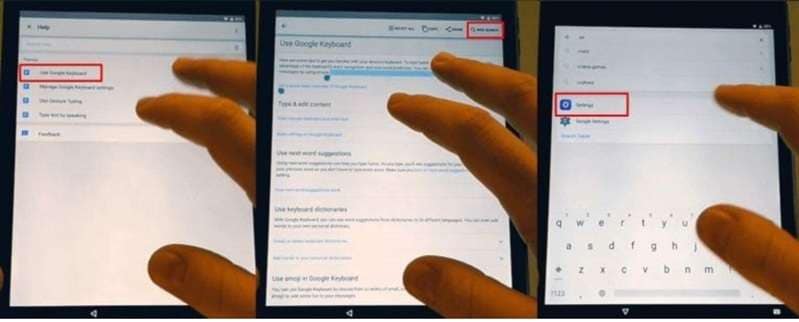
Step 3 Move into the keyboard’s help or support area.
-
Step 4 Use an available help link to reach a browser or related system page.
-
Step 5 Attempt to open Android settings from that environment.
-
Step 6 Use the available reset or setup options shown on the device.
This technique depends on software gaps that may exist only on older Android builds. Google and device makers can remove these paths through security updates, so results are often inconsistent.
3. TalkBack and Google Settings Method [Complicated]
Some guides use Android’s TalkBack accessibility feature to reach apps, browser pages, or device settings during setup.
General Process
-
Step 1 Enable TalkBack from the welcome screen.
-
Step 2 Allow the accessibility permissions requested by the device.
-
Step 3 Use TalkBack to reach an available app or browser path.
-
Step 4 Turn TalkBack off once navigation is available.
-
Step 5 Open the device’s browser or system settings.
-
Step 6 Use a second phone if the workflow requires file transfer.
-
Step 7 Transfer the required utility through the supported sharing method.
-
Step 8 Open the utility and follow the device-specific prompts.
-
Step 9 Access the available system settings.
-
Step 10 Complete any supported setup or developer configuration required by the workflow.
-
Step 11 Restart or reset the phone if the method calls for it.
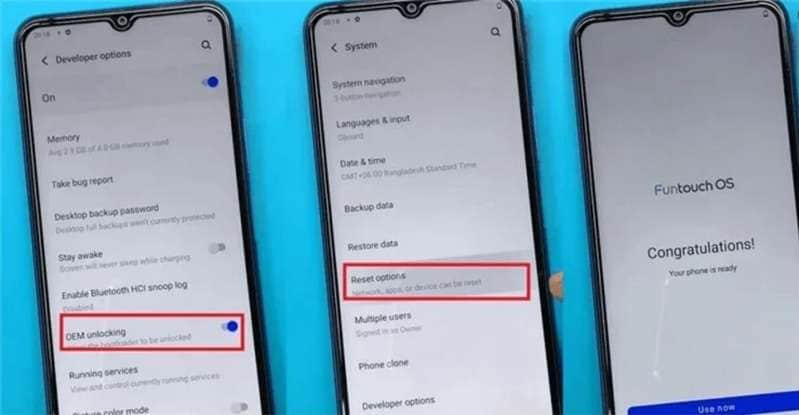
The supplied material describes this style of workaround for certain Android 11 and Android 12 devices, but that does not confirm support for every Nokia G22 build.

Part 5. Conclusion
A reliable Nokia G22 FRP unlock starts with the right match between the Unisoc T606 chipset, Android version, firmware, and security patch. Try Google Account Recovery first, as it is the official route. If that fails, Dr.Fone - Screen Unlock (Android) is a practical guided option for supported Nokia devices and avoids many outdated manual tricks.
Older APK, keyboard, and TalkBack methods can be inconsistent after software updates. Before you begin, confirm the exact G22 variant and current tool compatibility. The right method should fit the phone’s actual software, not just its model name.
 Add Wondershare Dr.Fone as a preferred source on Google